TL;DR
- Reaper excels at close-range combat with devastating shotgun damage and self-sustain
- Master Shadow Step positioning and Wraith Form timing for maximum survivability
- Death Blossom requires careful positioning but can wipe entire teams when executed properly
- Flanking and disrupting enemy backlines is crucial for creating team fight advantages
- Proper ability sequencing and animation cancels significantly increase damage output
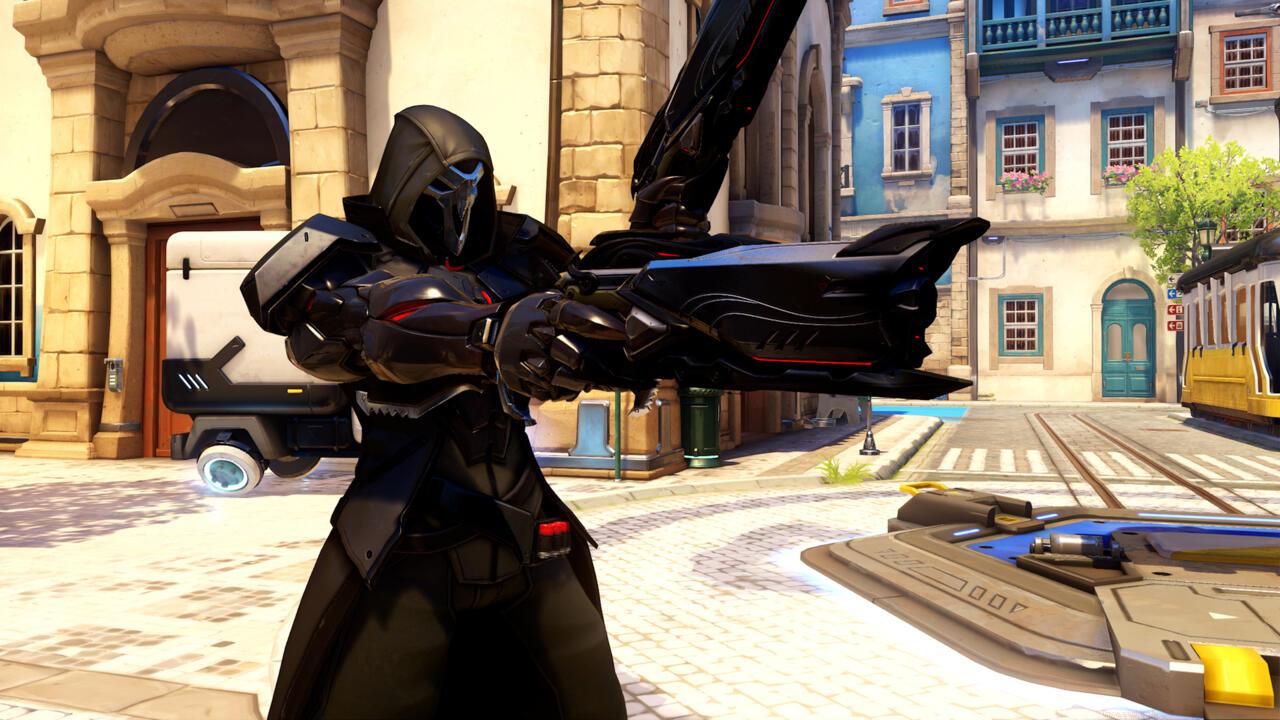
Reaper stands as Overwatch 2’s premier close-quarters specialist, designed to dominate tight spaces and shred opponents at point-blank range. His entire kit revolves around getting dangerously close to enemies and unleashing overwhelming damage while sustaining himself through combat.
As one of the original damage heroes returning with significant balance adjustments, Reaper maintains his core identity while adapting to Overwatch 2’s faster-paced 5v5 format. The transition to fewer tanks means Reaper’s tank-busting potential becomes even more valuable in specific matchups.
Understanding hero rankings can help contextualize Reaper’s place in the meta—check our comprehensive Class Guide for detailed comparisons of damage dealer effectiveness across different scenarios.
His dual Hellfire Shotguns deliver catastrophic damage within their effective range, making positioning the most critical skill for Reaper players. Unlike many other damage heroes, Reaper thrives in the chaos of close-quarters engagements where his survivability tools and raw damage output create decisive advantages.
Hellfire Shotguns: Devastating short-range spread weapons that deal approximately 140 damage per shot at point-blank range. The damage falls off significantly beyond 10 meters, making distance management crucial. Advanced technique: Learn to melee between shots for maximum burst damage.
Shadow Step: Teleport to a targeted location with audible audio cues. Strategic usage: Position on high ground before engagements or flank routes enemies won’t anticipate. Common mistake: Using this ability while enemies are watching your destination.
Wraith Form: Become invulnerable and move 50% faster for 3 seconds, automatically reloading your shotguns. Pro tip: Use to cleanse negative status effects like Ana’s biotic grenade or Zenyatta’s Discord Orb.
Death Blossom ultimate: Unleash the Hellfire Shotguns in a 8-meter radius, dealing up to 510 damage total to each enemy. Critical execution: Combine with vertical drops or Wraith Form engagements for surprise attacks.
The Reaping passive: Heal for 35% of all damage dealt to heroes. This makes Reaper incredibly durable during extended close-range fights against multiple targets.
Reaper’s self-sufficient design enables aggressive backline dives, but requires precise ability timing to survive.
Reaper’s effectiveness hinges entirely on engagement timing and positioning. Unlike heroes with ranged capabilities, Reaper must carefully choose when and where to commit to fights, as poor positioning often means certain death.
Initiate engagements using environmental cover to close distance without taking damage. The ideal engagement range is 3-5 meters where your shotguns deal maximum damage while still allowing movement flexibility. Always prioritize targets you can eliminate quickly to trigger your healing passive and snowball fights.
Against organized teams, coordinate with your tank to create distraction opportunities. While Reaper can operate independently, his effectiveness multiplies when enemies are already engaged with your frontline. For weapon optimization strategies that complement close-range specialists, our Weapons Unlock guide offers valuable insights.
Escaping unfavorable situations requires predictive Wraith Form usage—don’t wait until you’re critical health. Good Reaper players use their escape ability at around 50% health to ensure they survive to fight another engagement.
Reaper’s value varies significantly across different game modes, requiring adaptable playstyles and strategic adjustments based on objective type and map geometry.
Control Points: Reaper excels in these confined spaces where team fights naturally cluster. Use buildings and cover to approach objectives without taking ranged damage. On maps like Nepal: Sanctum or Ilios: Ruins, his close-quarters dominance can single-handedly control capture progress.
Payload Defense: While defending, focus on flanking routes that allow you to attack the enemy backline. Your goal is to eliminate supports and damage dealers while the enemy team is distracted pushing the objective.
Push Mode: The linear nature of Push creates predictable engagement zones. Use side routes and buildings to ambush enemies as they contest the robot. Time your engagements when the robot changes direction for maximum disruption.
Understanding how different heroes perform across game modes is crucial—our Complete Guide covers these strategic nuances in depth for competitive play.
Beyond basic ability usage, mastering Reaper requires understanding several advanced techniques that separate mediocre players from dominant forces.
Animation Cancels: Master the melee cancel at the end of your shotguns’ firing animation to increase damage per second. This can reduce time-to-kill by nearly 15% against 200-health targets.
Shotgun Spread Optimization: Aim for center mass rather than headshots at extreme close range. The spread pattern means body shots often land more pellets consistently than attempting precise headshots.
Cooldown Sequencing: Optimal ability rotation is Shadow Step for positioning, engage with shotguns, Wraith Form to escape or reload. Never use both mobility abilities to engage unless committing with Death Blossom.
Ultimate Baiting: Experienced players will anticipate your Death Blossom. Use Wraith Form aggressively then cancel early to bait out defensive abilities before activating your ultimate.
Matchup Knowledge: Understand which heroes you counter (Winston, Reinhardt) and who counters you (Pharah, Echo). This awareness dictates when to switch heroes versus adapting your playstyle.
Action Checklist
- Practice shotgun-melee combos in training range until muscle memory develops
- Master three reliable Shadow Step positions on each Control Point map
- Learn to track enemy cooldowns that counter Death Blossom (Sleep Dart, Flashbang)
- Develop Wraith Form timing instinct—practice escaping at 50% health in quick play
- Study matchup charts to understand when to switch off Reaper versus adapting strategy
No reproduction without permission:SeeYouSoon Game Club » Overwatch 2 – Reaper Hero Guide Master Reaper's close-range dominance with advanced strategies, ability combos, and positioning tactics in Overwatch 2