TL;DR
- Defeating major bosses at night’s end grants permanent flask charge increases
- Statues of Marika provide immediate flask charges through map exploration
- Progressive difficulty requires strategic healing management throughout expeditions
- Team coordination significantly improves boss fight success rates
- Balancing both methods ensures maximum flask availability for final battles
Elden Ring Nightreign begins with a limited supply of Healing Flask Charges, presenting a strategic challenge that demands careful resource management from the outset. Understanding how to expand your healing capacity becomes crucial for surviving the increasingly dangerous nights and reaching expedition completion.
Healing represents one of the most critical survival mechanics in Elden Ring Nightreign. Maintaining health throughout your run directly impacts your ability to withstand nocturnal assaults and confront the formidable bosses awaiting at each stage. The initial allocation of just three Healing Flask Charges provides minimal cushion for early encounters but proves dangerously insufficient against later challenges and final confrontations.
Strategic flask management separates successful expeditions from failed attempts. Unlike traditional Souls games where flask upgrades are permanent, Nightreign requires you to rebuild your healing capacity during each new expedition, making efficient charge acquisition essential for progression.
The primary method for increasing your Healing Flask Charges involves defeating the major boss concluding each night during expeditions. Each successful boss takedown permanently enhances your healing capacity for the remainder of that expedition, creating a tangible reward for overcoming significant challenges.

Strategic boss elimination provides flask charge upgrades essential for later stages.
Initial nocturnal bosses typically present as singular formidable enemies requiring coordinated team efforts. The Bell Bearing Hunter serves as the introductory boss during your first expedition, testing fundamental combat skills and teamwork dynamics. Subsequent nights introduce progressively complex encounters, often featuring multiple bosses with complementary abilities that demand advanced tactical approaches.
Each major boss defeated to advance to the next day rewards you with one additional Healing Flask Charge. This systematic progression means that after conquering the Bell Bearing Hunter, your next day begins with enhanced healing capacity. The pattern continues through subsequent nights, with each victory strengthening your position against the expedition’s ultimate challenge.
Successful boss strategies involve careful aggro management, environmental awareness, and coordinated attack patterns. Teams that communicate effectively and assign specific roles (tank, damage, support) consistently achieve higher success rates against these challenging encounters.
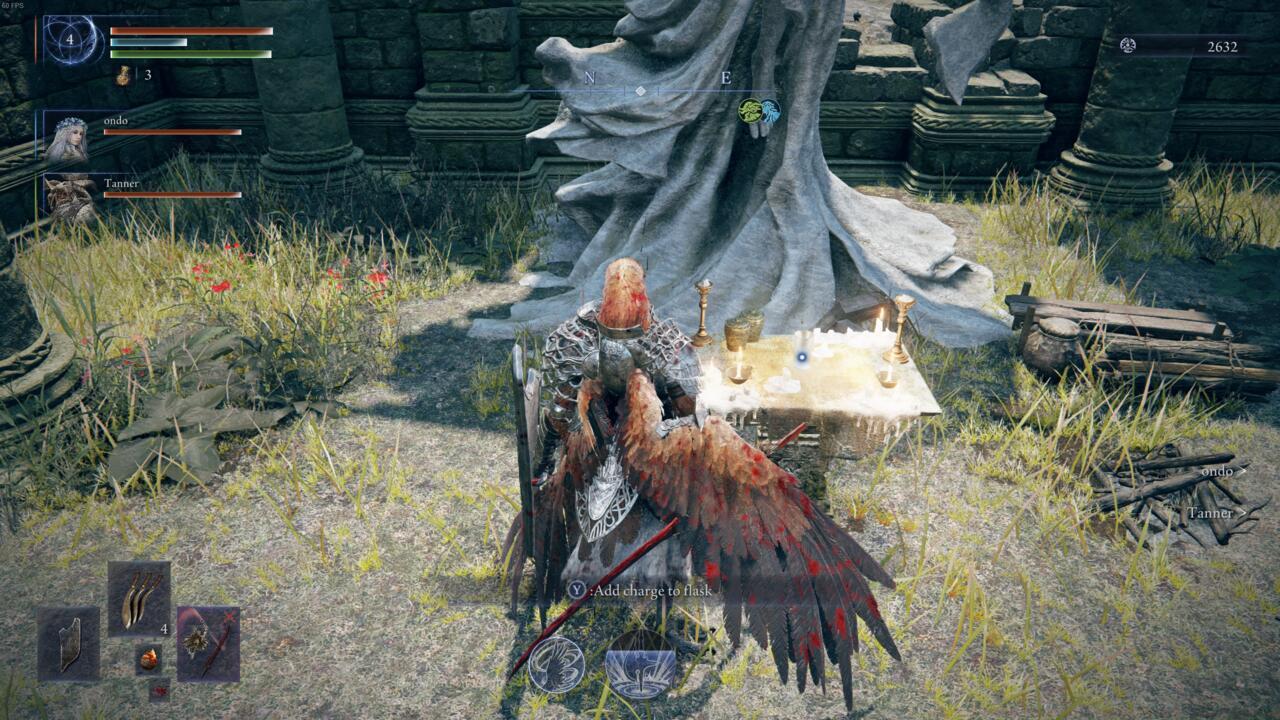
The more efficient approach to rapidly expanding your Healing Flask Charges involves systematic exploration of Statues of Marika scattered throughout Nightreign’s maps. These sacred landmarks offer immediate flask charge increases without the combat risks associated with boss encounters.
Interacting with Marika statues provides immediate flask charge enhancements.
Statues of Marika occupy multiple strategic locations across each map zone, marked by distinctive architectural features and ambient lighting. When discovered, approach the candle-lit altar positioned before each statue to activate the blessing, immediately adding one charge to your Healing Flasks.
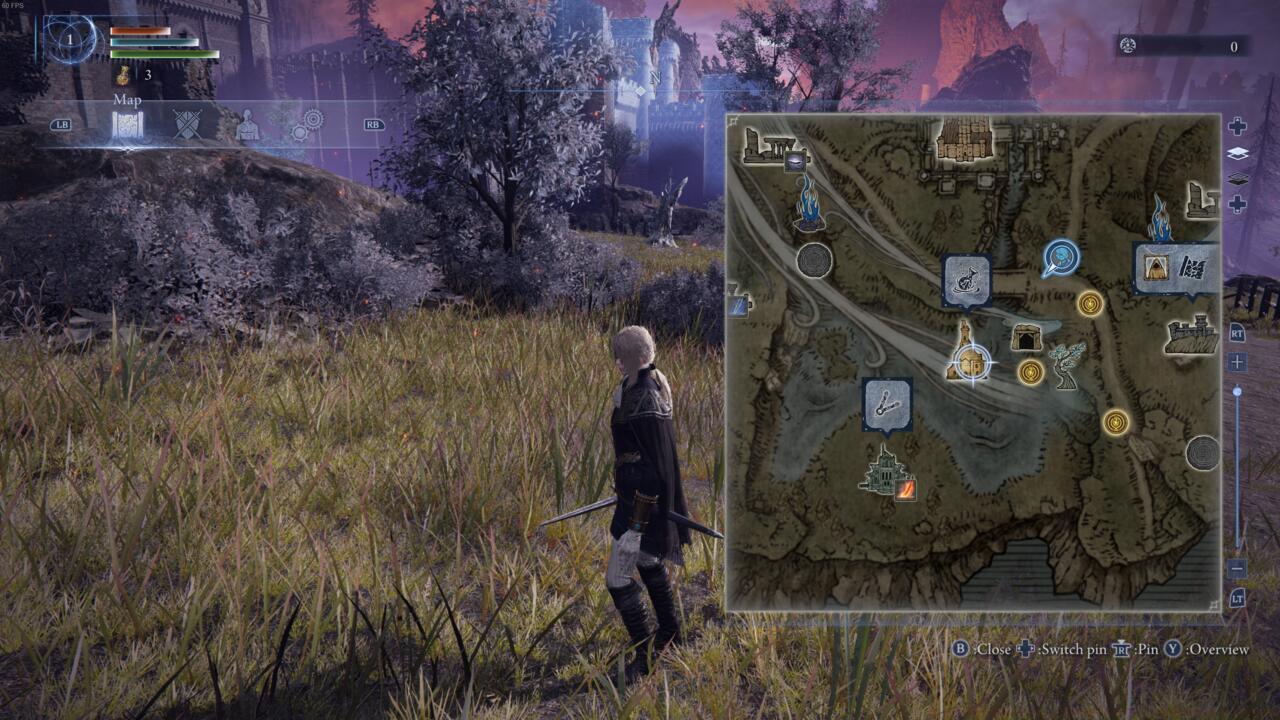
Map icons help identify statue locations for efficient route planning.
Optimal exploration involves systematically scanning each map sector during daylight hours when threats are reduced. Prioritize statue visits before engaging in major combat encounters to maximize your healing capacity when it matters most. Advanced players often create mental maps of statue locations to optimize their expedition routes.
Combining both methods—strategic boss defeats and thorough statue exploration—creates the most robust healing strategy. This dual approach ensures you enter final battles with the maximum possible flask charges, significantly improving your chances of expedition success.
Seasoned Nightreign players develop sophisticated flask management techniques that dramatically improve expedition outcomes. Understanding common mistakes and optimization strategies can significantly reduce failed attempts and frustration.
Avoid these common flask charge mistakes:
- Premature flask usage: Conserving charges for critical moments rather than minor damage
- Insufficient statue exploration: Missing easily accessible charges that require minimal combat
- Poor boss preparation: Entering major encounters without maximizing available healing capacity
- Team resource imbalance: Failing to coordinate healing usage across party members
Advanced optimization involves timing your statue explorations between boss attempts. After failing a boss encounter, use the respawn time to locate additional statues rather than immediately re-engaging. This “learning loop” approach turns failed attempts into progression opportunities.
For teams struggling with specific bosses, consider our Class Guide for optimal character builds and our Weapons Unlock guide for combat enhancement strategies. The Complete Guide offers comprehensive strategies for mastering Nightreign’s challenges.
Time investment varies significantly between methods. Boss defeats typically require 15-30 minutes depending on team coordination, while statue exploration can yield multiple charges in 10-15 minutes of focused searching.
Action Checklist
- Systematically explore each map zone during daylight to locate Statues of Marika
- Coordinate with teammates to defeat the night’s boss for permanent charge increase
- Balance exploration and combat – prioritize statues before major encounters
- After failed boss attempts, use respawn time to locate additional statues
- Consult advanced guides for team composition and weapon optimization
No reproduction without permission:SeeYouSoon Game Club » How To Increase Healing Flask Charges In Elden Ring Nightreign Master Elden Ring Nightreign healing with boss strategies and Marika statue locations for maximum flask charges