TL;DR
- Relics provide character customization through abilities and buffs, accessible only at Roundtable Hold
- Acquire Relics through expedition rewards, Small Jar Bazaar purchases, and hidden exploration finds
- Equip Relics in color-coded slots that determine activation conditions and synergies
- Unlock additional class slots and customize color assignments for build optimization
- Advanced strategies include goblet swapping and strategic slot management for endgame content
Relics represent the cornerstone of character build personalization within Elden Ring Nightreign, offering deep mechanical customization that significantly impacts your expedition performance. These powerful artifacts function as specialized modifiers that bestow unique abilities, statistical enhancements, and combat buffs tailored to your preferred playstyle.
While multiple customization avenues exist during active expeditions, the Roundtable Hold serves as the exclusive hub for Relic management. This design choice emphasizes strategic preparation before embarking on dangerous journeys. Relics operate as your primary build-defining system when preparing for expeditions, allowing you to craft specialized loadouts that complement your chosen character class and weapon preferences. However, the game provides minimal explanation of this crucial system, leaving many players unaware of advanced optimization techniques.
Our comprehensive guide below delivers actionable strategies to master the Relic system, including common pitfalls to avoid and advanced techniques for experienced players.
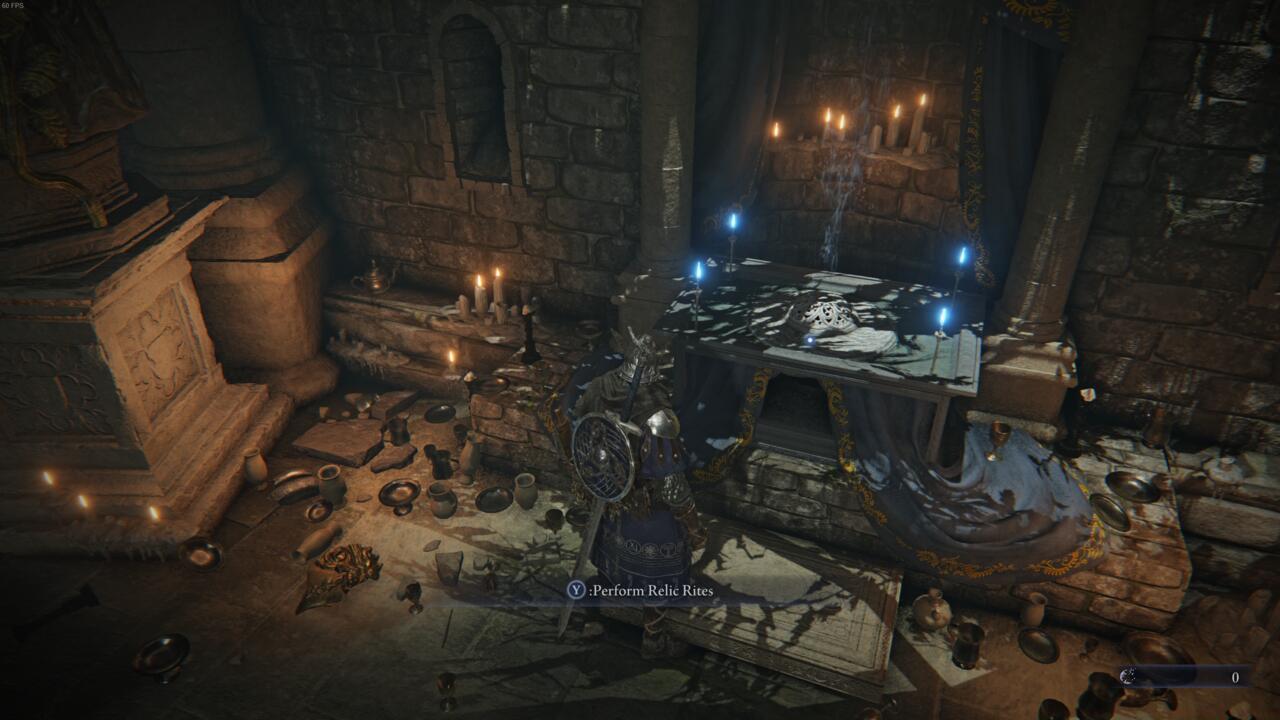
Accessing the Relics area at the Roundtable Hold requires locating the distinctive blue-candle altar in the central chamber
To access the Relic management interface, navigate to the Roundtable Hold’s central chamber and scan the circular walls for a recessed alcove illuminated by blue ceremonial candles. Approach this sacred space and interact with the central altar, selecting the “Perform Relic Rites” option to activate the comprehensive Relics configuration menu.
The Relics interface displays all unlocked character classes on the left panel—initially six, expandable to eight through specific in-game achievements. Each class features three distinctly colored slots that govern Relic activation conditions and synergies. The right panel showcases your collected Relics inventory, organized by type and power level.
Securing powerful Relics requires understanding three primary acquisition methods, each with distinct advantages and time investments. Expedition completion rewards represent the most reliable source, with higher-difficulty missions granting rarer and more potent artifacts. The reward screen clearly indicates which Relics you’ve unlocked, allowing for targeted farming of specific enhancements.
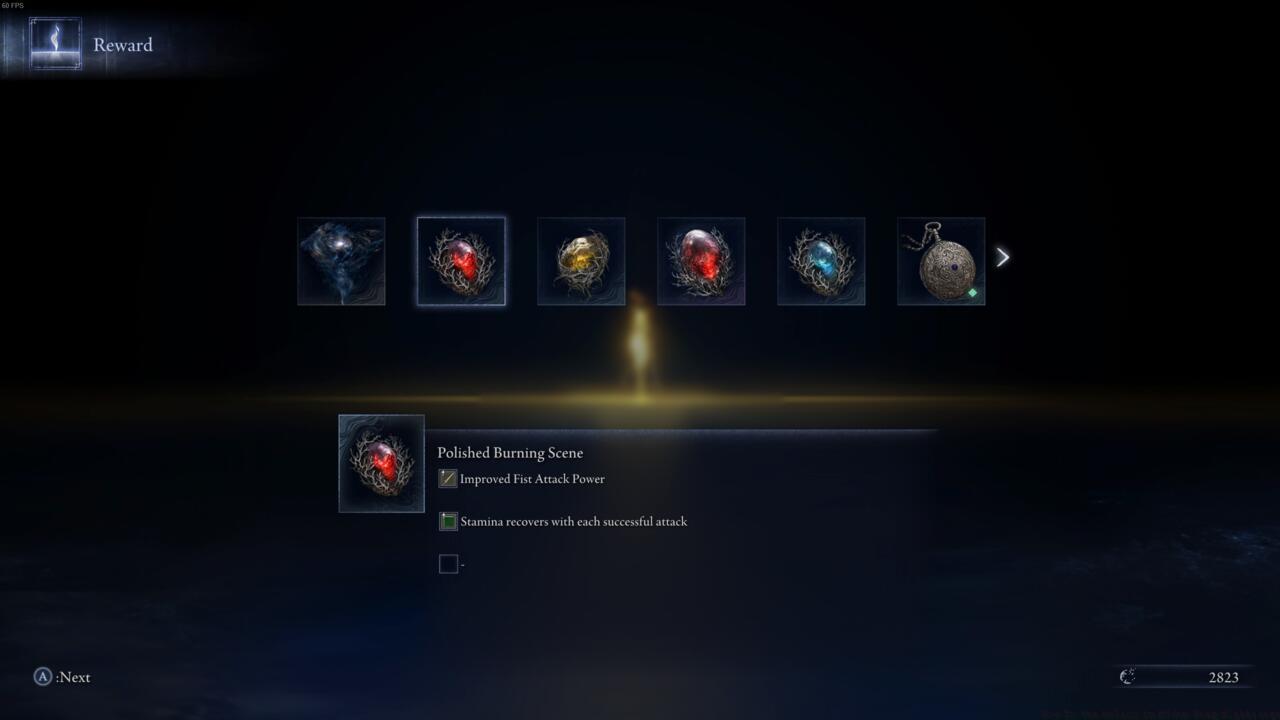
Expedition completion screens provide clear indication of newly acquired Relics for targeted collection
The Small Jar Bazaar offers curated Relic selections in exchange for various in-game currencies, with inventory rotating periodically. This merchant specializes in class-specific artifacts and customization items like Scenic Flatstones, which enable advanced Relic modifications for experienced players.
The Small Jar Bazaar merchant provides access to both standard Relics and specialized modification items
Hidden Relics scattered throughout the game world provide opportunities for players who thoroughly explore environments. These are often concealed in obscure locations, behind illusionary walls, or as rewards for solving environmental puzzles. Exploration-focused players can discover powerful unique Relics not available through other means.
Pro Tip: Focus on completing expedition bonus objectives, as these frequently reward high-tier Relics that significantly outperform standard drops. Many players overlook these optional challenges, missing out on game-changing artifacts.
Mastering Relic equipment requires understanding the sophisticated color slot system that governs activation conditions and synergistic combinations. Each colored slot corresponds to specific activation requirements—red slots typically trigger during aggressive play, blue during defensive maneuvers, and green for exploration benefits. Strategic placement in appropriate slots maximizes their effectiveness.
The Relics menu interface displays color-coded slots that determine activation conditions and Relic synergies
When selecting Relics, prioritize those that complement your primary class abilities and weapon choices. For example, magic-focused classes benefit tremendously from Relics that reduce spell costs or increase casting speed, while warrior types should seek damage amplification and stagger resistance artifacts.
Strategic Relic selection like the Night of the Beast can dramatically enhance specific playstyles and combat approaches
Common Mistake: Many players equip Relics based solely on raw stat increases without considering activation conditions, resulting in inconsistent performance during actual gameplay.
Advanced optimization involves creating Relic combinations that trigger complementary effects. Some Relics provide bonus effects when paired with others of the same color or type, enabling powerful build-defining synergies that transform combat effectiveness.
For players transitioning to more advanced content, our BF6 Class Selection Guide provides additional insights into class-specific optimization strategies that apply directly to Relic selection.
The Goblet system introduces sophisticated Relic customization by allowing players to modify slot colors and properties. Each character class possesses a default vessel (like the Guardian’s Urn) that determines initial slot configurations. Upgrading to specialized goblets unlocks enhanced customization options.
The Small Jar Bazaar showcases various class-specific goblets that enable advanced slot customization
To modify your slot configuration, acquire alternative goblets from the Small Jar Bazaar or as expedition rewards. Each goblet offers unique color combinations and special properties that can dramatically alter your build’s functionality.
Swapping between different class vessels like the Guardian’s Urn and Guardian’s Goblet enables strategic slot reconfiguration
Advanced Strategy: Endgame optimization involves creating specialized goblet loadouts for different content types—one optimized for boss encounters, another for exploration, and a third for PvP scenarios. This approach requires significant investment but provides unparalleled versatility.
Strategic slot management becomes crucial for maximizing build efficiency. Analyze your most frequently triggered activation conditions and prioritize Relics that capitalize on those scenarios. Many top players spend 2-3 hours perfecting their slot configurations before attempting challenging endgame content.
For comprehensive gameplay guidance that complements Relic mastery, consult our Battlefield 6 Complete Guide for additional strategic insights.
Remember that certain high-tier Relics require specific slot color configurations to activate their full potential. Planning your goblet choices around the Relics you intend to use prevents wasted resources and ensures optimal performance.
Action Checklist
- Locate and activate the Relic altar in Roundtable Hold’s central chamber
- Complete expeditions focusing on bonus objectives for high-tier Relics
- Visit Small Jar Bazaar regularly to purchase class-specific Relics and goblets
- Analyze and equip Relics based on color slot activation conditions
- Acquire and test different goblets to optimize slot configurations
No reproduction without permission:SeeYouSoon Game Club » How To Use Relics In Elden Ring Nightreign Master Elden Ring Nightreign's Relic system with expert strategies for acquisition, optimization, and advanced customization