TL;DR
- Gladius uses chain, sword, and melee attacks with fire damage specialization
- The primal form splits into three dogs with dangerous area-of-effect banners
- Position your party strategically to avoid simultaneous damage from multiple attacks
- Fire resistance gear and proper dodging timing are essential for survival
- Phase transitions require immediate repositioning to avoid banner damage
As the inaugural boss encounter in Elden Ring Nightreign, Gladius, Beast of the Night presents a formidable challenge that tests your understanding of core combat mechanics. This Tricephalos creature serves as the gateway to more complex challenges ahead, making mastery essential for progression.
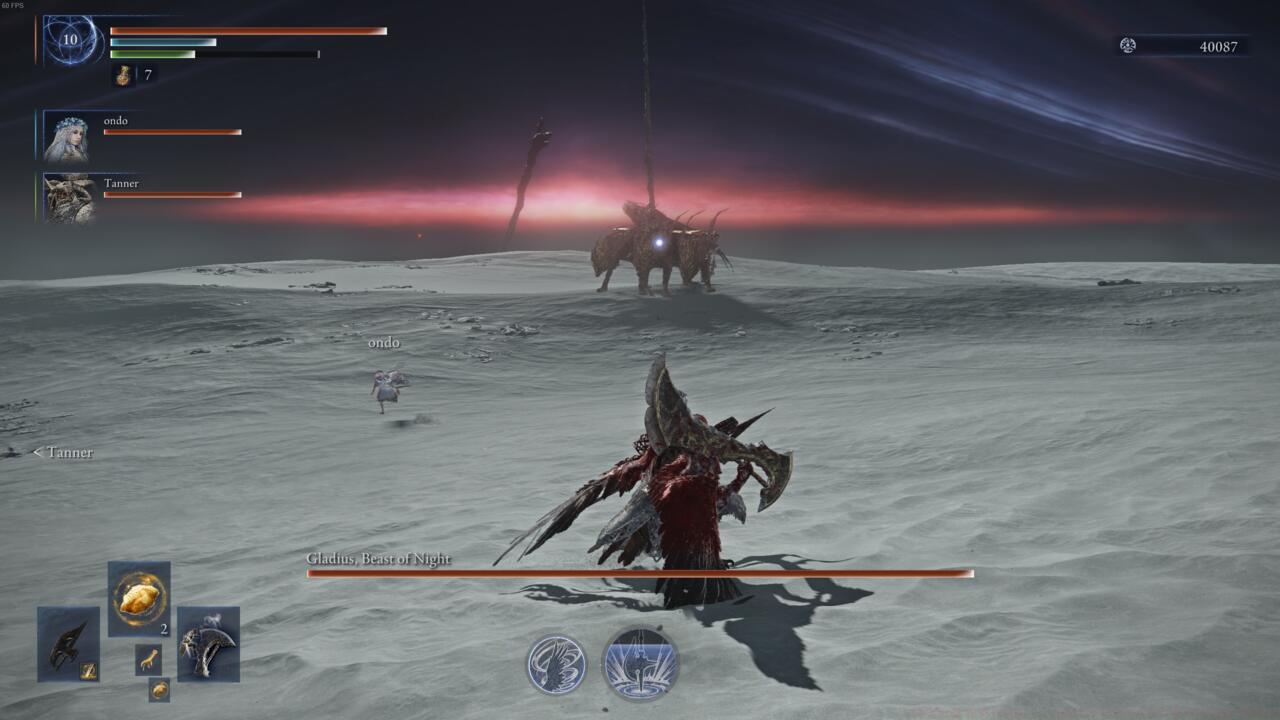
The opening scene with Gladius, Beast of the Night
Following the tutorial section, Gladius becomes immediately available through the Expeditions menu interface. Whether you prefer solo challenges or cooperative multiplayer sessions, this three-headed canine adversary remains your primary objective during the initial progression phase. Successfully navigating through two nights of preliminary content unlocks access to the boss arena where you’ll confront this fiery menace.
Gladius specializes exclusively in fire-based assaults, making elemental resistance a critical consideration during gear selection. The creature’s three-headed design allows for multi-directional targeting, creating unique positioning challenges throughout the encounter.
The encounter begins with Gladius deploying its signature chain assault. This opening move involves the beast uncoiling an overhead whip-like chain that arcs across the battlefield in a curved trajectory. While initially targeting a single party member, the secondary chain sweep creates a wider danger zone affecting anyone positioned along its return path.
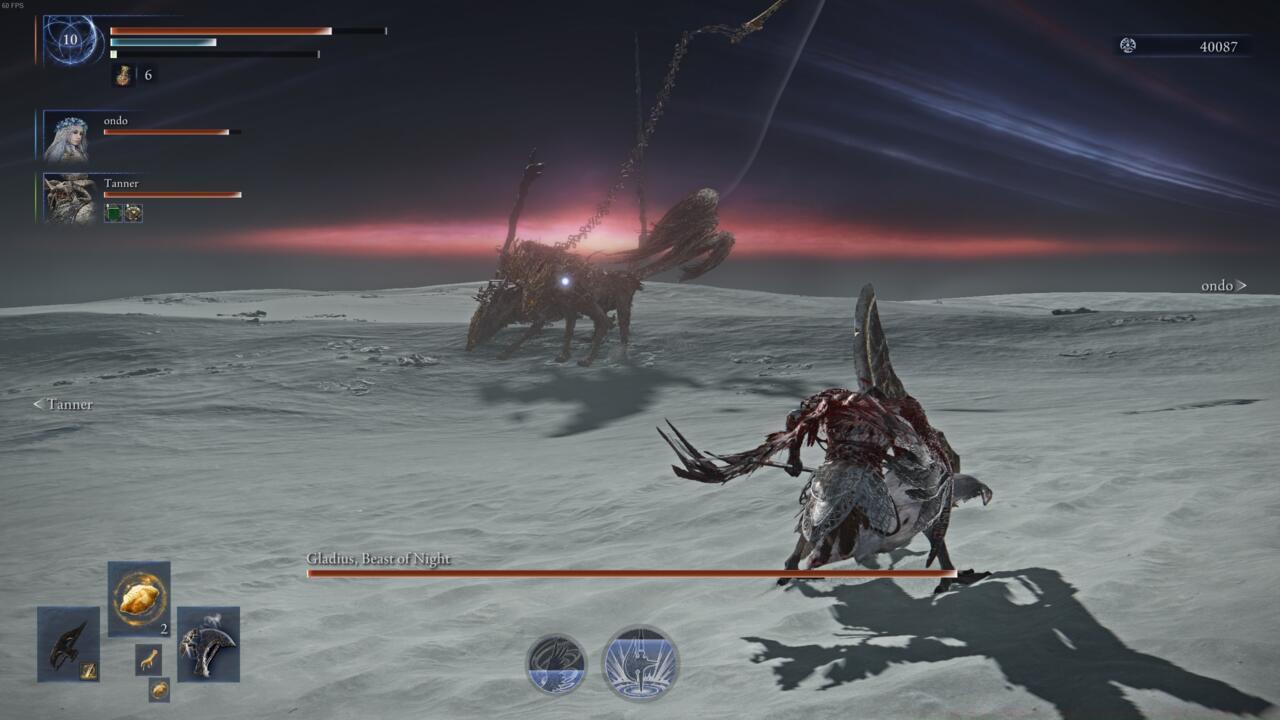
Splitting up your party’s three members is a great strategy for Gladius
Following chain retrieval, Gladius typically initiates aggressive positioning behavior, seeking specific targets for close-quarters engagement. When not pursuing individual players, the boss transitions to its sword technique—a linear, high-velocity strike that demands rapid evasion responses. Anticipating target selection becomes straightforward, but the execution speed requires precise timing.
Beyond its primary weapon-based assaults, Gladius incorporates melee combinations utilizing its anatomical features. Between chain and sword sequences, the creature executes biting maneuvers, powerful stomping actions with its forepaws, and sweeping tail rotations that threaten adjacent combatants.
Upon sustaining significant damage, Gladius undergoes a dramatic transformation into its primal manifestation. This phase shift divides the entity into three separate canine forms, each retaining substantial size but only one wielding the signature sword. The arena becomes saturated with hazardous banners emitting persistent area-of-effect damage, necessitating constant positional awareness.

The primal form of Gladius litters the arena with dangerous banners.
Successful Gladius engagements require meticulous party coordination and spatial management. Distribute your team members strategically across the arena to minimize simultaneous damage from area-effect abilities. Designate roles clearly—ranged specialists should maintain distance while melee fighters coordinate attack windows between boss animations.
Fire resistance optimization cannot be overstated. Equip gear with inherent flame protection or utilize consumables that provide temporary resistance buffs. The cumulative fire damage throughout this extended encounter will test your sustainability without proper preparation.
During the primal phase transition, immediately reassess positioning relative to the newly spawned banners. These orange structures emit continuous damage fields that quickly overwhelm unprepared parties. Create escape routes and establish fallback positions before triggering the transformation threshold.
Monitor Gladius’s animation cues closely—each attack type features distinct telegraphing movements that allow for proactive evasion. The chain attack begins with distinctive overhead coiling motions, while sword strikes involve specific shoulder adjustments before execution.
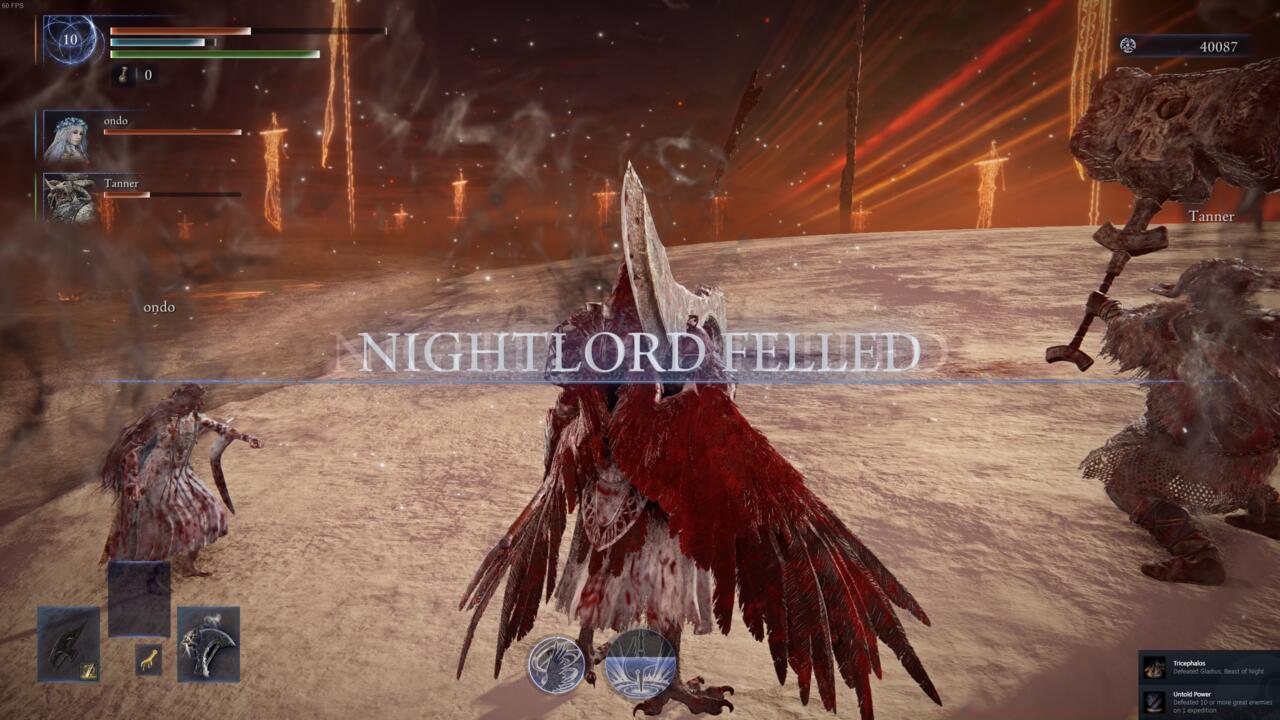
The first Night Lord Felled screen in Elden Ring Nightreign
Common strategic errors include clustering together during chain attacks, neglecting fire resistance preparation, and failing to reposition during phase transitions. Advanced players should practice dodge timing specifically for the sword attack, which features the tightest evasion window of all Gladius’s abilities.
Action Checklist
- Equip maximum fire resistance gear before entering the arena
- Position party members in separated formations to avoid group damage
- Practice recognizing chain and sword attack telegraph animations
- Coordinate phase transition positioning to avoid banner damage zones
- Master dodge timing for the high-velocity sword attack
No reproduction without permission:SeeYouSoon Game Club » Elden Ring Nightreign Tricephalos Boss Guide – How To Beat Gladius Master the first Elden Ring Nightreign boss with expert strategies for Gladius, Beast of the Night combat phases