TL;DR
- Master Ascend ability timing for precise vertical movement through obstacles
- Strategic block positioning creates optimal pathways through shrine chambers
- Balance platforms carefully to access ceiling pillars without falling
- Position escape platform on cage corners for stable Ascend surface
- Complete entire puzzle in 8-12 minutes with proper execution
Successfully navigating the Jikais Shrine demands exceptional proficiency with Link’s Ascend ability, which enables vertical movement through solid surfaces. This comprehensive guide provides step-by-step solutions to overcome its challenging ‘Jailbreak’ puzzle mechanics.
While exploring the vast landscapes of Hyrule in The Legend of Zelda: Tears of the Kingdom, adventurers will encounter numerous shrines testing various abilities. Situated in the southeastern region near Mount Lanayru’s slopes, the Jikais Shrine presents the ‘Jailbreak’ challenge, requiring strategic block manipulation combined with precise Ascend ability usage to progress.
Upon entering the shrine’s first chamber, you’ll immediately notice four distinct movable blocks that cannot be scaled conventionally, alongside several wall openings at varying heights. The core objective involves arranging these blocks strategically to create Ascend pathways reaching the upper wall sections.
Begin by activating Ascend on the initial blocks to reach the central area, then leap to the left block and ascend through the adjacent wall opening. This establishes your foundational movement pattern for the entire shrine.
Employ Ultrahand to reposition the lower two blocks, positioning the taller one adjacent to the middle opening while moving the shorter block toward the right side. Shift the large block rightward until it aligns perfectly beneath the left wall opening. Now ascend through the middle block into the central hole and descend onto the left large block. Subsequently relocate the upper block beside the opening and ascend into it. Proceed through the wall gap and ascend to the wall’s summit, concluding this initial segment. Pro Tip: Position blocks at slight angles rather than perfectly aligned to create more stable Ascend surfaces that prevent slipping during transitions.
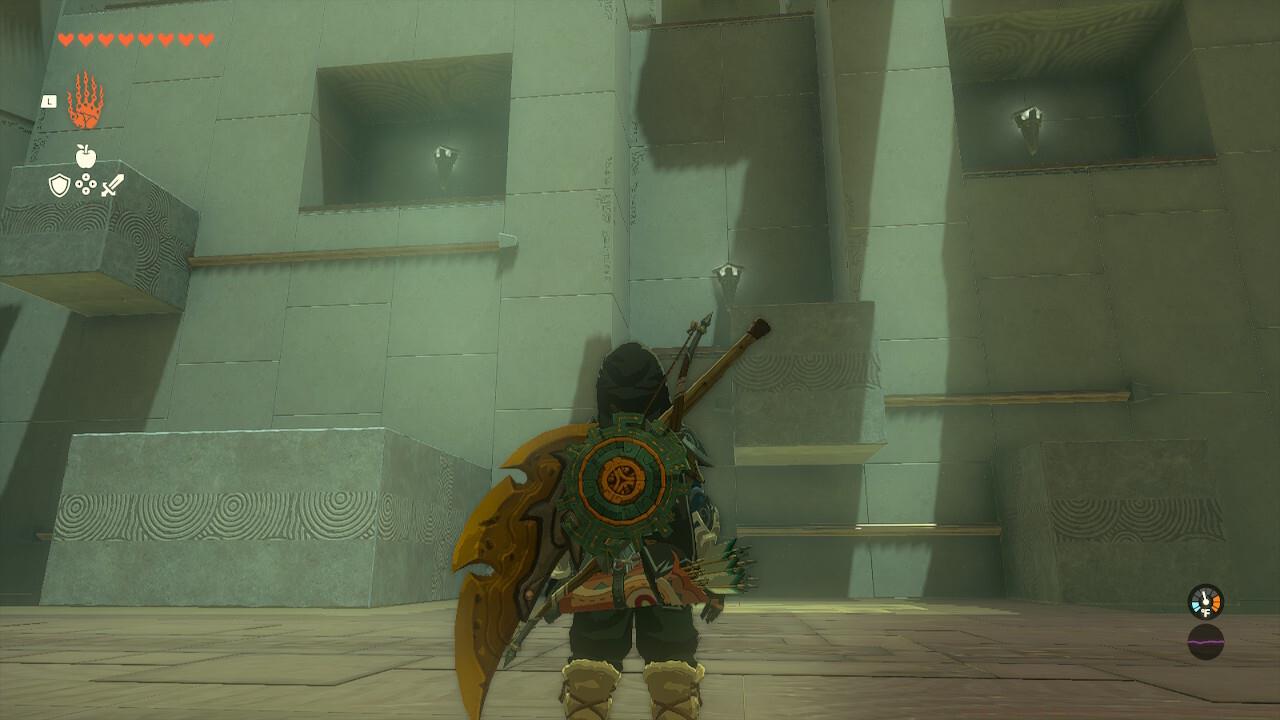
Strategic block positioning creates optimal Ascend pathways through the initial chamber’s vertical challenges.
Your next objective involves ascending through the central ceiling pillar, which presents unique vertical navigation challenges requiring precise platform management.
The subsequent chamber features a substantial pillar extending from the ceiling at the room’s center, complemented by a ground-based pillar on the left side with an adjustable flat platform. Before addressing this primary puzzle component, immediately turn right to spot a concealed chest resting on a grated platform accessible via Ascend. Expert Insight: This hidden chest often contains valuable zonaite materials or weapon enhancements, making the brief detour worthwhile for resource accumulation.

Ascending through the central ceiling pillar requires careful platform positioning and timing.
Position the platform to extend slightly beyond the ledge edge, creating sufficient clearance to access the pillar for Ascend activation while maintaining platform stability to prevent catastrophic falls.
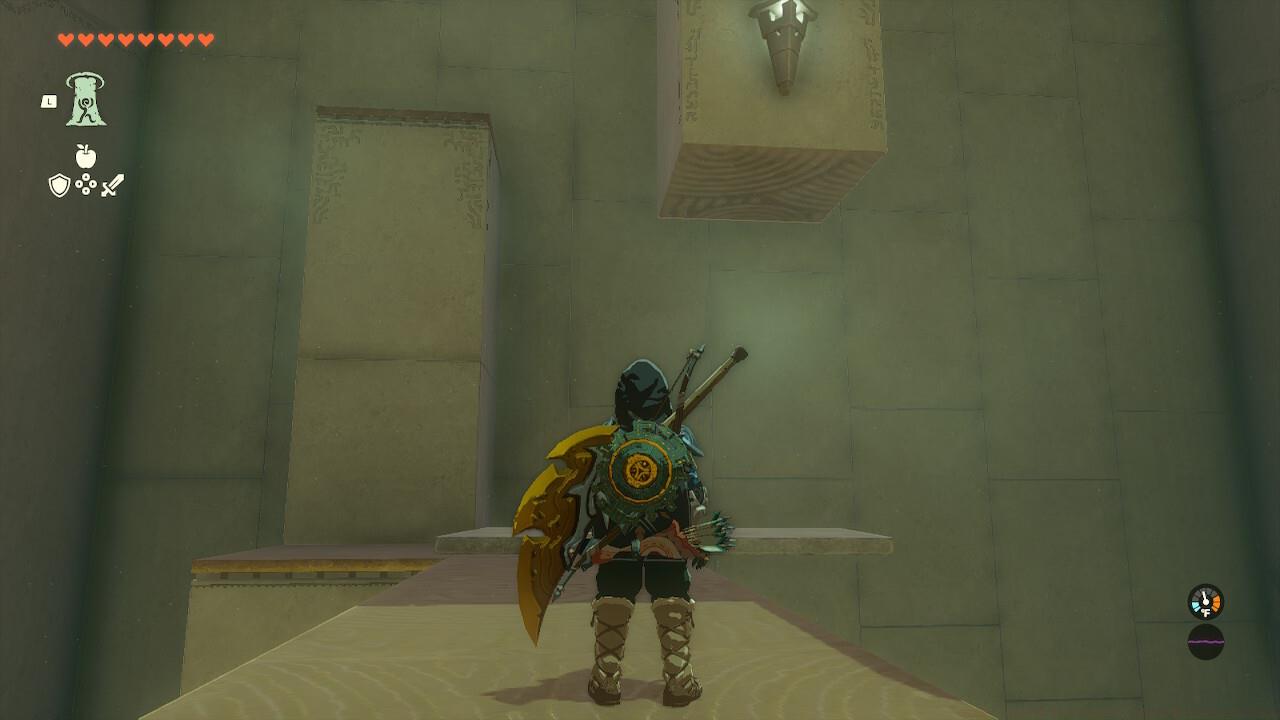
Precise platform balancing enables safe access to the ceiling pillar without risking platform displacement.
Having reached the shrine’s conclusion, you’ll find yourself confined within an imposing cage structure that cannot be scaled traditionally. A movable platform rests just beyond the cage perimeter, retrievable using Ultrahand. The final challenge requires balancing this platform atop the cage to create an Ascend exit point.
Strategically position the platform on one of the cage’s corners rather than flat surfaces, significantly reducing instability risks and preventing accidental dislodgement during your escape sequence. Advanced Technique: Angle the platform diagonally across the corner for maximum surface contact and stability, ensuring successful Ascend activation without last-minute adjustments.
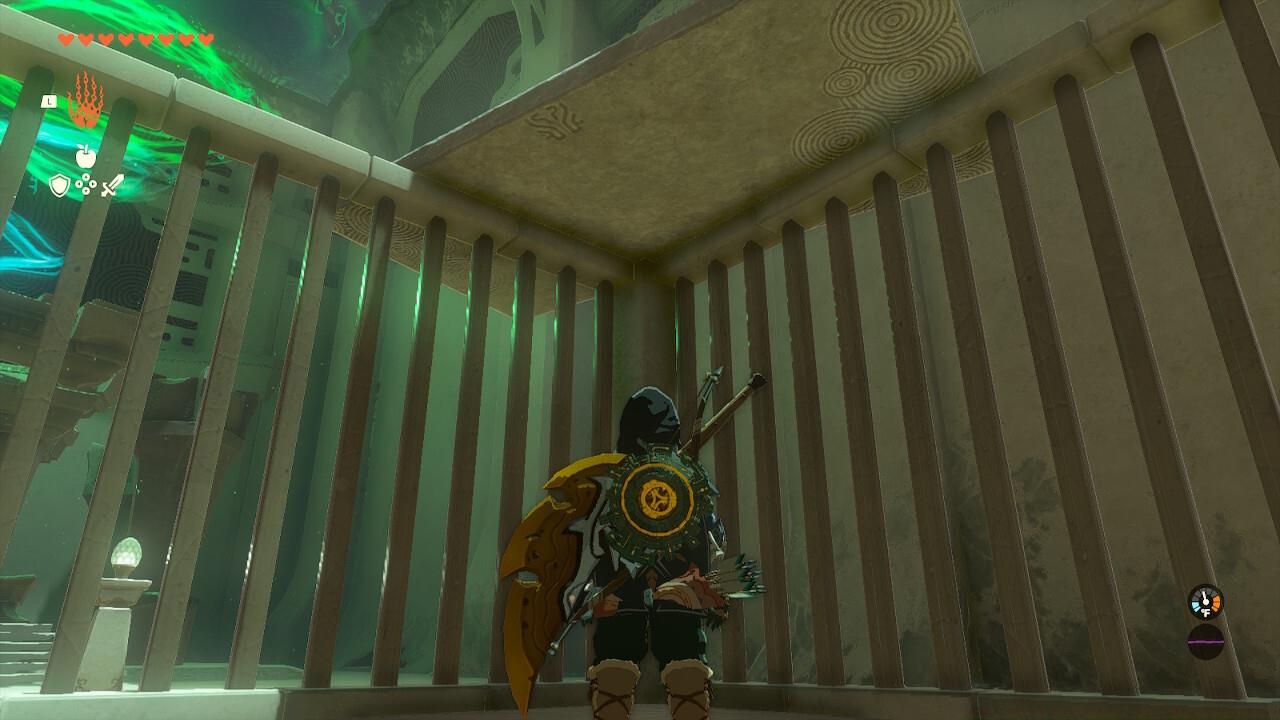
Corner placement of the escape platform provides optimal stability for the final Ascend execution and shrine completion.
With the platform securely positioned, activate Ascend to transcend the cage confines and claim your well-earned spirit orb reward. Most players complete this shrine in 8-12 minutes with proper execution, though beginners may require 15-20 minutes to master the Ascend timing and block positioning mechanics.
Action Checklist
- Arrange initial four blocks to create Ascend pathways to wall openings
- Use Ultrahand to position blocks beneath left and middle wall holes
- Collect hidden chest contents by ascending to grated platform in middle chamber
- Balance platform off ledge for stable ceiling pillar access
- Position escape platform on cage corner and use Ascend to complete shrine
No reproduction without permission:SeeYouSoon Game Club » Zelda: Tears Of The Kingdom – Jikais Shrine Puzzle Guide Master the Jikais Shrine Jailbreak puzzle with expert Ascend techniques and strategic block positioning