TL;DR
- Bell Demon provides optional hard mode with enhanced rewards but increased enemy aggression
- Two distinct shrine access routes offer flexibility based on your progression stage
- Sinister Burden can be toggled via inventory for strategic difficulty management
- New Game+ combined with refusing Kuro’s Charm creates ultimate challenge mode
- Strategic Bell Demon usage optimizes early-game farming and late-game challenge
From Software has built its reputation on punishing but fair gameplay experiences, with Sekiro: Shadows Die Twice continuing this tradition through innovative difficulty mechanics. Unlike conventional games where you simply select ‘Hard’ from a menu, Sekiro requires players to actively seek out and engage with specific game elements to unlock enhanced challenge modes. The primary method involves locating the Bell Demon, a hidden entity that fundamentally alters combat dynamics while providing tangible benefits for skilled players.
The Bell Demon manifests as a special inventory item that, when activated, applies a status effect called Sinister Burden. This condition amplifies enemy aggression patterns, increases their health pools by approximately 15-20%, and makes boss encounters significantly more demanding. However, this increased difficulty comes with valuable compensation – defeated enemies drop more sen (currency) and have improved item discovery rates, making the Bell Demon particularly useful for farming rare upgrade materials.
Strategic implementation of the Bell Demon requires understanding its risk-reward balance. Early game usage can accelerate your progression through improved resource acquisition, while late-game activation tests your mastery of Sekiro’s combat mechanics against enhanced opponents. The system’s toggle functionality allows players to adapt difficulty in real-time based on their current objectives and skill level.
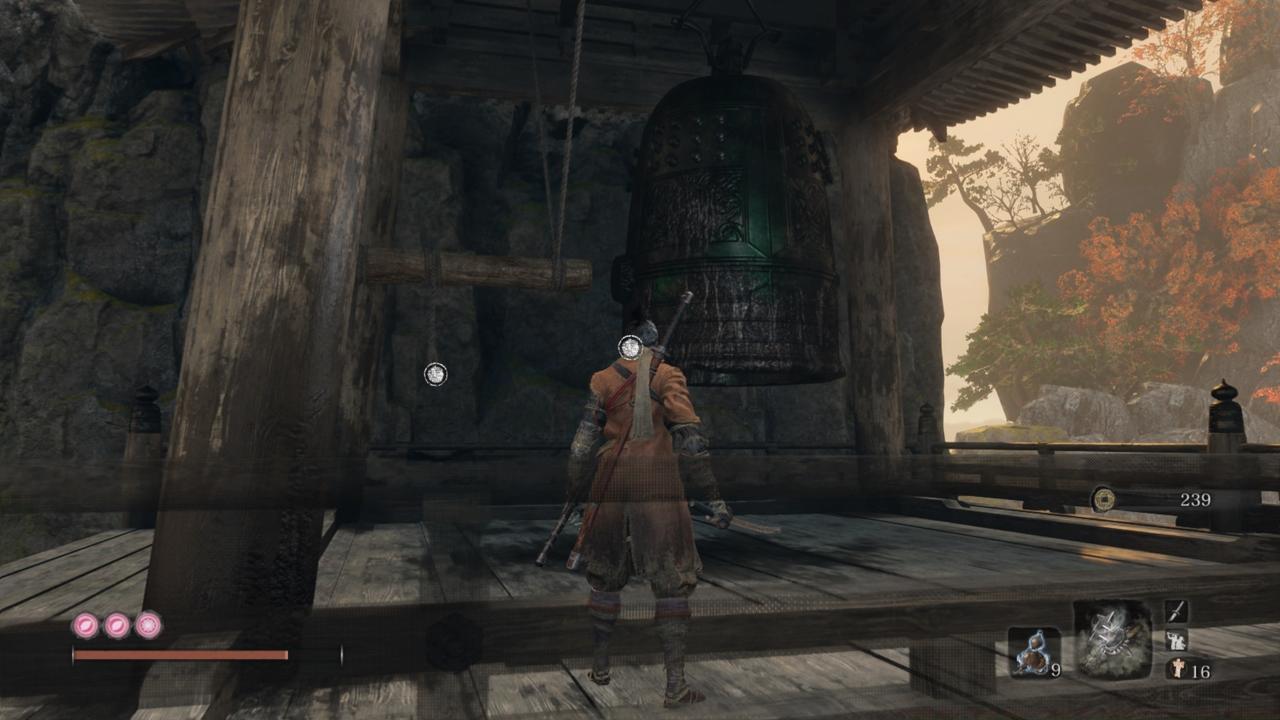
Your journey to the Bell Demon begins at Mount Kongo’s Shugendo region, specifically near the Sculptor’s Idol checkpoint. As you ascend the mountain path and reach the wooden bridge spanning the chasm, careful environmental observation becomes crucial. The shrine sits conspicuously to the left, marked by a distinctive iron bell that serves as both visual cue and activation mechanism.
From the bridge vantage point, identify the rocky outcropping adjacent to the structure. Navigation requires precise platforming – look for the tree stump grapple point and descend carefully to the lowest accessible level. Along the cliff edge, you’ll discover a weathered wooden walkway that demands a calculated jump to access. Follow this precarious path until it terminates, then survey the opposing cliff face for a specific ledge formation that permits grabbing and climbing.
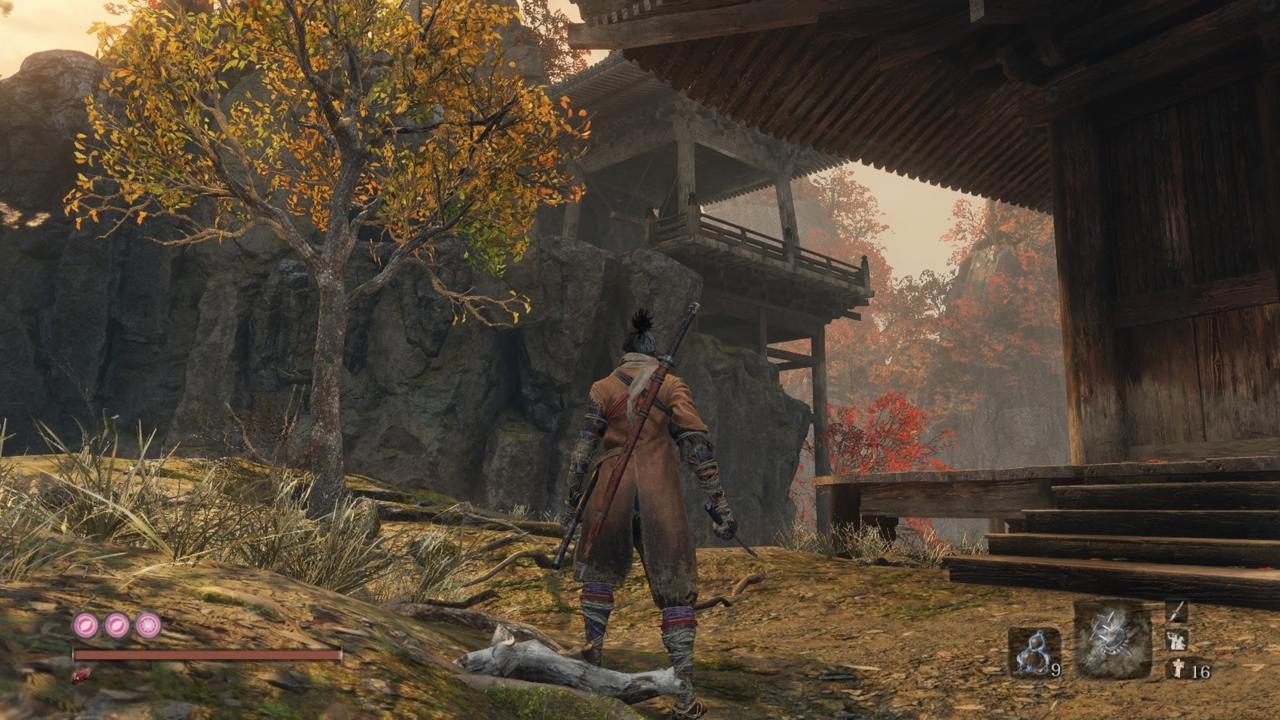
Execution timing proves critical for this route. The gap leap requires full sprint momentum, and the ledge grab window is tighter than standard environmental interactions. Many players fail their initial attempts by underestimating the required running start distance. Success grants access to the elevated bell shrine where your hard mode journey properly begins.
For players seeking earlier access to hard mode capabilities, an alternative route through Ashina Outskirts bypasses significant progression requirements. Beginning at the Underbridge Valley Sculptor’s Idol, retrace your steps to the broken bridge structure and follow the fortress perimeter leftward. This path introduces additional hazards but provides the Bell Demon much sooner in your playthrough.
The critical navigation element involves locating a specific wooden walkway marked by a foreboding note warning of the Headless apparition ahead. This spectral enemy presents a substantial threat to unprepared players, particularly due to its terror-inducing attacks and spirit-based damage type. Rather than engaging this formidable foe immediately, the strategy focuses on evasion and rapid traversal.
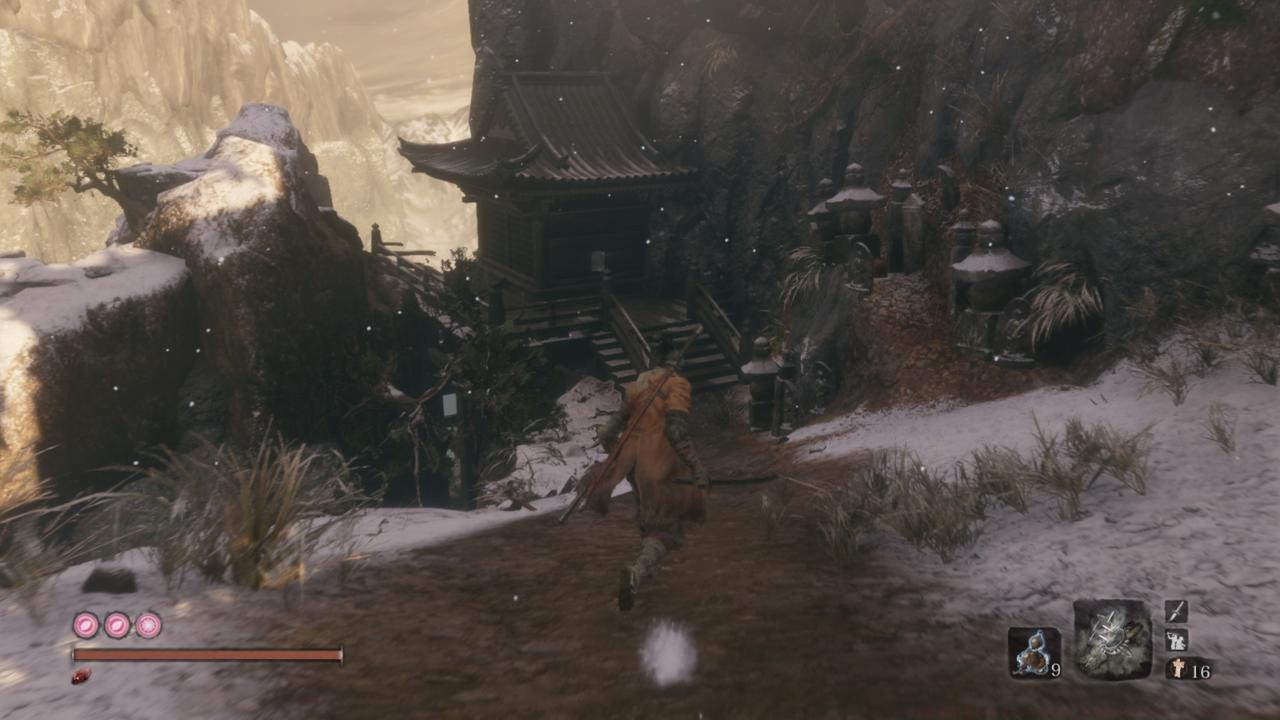
Follow the path to its apparent dead end, then carefully examine the cliff wall for a subtle but accessible ledge formation. This requires a precise jump and immediate grab input. Continue along this narrow ledge system until you can safely drop into the cavern below, where the Headless awaits. Sprint past this enemy while hugging the right wall to locate a concealed opening that leads to the Shinobi escape route. The door mechanism requires wall-hugging interaction, which then transports you directly to the Mount Kongo bell shrine location.
This route’s primary advantage lies in accessibility timing – you can reach the Bell Demon before confronting many of Sekiro’s major bosses. However, the Headless encounter presents significant risk, making Divine Confetti and Pacifying Agent preparations advisable for contingency planning.
Once you’ve reached the Bell Demon shrine, activation proves straightforward yet momentous. Simply interact with the iron bell to ring it, immediately applying the Sinister Burden status to your character. This manifests visually through a distinctive aura effect and adds the Bell Demon item to your inventory, confirming your hard mode status.
The Bell Demon’s influence extends beyond simple stat adjustments. Enemy behavior patterns become more aggressive and unpredictable, with attack combos extending beyond their normal patterns. Boss encounters particularly showcase these changes, with previously predictable phases introducing new moves and faster response times. The most significant combat alteration involves posture damage – both dealing and receiving posture damage increases substantially, demanding perfect parry timing for survival.


Strategic deactivation provides crucial flexibility. Access your inventory and select the Bell Demon item, using it as you would any consumable. This immediately removes the Sinister Burden, normalizing enemy behavior and difficulty. This toggle capability proves invaluable when approaching particularly challenging boss encounters where the additional difficulty might impede progression.
The nearby Bell Demon’s Temple Sculptor’s Idol enables rapid return for reactivation, creating a dynamic difficulty management system. Many advanced players develop specific patterns – activating the demon for area clearing and farming, then deactivating for boss encounters until they’ve mastered specific patterns.
For players seeking the ultimate Sekiro challenge, New Game+ introduces additional difficulty scaling that stacks with the Bell Demon system. Enemy damage output increases by approximately 30% in New Game+, with health pools growing correspondingly. This creates a natural difficulty progression for subsequent playthroughs.
The true hard mode emerges when you combine New Game+ with refusing Kuro’s Charm during the early game story sequence. This decision fundamentally alters core combat mechanics beyond simple stat adjustments.
Without Kuro’s Charm protection, blocking becomes significantly less effective. Standard blocks that would normally prevent all damage now allow chip damage through – typically 10-15% of the attack’s normal damage. This mechanic forces perfect parry execution rather than relying on defensive blocking strategies.
The chip damage system creates a paradigm shift in combat approach. You can no longer safely hold block to observe enemy patterns; instead, you must actively engage with precise deflection timing. This advanced mode essentially removes the safety net that normal gameplay provides, demanding near-flawless execution for survival.
Strategic considerations for this ultimate challenge include extensive pattern memorization and accepting that some damage during learning phases becomes unavoidable. Many players recommend mastering the game with Kuro’s Charm first before attempting charmless runs, as the difficulty spike proves substantial even for experienced players.
Action Checklist
- Choose your access route – Mount Kongo for progression or Ashina Outskirts for early access
- Navigate carefully to the Bell Demon shrine using platforming precision
- Ring the bell to activate Sinister Burden and receive Bell Demon item
- Farm early areas with activated demon for enhanced resource acquisition
- Toggle demon off for difficult boss encounters until patterns are mastered
- Combine with New Game+ and refuse Kuro’s Charm for ultimate challenge
No reproduction without permission:SeeYouSoon Game Club » Sekiro Bell Demon How-To Guide: How And Where To Activate Hard Mode Master Sekiro's hidden difficulty modes and Bell Demon mechanics for enhanced rewards and challenge