TL;DR
- Clear surrounding enemies first and use the nearby Idol for quick resets
- Acquire Flame Vent from Hirata Estate for emergency crowd control
- Execute stealth deathblow from behind before the Ogre breaks free
- Dodge sideways, not backward, to avoid devastating grab attacks
- Use fire staggers strategically for healing windows and finishing blows
From Software consistently delivers demanding combat experiences that test player skill and persistence. In Sekiro: Shadows Die Twice, the development team introduces early-game boss encounters specifically designed to sharpen your swordplay fundamentals. Overcoming these initial hurdles becomes significantly more manageable when you’ve secured the optimal prosthetic tools, though several are easily overlooked during initial exploration.
The Chained Ogre represents your first significant combat trial—a crimson-eyed brute confined within wooden restraints. While Sekiro provides environmental clues about defeating major adversaries through eavesdropping opportunities, theoretical knowledge and practical execution present distinct challenges. Vanquishing this foe serves as the final barrier before confronting Gyoubu Oniwa, rewarding you with Prayer Beads to enhance your combat capabilities for upcoming battles.
Locate the Ogre within Ashina Outskirts, specifically at the Outskirts Wall—Stairway segment. Prioritize eliminating all surrounding foot soldiers to prevent interruptions during your duel. Master stealth elimination techniques to preserve vitality, and utilize the nearby Sculptor’s Idol for tactical resets when necessary. This reset capability proves invaluable for minimizing mortality rates while mastering the encounter mechanics.
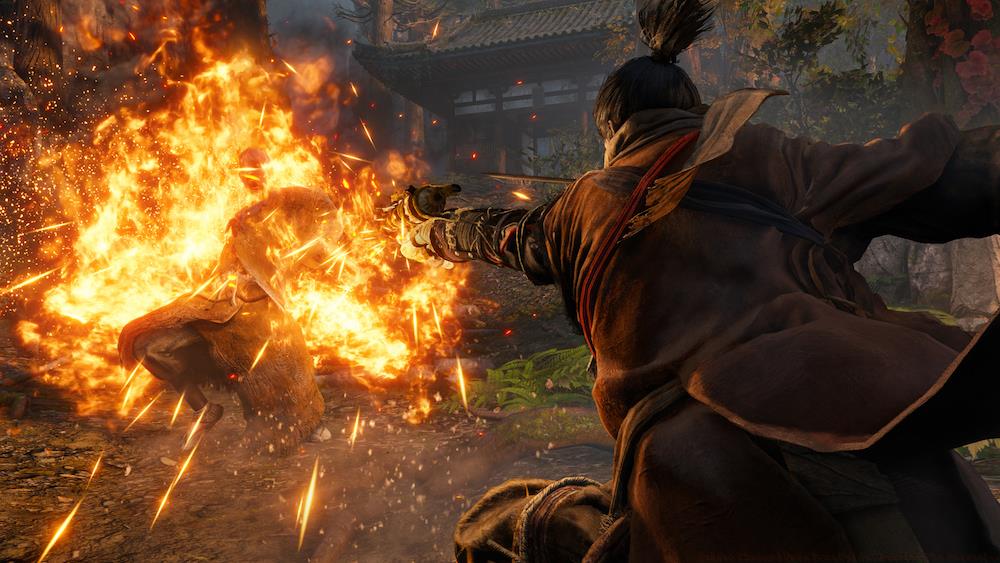
Crimson-eyed adversaries function as berserker-type enemies, largely ignoring standard offensive pressure. This necessitates extensive evasion and calculated counter-attacking during the Ogre’s attack recovery frames. However, fire-based attacks create valuable openings—flames terrify red-eyed creatures, and an early-game Shinobi Prosthetic generates a fiery blast that temporarily incapacitates the Ogre, granting tactical superiority.
Journey to Hirata Estate to obtain the Flame Vent tool. Before reaching the Stairway area, explore the Gate Path region and locate an elderly woman inside a destroyed dwelling. Engaging in conversation and humoring her maternal confusion yields a ceremonial bell offering. Transport this item to Dilapidated Temple and present it to the Buddha statue adjacent to the Sculptor, unlocking access to Hirata Estate. Consult specialized guides for precise Flame Vent location details—return the prosthetic to the Sculptor for installation before your Ogre confrontation.
The Flame Vent doesn’t constitute an essential victory requirement, nor does it inflict amplified damage. This utility tool excels in critical situations, such as creating distance when the Ogre pressures you or securing final strikes when the enemy nears defeat.
Stealth approaches prove ineffective against the Ogre due to the single staircase access point ensuring detection. However, attempting a rear-position deathblow can substantially reduce encounter difficulty by approximately fifty percent immediately. Achieve this by holding the dodge input to sprint, maneuvering behind the Ogre before it liberates itself from constraints. This timing challenge demands precision, but the payoff justifies the effort.
The Ogre’s offensive repertoire delivers substantial damage, though its grappling maneuvers present the greatest threat. These techniques display the crimson kanji symbol indicating unblockable assaults. Successful grabs inflict massive, unavoidable damage that frequently proves fatal. Evade these crushing grabs exclusively through Step Dodging, maintaining general distance management—the creature’s lunging grab can connect even during backward movement, so prioritize lateral evasion and ensure sufficient space for retreat.
Advanced combat analysis reveals the Ogre’s grab attacks feature distinct wind-up animations. The standard grab requires close proximity, while the diving grab covers surprising distance. Recognizing these telegraphs enables preemptive positioning—when the Ogre crouches slightly with arms extended, prepare for immediate sideways dodging rather than backward movement.
Many players underestimate the Ogre’s grab range, attempting backward dodges that consistently fail. The diving grab specifically tracks backward movement, making sideways evasion essential. Additionally, newcomers frequently squander the initial deathblow opportunity by approaching too slowly or hesitating once the Ogre begins breaking free.
Optimal Flame Vent deployment occurs during specific scenarios: when your health drops critically and requires healing, when the Ogre’s posture nears breaking point, or when you need to create space against aggressive pressure. The tool provides approximately 2-3 seconds of stagger time—sufficient for one healing item use or 2-3 sword strikes. Avoid using it randomly, as the limited Spirit Emblem cost adds resource management considerations.
Posture management represents another overlooked aspect. While the Ogre primarily suffers vitality damage, repeated attacks still build posture meter. Combining flame staggers with aggressive assaults can sometimes break posture faster than pure health depletion, though this requires precise execution.
You might also want to study Sekiro’s death mechanics and Dragonrot curing processes, and examine our comprehensive Sekiro: Shadows Die Twice evaluation.
Action Checklist
- Clear all staircase enemies using stealth takedowns
- Acquire Flame Vent from Hirata Estate via old woman’s bell
- Execute sprinting backstab deathblow before Ogre breaks free
- Practice sideways dodging against grab attacks specifically
- Use Flame Vent strategically for healing windows or finishing blows
No reproduction without permission:SeeYouSoon Game Club » Sekiro Chained Ogre Boss Guide: Beating The Berserker Master the Chained Ogre fight with expert dodging tactics, Flame Vent strategies, and stealth deathblow techniques