TL;DR
- Mauga excels at close-range combat with dual miniguns that synergize for massive damage
- Cardiac Overdrive provides team sustain while Berserker passive rewards aggressive play
- Positioning and timing Overrun correctly is crucial to avoid crowd control vulnerabilities
- Cage Fight ultimate can single-handedly win team fights when used strategically
- Master the ignite-crit combo and manage cooldowns to maximize effectiveness
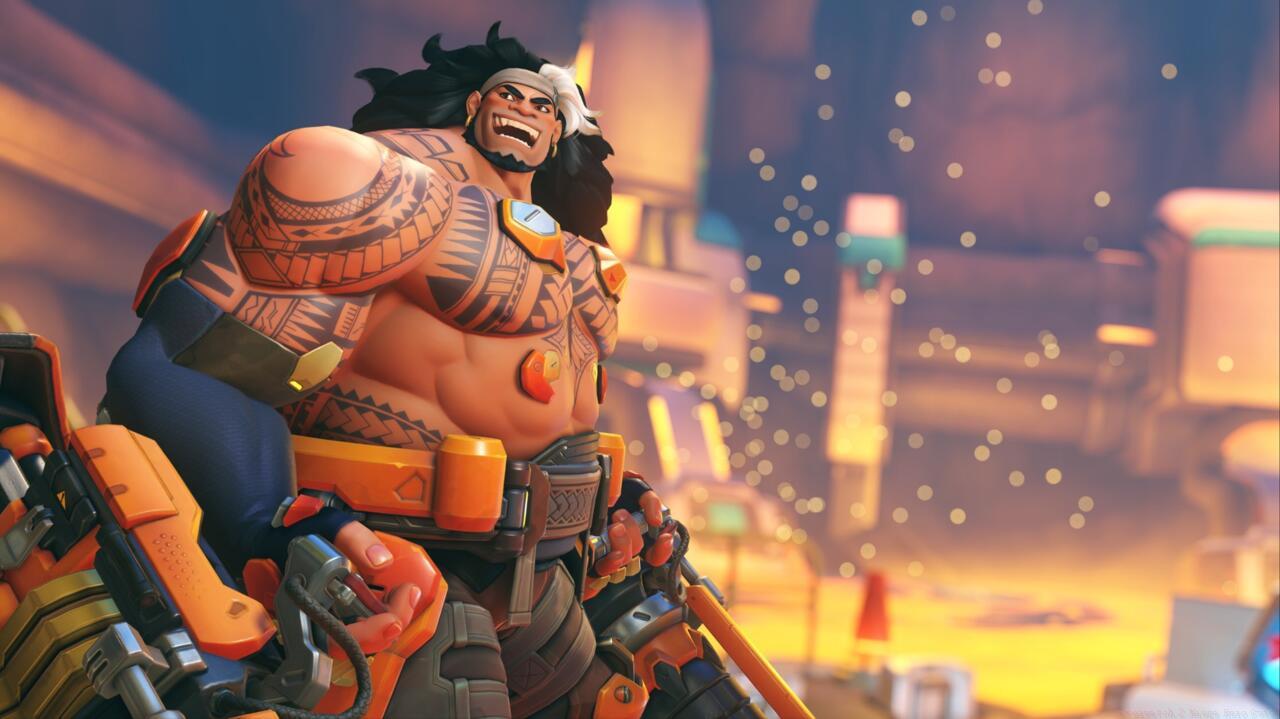
Mauga represents an aggressive tank archetype in Overwatch 2, designed to lead assaults while providing unique team sustain capabilities. Unlike traditional tanks who primarily focus on protection, Mauga combines offensive pressure with damage-based healing mechanics that reward calculated aggression.
This dual-minigun wielding powerhouse specializes in close-quarters dominance, though his forward-pushing nature creates significant vulnerability to enemy crowd control effects. Proper positioning and timing engagements separates successful Mauga players from those who feed ultimate charge to opponents.
You can evaluate how Mauga compares to other tank options in our comprehensive Battlefield 6 Complete Guide that analyzes hero matchups and team compositions.
Mauga’s effectiveness peaks within 15 meters, where both miniguns can consistently hit targets.
Mauga’s kit revolves around his complementary miniguns and damage-to-healing conversion mechanics. Understanding these synergies is essential for maximizing his combat effectiveness.
Incendiary Chaingun: This automatic weapon applies burn status to enemies after multiple consecutive hits. The ignition effect persists for 2 seconds and sets up devastating follow-up damage.
Volatile Chaingun: Your secondary weapon deals critical strikes to burning targets. The synergy between these weapons creates Mauga’s core damage loop: ignite with primary, then crit with secondary.
Overrun: Charge forward to reposition aggressively while gaining unstoppable status, then stomp to launch enemies. Perfect for initiating fights or escaping dangerous situations.
Cardiac Overdrive: Creates an area-of-effect around Mauga where allies receive 30% damage reduction and heal for 60% of damage dealt. This ability turns team fights dramatically when activated during peak damage output.
Berserker Passive: Grants temporary health whenever you deal critical damage, rewarding accurate fire on burning targets and enhancing survivability during extended engagements.
Cage Fight Ultimate: Deploys a circular barrier that traps nearby enemies while providing you unlimited ammunition. This ability single-handedly wins team fights when catching multiple opponents.
Mastering Mauga requires understanding optimal ability sequences and positioning to mitigate his weaknesses while maximizing damage output.
Weapon Combos: Alternate firing between miniguns to maintain ignition uptime while maximizing critical damage. The most effective pattern involves firing Incendiary Chaingun until ignition, then switching to Volatile Chaingun for critical strikes, repeating this cycle throughout engagements.
Ability Rotation: Use Overrun to engage or disengage, never during enemy crowd control availability. Activate Cardiac Overdrive when both you and teammates are dealing concentrated damage to maximize healing output.
Team Coordination: Position yourself where multiple allies can benefit from Cardiac Overdrive while maintaining line-of-sight to supports. Coordinate Cage Fight with allied area-denial ultimates for guaranteed team wipe potential.
For weapon optimization strategies that complement Mauga’s playstyle, check our BF6 Weapons Unlock Guide covering damage profiles and ideal pairings.
Many players struggle with Mauga due to fundamental misunderstandings about his role and ability limitations. Recognizing these pitfalls early will dramatically improve your performance.
Overextension Pitfalls: Mauga’s aggressive design tempts players to push too far forward. Maintain awareness of support sightlines and disengage before reaching point-of-no-return positioning.
Ability Timing Errors: Using Overrun when enemies have stuns available or activating Cardiac Overdrive during low-damage periods significantly reduces effectiveness.
Counter Management: Enemy heroes with crowd control abilities like Ana, Brigitte, or Cassidy can shut down Mauga completely. Track enemy cooldowns and engage during vulnerability windows.
Understanding proper class selection to counter Mauga’s weaknesses is covered in our BF6 Class Selection Guide, which details optimal matchups.
Advanced Technique: High-level Mauga players use environmental geometry during Overrun to minimize exposure while maximizing displacement value. Practice charging along walls and around corners to maintain cover.
Action Checklist
- Practice the ignite-crit weapon combo in training mode until muscle memory develops
- Master Overrun positioning to engage without overextending beyond support range
- Learn to track enemy crowd control cooldowns before initiating engagements
- Coordinate Cage Fight usage with teammates’ area-denial ultimates
- Practice activating Cardiac Overdrive during peak damage moments for maximum value
No reproduction without permission:SeeYouSoon Game Club » Overwatch 2 Mauga Hero Guide Master Mauga's dual miniguns and tank strategies to dominate Overwatch 2 matches effectively