TL;DR
- Use fast-hitting weapons like daggers or whips to quickly deplete revival gauges
- Coordinate with teammates to cover revival attempts with defensive positioning
- Master the timing window – you have approximately 8-10 seconds per revival attempt
- Position strategically to avoid becoming the next casualty during rescue operations
- Utilize Ultimate Arts with multi-hit properties for maximum revival efficiency
Successfully navigating Elden Ring Nightreign’s challenging multiplayer encounters requires a deep understanding of its unique revival system. Unlike traditional souls-like games where death typically results in immediate failure, Nightreign introduces a crawling state that provides a critical window for teammate intervention.
When a player’s health reaches zero, they enter a vulnerable crawling phase lasting approximately 8-10 seconds. During this period, teammates must rapidly attack the downed player to deplete a visible gauge bar above their character. This mechanic becomes progressively more demanding with each subsequent death, as the gauge expands to require up to three full depletion cycles for repeated casualties.
Failure to complete the revival process within the allotted time results in permanent death for that encounter, accompanied by the loss of one character level and all carried runes. This penalty system creates high-stakes scenarios where efficient revival techniques become essential for party survival.
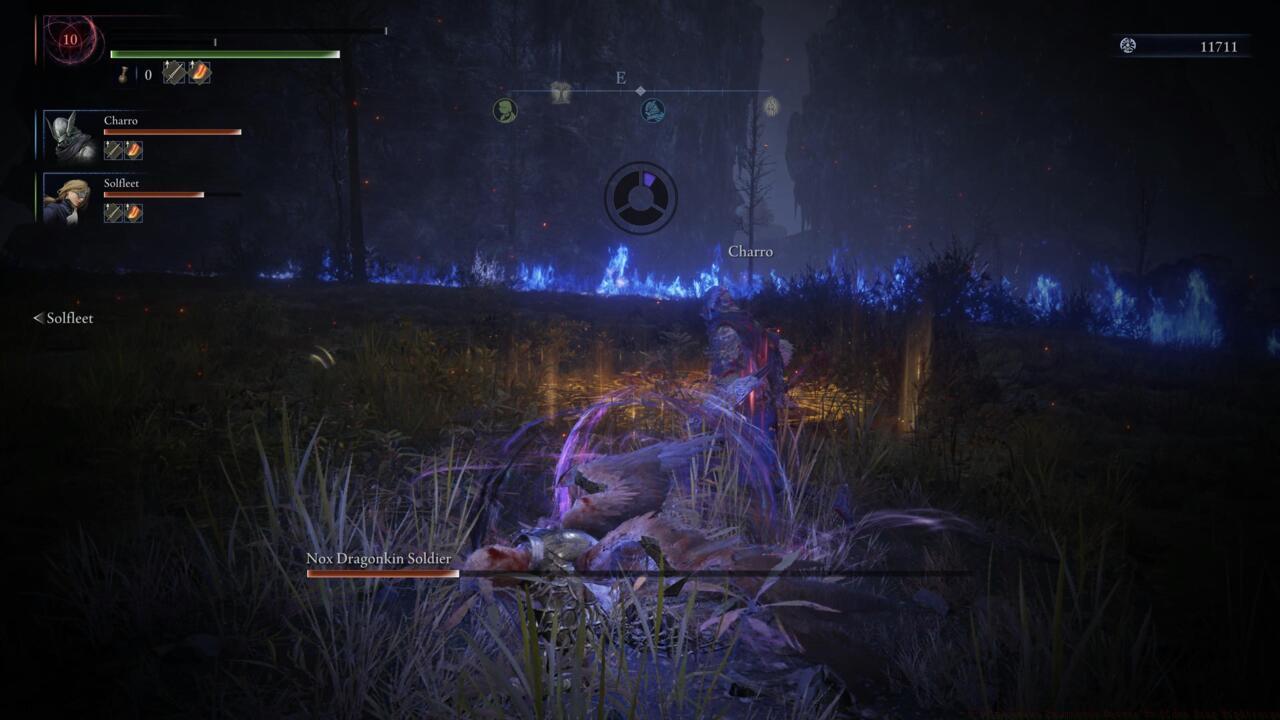
Visual demonstration of the revival gauge mechanics during a teammate rescue scenario.
Choosing the right weapon for revival situations can dramatically reduce rescue time and increase overall party survivability. Light melee weapons like daggers, straight swords, and whips excel at rapidly depleting the revival gauge due to their fast attack animations and minimal recovery frames.
Heavier weapons present a strategic trade-off: while individual strikes remove larger portions of the gauge, their slower attack speed may result in fewer total hits within the limited revival window. Greatswords and colossal weapons typically require precise timing but can achieve near-instant revivals with well-executed charged attacks.
Ranged weapons offer unique advantages in dangerous environments. Bows, crossbows, and magical implements allow safe revival from distance, particularly useful when the downed player is surrounded by enemies or positioned in hazardous terrain.
For optimal results, consider maintaining a secondary fast-attack weapon specifically for revival purposes, especially if your primary build utilizes slower, heavier armaments. This weapon-swapping strategy ensures you’re always prepared for emergency rescue scenarios.
Beyond basic weapon selection, mastering advanced revival techniques can significantly improve your team’s resilience. Ultimate Arts with multi-hit properties or area-of-effect capabilities can simultaneously revive multiple downed teammates while dealing with surrounding threats.
Strategic positioning is crucial during revival attempts. Always assess the battlefield before committing to a rescue – positioning yourself with cover or escape routes prevents chain casualties. Coordinate with your team using voice chat or predetermined signals to ensure someone provides covering fire while others perform revivals.
Develop a revival priority system: focus on healers and support characters first, as their survival increases overall party sustainability. Establish clear roles where certain players specialize in revival duties while others maintain defensive perimeters.
Advanced teams should practice synchronized revivals where multiple players simultaneously attack the gauge for dramatically accelerated results. This technique requires precise timing but can reduce revival time by up to 60% compared to solo efforts.
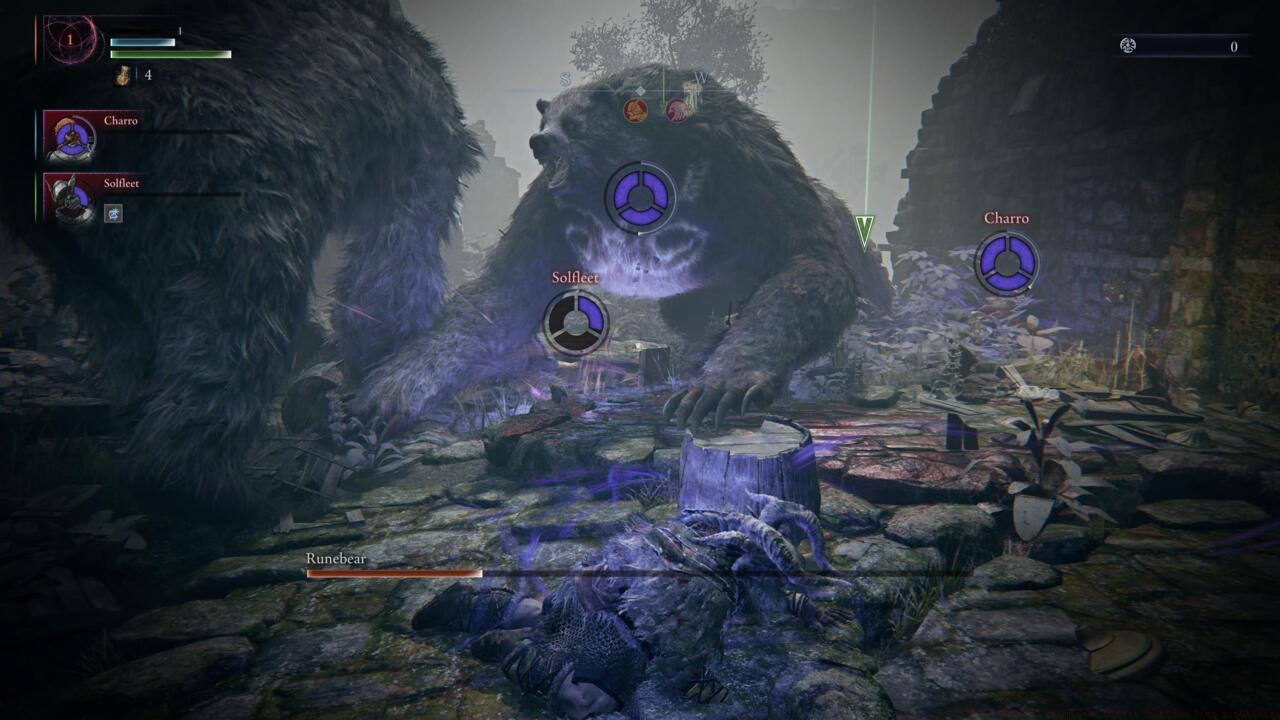
Strategic positioning example showing optimal revival angles while maintaining defensive awareness of environmental threats.
Many players undermine their revival efforts through preventable errors. The most frequent mistake involves poor timing – initiating revivals too late in the countdown or abandoning attempts prematurely. Practice recognizing the visual and audio cues that indicate the revival window is closing.
Weapon choice pitfalls include sticking with slow primary weapons instead of switching to optimized revival tools. Always keep a fast-hitting secondary weapon readily accessible for emergency situations.
Environmental awareness failures account for numerous revival casualties. Before attempting any rescue, quickly scan for enemy patrol patterns, environmental hazards, and boss attack telegraphs that could interrupt your efforts.
Another critical error involves revival tunnel vision – focusing so intensely on the downed teammate that you ignore your own positioning and become the next casualty. Maintain situational awareness by frequently checking your surroundings during the revival process.
Teams often neglect to establish revival protocols beforehand, leading to chaotic situations where multiple players attempt the same revival or no one takes responsibility. Designate revival specialists during your team’s class selection phase to ensure clear role distribution.
Action Checklist
- Equip a fast-hitting secondary weapon specifically for revival scenarios
- Practice weapon switching to your revival tool during combat simulations
- Establish team revival protocols and role assignments
- Master timing recognition for the 8-10 second revival window
- Coordinate synchronized revival techniques with your regular team
No reproduction without permission:SeeYouSoon Game Club » How To Revive Teammates Faster In Elden Ring Nightreign Master Elden Ring Nightreign revival mechanics with optimized strategies and team coordination tactics