TL;DR
- Guardian Ebony provides massive damage boosts through Burst skill with continuous attacks
- Guardian Arkveld excels at wound creation and health regeneration through Flayer mechanics
- Both sets require reaching Ruins of Wyveria after ~12 hours of gameplay
- Material farming involves specific Guardian-type monsters with unique mechanics
- These are Low-Rank sets – prepare to upgrade when reaching High Rank content
Securing optimal armor within the first dozen hours of Monster Hunter Wilds dramatically accelerates your hunting efficiency. The Guardian Ebony and Guardian Arkveld sets represent the pinnacle of Low-Rank defensive gear, offering specialized benefits that cater to distinct combat approaches.
After extensive testing and analysis, we’ve determined these two armor configurations provide unmatched value during the early campaign. Their unique skill combinations and set bonuses create powerful synergies that significantly enhance both offensive capabilities and survivability against the game’s formidable Guardian-type creatures.
Reaching these armor sets requires progressing through approximately twelve hours of core gameplay to access the Ruins of Wyveria region. This mid-campaign milestone introduces specialized monster variants with self-healing abilities that demand strategic engagement.
Before attempting to acquire these premium armor sets, strategic preparation ensures you’re equipped to handle the challenging Guardian monsters efficiently.
- Master Your Weapon: Dedicate 15-20 minutes in the Training Area to experiment with different weapon types. Focus on understanding combo timing, mobility options, and how each weapon interacts with wound mechanics – this knowledge becomes critical against self-healing Guardian creatures.
- Craft Essential Consumables: Stockpile Potions, Mega Potions, and Demondrug/Armorskin items. These early-game essentials provide the sustain needed during extended farming sessions against resilient targets.
Common Mistake Alert: Many hunters rush to the Ruins of Wyveria without adequate preparation, resulting in failed hunts and wasted time. Ensure your weapon proficiency and item stockpiles are sufficient before engaging Guardian monsters.
The Guardian Ebony armor emerges as Monster Hunter Wilds’ premier offensive option for players who maintain constant pressure on their targets. This set’s power derives from the Burst skill, which three key pieces (helmet, gloves, and coil/pants) activate at level 3 when equipped together.
Burst Mechanics Deep Dive: This perk provides stacking physical and elemental attack bonuses that scale with consecutive hits landed. The damage increase becomes substantially more potent at Burst level 3, rewarding aggressive playstyles that maintain uninterrupted assault patterns.
The complete 4-piece set bonus unleashes Ebony Odogaron’s Power, further amplifying your attack power while extending the duration of Burst buffs. This creates a powerful feedback loop where sustained aggression yields increasingly devastating results.
Material Requirements:
- Helmet: 1x Guardian Ebony Claw, 1x Guardian Ebony Fang, and 1x Guardian Ebony Tail
- Chestpiece: 2x Guardian Ebony Sinew and 1x Guardian Ebony Fang
- Gloves: 2x Guardian Ebony Scale, 2x Guardian Ebony Sinew, and 1x Guardian Ebony Fang
- Coil/Pants: 1x Guardian Ebony Odogaron Certificate, 1x Guardian Ebony Tail, 1x Guardian Ebony Claw, and 1x Guardian Ebony Plate
- Boots: 2x Guardian Ebony Scale and 1x Guardian Ebony Claw
Combat Strategy: Focus on the Guardian Ebony Odogaron’s weaknesses to water element and paralysis status effects. Use weapons with high attack speed to maximize Burst uptime and prevent the creature from activating its self-healing abilities.
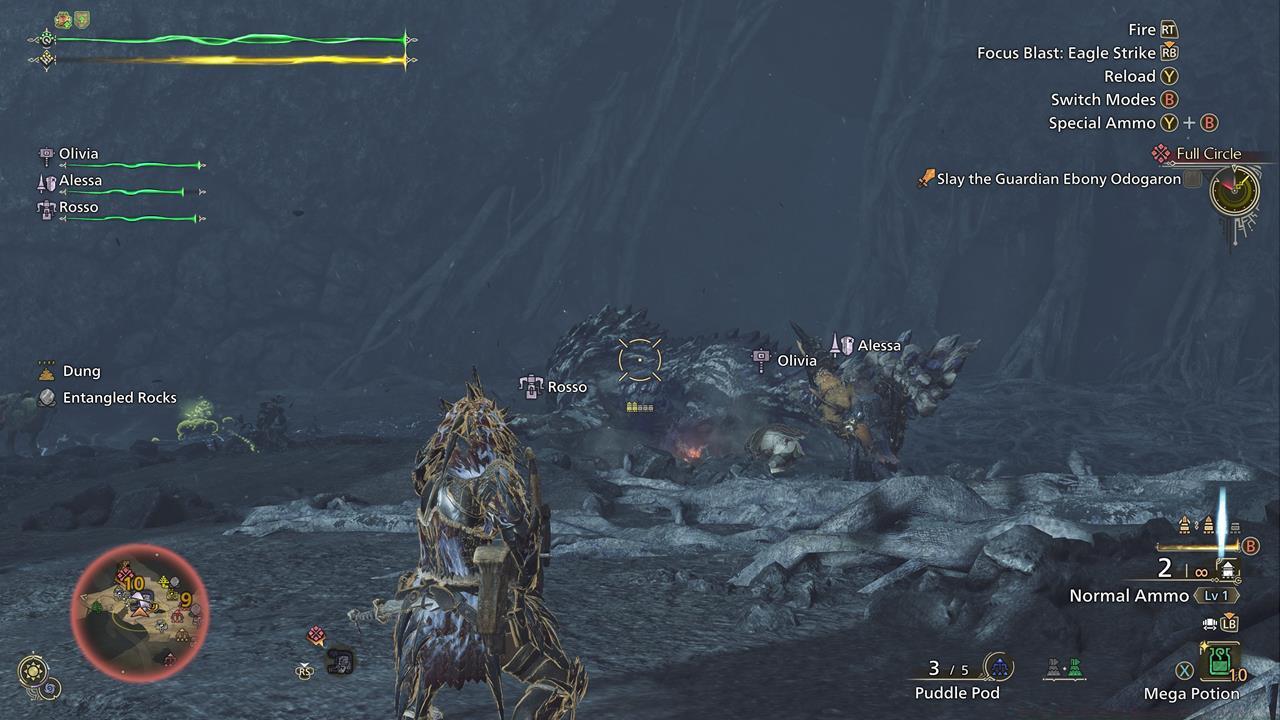
The Guardian Ebony Odogaron is weak against the water element and paralysis status effect.
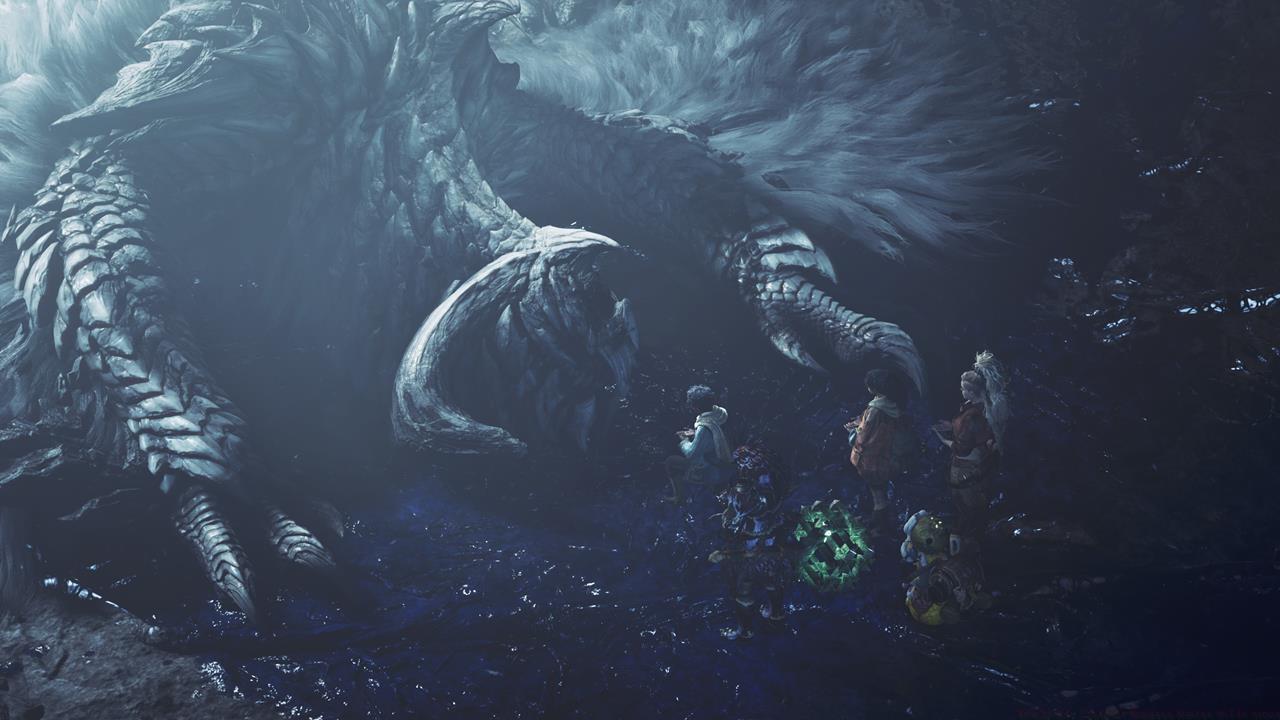
The Guardian Arkveld configuration excels for hunters who prioritize wound mechanics and sustained survivability. Its defining Flayer perk significantly increases wound infliction frequency while adding substantial non-elemental damage to vulnerable monster parts.
Flayer Skill Optimization: This ability transforms wound creation from occasional opportunities into consistent combat advantages. The 4-piece set bonus grants Guardian Arkveld’s Vitality, which automatically restores health whenever you destroy wounds on large monsters.
Material Acquisition Guide:
- Helmet: 1x Guardian Blood, 2x Guardian Rathalos Webbing, and 1x Guardian Scale
- Chestpiece: 1x Guardian Blood, 2x Guardian Ebony Claw, and 3x Tough Guardian Bone
- Gloves: 1x Guardian Blood, 2x Guardian Scale, and 2x Guardian Seikret Feather
- Coil/Pants: 1x Guardian Blood, 2x Guardian Doshaguma Claw, and 1x Guardian Pelt
- Boots: 1x Guardian Blood and 2x Guardian Pelt
Efficient Farming Strategy: The Guardian Arkveld set’s materials originate from multiple creatures within the Ruins of Wyveria ecosystem. Target Guardian Rathalos, Guardian Doshaguma, and previously encountered Guardian Ebony Odogaron during your hunts.
For Guardian Seikret Feather acquisition, repeatedly complete the “Spread Those Wings” optional quest by consulting Alma at your camp. The wild raptor-bird enemies consistently drop the necessary components.
Don’t worry too much about having to farm the Guardian Arkveld boss. The required materials for the armor set come from other creatures.
Skill Synergy Combinations: Consider mixing Guardian Ebony pieces with weapons that have innate affinity or critical boost capabilities. The Burst damage amplification synergizes exceptionally well with high-crit builds, creating explosive damage potential.
Advanced Player Tip: Master the timing for wound destruction against Guardian monsters. These creatures activate healing sequences approximately 5-7 seconds after receiving wounds, giving you a limited window to capitalize on vulnerability.
Progression Planning: Remember these represent Low-Rank equipment options. Once you unlock High Rank content and eventually face Tempered Monsters, superior armor variants become available with enhanced skills and defense values.
For comprehensive guidance on advancing through Monster Hunter Wilds’ challenges, explore our Complete Guide covering all gameplay systems and advanced mechanics.
As you continue battling deadly creatures across unexplored territories, additional specialized knowledge becomes essential. Our Weapons Unlock guide provides detailed information on optimizing your arsenal, while the Class Guide helps refine your hunting approach based on preferred playstyles.
Action Checklist
- Spend 15-20 minutes in Training Area testing weapons against wound mechanics
- Craft Potions, Mega Potions, Demondrug, and Armorskin items
- Progress through campaign to Ruins of Wyveria (~12 hours)
- Farm Guardian Ebony Odogaron for Burst armor pieces
- Complete “Spread Those Wings” quest repeatedly for Guardian Seikret Feathers
- Target Guardian Rathalos and Doshaguma for remaining Arkveld materials
No reproduction without permission:SeeYouSoon Game Club » How To Get The Best Monster Hunter Wilds Armor Master the Guardian Ebony and Arkveld armor sets with expert farming strategies and combat optimization tips