TL;DR
- Capture requires weakening monsters to limping state before using traps and tranquilizers
- Prepare multiple trap types and tranquilizer variants for different hunting scenarios
- Dismiss AI companions during capture attempts to prevent accidental kills
- Capturing provides different reward pools than slaying but excludes carving opportunities
- Advanced tactics include environmental manipulation and status effect combinations
Mastering the art of capturing creatures rather than eliminating them represents a sophisticated gameplay approach in Monster Hunter Wilds. While the majority of campaign objectives demand complete monster elimination, specialized missions specifically require live capture, presenting unique challenges that demand precise execution and strategic preparation.
Understanding the strategic advantages of capture reveals why this technique deserves your attention. Captured specimens yield distinct material rewards unavailable through standard hunting methods, though you sacrifice the traditional three-carve opportunity. This approach proves particularly valuable for acquiring rare components that drop more frequently from live captures, making it essential for endgame equipment crafting.
Mission identification becomes crucial—while most assignments specify “slay” or “hunt,” capture-exclusive quests clearly indicate this requirement in their descriptions. Seasoned hunters recommend always checking quest details before departure to determine the optimal approach.
Proper equipment preparation separates successful captures from frustrating failures. The capture process demands specific tools that must be crafted or acquired before engaging your target.
Here’s how to assemble your capture arsenal in Monster Hunter Wilds:
- Acquire Trap Tools from the Provisioner merchant available at all base camps
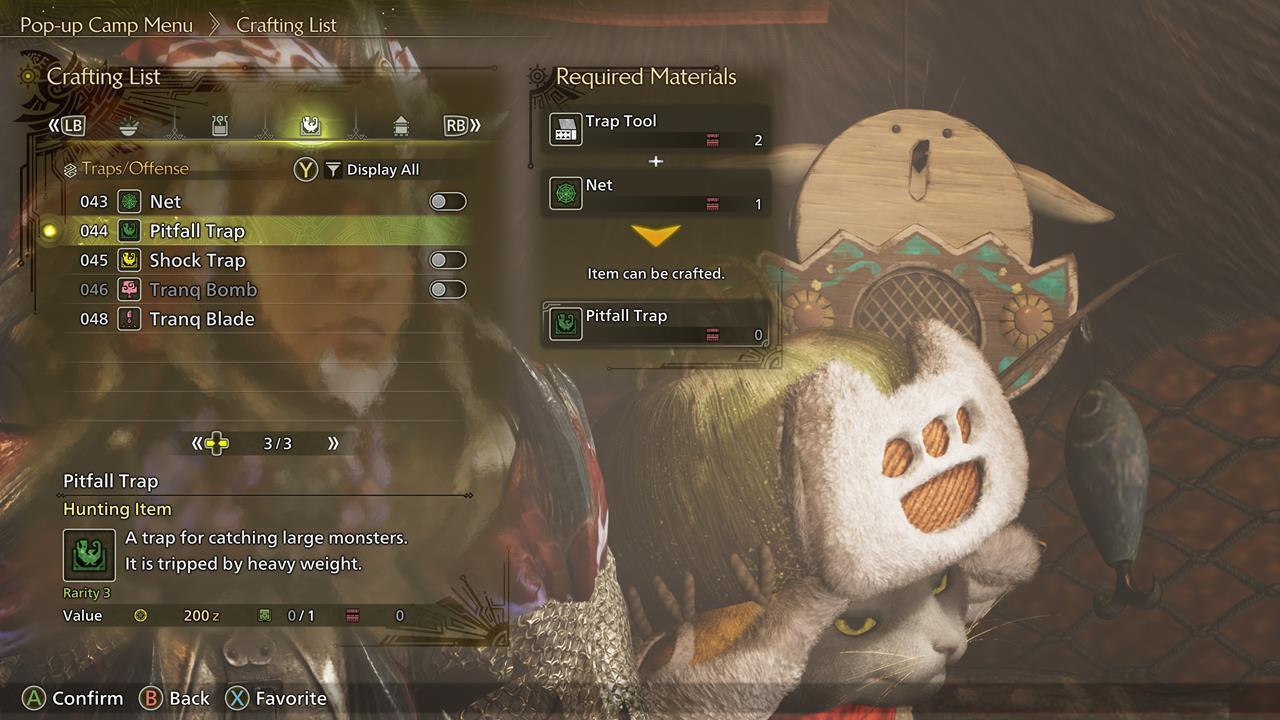
- Retreat to your tent to fabricate either Pitfall or Shock variants:
- Pitfall Trap: Combines 1x Trap Tool with 1x Net—craft nets using 1x Ivy and 1x Spider Web
- Shock Trap: Merges 1x Trap Tool with 1x Thunderbug Capacitor
Before embarking on your expedition, ensure you possess multiple tranquilizer options. Your arsenal should include:
- Tranq Bomb: Created from 1x Sleep Herb and 1x Parashroom
- Tranq Blade: Formed by combining 1x Tranq Bomb with 1x Throwing Knife (unlimited supply available)
- Tranq Ammo: Produced by merging 1x Tranq Bomb with 1x Normal Ammo (infinite reserves)
Carrying several Tranq Bombs typically suffices for most encounters. Crucially, verify that both your selected trap type and tranquilizers occupy slots in your item container.
Strategic preparation includes gathering sufficient crafting materials for multiple trap attempts during extended hunts.
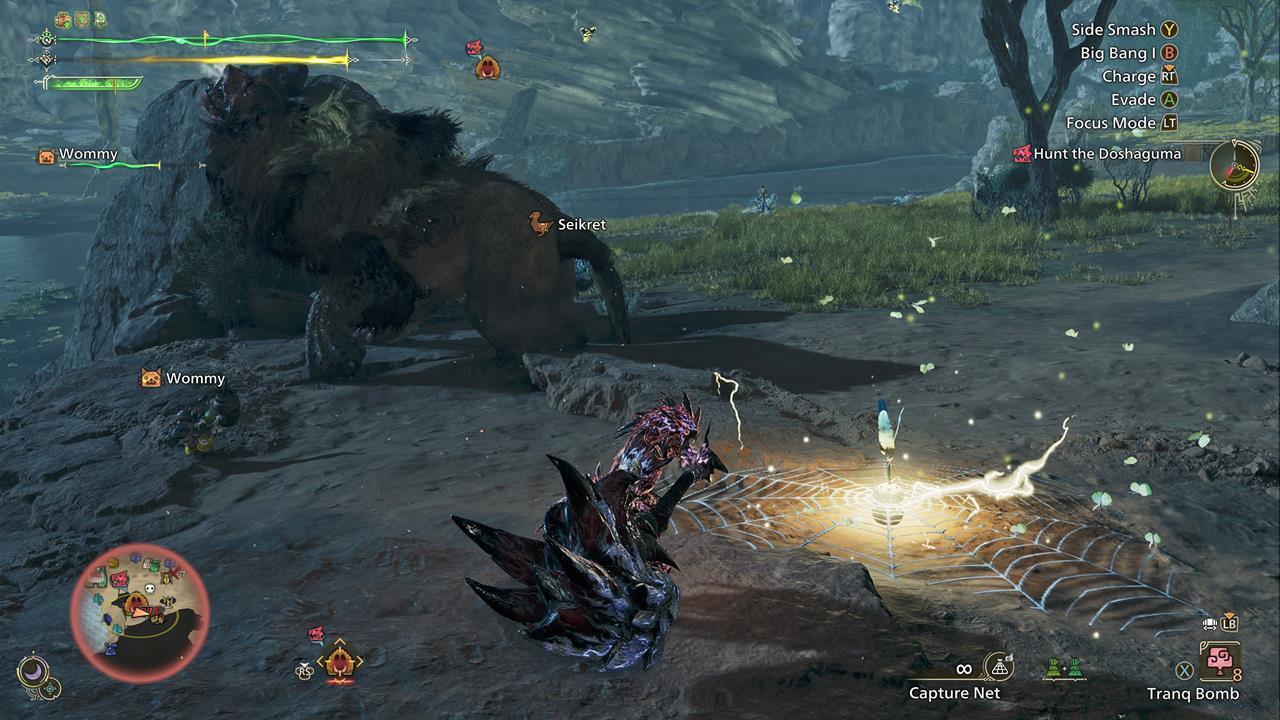
The actual capture sequence demands precise timing and situational awareness. Engage your target in combat until clear visual indicators signal vulnerability—typically manifested through pronounced limping movements and retreat behavior. The interface reinforces this status with explicit notifications prompting trap deployment.
Track the wounded creature as it seeks refuge, often settling in resting areas to recover. Position your trap strategically along its path or near its resting spot, then deliver a single provoking attack. Maneuver close to the deployed trap to entice the monster into triggering the mechanism.
Once immobilized, promptly administer tranquilizers from your inventory—typically requiring 2-3 applications depending on monster size and remaining vitality.
Critical Consideration: When a creature reaches the vulnerable state, immediately dismiss all AI companion units accompanying your quest, as their continued attacks may deliver fatal damage. Remove companions by accessing the Start menu, navigating to Missions & Quests, selecting Support Hunter Information, and eliminating automated teammates from your squad composition.
Optimal trap placement considers terrain advantages and monster behavior patterns for maximum effectiveness.
Elevate your capture success rate with these professional techniques. Environmental factors significantly influence trap effectiveness—Pitfall Traps perform optimally in sandy or soft terrain, while Shock Traps deliver superior results on conductive surfaces or during storm conditions.
For multi-monster encounters, prioritize capturing the most valuable target first. Weaken secondary monsters normally, then focus exclusively on the primary specimen for capture once it displays vulnerability indicators.
Status effects present additional capture opportunities. Creatures affected by sleep or paralysis require fewer tranquilizers, reducing resource consumption and increasing efficiency. Coordinate with hunting partners to time status applications just before trap deployment.
Advanced hunters recommend carrying both trap types simultaneously, as some monsters exhibit resistance to specific trap mechanisms. Having alternatives ensures you can adapt to unexpected resistances during critical moments.
Action Checklist
- Gather trap crafting materials: Ivy, Spider Web, Thunderbug Capacitor
- Craft 2-3 traps and 4-6 Tranq Bombs before departure
- Battle monster until limping and notification appears
- Dismiss AI companions via Support Hunter Info menu
- Place trap strategically and lure monster into activation
- Apply 2-3 Tranq Bombs while monster is trapped
No reproduction without permission:SeeYouSoon Game Club » Monster Hunter Wilds – How To Capture And Trap Monsters Master monster capture techniques in Monster Hunter Wilds with advanced strategies and tactical insights