TL;DR
- Rise towers contain valuable gear but require finding and breaking magical crests to access
- Most crests are found in ponds or under waving vegetation and require dodge rolls to break
- Advanced puzzles involve stone imps and animated objects requiring different interaction methods
- Strategic timing during early expedition nights maximizes tower access before rain circle closure
- Prioritize easily accessible towers and abandon problematic ones to optimize time investment
Nightreign’s distinctive rise towers present players with intricate locking mechanisms centered around locating and destroying magical crests. These structures offer significant gameplay advantages for those who master their secrets.
Accessing Elden Ring Nightreign’s rise towers demands crest discovery, though the game deliberately obscures both their appearance and destruction methods. Incorporating at least one tower into your exploration routes proves highly beneficial. Successfully disabling their protective barriers grants straightforward, combat-free entry to potentially exclusive weaponry for your arsenal.
This comprehensive Elden Ring Nightreign crest guide details location strategies, breaking techniques, and various obstacle types you’ll encounter during your quest.
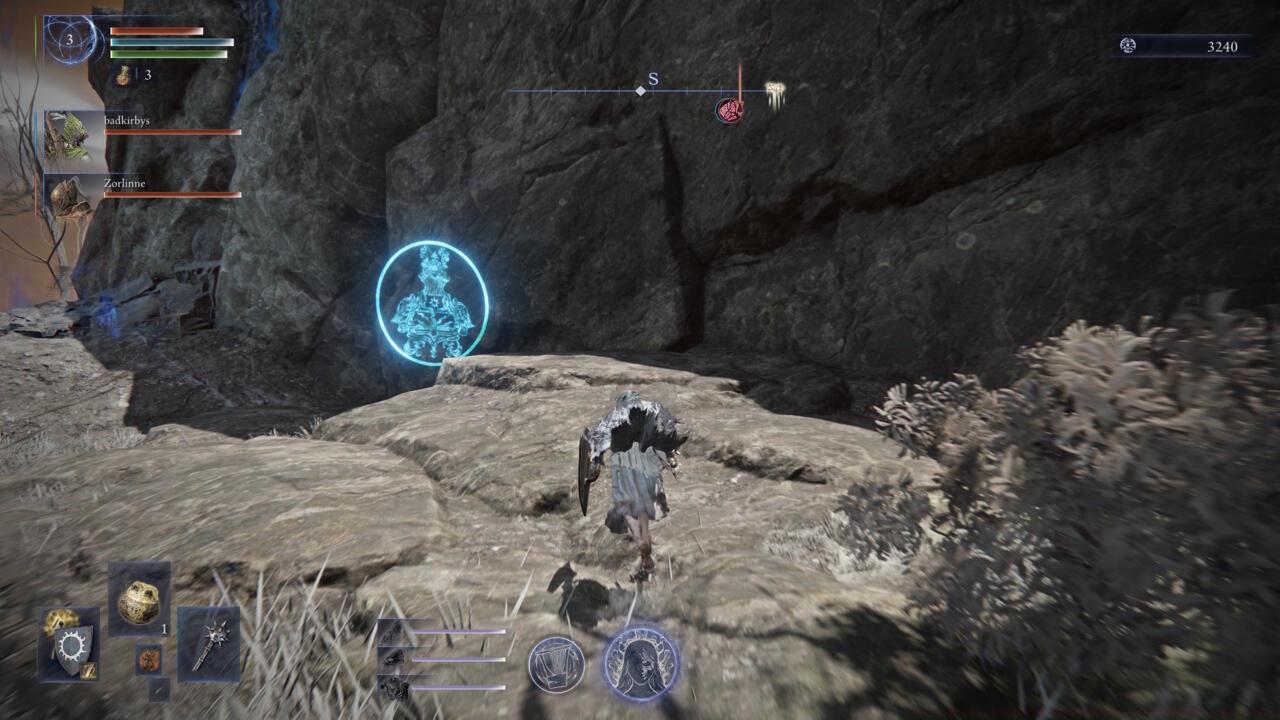
Rises represent the tower landmarks indicated on Nightreign’s cartography, with each expedition configuration containing no fewer than two. Typically positioned near map peripheries, you should target them during initial nights before the encroaching rain circle restricts access. (Consult our specialized Nightreign priority guide for optimal routing strategies.) Every rise’s upper level remains sealed by mystical barriers displaying messages instructing crest discovery.
The predominant crest varieties typically reside beneath foliage or within adjacent tower ponds, requiring keen observation skills to detect.
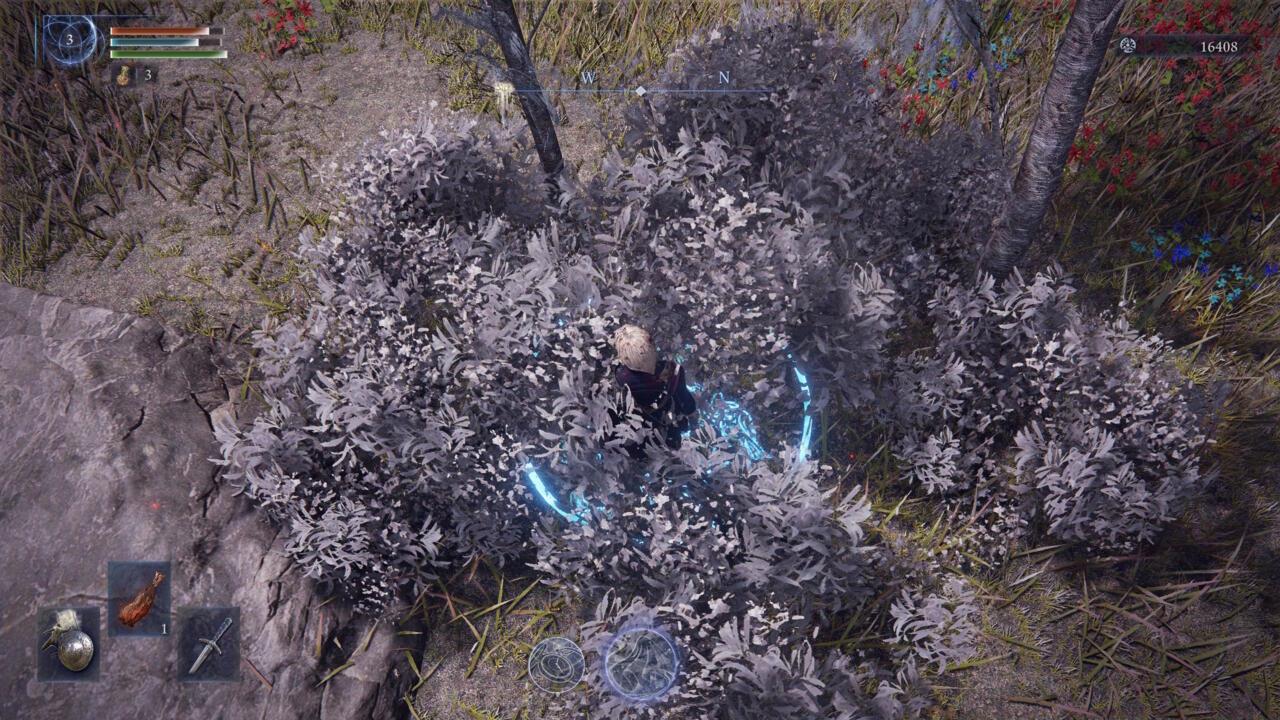
The most common crest type is under a shrub or in the tower’s small pond.
Rise crests manifest as azure-hued circular patterns containing mystical sigils, potentially situated in multiple locations surrounding each structure. Towers adjacent to bodies of water almost invariably position their crests within nearby aquatic environments. Alternative placements conceal them underneath bushes or trees, with distinctive environmental cues revealing their positions. When vegetation obscures a crest, imperceptible air currents will animate the specific plant. Essentially, identify the erratically moving tree or shrub to pinpoint the crest.
To destroy a crest, position yourself within its boundaries and execute an evasion roll maneuver. You’ll detect an audible shattering noise, accompanied by a universal notification confirming the rise’s accessibility.
Alternative configurations demonstrate increased complexity, exemplified by this instance materializing following a illusory tree’s disappearance.
Others are rather more obtuse, like this one, which appeared after a fake tree vanished.
In certain atypical situations, a rise might lack conventional crest arrangements. Instead, their mechanisms connect to stone imp statues positioned before the entrance. Engage with the tome the imp clutches to dissolve the seal. One documented scenario featured a crest concealed within an enchanted tree trunk. Aim at the arboreal formation and assault it to trigger its smoke-based dissipation and activate the rise.
No entry until you find a crest.
In exceptionally rare circumstances, a rise may appear completely crestless. Whether this represents programming anomalies or extraordinarily concealed placements remains uncertain. Should you encounter an impassable tower, disregard it and concentrate your efforts on more productive objectives.
Maximizing your tower conquest efficiency requires strategic planning and awareness of common stumbling blocks. Veteran players recommend scanning pond perimeters first, as aquatic crests typically require less time investment than vegetation-hidden variants. The distinctive waving animation for plant-concealed crests becomes more noticeable during rainfall periods, providing enhanced visibility cues.
Critical errors include wasting excessive time on single towers or misinterpreting environmental wind effects. Always verify you’re performing dodge rolls directly within the crest’s boundaries rather than near them. For stone imp puzzles, ensure you’re interacting with the correct object—sometimes multiple imps surround a rise, but only one holds the crucial tome.
Time allocation proves crucial; budget approximately 3-5 minutes per standard crest tower during early expedition phases. Complex puzzles involving animated objects may demand additional 2-3 minutes for proper solution. When encountering apparently crestless towers, limit investigation to 60 seconds before proceeding to alternative objectives.
Action Checklist
- Scan tower perimeter for ponds and waving vegetation
- Execute dodge roll within identified crest boundaries
- Investigate stone imp statues for interactive tomes
- Target suspicious animated objects with weapon attacks
- Abandon problematic towers after 60 seconds of fruitless searching
No reproduction without permission:SeeYouSoon Game Club » How To Find And Unlock Rise Tower Crests In Elden Ring Nightreign Master Nightreign's rise tower mechanics with expert strategies for finding and breaking crests efficiently