TL;DR
- Complete lockdown lifting first to access essential areas and Pack-a-Punch
- Acquire Chrysalax Wonder Weapon before interacting with crystal orbs
- Gather three neutralizer parts through specific map challenges
- Use Chrysalax to destroy catalysed crystals and manage infinite spawns
- Master the boss fight mechanics by targeting armor weak points strategically
Mastering the Forsaken Easter egg begins with understanding the critical first steps that set the foundation for your entire run. This final Zombies map in Black Ops Cold War’s Season 6 delivers the epic conclusion to the Dark Aether storyline through an intricate series of challenges.
Your immediate priority upon spawning into the map involves navigating to the Observation Tower and executing the lockdown lift procedure. This essential action unlocks access to restricted zones, activates the Pack-a-Punch machine, and enables completion of additional arcade side quests. Unlike previous Zombies maps, Forsaken features continuous round progression until you initiate departure from the starting zone, creating time pressure from the outset.
Strategic preparation during these initial moments significantly impacts your success rate. Experienced players recommend securing basic weapon upgrades and essential perks before advancing too deeply into the Easter egg sequence. The lockdown mechanic itself requires specific actions that we detail in our comprehensive Complete Guide to efficient completion.
Chrysalax Wonder Weapon
After successfully lifting the facility lockdown, proceed directly to the Observation Tower windows and locate the distinctive red button positioned beside a shuttered window. Activating this trigger initiates a crucial story cutscene that dramatically alters the map landscape.
The cinematic events spawn three massive Dark Aether crystals at strategic locations throughout the facility. These crystalline structures serve as central components for later Easter egg stages but require careful handling to avoid premature activation.
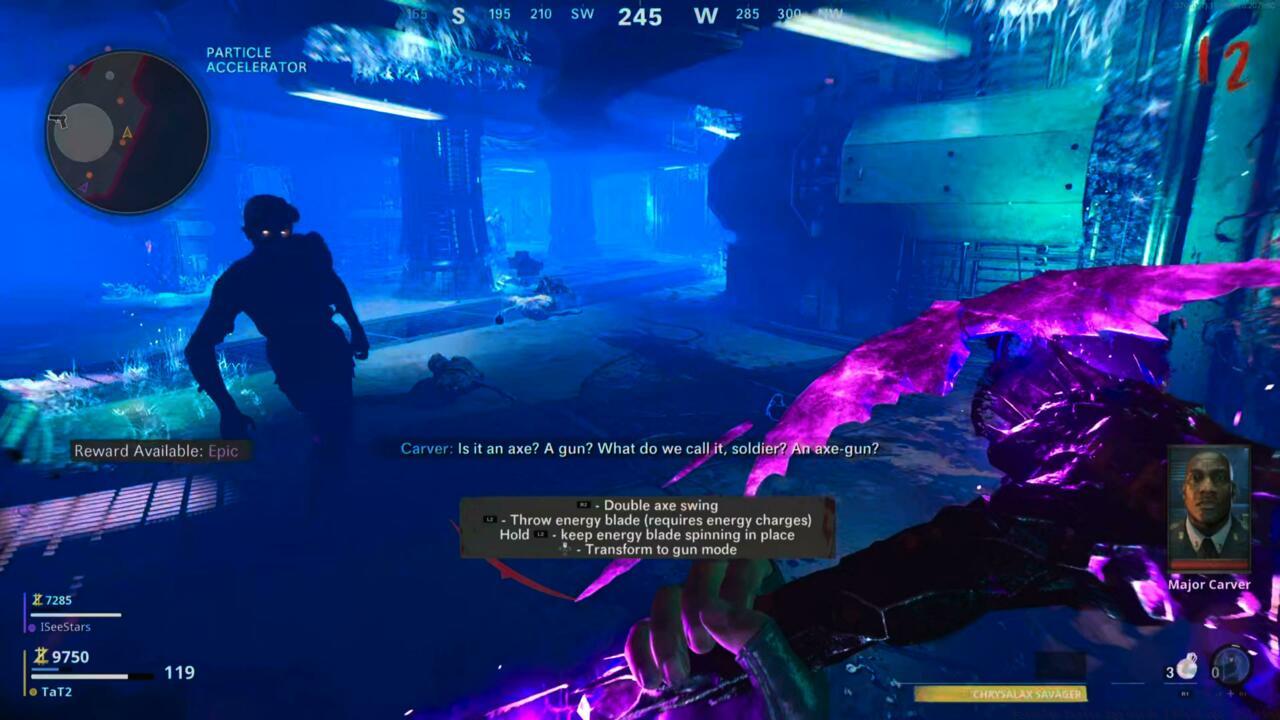
Critical Warning: Avoid shooting the three large crystals or their orbiting energy orbs until you possess the Chrysalax Wonder Weapon. Premature interaction triggers Step 5 prematurely, spawning endless enemy waves that cannot be stopped without the Chrysalax’s unique capabilities.
Common mistakes include accidental crystal damage during zombie training or curiosity-driven testing of the orbs. These errors often lead to overwhelmed teams and failed attempts. Professional players recommend maintaining distance and using careful movement paths around these structures.
Large crystal with the floating orbs
The Chrysalax represents an indispensable tool for Easter egg progression, making its acquisition a top priority. This Dark Aether-themed Wonder Weapon offers both melee and projectile capabilities essential for specific challenges.
Multiple acquisition methods exist, ranging from Mystery Box attempts to specific quest completion. Each approach carries distinct advantages and risk profiles that suit different playstyles and team compositions.
Optimal strategies involve pursuing Chrysalax acquisition while simultaneously progressing other Easter egg components. Advanced players often coordinate team efforts to optimize time efficiency, with one member focusing on weapon procurement while others advance the main quest.
The weapon’s dual functionality makes it particularly valuable for managing the infinite spawn situations triggered during later stages. Its melee mode efficiently handles clustered enemies while the projectile form deals with distant threats and specific objectives.
For players struggling with Wonder Weapon acquisition, our Weapons Unlock guide provides additional strategic insights that apply across multiple game modes.
Destroying armor with gun variant of the Chrysalax
Assembling the Neutralizer requires gathering three distinct components scattered throughout the facility. While collectible in any sequence, strategic prioritization based on your current loadout and perk status dramatically improves success rates.
Fuel Tank Component: Navigate to the Fuel Processing zone, previously accessed during the initial lockdown lift sequence. Locate the illuminated control panel on one of the fuel cylinders and interact to initiate a lockdown challenge. This traps your team in the area, requiring survival through intense enemy assaults.
Vent Component: Inside the TV Repair shop, locate and interact with the damaged ventilation system. This action spawns specific enemy types that must be eliminated to secure the part.
Abomination Component: This challenging segment requires luring an Abomination enemy to the Board Room corner. Position yourself strategically to draw its attention, then target the glowing weak point that appears after it consumes a Dark Aether shard.
Expert recommendation: Delay the Fuel Tank challenge until obtaining solid weaponry and essential survival perks like Juggernog and Quick Revive. The Chrysalax Wonder Weapon significantly simplifies this encounter if acquired beforehand.
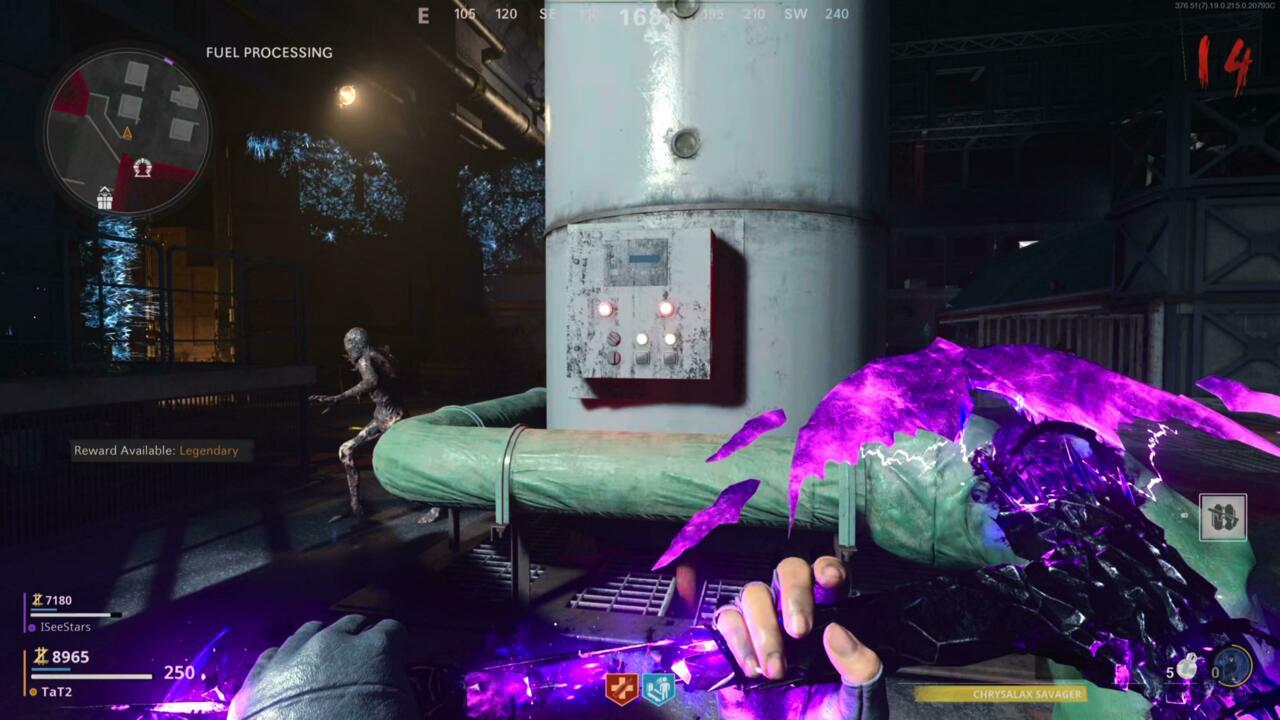
Fuel Processing’s button panels
The corner of the Board Room where you need to stand and lure the Abomination
Broken vent inside of TV Repair shop
With the Chrysalax Wonder Weapon secured, proceed to destroy the three large Dark Aether crystals and their orbiting orbs. This action triggers the catalysed crystal phase, spawning infinite enemy waves until completion.
Strategic crystal destruction order can impact difficulty management. Experienced teams often coordinate simultaneous attacks on multiple crystals to minimize prolonged exposure to endless spawns.
The Chrysalax proves essential here—its projectile mode efficiently shatters crystals while its melee capability handles the surrounding zombie hordes. This dual functionality makes it uniquely suited for this challenging segment.
Common pitfalls include inadequate ammunition preparation, poor positioning during crystal destruction, and failure to communicate target priorities. Successful teams establish clear roles: crystal destroyers and crowd controllers working in coordinated rhythm.
Time management becomes critical during this phase. Advanced players complete crystal destruction within 2-3 minutes to avoid being overwhelmed by accumulating enemy numbers.
Abomination’s tail glowing red after eating the shard
After collecting all three components, proceed to the Main Street crafting bench to assemble the Neutralizer device. This construction process requires precise positioning and timing to avoid interruption by enemy attacks.
Once constructed, transport the Neutralizer to the designated activation site. This typically involves navigating through hostile territory while protecting the device.
Power management becomes crucial during activation. Locate and destroy the orange power crystals that spawn nearby to maintain the Neutralizer’s energy levels.
The activation sequence demands constant attention to power replenishment while defending against specialized enemy types. Strategic positioning around the device creates effective kill zones for managing incoming threats.
Professional teams assign specific roles: power crystal hunters, close-range defenders, and long-range support.
Main Street crafting bench for Neutralizer
Orange crystals needed to refill power to the Neutralizer
The climactic confrontation against the Forsaken boss requires mastery of specific mechanics and coordinated team execution. Understanding the multi-phase structure of this encounter separates successful teams from failed attempts.
Armor destruction represents the primary challenge. The boss features multiple armor plates that must be systematically eliminated using specific strategies.
Phase transitions occur at specific health thresholds, introducing new attack patterns and environmental hazards. Team communication becomes absolutely essential for managing these transitions smoothly.
The Chrysalax’s gun variant proves particularly effective for armor plate destruction due to its high damage output and precision targeting.
Victory conditions involve surviving the boss’s ultimate attacks while dealing sufficient damage during vulnerability windows.
For teams struggling with boss mechanics, reviewing our Class Guide provides additional insights into role specialization that can be adapted to this encounter.
Forsaken boss fight
Maxis in ring of fire
Action Checklist
- Lift facility lockdown and access Pack-a-Punch
- Trigger story cutscene and note crystal locations
- Acquire Chrysalax Wonder Weapon through preferred method
- Collect three neutralizer parts in strategic order
- Destroy catalysed crystals using Chrysalax while managing spawns
- Construct Neutralizer and activate with power management
- Execute boss fight strategy focusing on armor destruction
No reproduction without permission:SeeYouSoon Game Club » Forsaken Easter Egg Guide | Black Ops: Cold War Complete guide to mastering the Forsaken Easter egg with expert strategies and essential tips