TL;DR
- The Raider specializes in massive damage with heavy weapons but suffers from slow movement and attack speed
- Fighter’s Resolve passive dramatically boosts Retaliate skill when taking sufficient damage
- Totem Stela ultimate provides battlefield control, enemy knockdown, and safer revives
- Prioritize Strength, Stamina recovery, and heavy weapon bonuses in relic selection
- Effective Raider play requires careful positioning and coordination with teammates
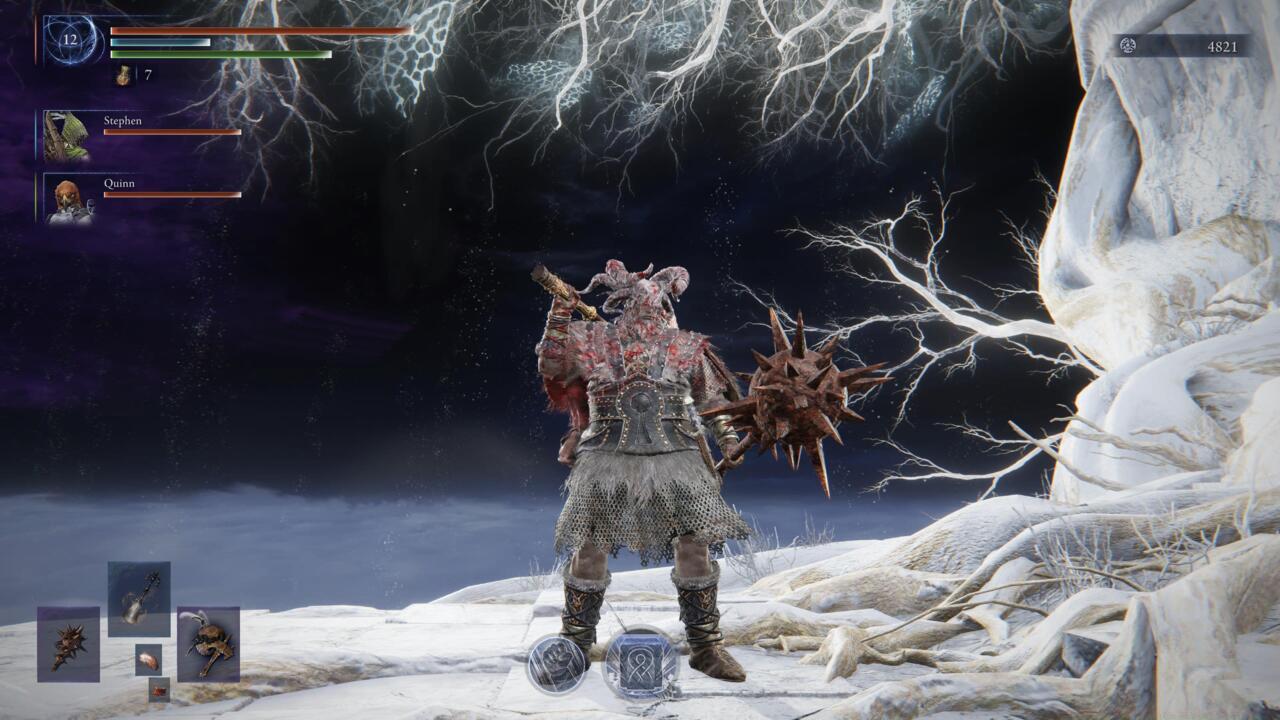
The Raider delivers devastating damage potential with heavy two-handed weapons, though his sluggish movement and attack animations create significant challenges in Elden Ring Nightreign’s fast-paced multiplayer combat. This class represents the ultimate glass cannon – capable of deleting enemy health bars but vulnerable to faster opponents.
The Raider’s massive weapons deliver crushing blows but require precise timing due to slow swing speeds.
Elden Ring Nightreign presents multiple character options for cooperative battles against the Night Lords. The Raider functions as a heavy assault specialist, optimized for wielding oversized weapons like great axes and colossal swords. Despite his imposing stature, he shouldn’t be mistaken for a true tank like the Guardian class, though he possesses respectable damage absorption capabilities.
The Raider suits players who prefer methodical, high-impact combat over rapid attacks. He synergizes exceptionally well with Ironeye, as shattering Ironeye’s Marking ability triggers enormous burst damage. This comprehensive guide examines the Raider’s complete ability kit alongside recommended Relic configurations. For broader class comparisons, consult our BF6 Class Selection Guide covering all available options.
The Raider’s entire kit revolves around Strength, making this his defining attribute. This specialization naturally directs players toward two-handed weaponry, though dual-wielding heavy weapons remains viable despite the increased difficulty. Nightreign’s combat tempo moves rapidly, while the Raider operates at a deliberate pace with extended weapon wind-ups. His limited Stamina pool further restricts attack frequency, compounding his slow damage output. With coordinated teammates and at least one additional melee combatant, the Raider becomes significantly more effective.
The Raider possesses a surprisingly versatile ability set that we’ll analyze in detail:
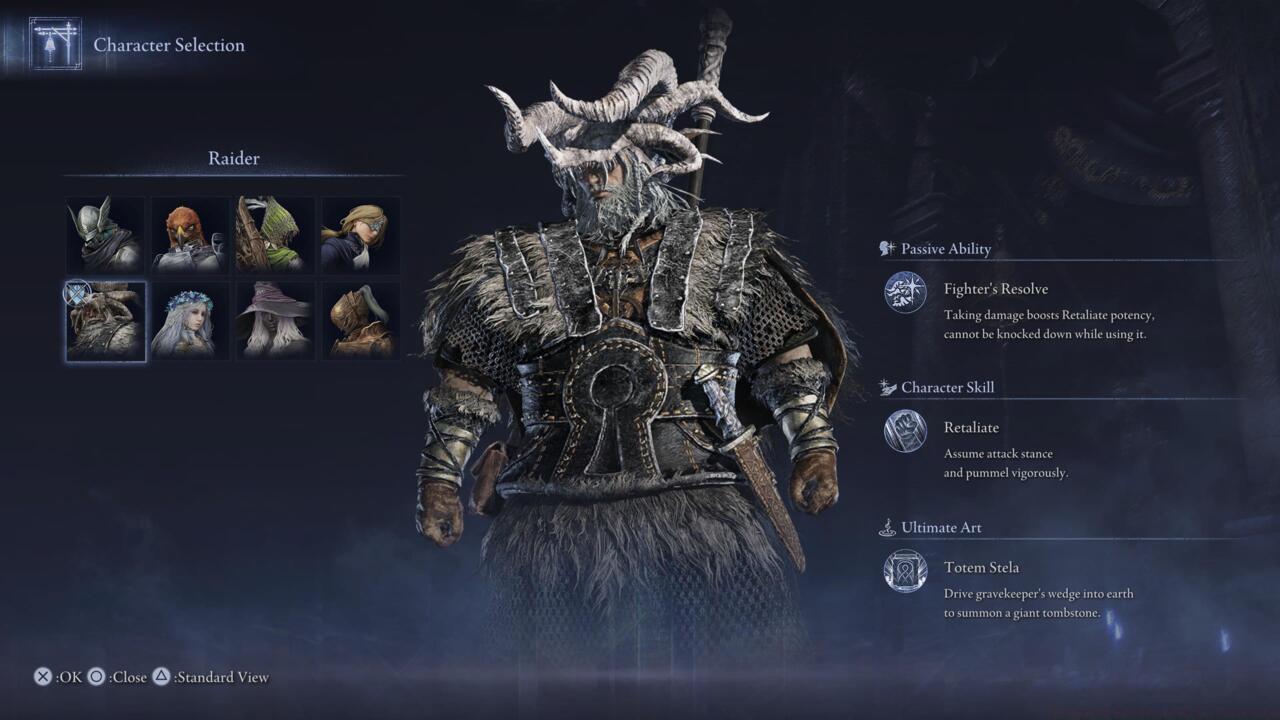
Passive Ability: Fighter’s Resolve
Sustaining substantial damage amplifies the Raider’s character skill performance. The enhancement provides knock-down immunity during activation while substantially increasing damage output. Activation triggers are clearly indicated through distinct audio cues and a white haze emanating from the Raider’s character model.
Character Skill: Retaliate
Activating this ability positions the Raider in a powerful combat stance followed by a series of forceful punches. Without the passive charge, it inflicts minimal damage and negligible stagger, but both damage and crowd control effects skyrocket when Fighter’s Resolve is active.
Ultimate Art: Totem Stela
The Raider plunges his ritual knife earthward, summoning an enormous tombstone at the target location. This versatile ultimate serves multiple functions: it damages and topples enemies positioned beneath it, creates tactical obstructions on the battlefield, and elevates downed allies for safer revival positioning.
While the Raider boasts exceptional damage potential, successful play demands careful Stamina management and anticipation of his slow attack animations.
The Raider functions as a primary damage dealer rather than a defensive tank despite his size.
Given the randomized nature of Relic acquisitions, recommending specific items proves challenging, but these Relic categories frequently provide optimal stat distributions for the Raider. The default Raider’s Urn configuration includes one red and two green slots, while the upgraded Raider’s Goblet – obtainable at the Small Jar Bazaar – features Red, Blue, and Yellow slot combinations.
Polished Burning Scene
This relic type commonly appears with Strength enhancements and specific weapon bonuses. Notably, it can provide Health Point restoration on successful Axe Attacks, significantly improving the Raider’s sustainability during extended engagements.
Grand Drizzly Scene
The Grand Drizzly Scene also frequently drops with augmented Strength attributes and accelerated Ultimate Art Gauge generation. This enables more frequent Totem Stela deployments, particularly valuable during demanding boss encounters where creating safe zones becomes crucial.
The most valuable Raider statistics to prioritize include Strength, enhanced Stamina and Stamina regeneration, and any modifiers benefiting heavy two-handed weapons. For supplementary strategies, explore our BF6 Weapons Unlock Guide for weapon progression optimization.
Mastering the Raider requires overcoming several common pitfalls that trap inexperienced players. The most frequent error involves overcommitting to attack sequences without adequate Stamina reserves, leaving players vulnerable during recovery animations. Successful Raider mains learn to anticipate enemy movements and initiate attacks well in advance of their intended impact.
Stamina Management Techniques: Always maintain at least 30% Stamina for emergency dodges. Use heavy attacks sparingly – their extended animations create massive openings for counterattacks. Coordinate with teammates to create distraction opportunities for your slow wind-up attacks.
Positioning and Timing Mastery: Position yourself where enemies will be rather than where they are. Time your Retaliate activation to coincide with enemy attack animations for maximum effectiveness. Deploy Totem Stela strategically to control choke points and protect vulnerable allies.
Common Raider Mistakes to Avoid:
- Spamming attacks until Stamina depletion
- Attempting to chase fast-moving enemies
- Using ultimate abilities without team coordination
- Ignoring audio and visual cues for passive activation
For comprehensive gameplay guidance beyond class specifics, our Battlefield 6 Complete Guide offers extensive strategic coverage.
Action Checklist
- Practice heavy weapon timing against stationary targets to master wind-up durations
- Experiment with Retaliate timing to maximize Fighter’s Resolve synergy
- Farm Polished Burning Scene relics for health sustain on axe attacks
- Coordinate Totem Stela placements with teammates for optimal battlefield control
- Master Stamina conservation by always keeping 30% reserve for emergency dodges
No reproduction without permission:SeeYouSoon Game Club » Elden Ring Nightreign Raider Class Guide Master the Raider's devastating heavy weapons while overcoming slow speed limitations in Elden Ring Nightreign