TL;DR
- Curveballs are tactical throwables that can be equipped two at a time and swapped during combat
- Locations progress geographically from Bel-Air to Venice Beach as you advance through the campaign
- Strategic combinations with Skill Cards dramatically increase damage output and crowd control
- Several Curveballs require specific side quest completion or trader purchases to unlock
- Elemental effects create powerful synergies when used against specific zombie types
Mastering Curveballs in Dead Island 2 provides crucial tactical advantages against the relentless zombie hordes. These specialized throwable items range from offensive explosives to utility tools that can turn the tide of difficult encounters.
Curveballs represent your character’s tactical arsenal – throwable devices that serve distinct combat purposes. While most function as offensive weapons to eliminate threats efficiently, others offer strategic utility like crowd control or environmental manipulation. Understanding when and how to deploy each type separates surviving players from dominant ones.
Your loadout accommodates two simultaneously equipped Curveballs, allowing strategic flexibility during intense combat situations. The default controls utilize ‘T’ and ‘Q’ keys on PC or directional pad inputs on controllers for quick swapping and throwing. Certain Skill Cards create powerful synergies with Curveball usage, such as damage amplification after deployment or cooldown reduction effects. Experimentation with different combinations reveals optimal setups for various playstyles.
The following comprehensive guide details every Curveball location throughout Hell-A. Note that several items remain inaccessible until reaching specific campaign milestones or completing optional content.
Meat Bait
- Location: Bel-Air – Acquired through bartering with Carlos during the Call the Cavalry main story mission. This represents your initial Curveball acquisition, available within the first few hours of gameplay.
- Effect: Generates a viscous organic puddle that draws standard zombies while ignoring elite Apex variants. Strategic placement creates effective choke points and distraction zones.
Shuriken
- Location: Bel-Air – Affixed to the windshield of a dark-colored vehicle near the signage directing toward Halperin Hotel.
- Effect: Delivers precise physical damage to individual targets with excellent accuracy. Ideal for silently eliminating isolated zombies without alerting nearby hordes.
Chem Bomb
- Location: Halperin Hotel – Positioned on the upper level immediately preceding the flame-engulfed corridor section.
- Effect: Extinguishes environmental fires while applying the ‘Traumatized’ and ‘Soggy’ status effects to affected zombies, temporarily disabling their aggression.
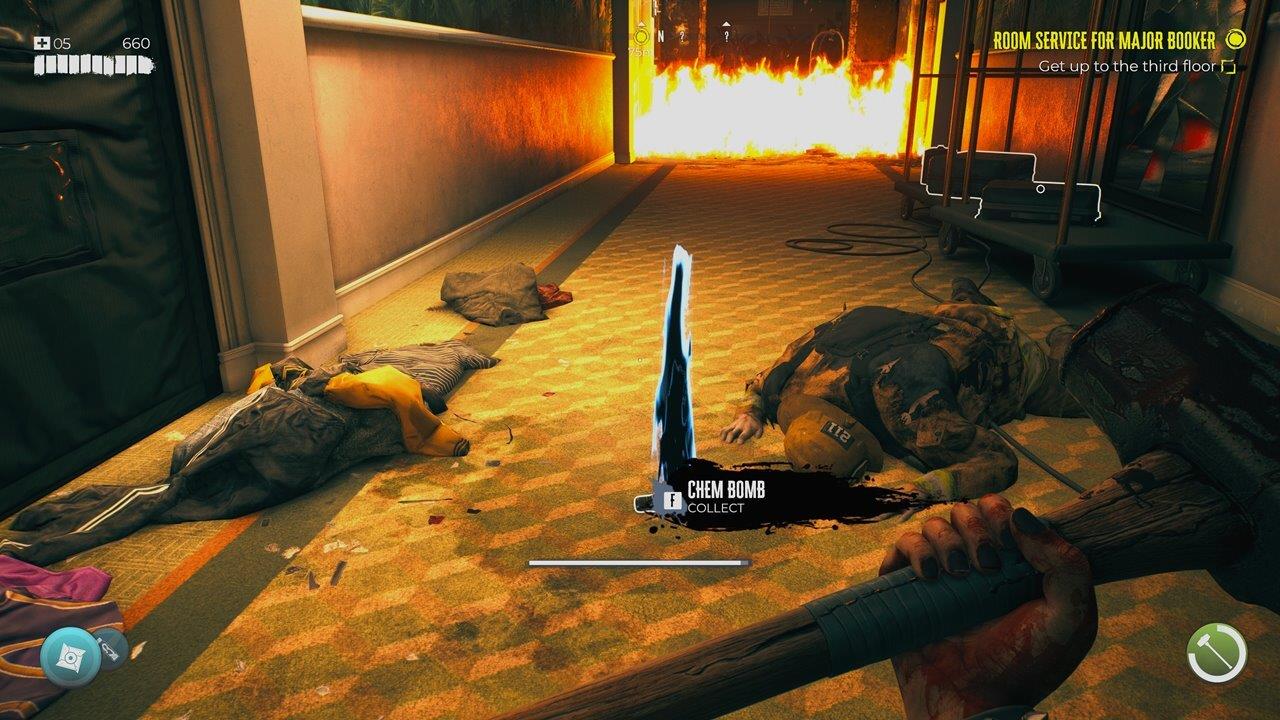
The Chem Bomb can put out fires, which is useful for this particular area.
Caustic-X Bomb
- Location: Halperin Hotel – Reward for successfully completing the optional Ravages of Caustic-X side mission.
- Effect: Detonates after a brief delay, inflicting substantial caustic damage that literally dissolves zombie flesh upon contact.
Pipe Bomb
- Location: Beverly Hills – Follow the main thoroughfare toward Monarch Studios. Before reaching the security checkpoint, locate the item secured within a bright yellow protective case.
- Effect: Standard explosive device with a short fuse timer before detonation. Effective against clustered standard zombies in open areas.
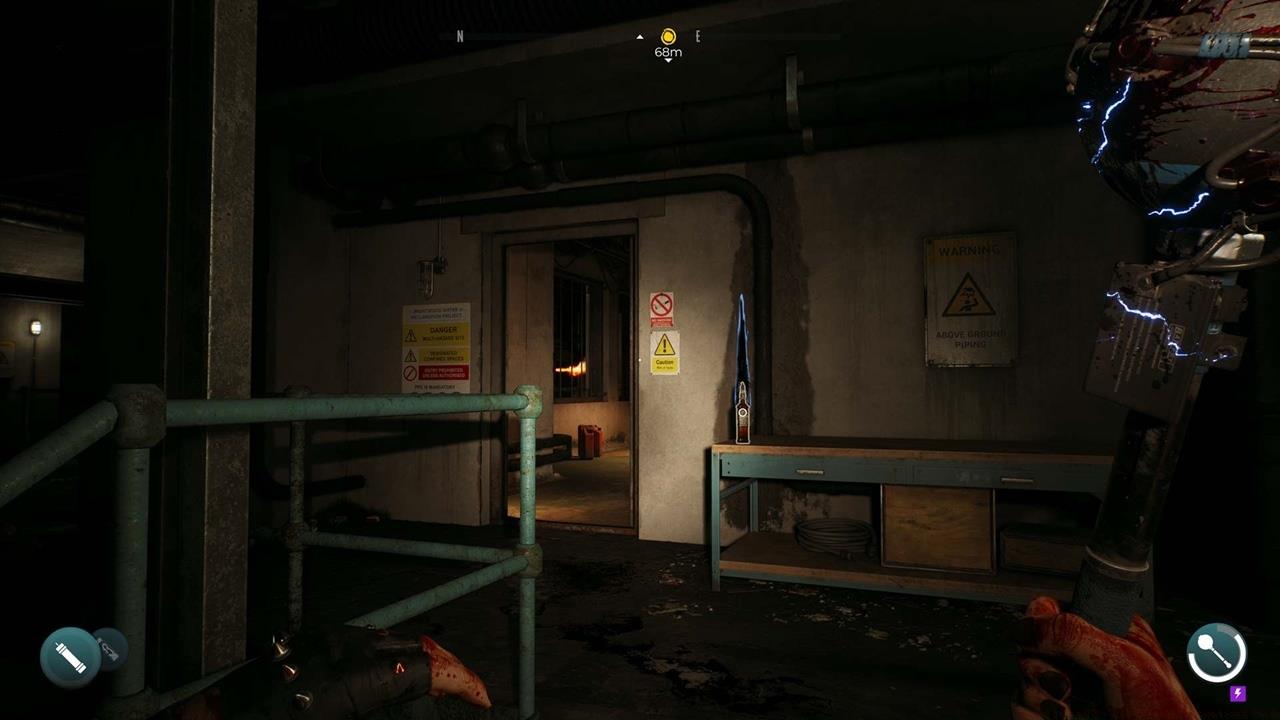
Electric Star
- Location: Beverly Hills – Progress through the main narrative until completing the O Michael, Where Art Thou mission at Monarch Studios. Upon exit at Brentwood Water facility, find it attached to metallic fencing adjacent to the entrance gate.
- Effect: Functions similarly to the Shuriken with direct impact damage, but adds electrical discharge that applies the Shock status. This enables elemental chain reactions with water or other conductive surfaces.
Military Grenade
- Location: Monarch Studios – Earned as completion reward for the Boz Makes a Bang optional quest.
- Effect: Superior explosive power with significantly expanded area of effect compared to standard grenade types. Ideal for clearing large groups or damaging resilient Apex variants.
Molotov Cocktail
- Location: Brentwood Sewer – Discovered while navigating this unpleasant underground network. Eventually reach an administrative office featuring a corpse disposal pit containing Slobbers. The item rests on a desk immediately before this hazardous section.
- Effect: Creates sustained fiery terrain upon impact, continuously damaging zombies that traverse the flames. Particularly effective against vulnerable flesh-based enemies.
Don’t forget to pick up the Molotov Cocktail before you head deeper into Brentwood Sewer.
Sticky Bomb
- Location: Ocean Avenue – Available for purchase from the Serling Hotel merchant at a cost of $1,500.
- Effect: Adheres to surfaces or enemies upon contact before detonating. Allows precise placement on specific targets or strategic environmental points.
Nail Bomb
- Location: Ocean Avenue – Located atop a dresser inside Apartment 2C within Thalia Residences. This structure sits directly behind the coffee establishment when approaching from Serling Hotel. You’ll naturally visit this location during The Search for Truth mission while locating Tisha.
- Effect: Standard explosive properties combined with shrapnel that inflicts the Bleeding status on affected hostiles, causing damage over time.
Bait Bomb
- Location: Ocean Avenue – After obtaining the Sticky Bomb and finishing The Search for Truth questline, the identical vendor stocks this item for $3,500.
- Effect: Combines the zombie-attracting properties of Meat Bait with delayed explosive detonation. Creates effective crowd-gathering then elimination sequences.
Flashbang
- Location: Venice Beach – Navigate to the transmission tower adjacent to military encampments. Ascend to the summit to encounter Warrant Officer Rodriguez, who provides the Cremains of the Day side mission. Complete this objective to unlock purchase availability for $2,500.
- Effect: Temporarily blinds and disorients all zombies within the effective radius, applying the Traumatized status that enables counter-attack opportunities during their stunned state.
Electric Bomb
- Location: Venice Beach – This specialized Curveball serves as a completion reward for the Jo’s Secret Stash Lost and Found quest. If this mission remains unavailable, further campaign progression or completion may be necessary, consistent with other Lost and Found objectives.
- Effect: Generates an expansive electrical field that delivers shocking damage to multiple hostiles simultaneously, mimicking the area-effect capabilities of Shocking Walkers or Shocking Runners.
Surviving Hell-A’s zombie pandemic demands mastery of every available tool. Curveballs provide the tactical edge needed when overwhelming numbers threaten to consume you. For comprehensive strategic guidance covering weapon systems and character development, explore our Weapons Unlock and Class Guide resources. Additionally, our Complete Guide offers additional gameplay mechanics and advanced combat techniques.
Action Checklist
- Complete Call the Cavalry mission in Bel-Air to obtain Meat Bait – your foundation Curveball
- Systematically explore each region following campaign progression to collect available Curveballs
- Complete all side quests as they become available to unlock specialty items
- Save $7,500 for trader-purchased Curveballs (Sticky Bomb, Flashbang, Bait Bomb)
- Experiment with Skill Card combinations to maximize Curveball effectiveness
No reproduction without permission:SeeYouSoon Game Club » Dead Island 2 – All Curveball Locations Guide Complete guide to finding all 13 Curveballs in Dead Island 2 with strategic usage tips and location maps