TL;DR
- Security Guard’s Safe Key found in Halperin Hotel parking garage guarded by red skull enemies
- Over-leveled zombies remain 3+ levels above you until you match their level threshold
- Environmental hazards and co-op play provide crucial advantages for early acquisition
- Level scaling mechanics allow strategic postponement until better equipped
- Named enemies consistently guard valuable optional content throughout the game
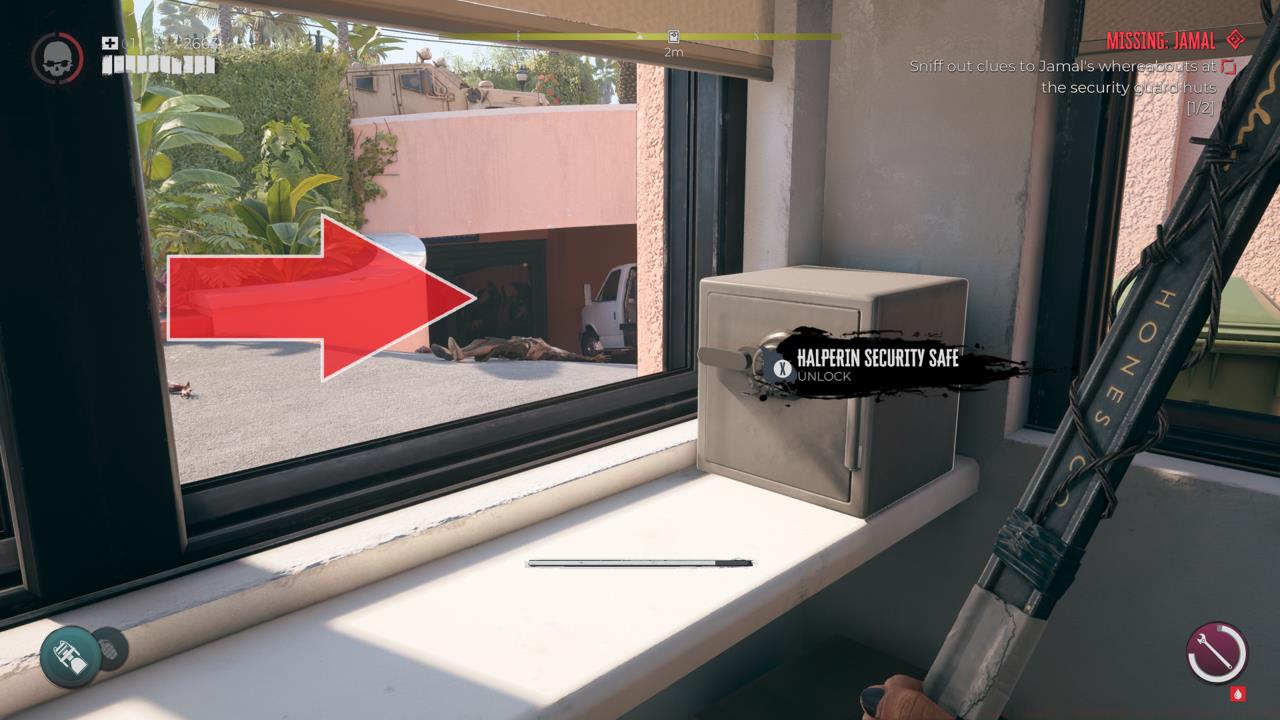
When exploring the Halperin Hotel region in Dead Island 2, you’ll encounter a secured kiosk containing a locked safe that demands the Security Guard’s Safe Key for access. This early-game obstacle serves as your introduction to the title’s approach to progression-gated content and strategic risk assessment.
The game’s semi-open world design philosophy becomes apparent quickly – numerous locked containers and restricted areas dot the landscape. While many keys become accessible only during specific mission progressions, the Security Guard’s Safe Key presents an intriguing exception. It represents one of those rare opportunities where determined players can bypass intended progression sequences through skillful play and tactical decision-making.
Within the hotel’s parking area, a security booth stands accessible for preliminary scavenging, though its central safe remains firmly locked. The required key maintains a fixed spawn location, ensuring consistent availability for persistent hunters. However, acquiring it during initial exploration requires confronting significantly overpowered opposition that the game clearly expects you to avoid until later stages.
Descending the concrete ramp visible in the reference imagery below leads directly to your objective, but prepare for substantial resistance. The Security Guard’s Safe Key remains in possession of a specially designated named enemy, accompanied by multiple similarly leveled zombie companions.
Strategic positioning at the ramp’s edge allows assessment of enemy composition before engagement.
This confrontation introduces Dead Island 2’s red skull indicator system – when enemy health bars display this symbol rather than numerical levels, they exceed your current capabilities by three or more levels. These superior foes can eliminate unprepared survivors with single attacks, making evasion the wisest initial strategy for under-leveled adventurers.
Named adversaries like “Security Guard” or “Noisy Neighbor” differ fundamentally from common walkers or shamblers. These specially marked opponents consistently protect quest-related items or optional content treasures, establishing a pattern you’ll recognize throughout your zombie-slaying journey.
Cooperative gameplay dramatically alters the engagement calculus. With partner support, attempting area clearance becomes viable through coordinated tactics and environmental exploitation. Electrical conduits, flammable containers, and other hazard sources enable damage dealing while maintaining safe distances from these overpowered threats.
Solo operators should strongly consider tactical postponement. The difficulty spike presents substantial character mortality risk without team-based advantages. Successful early acquisition demands flawless execution and thorough resource utilization.
Mastering environmental manipulation proves essential – lure pursuers through electrified puddles, detonate explosive barrels at choke points, and utilize elevated positions for temporary safety. These techniques reduce direct confrontation requirements while still achieving objective completion.
Weapon elemental effects provide crucial combat multipliers. Early-game tools like electrified machetes or incendiary axes inflict damage-over-time while you focus on evasion and positioning. This hit-and-run methodology maximizes survival odds against superior opponents.
Dead Island 2’s enemy scaling system features unique behavior for red skull designated foes. While standard zombies typically match your current level, these specially marked adversaries maintain fixed level advantages until you achieve parity. A level 4 character facing level 7 enemies faces near-insurmountable odds, but upon reaching level 7, these same opponents will thereafter scale with your progression.
This creates strategic alternatives: engage immediately through skillful play, return after achieving level equivalence, or postpone until endgame when maximum level capabilities trivialize the encounter. The strategic choice depends on your risk tolerance and current resource availability.
The level matching threshold represents a permanent difficulty reduction point. Once your character level meets or exceeds these specially marked enemies, they convert to standard scaling behavior for the remainder of your playthrough.
Progression pacing considerations should account for available side content and exploration opportunities. Sometimes accumulating additional experience through nearby activities provides the minimal level boost needed to transform an impossible battle into a manageable challenge.
Safe contents operate on random number generation principles, making specific reward previews impractical. However, this early-game challenge establishes important patterns for subsequent locked container encounters throughout your adventure.
Future safe discoveries will frequently mirror this template – valuable contents protected by challenging opposition, often including named enemies or special zombie types.
Advanced players can utilize specific character builds and weapon modifications to improve early acquisition feasibility. Focusing on agility-enhancing skills and ranged combat capabilities provides alternative approaches to direct confrontation.
For comprehensive Dead Island 2 guidance, explore our Complete Guide covering advanced mechanics and progression optimization. Weapon enthusiasts should consult our detailed Weapons Unlock resource, while character development strategies are detailed in our Class Guide for build specialization advice.
Remember that patience often proves more valuable than persistence. Many challenging optional encounters become significantly more manageable with minor level advancements and equipment improvements.
Action Checklist
- Locate security kiosk in Halperin Hotel parking area and note safe location
- Assess enemy levels at parking garage ramp – retreat if red skull symbols visible
- Choose engagement strategy: immediate co-op attempt, level-equivalent return, or endgame postponement
- Utilize environmental hazards and elemental weapons for combat advantage
- Defeat named Security Guard enemy to obtain key and access safe
No reproduction without permission:SeeYouSoon Game Club » Dead Island 2 – How To Get Security Guard’s Safe Key Master the Halperin Hotel security safe challenge with expert strategies for early access and zombie combat tactics