TL;DR
- Prioritize Fire spells against Riot Troopers and Ice magic for Guard Dogs in the parking garage
- Thoroughly explore every corner for hidden chests containing weapons, armor, and valuable items
- Choose between elevator (faster but combat-heavy) or stairs (safer but longer) based on your playstyle
- Complete Hart’s side quest on Floor 62 to obtain Barret’s powerful EKG Cannon weapon
- Master counter-attack timing and materia synergy for challenging enemy encounters
Prepare to infiltrate the heart of Shinra’s power in Final Fantasy 7 Remake Chapter 16, where strategic planning becomes crucial for survival. This comprehensive walkthrough provides advanced tactics to conquer the tower’s toughest challenges while uncovering all hidden treasures.
Before entering Shinra Tower, ensure your party is properly equipped with balanced materia combinations. I recommend having at least one character with Healing and Revival materia, while others focus on elemental coverage. The parking garage serves as your initial combat test, featuring some of the game’s most demanding enemy combinations.
Understanding Shinra’s security layout is essential. The tower features multiple vertical paths, each offering different combat encounters and narrative moments. Plan your approach based on whether you prioritize speed, safety, or story content completeness.
Upon entering the Shinra building’s underground parking facility, you’ll encounter progressively challenging resistance. The initial skirmishes serve as warm-ups, but the real test comes when you face three Elite Riot Troopers, three Guard Dogs, and two 3-C SOLDIERS simultaneously. This multi-enemy engagement requires precise target prioritization and tactical spell usage.
Execute this battle sequence efficiently: immediately cast Fire spells on the Riot Troopers to eliminate their crowd control threat. Switch Cloud to Punisher mode to maximize counter-attack damage against the highly mobile Guard Dogs. These canine units are particularly vulnerable to Ice elemental attacks, which can stagger them quickly. Once the supporting enemies are neutralized, focus on the SOLDIERS using deliberate magic strikes and well-timed defensive maneuvers.
Before proceeding from the garage, thoroughly search the western section to discover a chest containing two mega-potions – essential healing items for the upcoming challenges. Many players underestimate the importance of this exploration phase, missing critical resources that become invaluable during later boss encounters.
When you reach the expansive main lobby, immediately investigate the southwest corner where you’ll find another chest housing a valuable Moogle Medal. These collectibles can be exchanged for rare items, making thorough exploration highly rewarding.
After transitioning to Tifa’s perspective, conduct a meticulous search of the eastern sector. In a narrow passageway, you’ll locate a chest containing 1,000 gil – substantial currency for future purchases. The environment contains multiple vertical navigation opportunities that many players overlook.
To ascend to the elevated lighting structures, utilize car hoods as launching points and employ the dark stone blocks as progressive platforms. When you encounter the ladder adjacent to the red toolbox, activate the interaction prompt to initiate hand-over-hand traversal westward toward a distinctive purple chest. This container holds Tifa’s Purple Pain weapon, which significantly enhances her combat capabilities with unique stat bonuses and special abilities.
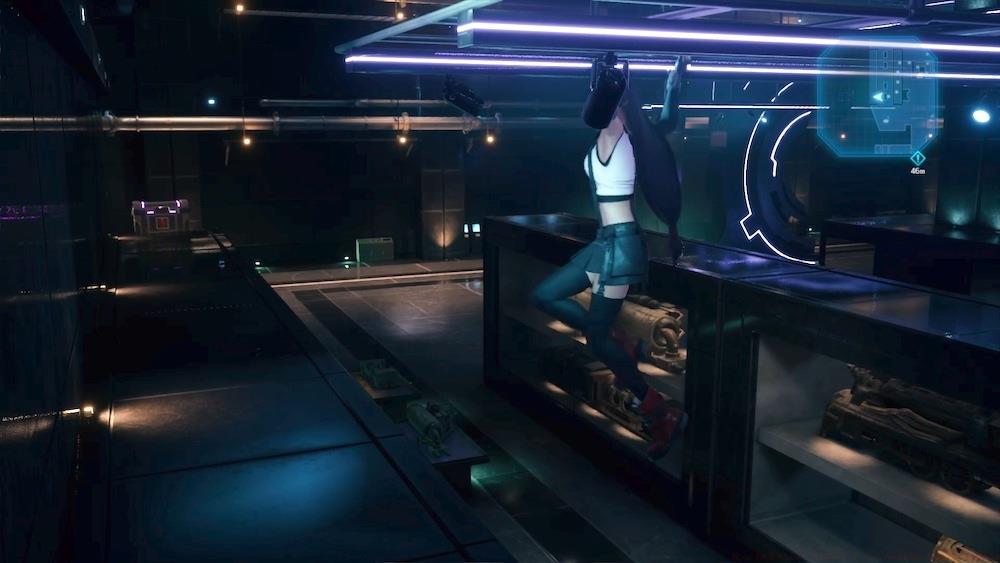
Strategic positioning: Before ascending the initial ladder in the ground floor lobby area, navigate toward the wall to acquire Tifa’s ultimate armament.
Once Tifa obtains the keycard access, return to the upper level and proceed eastward to unlock the Exhibition Hall. Against the northern wall rests a chest containing Iron Maiden armor, providing substantial defensive upgrades that can determine survival in critical battles.
You now face a significant strategic decision: utilize the northern elevator for rapid ascent or take the western staircase for safer progression. The elevator option involves combat encounters on the 10th and 20th floors, testing your party’s readiness for immediate engagements. Conversely, the staircase route requires substantially more time but minimizes combat risks, making it ideal for players focusing on resource conservation.
Both pathways deliver slightly different character development moments and narrative revelations. For completionists, experiencing both routes during separate playthroughs provides deeper insight into party dynamics and narrative subtleties.
Progress systematically through subsequent floors until reaching the 62nd level. In the Corporate Archives area, navigate the circular walkway to discover a chest containing 3,000 gil – a substantial financial boost for equipment upgrades and item purchases.
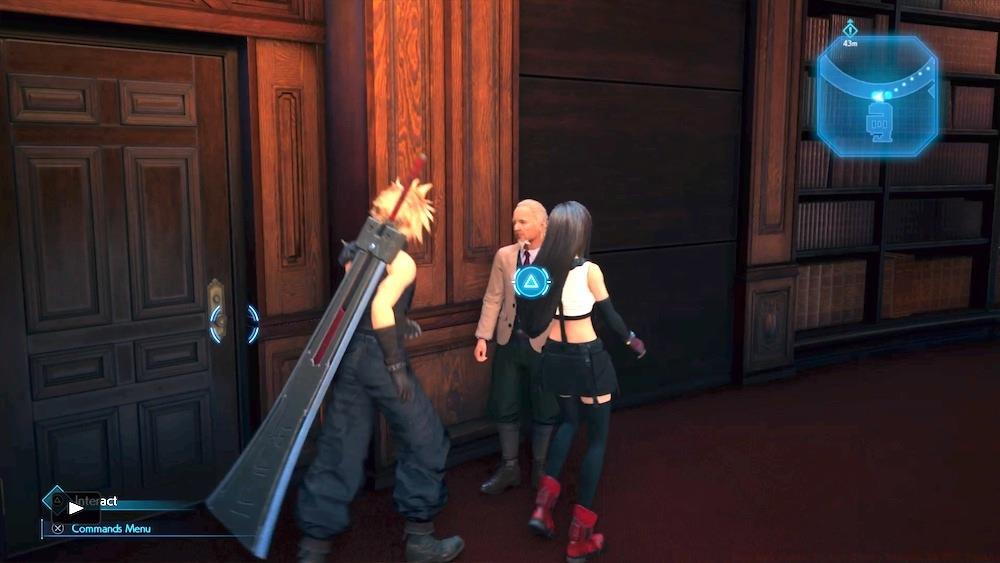
Strategic investment: Hart’s proposition requires 10,000 gil but rewards you with Barret’s ultimate firearm, making it one of the chapter’s most valuable transactions.
Before departing this area, interact with Hart and fulfill his 10,000 gil request to receive the EKG Cannon weapon for Barret. This powerful armament dramatically enhances Barret’s damage output and provides unique combat capabilities unavailable through other means.
Mastering Shinra Tower’s challenges requires understanding advanced combat mechanics beyond basic enemy weaknesses. The HO512 encounter exemplifies this, requiring precise targeting and party coordination to overcome its unique mechanics.
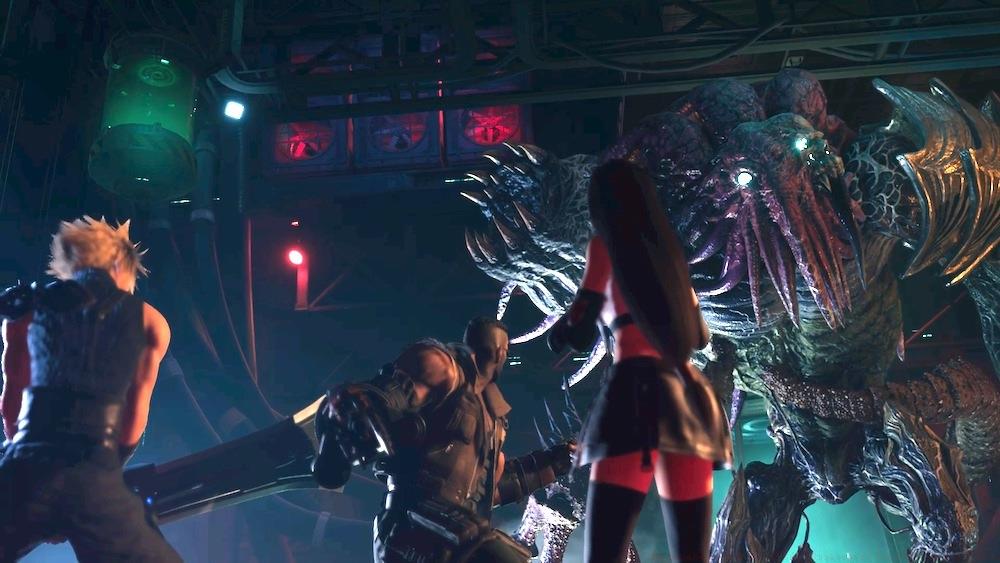
HO512 combat strategy: This enemy consistently attempts to drench your party with toxic mako, inflicting poison status. Concentrate your most powerful physical assaults on its Left Claw to disrupt this pattern and create vulnerability windows.
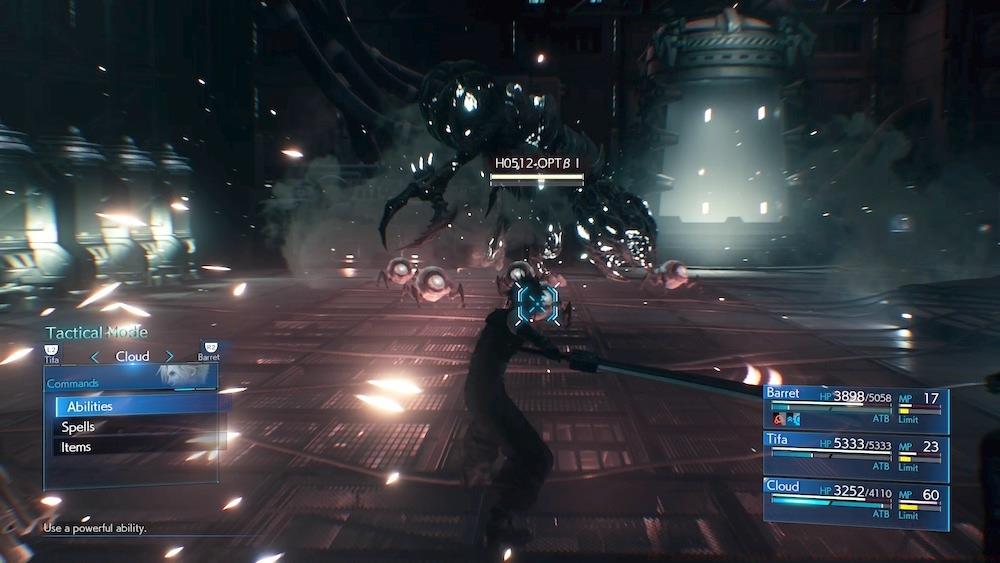
Minion management: HO512’s subordinate creatures progressively intensify in strength and aggression during the engagement, ultimately transforming into explosive threats requiring immediate attention.
Optimal materia configurations for this chapter include pairing Elemental with Fire on armor for Riot Trooper encounters, while linking MP Absorption with Ice can sustain your magic reserves against Guard Dog swarms. For your weapon optimization, ensure each character has a defined combat role – Cloud as primary damage dealer, Tifa for stagger building, and Barret for ranged support and healing.
Time management becomes crucial; the parking garage segment typically requires 15-20 minutes for thorough exploration, while upper floor navigation can vary from 30-45 minutes depending on your chosen path and combat efficiency.
Action Checklist
- Equip Fire and Ice elemental materia before entering, with Healing and Revival support
- Execute parking garage combat sequence: Fire on Riot Troopers first, then Ice on Guard Dogs
- Thoroughly explore all lobby areas for hidden chests and Tifa’s Purple Pain weapon
- Choose elevator (combat focus) or stairs (stealth focus) based on your playstyle
- Complete Hart’s side quest on Floor 62 to obtain Barret’s EKG Cannon
No reproduction without permission:SeeYouSoon Game Club » Final Fantasy 7 Remake Chapter 16 Walkthrough: The Belly of the Beast (Spoiler-Free) Master Shinra Tower infiltration with expert combat strategies, hidden loot locations, and optimal path choices