TL;DR
- Five safe deposit keys are scattered across three hotel floors requiring strategic exploration
- Certain keys require main quest progression and elevator system activation to access
- Rewards include currency and crafting materials rather than high-tier weapons
- Room 208, 302, and 307 contain keys with specific environmental clues
- Return later if keys don’t spawn due to progression requirements
Securing all Halperin Hotel safe deposit keys represents a crucial side objective during your Dead Island 2 journey. This location features five locked containers positioned behind the front desk, each requiring specific numbered keys for access. Understanding the distribution pattern and collection requirements will significantly enhance your looting efficiency.
The Halperin Hotel emerges as a significant explorable zone in Dead Island 2’s campaign progression. When you first enter the establishment, your attention will immediately be drawn to the secured deposit boxes at the reception area. These containers hold valuable resources, though their contents scale with your progression through the game’s narrative.
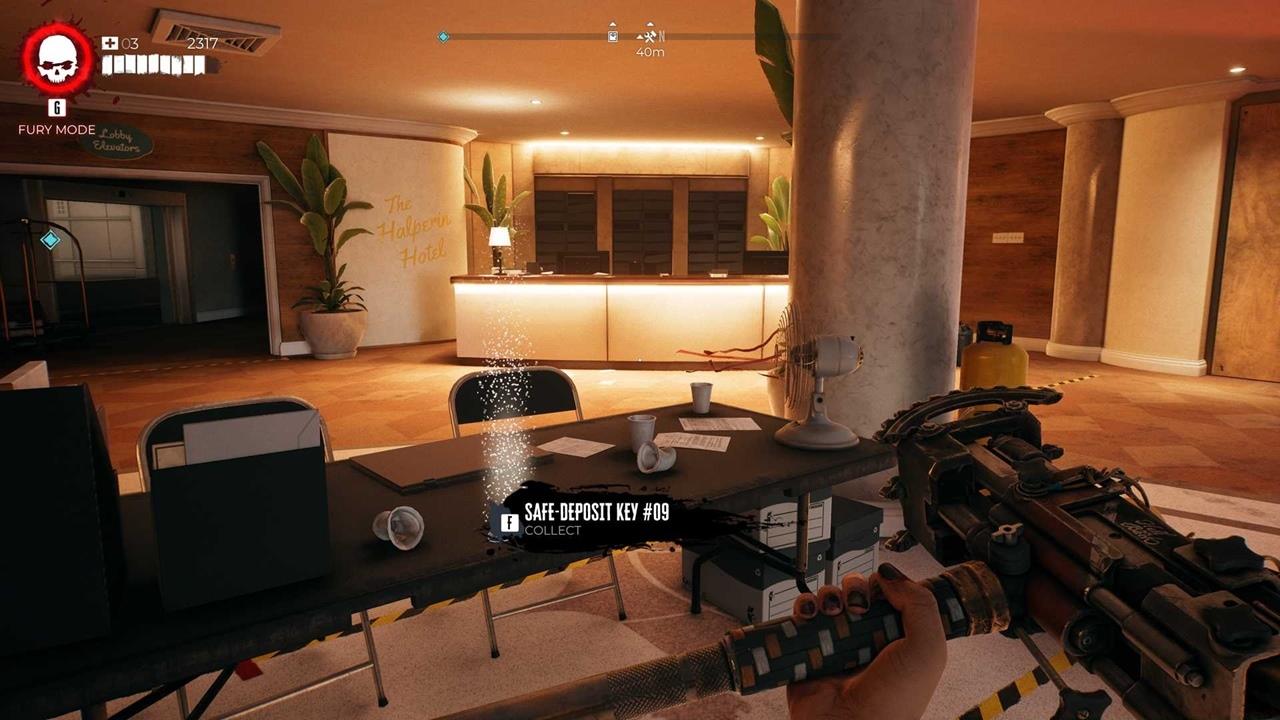
Safe Deposit Key #9
Accessing the hotel begins just beyond the Security Guard’s lockbox within the gatehouse structure. After eliminating the initial zombie threats, the reception counter becomes visible to your right, displaying the five secure containers awaiting unlocking. While theoretically possible to gather all keys during a single thorough exploration, certain numbered keys may remain inaccessible until you’ve advanced further in the main storyline quests for this region.
Key #9 rests on a table directly opposite the reception desk, making it typically the first key most players encounter. This straightforward placement serves as an introduction to the hotel’s key collection mechanics.
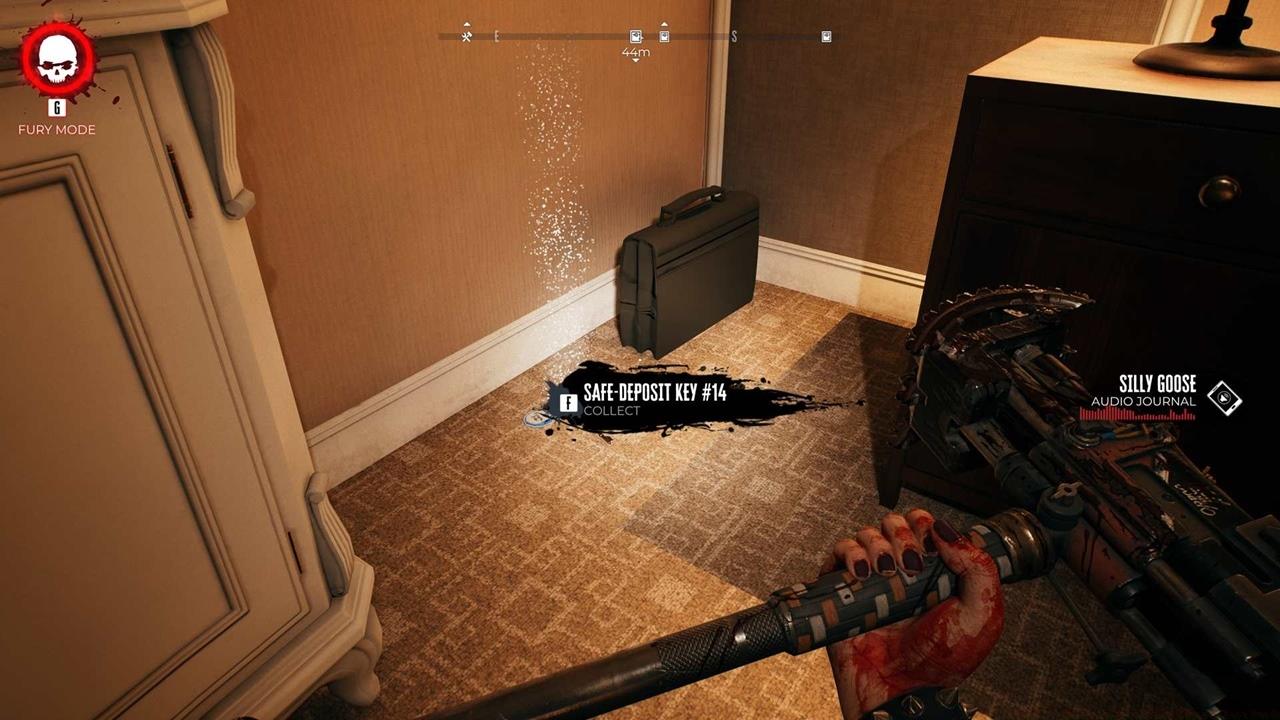
Progress through the hotel interior until you discover Room 208. Upon entering, meticulously inspect the left-side corner adjacent to the bed frame where this key awaits discovery. Environmental storytelling often provides subtle hints about key placements through disturbed bedding or nearby personal items.
Safe Deposit Key #14
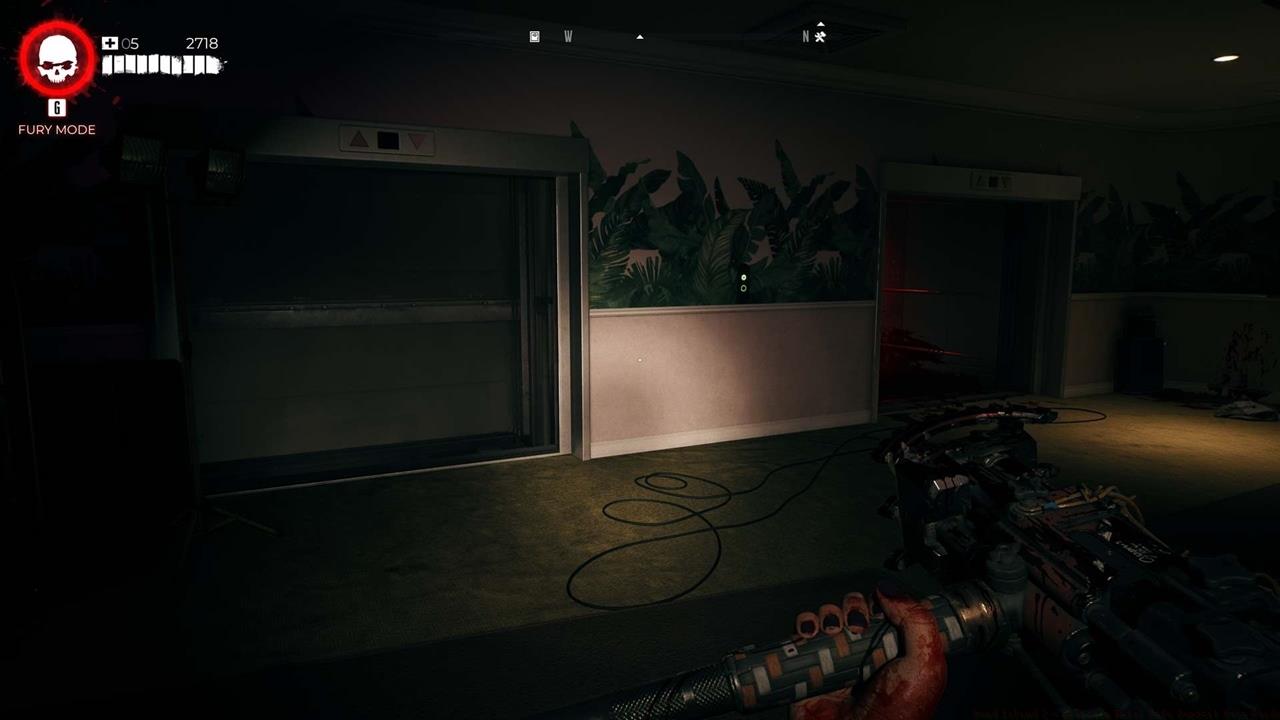
Many players initially bypass the elevator bank on the second level without realizing its significance. These elevators remain inoperable until you reach the maintenance room containing the workshop area, where you must activate the control lever to restore power.
After activating the elevator system, return to the second floor and summon a car. The doors will open to reveal the key resting beside multiple deceased individuals within the elevator compartment.
Safe Deposit Key #33
Upon reaching the third story, locate Room 302 and identify the accessible ventilation shaft. Navigate through this ductwork as it circumnavigates the room, and you’ll find the key concealed within an obscure corner of the ventilation system.

Safe Deposit Key #49
The final key becomes available as you approach your meeting with the major. Enter Room 307 and thoroughly examine the bathroom area, where the key resides beside the bathtub, often partially obscured by bathroom amenities or towels.

Safe Deposit Key #53
Progression gates significantly impact key accessibility throughout the Halperin Hotel. If specific numbered keys fail to materialize in their designated locations, this typically indicates insufficient main quest advancement. Returning after completing additional storyline objectives usually resolves these spawning issues.
Common exploration mistakes include rushing through areas without thorough environmental scanning. The hotel designers intentionally placed keys in locations that reward meticulous investigation rather than hurried progression. Additionally, some players mistakenly believe keys are interchangeable between containers, though each numbered key corresponds to a specific safe.
Optimization strategies recommend clearing the hotel of threats first, then systematically working through each floor while checking your map frequently for unexplored rooms. For players struggling with our Class Guide recommendations, adapting your character build to emphasize exploration and detection capabilities can prove beneficial.
The rewards from these safes primarily consist of currency and crafting/upgrade components rather than premium weaponry. This loot distribution aligns with the game’s broader progression system where exceptional armaments typically emerge during later game stages. Understanding this reward structure helps manage expectations during early to mid-game exploration.
Strategic timing for hotel exploration suggests completing this objective after acquiring movement-enhancing skills or equipment. The vertical nature of the hotel layout makes traversal efficiency crucial for minimizing backtracking. Consult our comprehensive Complete Guide for additional progression optimization techniques that complement key collection activities.
Mastering the Halperin Hotel’s key collection not only provides immediate resource benefits but also develops the investigative skills necessary for tackling similar challenges throughout Dead Island 2. The patterns established here recur in other locations, making this an excellent training ground for developing advanced looting methodologies.
Action Checklist
- Clear initial zombie threats and locate the five safes behind reception
- Collect Key #9 from table opposite front desk
- Explore Room 208 and retrieve key from bedside location
- Activate elevator system via maintenance room lever
- Navigate Room 302 ventilation system for hidden key
- Complete Room 307 bathroom inspection for final key
No reproduction without permission:SeeYouSoon Game Club » Dead Island 2 – Halperin Hotel Safe Deposit Keys Guide Complete guide to locating all Halperin Hotel safe deposit keys with strategic tips and optimal routes