TL;DR
- The Orphic Hammer is essential for freeing Orpheus without sacrificing his life
- Multiple paths exist depending on whether you obtain the hammer or choose transformation
- Lae’zel’s loyalty is tested with critical persuasion checks required
- The Morphic Pool marks the point of no return with permanent party lock
- Each choice significantly impacts endgame outcomes and companion relationships
Freeing the Githyanki prince Orpheus represents one of the most complex narrative decisions in Baldur’s Gate 3’s final act. This pivotal questline presents players with morally challenging choices that dramatically shape the game’s conclusion and character fates.
The Free Orpheus mission becomes available early in Act 3 but provides minimal guidance, creating confusion about progression requirements. This comprehensive guide breaks down every available path, including the critical consequences of each decision. Warning: This content reveals major story spoilers affecting endgame outcomes.
Successfully navigating this quest requires understanding the intricate relationship between the Emperor, Orpheus, and the Netherbrain threat. Your choices here will determine the fate of multiple characters and the broader Githyanki civilization.
Securing the Orphic Hammer stands as the fundamental requirement for truly liberating Orpheus. This entire story arc originates from your initial encounter with the Emperor Mind Flayer within the Astral Plane. During this meeting, you witness Orpheus imprisoned with no apparent means of release initially.
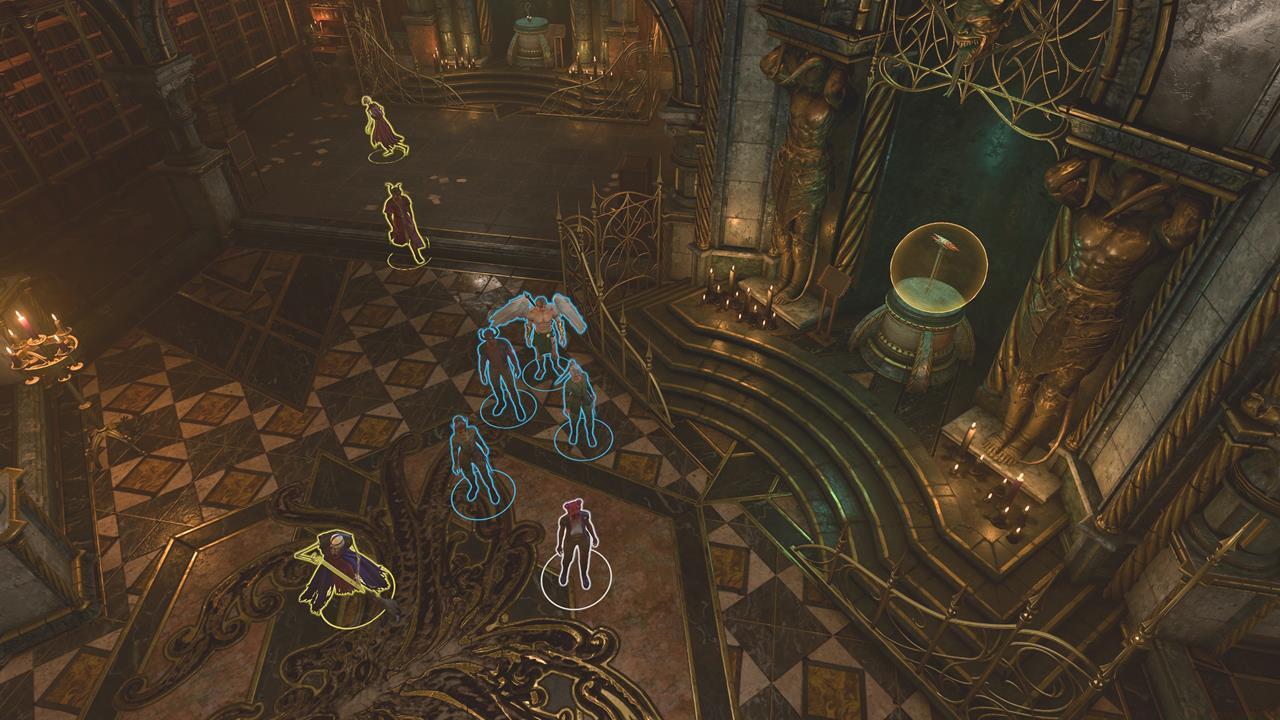
Progress demands collecting the two remaining Netherstones from Orin the Red and Lord Gortash. Only after acquiring these artifacts can you access the Morphic Pool located in the northern Undercity Ruins. Critical warning: This location marks an irreversible progression point that locks you into the final sequence. Party composition becomes permanently fixed at this stage, preventing any character swaps.
Ultimately, one character must emerge as a fully transformed Mind Flayer. This individual gains access to all high-tier Illithid Powers alongside control over the Triune Netherstone.
Players can acquire the powerful Baldur’s Gate 3 Orphic Hammer through two distinct methods:
- Infernal Pact – Raphael offers the hammer directly in exchange for your pledge to deliver the Crown of Karsus, creating a binding devil contract.
- House of Hope Assault – Refusing Raphael’s deal or seeking to reclaim your soul requires infiltrating his Avernus domain and defeating him in combat.
The Orphic Hammer can be found in the House of Hope, assuming you didn’t obtain it from Raphael.
Strategic consideration: The House of Hope approach provides additional legendary gear and story content, though it presents significant combat challenges requiring thorough party preparation.
Even without possessing the Orphic Hammer, you can still advance the Baldur’s Gate 3 Free Orpheus quest through several branching outcomes.
Emperor Control Path
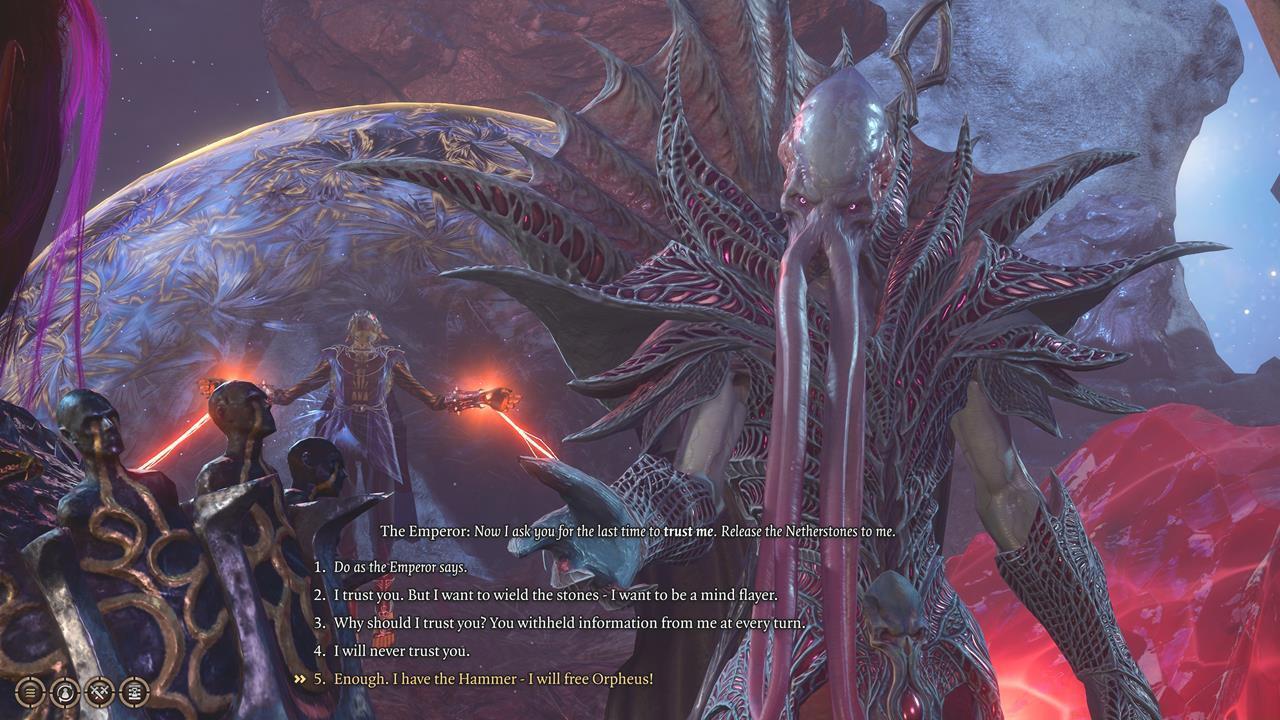
- Choose dialogue option: “Release the Netherstones to the Emperor.”
- The Emperor, already transformed into a Mind Flayer, assumes control of the Netherstones for the final battle.
- He consumes Orpheus’ brain to enhance his psionic capabilities.
- He becomes a permanent combat ally in your party formation.
Karlach Transformation Path
- Ensure Karlach occupies an active party slot when entering the Morphic Pool.
- During Emperor discussions, select either “Would I be able to wield…” or “I don’t care about Orpheus…”
- Karlach volunteers for transformation, citing her deteriorating Infernal Engine condition.
- Confirm her decision through dialogue: “Are you sure this is what you want?” followed by acceptance.
- Inform the Emperor: “Karlach will become the Mind Flayer.”
- She proceeds to consume Orpheus’ cerebral matter.
Talk to the Emperor to make an important decision: who gets to have floppy tentacles?
Player Transformation Path
- Select either “Would I be able to wield…” or “I don’t care about Orpheus…”
- Consider the implications carefully before telling the Emperor: “Make me a Mind Flayer” and confirming with “Do it, Emperor.”
- Your character maintains Netherstone control but undergoes permanent Illithid transformation.
- Orpheus suffers the same cerebral fate regardless of who transforms.
Lae’zel’s Loyalty Crisis
- Include Lae’zel in your active party when approaching the Morphic Pool.
- She reacts with extreme hostility toward anyone consuming her prince’s brain.
- A DC30 Persuasion check becomes necessary to prevent combat; failure requires defeating her permanently.


Left: Lae’zel won’t be too happy with everyone craving her prince’s brain; Right: Karlach wants to become a Mind Flayer given her critical condition.
Possessing the Orphic Hammer unlocks additional narrative possibilities for the Free Orpheus quest. Ensure you carry this legendary weapon when entering the Morphic Pool/Astral Plane transition.
Emperor’s Defection
- The Emperor insists that consuming Orpheus remains essential for defeating the Netherbrain threat.
- If you persistently advocate for Orpheus’ liberation, the Emperor abandons your cause to join the enemy forces.
Lae’zel’s Advocacy
- With the hammer available, Lae’zel continuously urges you to deploy it for Orpheus’ rescue.
- Execute the liberation by equipping the Orphic Hammer and destroying the two containment crystals.
Orpheus Transformation Decision
- If your character or Karlach already underwent Mind Flayer transformation, Orpheus remains in his original Githyanki form. He possesses multiple Monk combat abilities and joins as a temporary party member.
- Alternatively, you can orchestrate Orpheus’ transformation:
- Declare: “There is another way–we will free Orpheus.”
- State firmly: “Enough! I have the hammer–I will free Orpheus.” – This triggers the Emperor’s departure and assimilation.
- After freeing Orpheus, engage him with: “I had no choice. Without your powers, I would have died.”
- Continue with: “Let’s forget about the past. I was misled. What now?”
- Present the dilemma: “Someone will need to turn into a Mind Flayer. Are you willing to do that?”
- Conclude with: “You are a true hero.”
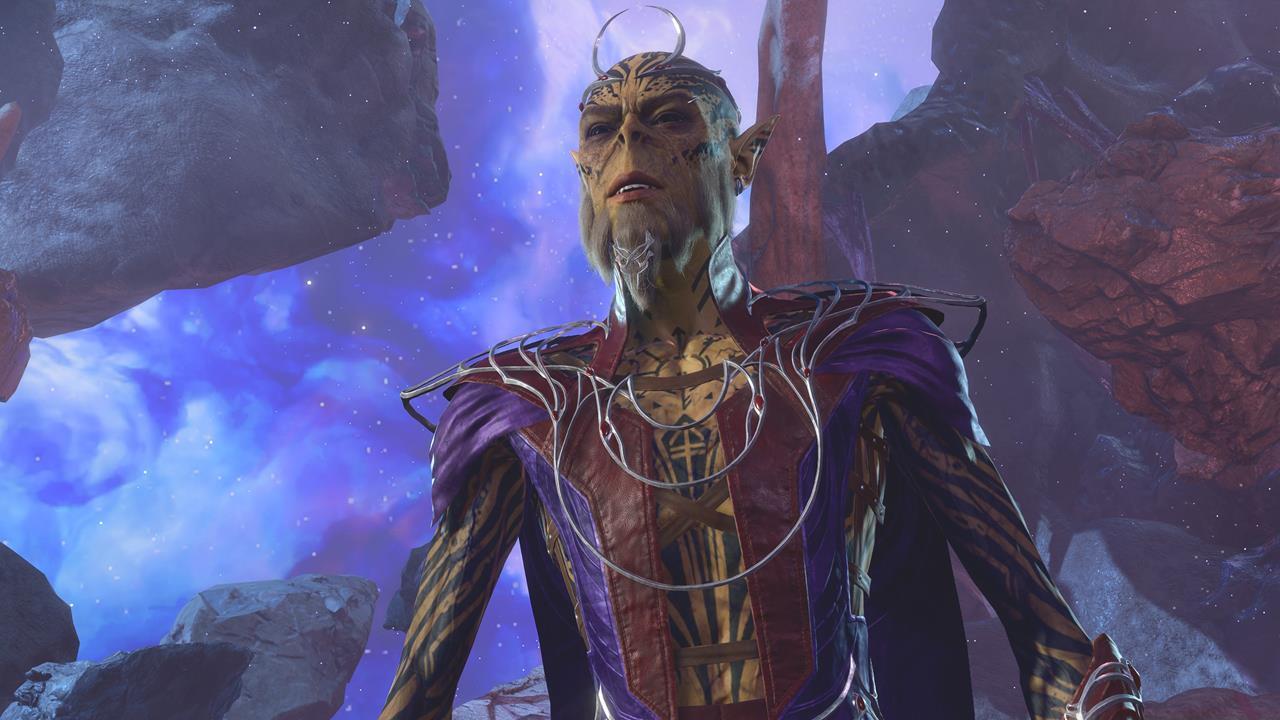
Orpheus woke up just for this. The poor guy.
Successfully freeing Orpheus in Baldur’s Gate 3 often results in his transformation into a Mind Flayer regardless. Similar to the Emperor, he functions as a combat companion in your team. Important technical note: Several bugs may occur during this sequence, including incorrect dialogue about Lae’zel’s status despite her presence.
Following this critical decision point, you advance toward the game’s conclusion. This phase includes reunions with various characters encountered throughout your journey. For comprehensive ally management strategies, consult our detailed Complete Guide covering companion interactions.
Baldur’s Gate 3 offers extensive content with numerous hidden elements and side quests. Players typically experience adventures requiring dozens of hours to fully complete. For additional gameplay optimization, explore our comprehensive Weapons Unlock system and Class Guide for character build recommendations.
Action Checklist
- Complete Netherstone collection from Orin and Gortash
- Decide between Raphael’s deal or House of Hope assault for hammer acquisition
- Prepare final party composition before entering Morphic Pool
- Execute critical dialogue choices based on your preferred outcome path
- Manage companion reactions, especially Lae’zel’s loyalty crisis
No reproduction without permission:SeeYouSoon Game Club » Baldur’s Gate 3 – How To Free Orpheus Master the complex process of freeing Orpheus in Baldur's Gate 3 with strategic choices and consequences explained