TL;DR
- Build custom decks focused on weak spot damage, weapon damage, and damage resistance
- Use specific safe positions for each tentacle to avoid damage entirely
- Prioritize the mouth weak spot in Phase 2 while maintaining close proximity
- Always designate a medic specialist for team sustainability
- Destroyed tentacles continue spewing acid – maintain distance after elimination
Conquering The Abomination requires meticulous preparation before entering the arena. This multi-stage boss represents the ultimate challenge in Back 4 Blood, demanding specialized equipment and strategic planning to overcome its devastating attacks and environmental hazards.
After completing the game’s three extensive acts, players confront this formidable finale that dramatically escalates difficulty. The creature employs massive tentacles, area-denying acid pools, and relentless zombie waves simultaneously. While intimidating, systematic preparation transforms this overwhelming encounter into a manageable challenge.
Critical spoiler warning: This guide contains detailed boss mechanics. New players should first explore our Class Guide for fundamental gameplay mechanics. Back 4 Blood is accessible on Xbox One, Xbox Series X|S, PS4, PS5, PC, and Xbox Game Pass.
Construct a dedicated custom deck specifically engineered for this encounter. The level grants immediate access to all selected cards, ensuring no resources are wasted. Prioritize cards that amplify weak spot damage, enhance weapon performance, and reduce incoming damage. Ammunition capacity enhancements prove equally valuable, as this boss consumes extraordinary quantities of bullets.
Team composition demands strategic consideration. Designate at least one player as a dedicated medic specialist. The sustained damage throughout this prolonged battle necessitates efficient healing application and rapid revival capabilities to maintain team viability.
The initial phase pits you against emerging ground tentacles that deliver punishing slam attacks. While technically the simplest segment, positional errors can quickly cause team wipes. Mastering environmental positioning provides complete safety from these devastating strikes.
For the first tentacle, position yourself with your back against the right-side arena wall adjacent to the substantial tire pile. The second tentacle’s safe zone resides on the elevated platform to the left of your entry point.


Strategic positions for engaging tentacles 1 through 4, sequentially displayed.
The remaining two tentacles require opposite approaches. The convenience store-adjacent tentacle succumbs easily from the zone immediately left of the raised platform. The ultimate tentacle cannot penetrate the compact alcove formed by the directly opposing store structure – utilize this protective niche for secure targeting.
Throughout tentacle engagements, remain vigilant against continuous zombie assaults and special infected attacks. Eliminated tentacles periodically discharge corrosive acid, necessitating immediate repositioning after destruction.
The confrontation intensifies as The Abomination reveals vulnerable weak spots requiring precise targeting. This phase demands aggressive positioning combined with meticulous damage optimization to progress efficiently.
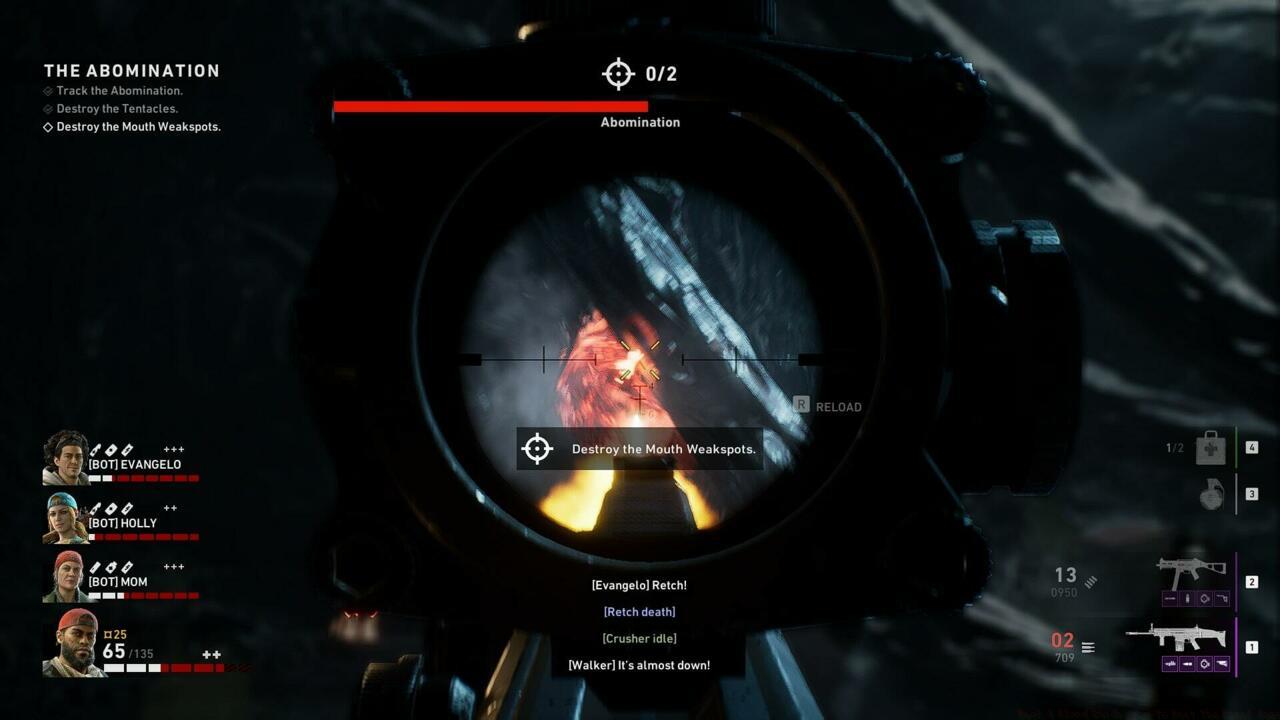
Proximity to the mouth weak spot significantly amplifies damage delivery effectiveness.
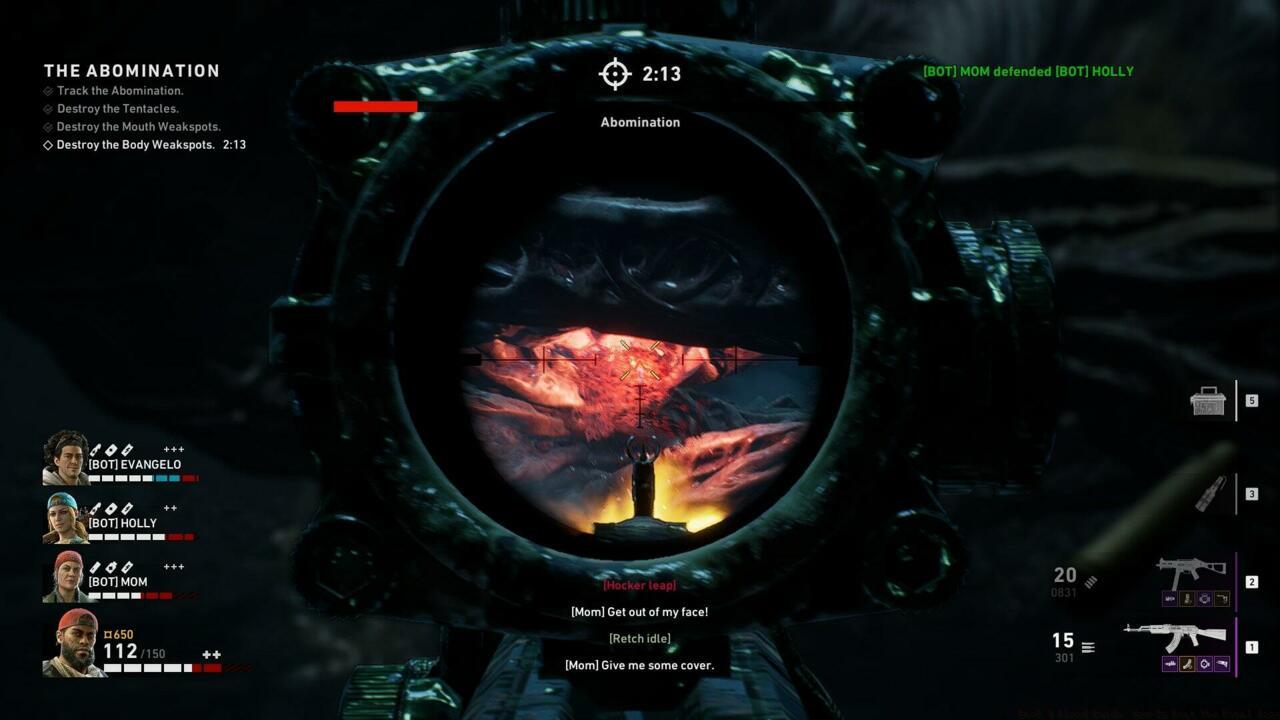
Strategic positioning prevents catastrophic damage during weak spot assault phases.
Success in this segment hinges on bold positioning near the primary mouth weak spot. Contrary to instinctual ranged combat preferences, close-quarters engagement dramatically increases damage penetration. Coordinate team movements to maintain pressure while avoiding the creature’s retaliatory strikes.
Mastering secondary mechanics separates competent teams from exceptional performers. Acid management represents a critical survival component often overlooked by inexperienced players.
Destroyed tentacles continue emitting corrosive pools for approximately 15-20 seconds post-elimination. Establish predetermined fallback positions before engaging each tentacle to facilitate organized retreats.
Special infected spawn rates escalate during phase transitions. Designate team members with crowd control capabilities to manage these additional threats while primary damage dealers focus on boss mechanics.
Ammunition conservation becomes paramount during extended engagements. Consider incorporating cards that enhance ammunition efficiency or provide replenishment capabilities to sustain prolonged assaults.
Action Checklist
- Build custom deck with weak spot damage, weapon damage, and damage resistance cards
- Designate dedicated medic role with healing efficiency cards
- Memorize all four tentacle safe positions before engaging
- Destroy tentacles using safe spots while managing zombie waves
- Position aggressively near mouth weak spot in Phase 2 for maximum damage
No reproduction without permission:SeeYouSoon Game Club » Back 4 Blood Guide: How To Beat The Final Boss Master The Abomination boss fight with strategic card builds, safe positioning tactics, and phase-by-phase execution