TL;DR
- Start quest by speaking with Oswald and Margit in Vernworth’s fountain area
- Choose from three distinct routes to reach the dangerous Misty Marshes region
- Use torches and follow braziers to navigate the fog-filled swamp safely
- Protect Ser Gregor from drowning while battling the teleporting Dullahan boss
- Return to Margit for substantial rewards including unique weapons and gold
Embark on a perilous rescue mission through the haunting Misty Marshes in Dragon’s Dogma 2’s Till Death Do Us Part quest. This challenging side adventure takes you through one of the game’s most dangerous undead-infested regions.
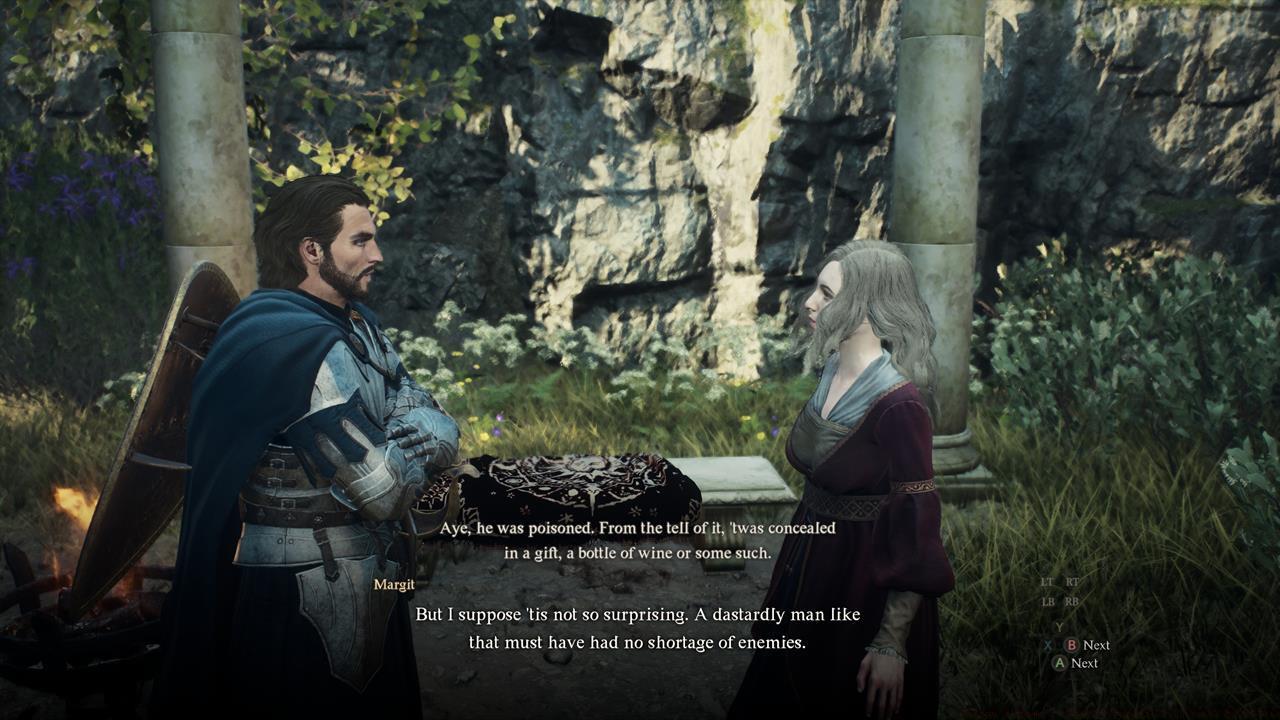
Begin your journey in Vernworth’s capital city by locating Oswald near the central fountain. This NPC reveals crucial backstory about Ser Ludolph’s tyrannical schemes. Your next critical step involves finding Margit positioned outside the Watchhead’s Home.
Margit discloses her husband Ser Gregor’s dangerous assignment at Illdoers’ Resting Place. She urgently requests your assistance to save him from both the swamp’s dangers and Ludolph’s sinister machinations.


Left: A map showing the locations of Oswald and Margit; Right: Speak with Margit to start the quest.
Accessing the Misty Marshes requires careful route selection based on your current progress and available fast travel options. Each path presents unique challenges and requires different preparation levels.
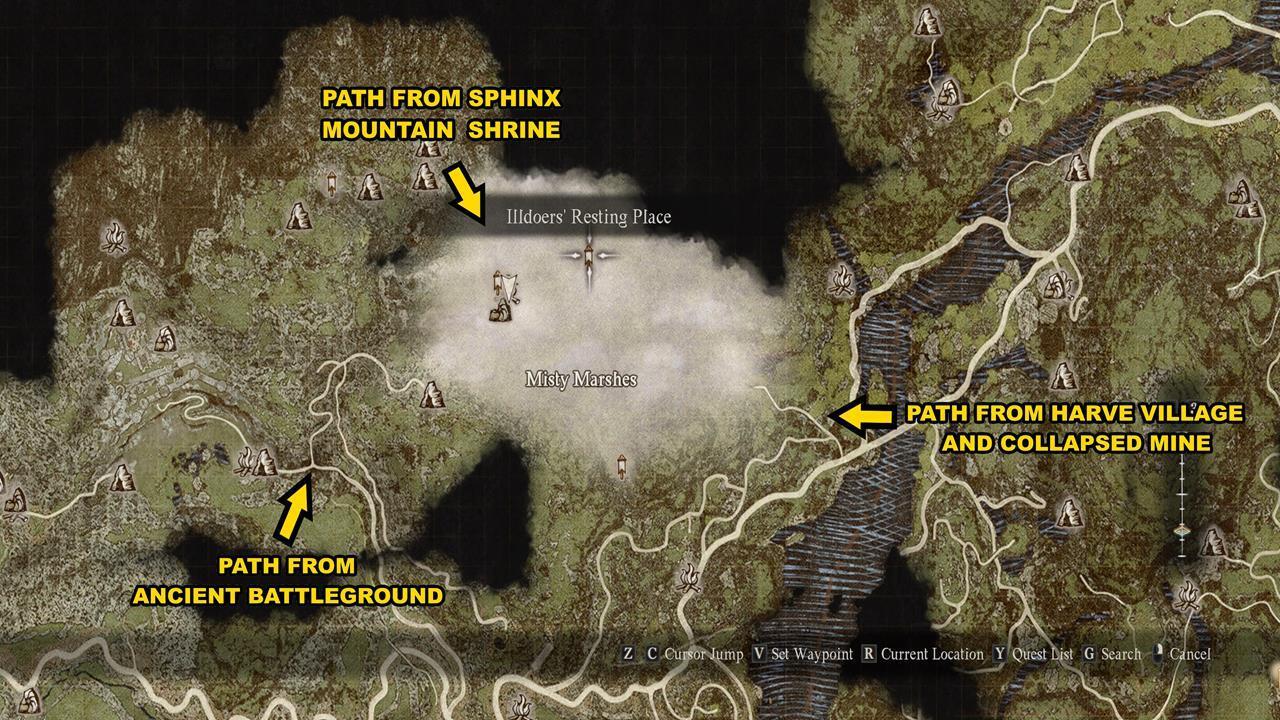
A map showing the paths that lead to the Misty Marshes and Illdoers’ Resting Place.
Northern Approach from Harve Village: Ideal for players who have primarily explored northern regions. Follow roads northward from Harve, cross the western stone bridge, and navigate the narrow fog-covered path. This route offers straightforward navigation but limited escape options if overwhelmed.
Eastern Path via Ancient Battleground: Accessible from Checkpoint Rest Town, this route passes near the Sphinx encounter location. The northern gate remains barred, requiring creative climbing over rock formations or Cenotaph ramparts. Once behind the gate, destroy the wooden plank to create permanent access.
Mountain Shrine Shortcut: The fastest option for players actively solving Sphinx riddles. From the Mountain Shrine steps, locate the nearby campsite and follow the hidden pass to the abandoned village.


From left to right: Heading to the Misty Marshes by way of the stone bridge north of Harve Village, the Ancient Battleground, and the hidden path along the Mountain Shrine.
The Misty Marshes present one of Dragon’s Dogma 2’s most challenging navigation experiences. Dense fog severely limits visibility while undead enemies spawn continuously regardless of time cycles.
Environmental Challenges: The minimap becomes virtually useless in this region, requiring reliance on environmental markers. Torches and braziers serve as critical navigation tools, illuminating safe paths through the treacherous terrain.
Your primary objective involves reaching the abandoned village containing a campsite and Riftstone. Look eastward to spot the small island where Ser Gregor’s forces battle the legendary Dullahan.
Bonus Discovery Opportunity: Following the southern brazier trail leads to a Griffin’s nest containing an extremely rare reusable Portcrystal—a valuable asset for any adventurer’s toolkit.


Left: The Misty Marshes is a dark and dreary area that’s crawling with undead; Right: Ser Gregor’s squad and the Dullahan are fighting on an island.
The Dullahan represents one of Dragon’s Dogma 2’s rarest and most formidable monster encounters. This Headless Horseman variant employs devastating combat techniques that require strategic countermeasures.
Combat Mechanics Analysis: The creature wields a massive scythe for close-quarters devastation while its detached head summons spectral projectiles. Its teleportation ability and Force Choke maneuver make positioning critically important.
Critical Protection Strategy: Ser Gregor faces permanent death if knocked into the surrounding lake waters. Maintain battle control by keeping engagements near the island’s center and physically relocating Gregor when the Dullahan approaches dangerous edges.
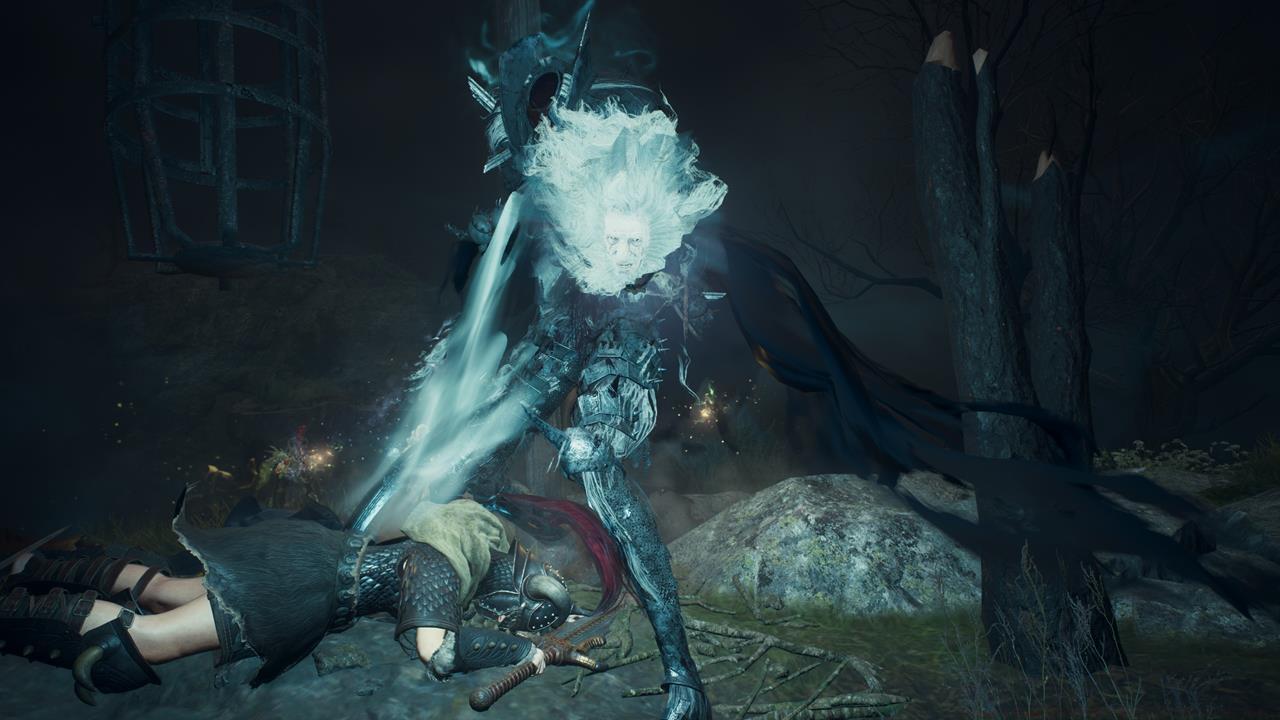
The Dullahan’s shriek causes nearby characters to collapse.
Victory Conditions: You have two paths to quest completion:
- Force Retreat: Inflict sufficient damage to trigger the Dullahan’s enraged state, causing it to teleport away after approximately one minute.
- Total Defeat: Eliminating the creature rewards 300 Rift Crystals, multiple Cursed Dullahan Bone crafting materials, and the exclusive “Before Dawn Breaks” achievement.
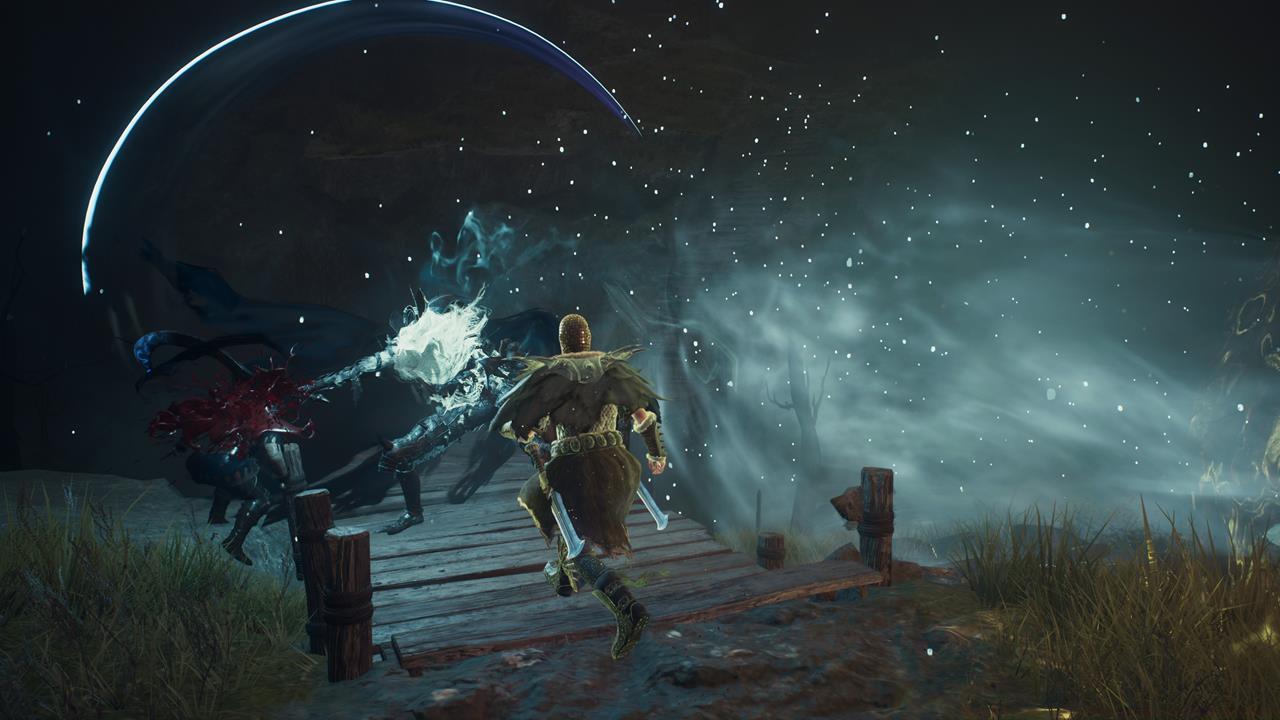
Avoid fighting the Dullahan if it moves close to the lake’s waters.
Your actions during the Dullahan confrontation directly determine the quest’s outcome and rewards. Return to Margit in Vernworth regardless of the battle’s resolution.
Success Rewards: Successfully rescuing Ser Gregor grants 2,800 experience points, 5,000 gold, the Steeled Virtue sword, and Lustrous Targe shield. Additionally, you’ll discover the fate of the scheming Ser Ludolph.
Failure Consequences: If Ser Gregor perishes during the encounter, you forfeit the shield entirely while Margit mourns her husband’s tragic demise.
Saving Ser Gregor nets you a bunch of rewards.
This comprehensive guide ensures you’re fully prepared for Dragon’s Dogma 2’s Till Death Do Us Part quest. For comprehensive strategies against other formidable creatures, consult our Complete Guide to monster encounters.
Action Checklist
- Locate Oswald near Vernworth’s central fountain and Margit outside Watchhead’s Home
- Select optimal route to Misty Marshes based on your progression
- Navigate swamp using torches and brazier markers while avoiding undead patrols
- Protect Ser Gregor during Dullahan battle by keeping combat centered
- Defeat Dullahan or force retreat through sustained damage output
No reproduction without permission:SeeYouSoon Game Club » Dragon’s Dogma 2 – How To Complete Till Death Do Us Part Master the challenging Till Death Do Us Part quest with expert strategies for navigation and Dullahan combat