TL;DR
- Locate Zanmik Shrine in Hateno Village’s southeast region near Mount Lanayru
- Connect battery to spinning wheel using metal platforms for power transfer
- Retrieve hidden chest from ball pit using Ultrahand before solving main puzzle
- Fuse ball to platform and attach to wheel’s far side for efficient transport
- Time your ascent to match the ball’s arrival at the top platform
Conquering the Zanmik Shrine presents one of the more inventive physics-based challenges in Tears of the Kingdom’s shrine collection. This particular trial, dubbed “Scoop It Out,” tests your mastery of Ultrahand mechanics and timing coordination.
Shrine puzzles represent essential side content throughout Hyrule, with Zanmik standing out for its clever wheel mechanism design. You’ll find this shrine positioned within Hateno Village, specifically in the southeastern territory bordered by Mount Lanayru to the north and East Necluda to the west. Proper navigation to this location is crucial before attempting the puzzle mechanics.
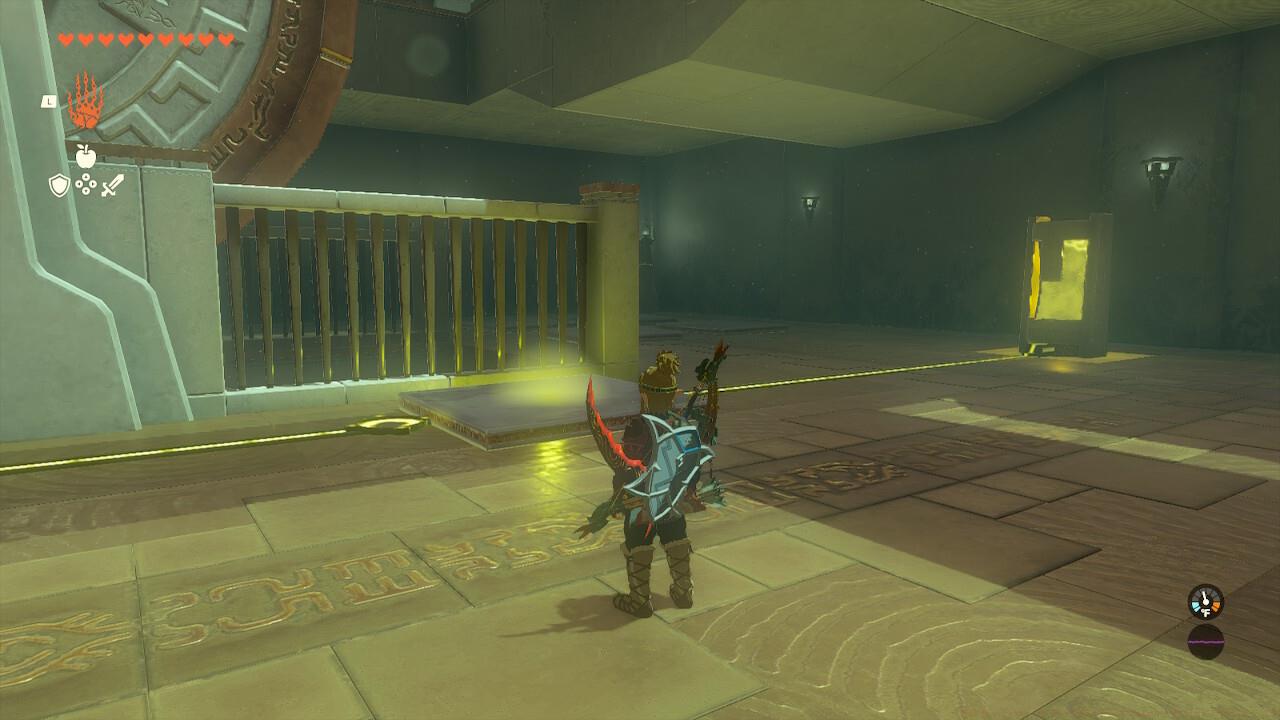
When you first step into the shrine chamber, the exit gateway stands directly ahead, while an enormous wheel apparatus dominates the left side of the space. Below this mechanical wonder lies a depression filled with oversized spheres, where retrieving one ball becomes your primary objective to unlock progress. Any sphere will suffice—the game doesn’t require a specific one. Descend to the lower level to locate the power source that will activate the entire system.
Activating the central wheel requires strategic use of the conductive metal platforms scattered throughout the chamber. These flat metallic surfaces serve as both structural components and electrical conductors.
Strategic platform placement ensures continuous power flow to the wheel mechanism.
Establish connection between the energy cell and the massive wheel by positioning one of the nearby metal platforms as a bridge. This linkage initiates the wheel’s rotation, creating the lifting motion necessary for ball transportation. The spinning action functions similarly to a water wheel, carrying objects from the lower to upper levels through centrifugal force.
Common mistakes include placing platforms at awkward angles that disrupt power transmission or using non-conductive materials. Ensure your connection is direct and stable—wobbly connections may cause intermittent operation that slows progress significantly.
Before tackling the main puzzle objective, savvy explorers should prioritize locating the hidden reward container. This bonus treasure offers additional loot for thorough players.
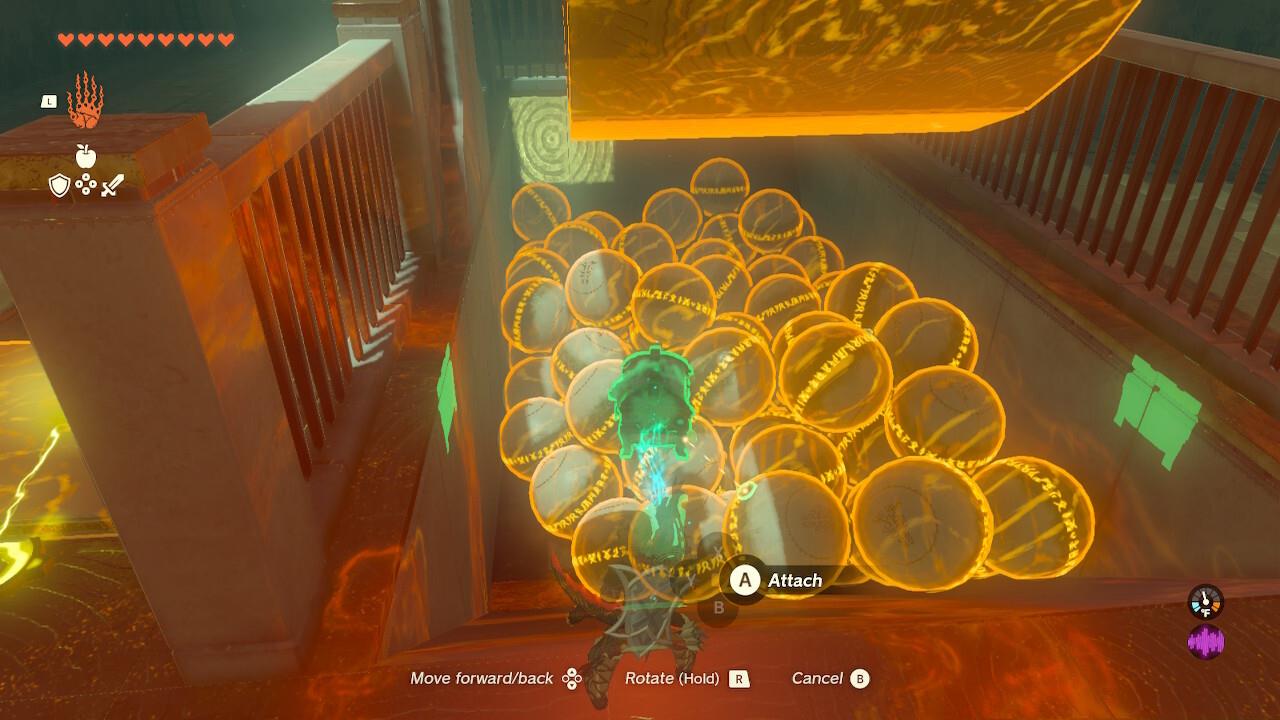
The concealed chest sits partially obscured within the ball collection, requiring careful examination to spot.
Approach the sphere collection from the battery-adjacent side for optimal visibility. With careful observation, you’ll notice the treasure container positioned one row inward on the pit’s left flank. Employ Ultrahand to extract it from the mass of spheres, being prepared to relocate any balls obstructing access. The chest typically contains valuable equipment or materials worth the extra effort.
Advanced players can optimize this process by clearing a path to the chest first, then proceeding with the main puzzle. This prevents having to navigate around the chest area during the primary ball-retrieval phase.
The primary challenge revolves around transporting a sphere from the lower chamber to the upper platform using the rotating wheel mechanism. This requires precise application of fusion abilities and timing.
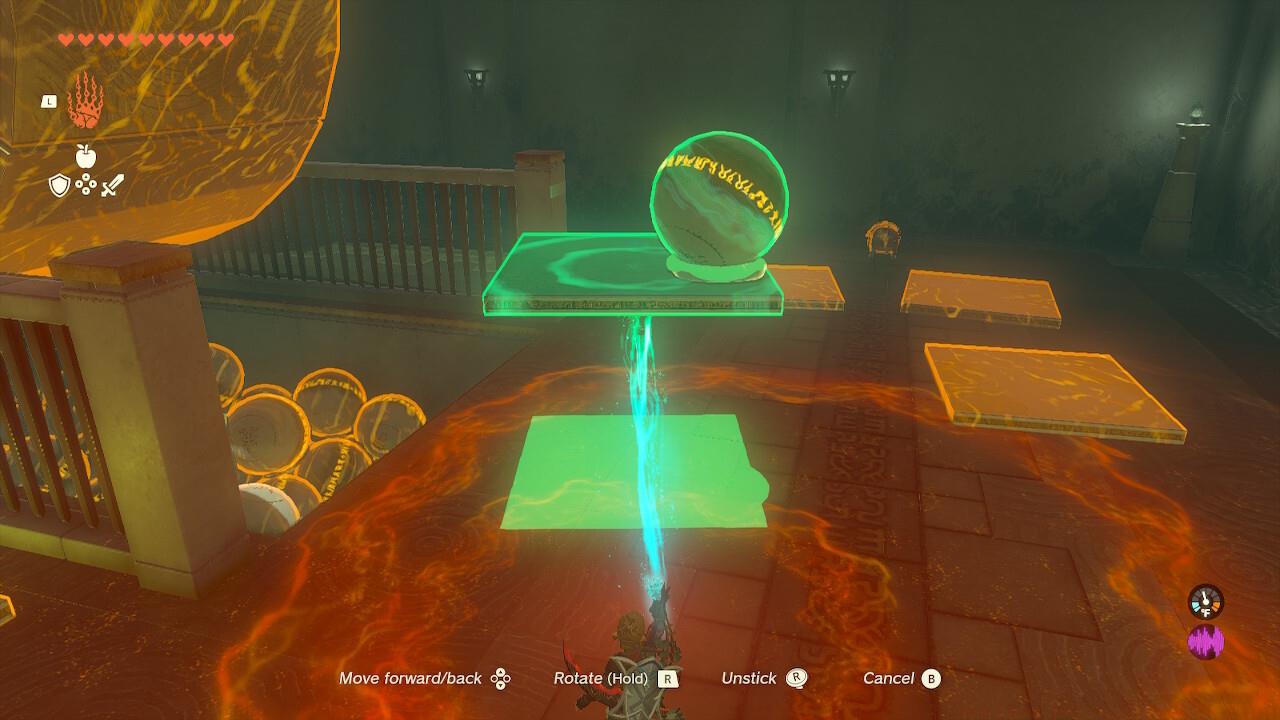
Ball-platform fusion creates a stable transport unit that withstands the wheel’s rotational forces.
Acquire one of the remaining metal platforms and use Ultrahand to merge a sphere onto its surface. This fusion creates a secure carrying vessel that won’t detach during the lifting process.
Position your created transport unit on the wheel’s far side, beyond the sphere collection area. This placement ensures the ball gets carried upward during rotation rather than falling back into the pit.
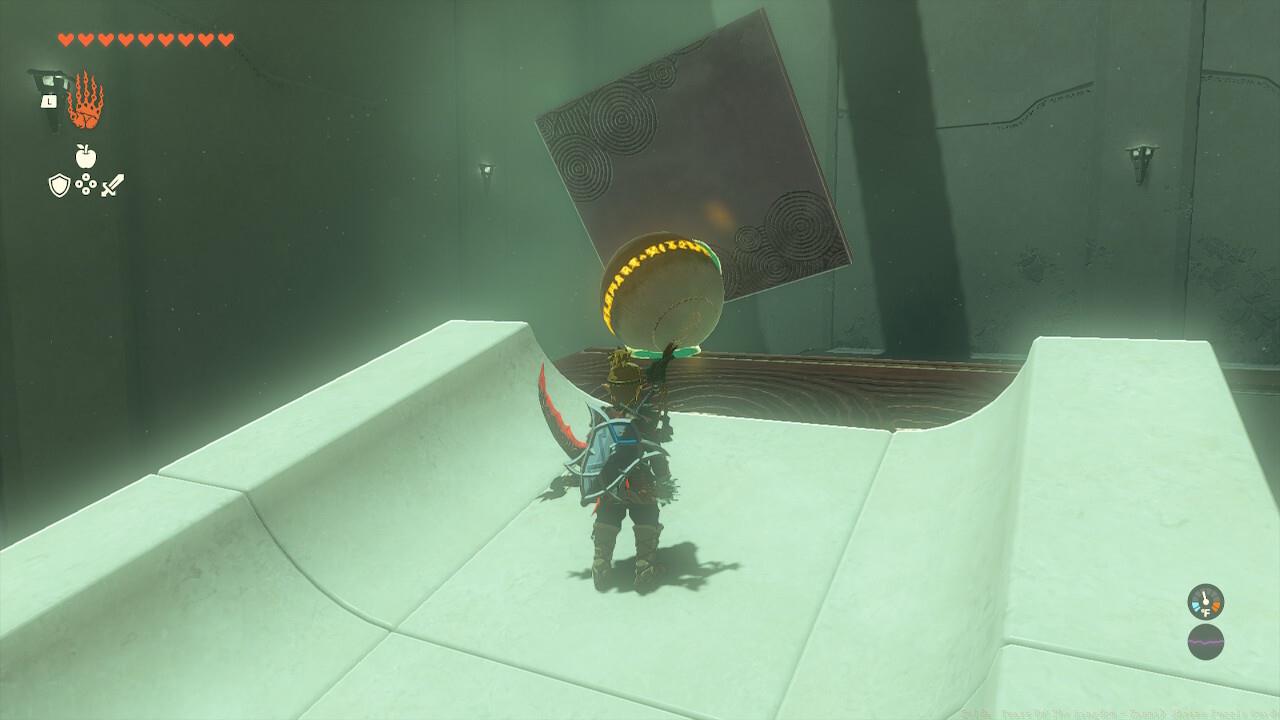
Perfect timing synchronization allows seamless collection of the sphere at the summit.
After securing the transport unit, immediately ascend using the staircase near the power source. With proper timing, you’ll arrive at the upper platform simultaneously with the ascending sphere, enabling immediate retrieval. The entire process typically takes 2-3 minutes once mastered.
Pro players recommend practicing the timing sequence separately if struggling—observe several wheel rotations to internalize the rhythm before attempting the full sequence. This shrine perfectly demonstrates the Complete Guide principles of mechanical puzzle solving that apply across many gaming challenges.
Action Checklist
- Navigate to Hateno Village and locate the shrine entrance
- Connect battery to wheel using metal platform as conductor
- Retrieve optional chest from ball pit using Ultrahand
- Fuse ball to platform and attach to wheel’s far side
- Ascend ladder and collect ball upon its arrival at top platform
No reproduction without permission:SeeYouSoon Game Club » Zelda: Tears Of The Kingdom – Zanmik Shrine Puzzle Guide Master the Zanmik Shrine's Scoop It Out puzzle with expert strategies and time-saving techniques