TL;DR
- Remove bottom blocks strategically to collapse the tower toward the ramp
- Collect both optional chests before attempting the main ball retrieval
- Use extracted blocks as bridges to reach otherwise inaccessible items
- Reset the puzzle if the ball falls into the abyss or chests become unreachable
- Master Ultrahand positioning for precise object manipulation during tower collapse
The Jochi-iu Shrine presents players with a challenging Jenga-inspired puzzle that tests both patience and strategic thinking. Unlike traditional shrine challenges, this requires careful block extraction to achieve success without catastrophic failure.
The Legend of Zelda: Tears of the Kingdom empowers players with multiple solution paths for its diverse puzzles, though some present particularly intricate challenges. The Jochi-iu Shrine specifically requires extracting a substantial sphere from an unstable tower structure. Located within North Akkala Foothill near East Akkala Stable, this shrine’s “Courage to Pluck” puzzle demands methodical execution.
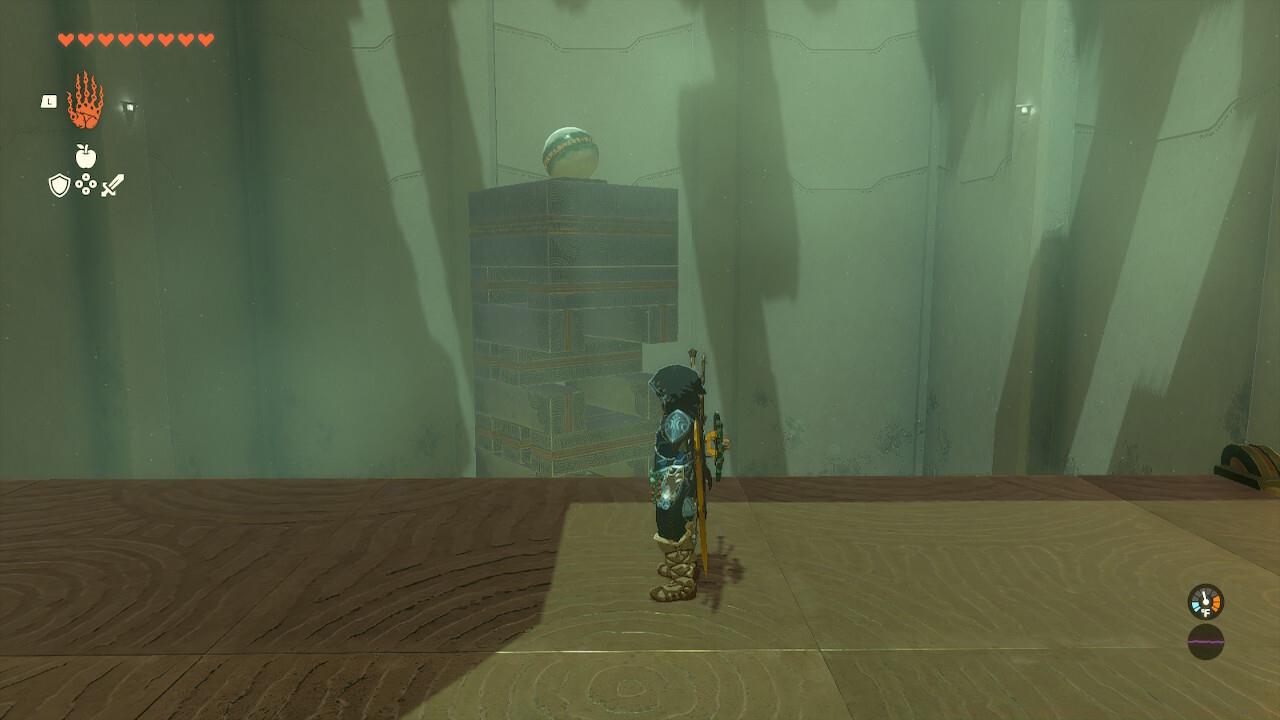
Upon entering the Jochi-iu Shrine, you’ll discover a single expansive chamber containing the complete puzzle environment. The exit doorway sits to your right, secured until you place the large ball. Centrally positioned rests the crucial sphere atop an unstable assembly of platform fragments resembling a Jenga tower. To the right rests an optional chest positioned on an elevated ledge, while a second optional chest hides within the tower structure itself. Attempting to jump directly onto the tower platform will immediately plunge you into the void below.
Success requires obtaining the central sphere to unlock the shrine’s concluding doorway.
The exit door remains sealed until you successfully deliver the large sphere.
The primary objective involves collapsing the tower structure toward the ramp area where you’re positioned, enabling sphere capture. Should the ball descend into the abyss, the puzzle immediately resets. Begin by extracting a foundational block without compromising structural integrity – the front bottom piece works ideally – creating access to the initial optional chest. Procrastinating on chest collection until after sphere retrieval often leaves insufficient materials for bridge construction.
The first supplementary chest becomes accessible by repurposing a removed block segment as an improvised crossing.
Bridge construction using extracted blocks provides safe passage to the first chest.
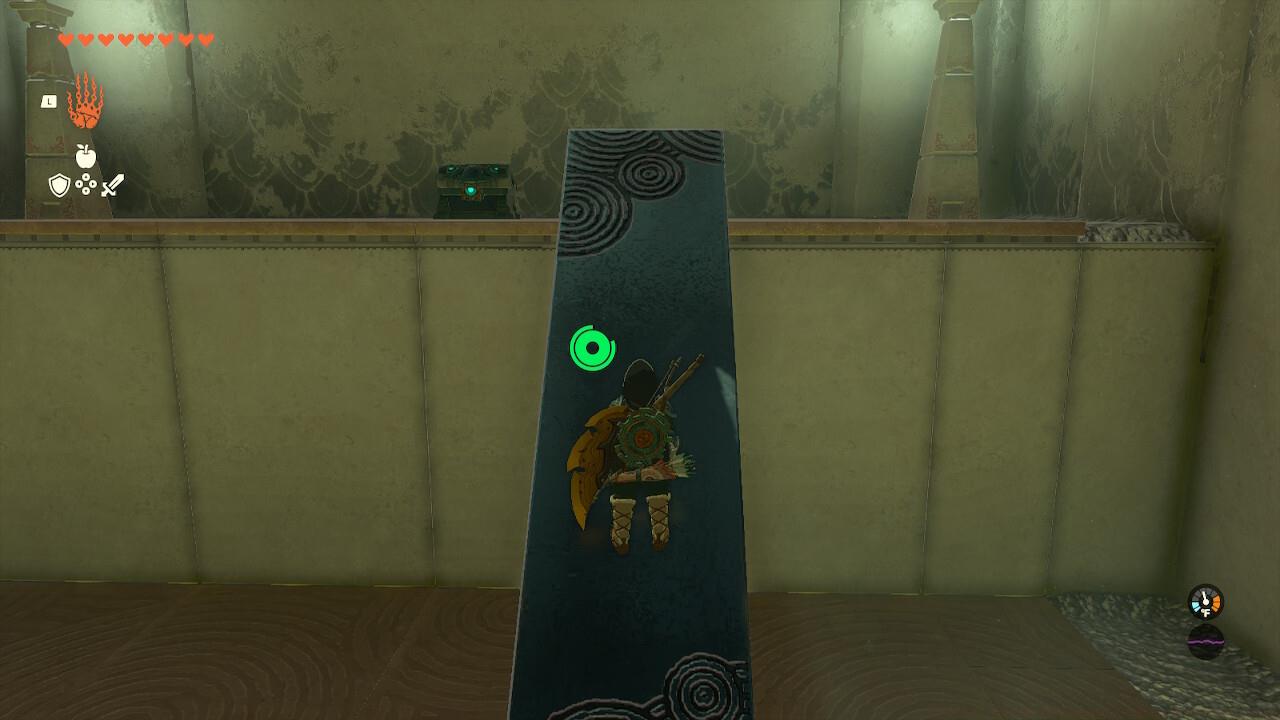
Subsequently, concentrate on acquiring the second optional chest concealed within the tower framework. This container resides on the tower’s fifth tier. Extract the rear segment from the third level directly beneath the chest, followed by the rear piece from the fifth level supporting the chest itself. The container should descend to the base platform, where Ultrahand can retrieve it. If initial descent positioning proves unsatisfactory, topple the structure completely and restart. After successful chest acquisition, reset the tower to its original configuration.
The secondary chest becomes obtainable after lowering it to ground level through strategic rear block removal.

Precise block extraction from the rear enables controlled chest descent to accessible levels.
Now commence the primary sphere retrieval phase. Initiate by eliminating the two foundational blocks, beginning with the exterior one followed by the central segment.
Following removal of both base blocks, seize the foremost bottom fragment and propel it away from your position, triggering the sphere’s descent toward you.
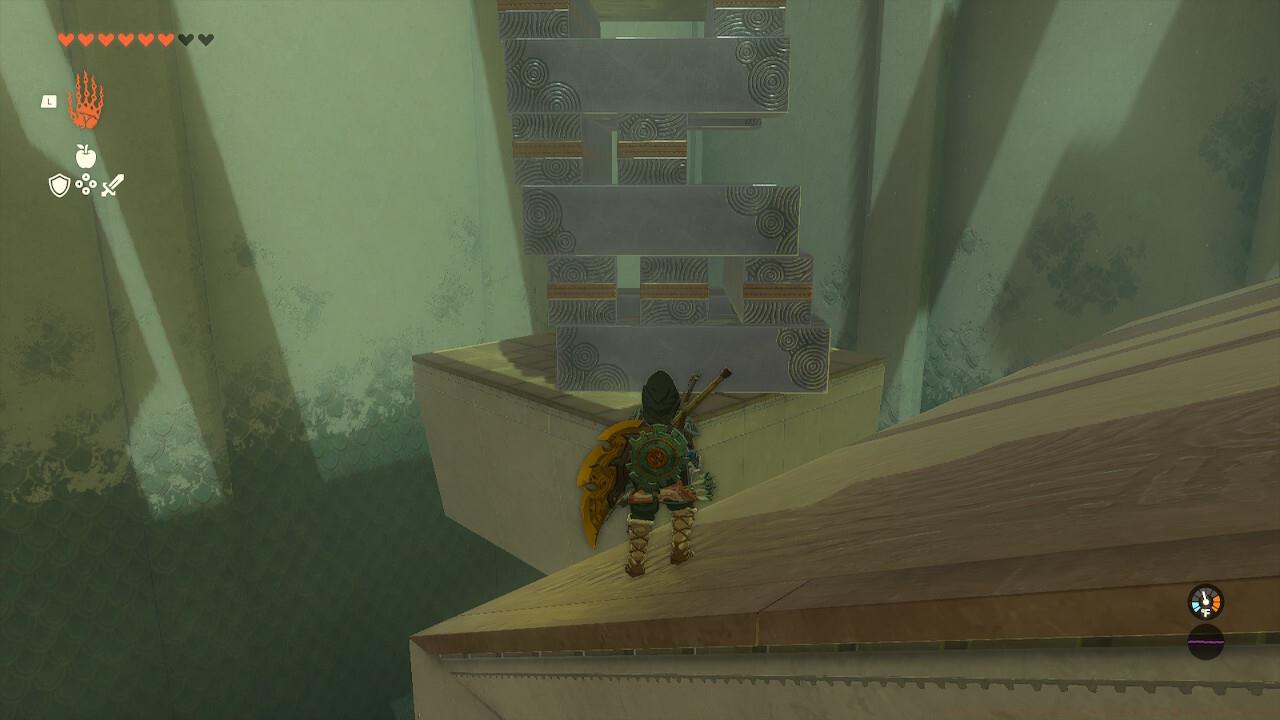
Strategic block displacement directs the sphere’s trajectory toward your waiting position.
Mastering the Ultrahand ability proves essential for precise object manipulation during the tower’s controlled collapse. Position yourself strategically on the ramp area, ensuring clear access to the descending sphere while maintaining safe distance from potential structural failure zones. The puzzle’s physics engine responds to both force application and removal sequence, requiring thoughtful consideration of each extraction’s consequences.
Seasoned players recommend extracting blocks from the tower’s rear initially, as this creates more predictable collapse patterns. Avoid removing side blocks simultaneously, as this frequently causes uncontrolled tower disintegration. For optimal efficiency, complete both chest retrievals before attempting the main sphere, as resetting after ball acquisition wastes previously collected resources.
Common errors include premature tower destabilization through aggressive block removal and misjudging sphere trajectory during collapse. If the ball consistently misses the ramp area, adjust your block extraction sequence – sometimes removing a middle block before bottom blocks creates better directional control. The entire puzzle typically requires 5-8 minutes for completion, though mastery reduces this to under 3 minutes with proper execution.
Understanding the shrine’s structural physics reveals that blocks supporting the sphere require careful sequencing. The tower maintains stability through distributed weight – removing critical load-bearing elements too early causes immediate failure. Like mastering specialized class abilities in other games, this puzzle rewards methodical approach over rushed attempts.
Action Checklist
- Extract front bottom block to bridge first optional chest
- Remove rear blocks from levels 3 and 5 to lower second chest
- Reset tower after chest collection
- Extract bottom two blocks sequentially
- Push front bottom piece away to direct ball toward ramp
No reproduction without permission:SeeYouSoon Game Club » Zelda: Tears Of The Kingdom – Jochi-iu Shrine Puzzle Guide Master the Jenga-style Jochi-iu Shrine puzzle with strategic block removal and chest collection techniques