TL;DR
- Complete ‘Into the Unknown’ main quest before attempting to acquire Gravity Wave
- Navigate Cassiopeia II-A’s dust storms using scanner glitch detection for temple location
- Collect 5-10 glowing orbs inside Temple Beta to activate the power portal
- Defeat the stealth enemy ambush that spawns after obtaining the ability
- Gravity Wave functions as Starfield’s equivalent to Skyrim’s Fus Ro Dah shout
Harness the devastating force of Gravity Wave to dominate combat encounters throughout the Settled Systems.
While Starfield represents Bethesda’s leap into science fiction, it maintains connections to their fantasy roots through extraordinary abilities that defy conventional physics. The Gravity Wave power specifically channels the same crowd-control potential as Skyrim’s iconic Fus Ro Dah shout, allowing players to unleash concussive blasts that stagger enemies and create tactical advantages. This guide provides comprehensive instructions for obtaining this formidable ability while addressing common challenges encountered during the acquisition process.
For players seeking broader understanding of Starfield’s supernatural mechanics, our detailed powers and temples guide explores all available abilities and their strategic applications. The Gravity Wave stands out as particularly valuable for its versatility in both offensive and defensive scenarios.
Acquiring the Gravity Wave ability requires completion of the Into the Unknown main story mission, which introduces the core mechanics of power acquisition. Once this prerequisite is fulfilled, chart a course for the Cassiopeia system and target its moon designated Cassiopeia II-A.
Current evidence suggests this power location remains consistent across playthroughs, though Bethesda’s procedural generation systems may introduce variations in future updates. Upon arriving in the Cassiopeia system, your navigation console will immediately detect anomalous energy signatures, signaling the presence of Temple Beta.


Left: Cassiopeia II-A; Right: Temple Beta.
Cassiopeia II-A presents significant environmental challenges with perpetual dust storms that reduce visibility to near-zero conditions. The most reliable navigation method involves activating your scanner and slowly rotating your viewpoint until the display exhibits distinctive distortion patterns. These visual artifacts indicate the bearing toward Temple Beta’s entrance.
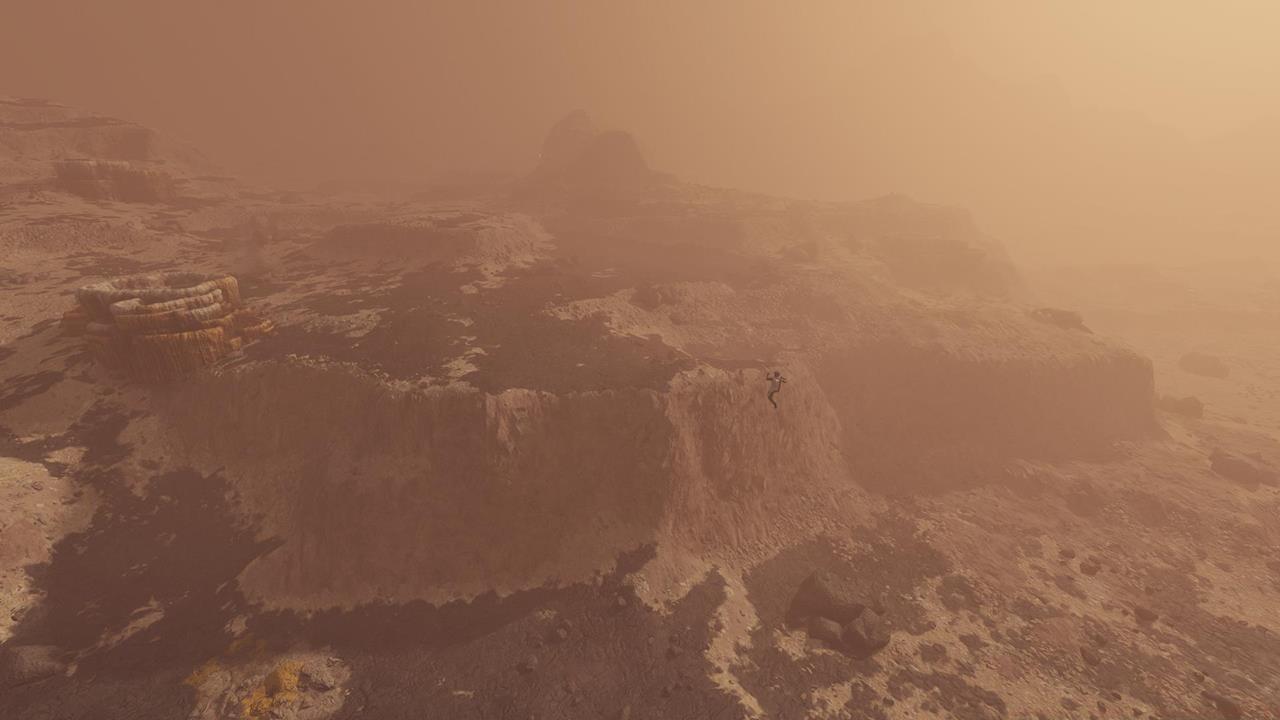
Poor visibility will hamper your exploration of this moon.
Upon spotting the temple structure, identify the narrow crevice formed between two towering rock formations that serves as the primary access point. Exercise caution when approaching, as the limited visibility can easily disorient unprepared explorers.
Inside Temple Beta’s cavernous interior, you’ll encounter an otherworldly puzzle involving luminous floating orbs. The chamber operates with zero-gravity physics, requiring careful maneuvering to interact with these energy sources. Each orb emits both visual and auditory feedback when successfully collected, with distinct chimes confirming proper activation.
Strategic orb collection demands efficient movement through the anti-gravity environment. Target between five and ten orbs to trigger the central portal’s activation sequence. The spinning vortex that materializes transports you back to the moon’s surface, now imbued with the Gravity Wave power.
Immediately following power acquisition, remain vigilant for hostile forces that materialize in the immediate vicinity. These “stealth enemy mobs” typically employ ambush tactics, making immediate defensive positioning crucial. The newly obtained Gravity Wave ability proves exceptionally effective for creating distance and disrupting enemy formations during this encounter.
Common mistakes during this sequence include insufficient orb collection due to missed targets in the three-dimensional space, or premature engagement with spawned enemies before securing the ability. Allocate approximately 15-20 minutes for the complete temple navigation and activation process under normal conditions.
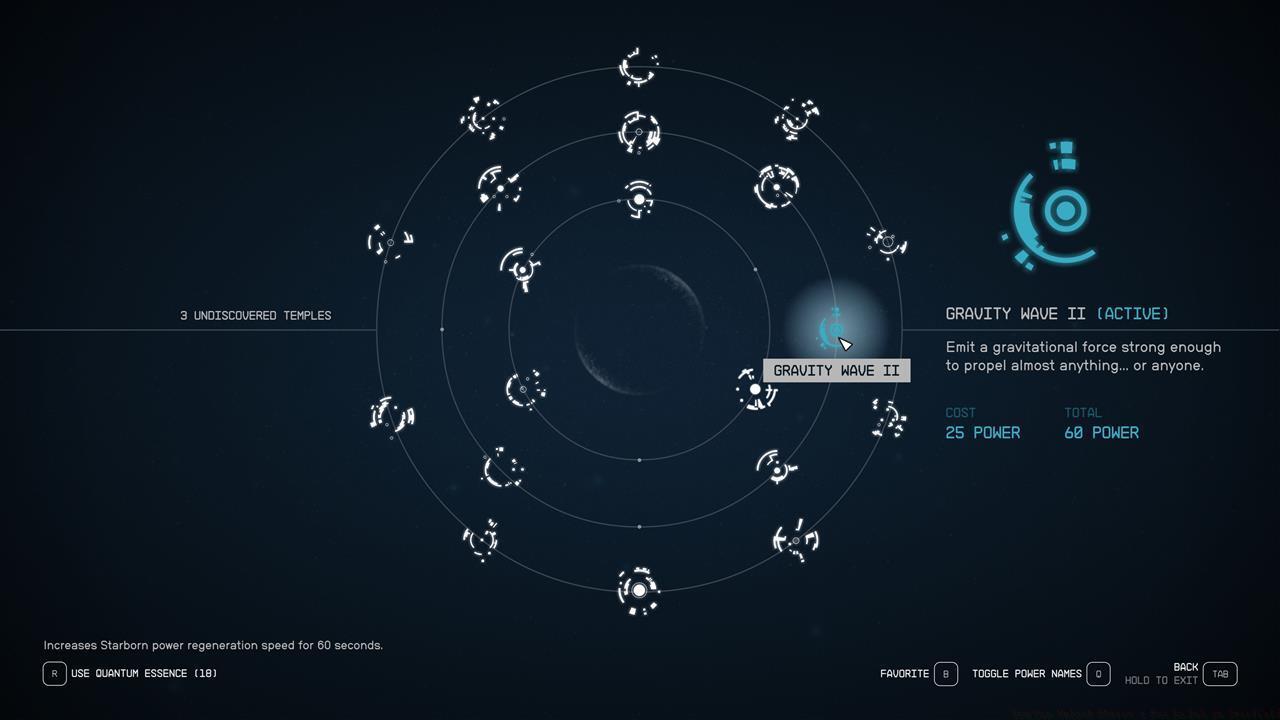
The Gravity Wave power transcends simple enemy knockdown, offering sophisticated tactical applications. In space combat scenarios, it can create breathing room during boarding actions, while planetary engagements benefit from its area denial capabilities against grouped opponents.
For veteran players pursuing optimization, the ability scales with character level and can be enhanced through subsequent temple visits in New Game Plus cycles. Each upgrade tier increases both damage output and effective radius, making it progressively more devastating.
You might acquire a Gravity Wave upgrade during your New Game Plus run.
Strategic deployment involves timing the ability to interrupt enemy special attacks, create escape routes when overwhelmed, or set up follow-up attacks against staggered targets.
Understanding how Gravity Wave integrates with Starfield’s broader combat systems enhances its effectiveness considerably. For comprehensive weapon and ability synergies, consult our BF6 Weapons Unlock Guide to maximize your tactical options.
Action Checklist
- Complete ‘Into the Unknown’ main story quest
- Travel to Cassiopeia system and land on Cassiopeia II-A
- Use scanner distortion to locate Temple Beta entrance
- Navigate zero-gravity chamber and collect 5-10 glowing orbs
- Defeat stealth enemy ambush after obtaining power
No reproduction without permission:SeeYouSoon Game Club » You Can Unlock Skyrim’s Fus Ro Dah In Starfield Master Starfield's Gravity Wave power with expert strategies for temple navigation and combat optimization