TL;DR
- Your choice determines which Constellation companion survives – highest affinity companion is most at risk
- Companion locations are predetermined based on relationship levels before the mission triggers
- The Hunter encounter varies significantly depending on your location decision
- Mission outcome permanently affects your playthrough and available companion quests
- Strategic preparation can influence survival outcomes through affinity management
Prepare for one of Starfield’s most emotionally charged missions where your decisions carry permanent consequences for your Constellation allies. This pivotal moment tests your relationships and strategic thinking under extreme pressure.
The Starfield narrative builds toward this devastating turning point that will permanently alter your crew dynamics. Be aware that proceeding further reveals major story spoilers that impact your gameplay experience.
A High Price to Pay activates immediately following the No Sudden Moves mission, catching players during a moment of supposed safety. The Constellation organization splits between two key locations due to security concerns, creating the dilemma’s foundation.
Understanding the division is crucial for planning:
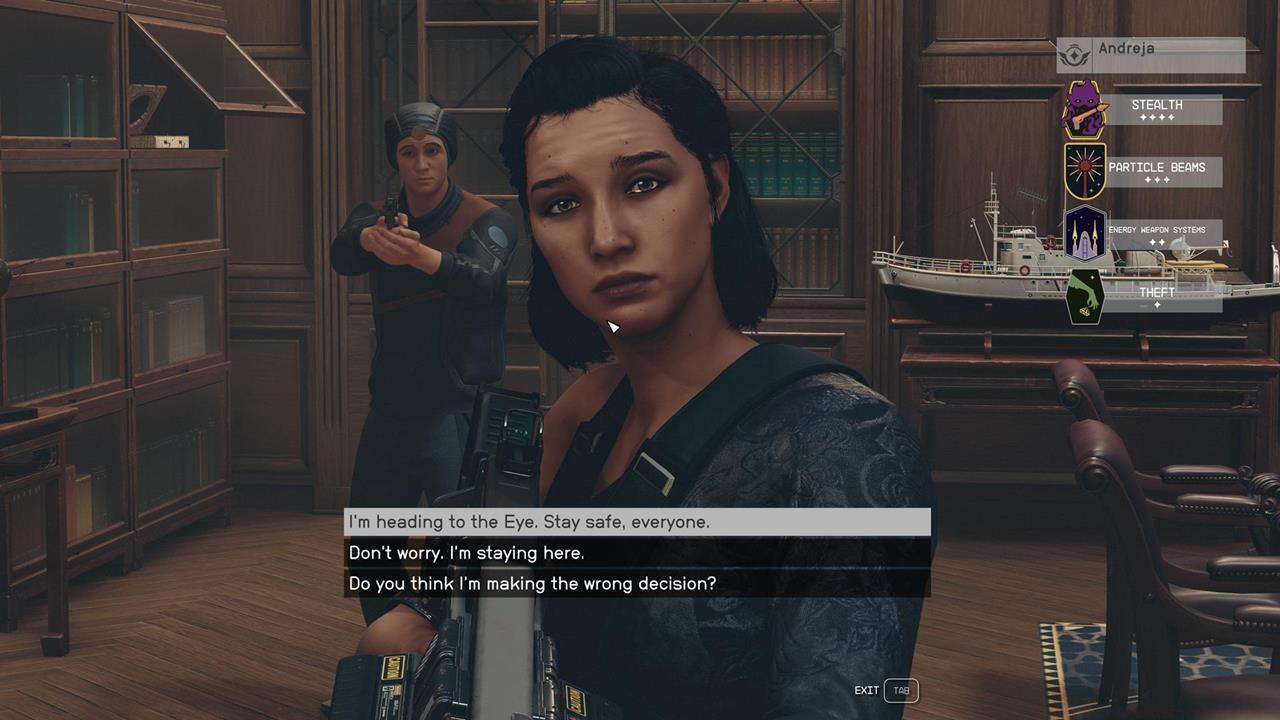
When Noel reports the devastating attack on The Eye, simultaneous intrusion attempts at The Lodge force an immediate response decision with no opportunity for compromise.
The weight of your choice will shape your Starfield journey permanently.
The moment you commit to a location determines which companion faces mortal danger. This isn’t a temporary setback – the fallen ally remains permanently unavailable for future missions and personal quests.
Selecting The Lodge defense initiates a direct confrontation with the Hunter, who materializes unexpectedly while you check on Walter. This powerful Starborn warrior demonstrates abilities beyond conventional combat, requiring adaptive tactics rather than brute force.


Left: The Hunter demonstrates advanced combat techniques against Walter; Right: Your evacuation path extends through multiple districts to reach the Spaceport.
Choosing The Eye rescue mission means battling through damaged sections to reach endangered companions, but leaves The Lodge team vulnerable to the Hunter’s assault. Many players report struggling with this choice emotionally, as both options guarantee losing someone important.
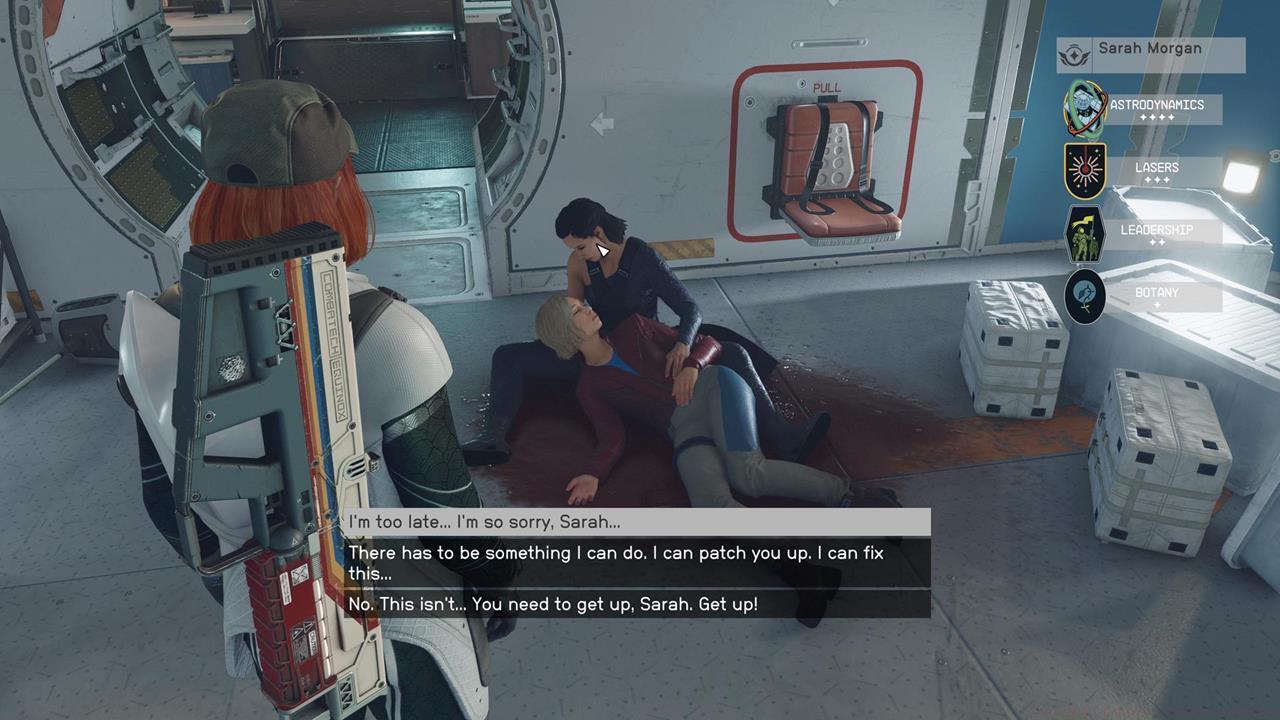
Sarah Morgan’s death occurred during our Eye rescue attempt, demonstrating how location choice directly impacts survival.
Strategic preparation before reaching this story point can influence outcomes. Building affinity with multiple companions creates flexibility, while focusing exclusively on one relationship increases vulnerability during the crisis.
When defending The Lodge, the Hunter’s sudden appearance introduces players to Starborn combat capabilities that defy conventional tactics. His ability to manipulate space and time requires defensive positioning rather than aggressive engagement.
The confrontation follows this sequence: immediately after checking Walter’s status on the second floor, the Hunter materializes and initiates a chokehold. Your response timing affects Walter’s survival chances and available dialogue options afterward.
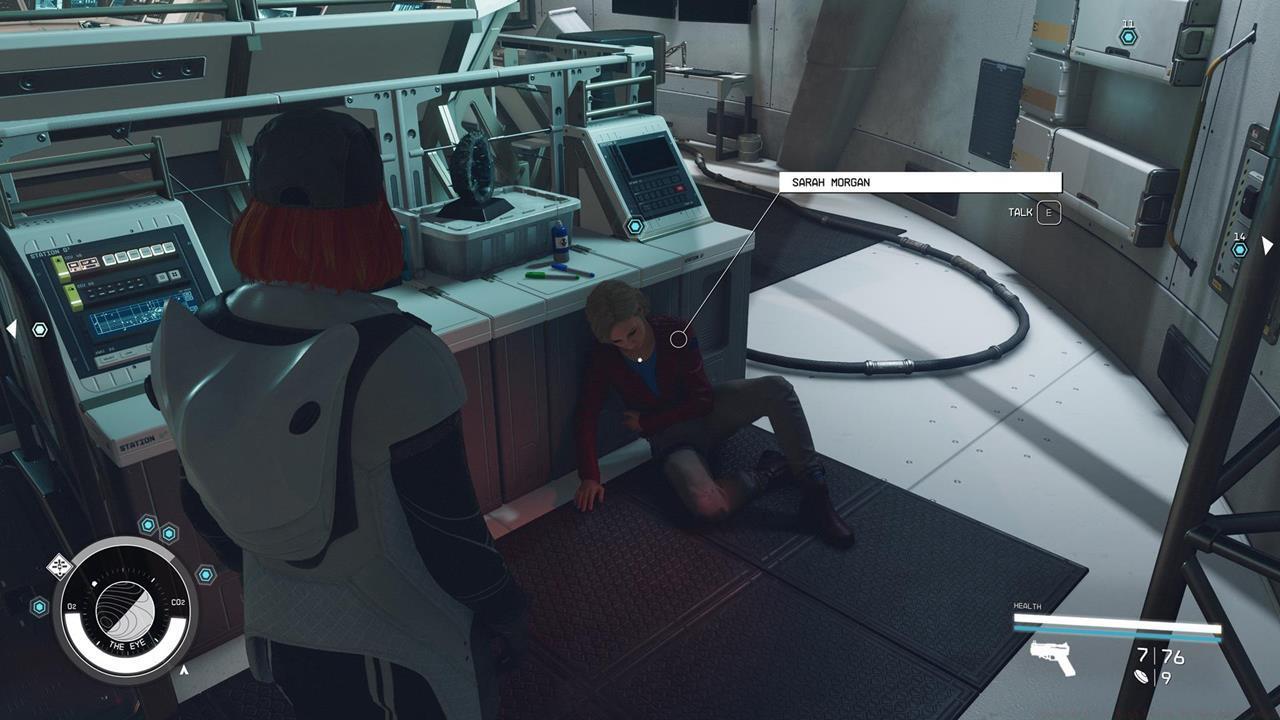
Choosing The Eye rescue allowed Sarah to survive in this playthrough, though other companions faced the consequences.
Escaping the Hunter’s assault requires navigating through The Lodge’s defensive systems and making your way toward the Spaceport district. This escape sequence introduces environmental hazards and timed challenges that test your mobility and combat skills under pressure.
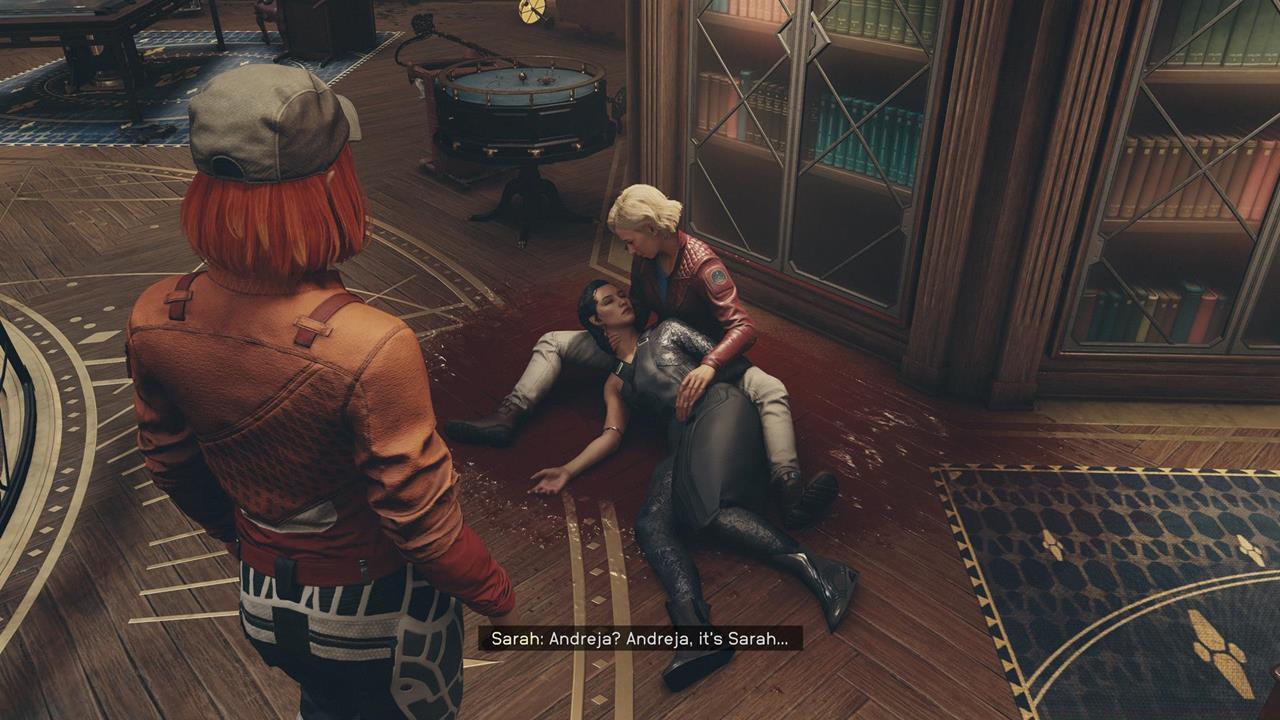
Andreja’s death resulted from our Lodge defense choice, eliminating her companion questline from that playthrough.
Advanced players should note that weapon selection significantly impacts survival chances during both the Hunter encounter and escape sequence. Energy weapons and defensive mods provide advantages against Starborn abilities, while conventional firearms prove less effective. For more combat strategies, check our Weapons Unlock guide for tactical insights.
Mission completion unlocks new narrative branches regardless of your choice, though the emotional tone and available companions shift dramatically. Consider creating a separate save file before this mission to experience both outcomes, as the consequences resonate throughout remaining gameplay hours.
Action Checklist
- Create pre-mission save file and verify companion affinity levels
- {‘step’: ‘2’, ‘equip’: ‘Energy-based weapons and defensive gear before mission trigger’, ‘difficulty’: ‘Medium’, ‘time_estimate’: ‘5 minutes’}
- Decide location priority based on companion preference and quest completion needs
- Execute chosen strategy – either direct Hunter confrontation or orbital station rescue
- Navigate escape sequence to Spaceport while managing combat encounters
No reproduction without permission:SeeYouSoon Game Club » Starfield – A High Price To Pay Quest Guide Master Starfield's pivotal mission with strategic insights and companion survival tactics