TL;DR
- Plunder targets specific settlements without fast travel icons for maximum loot acquisition
- Combat progresses through four distinct stages requiring elimination of ships and guard towers
- Strategic ship upgrades and weapon selection dramatically impact plunder success rates
- Proper settlement selection based on difficulty level prevents overwhelming enemy encounters
- Cooldown periods between plunders require planning for efficient resource farming
Plundering represents the quintessential pirate experience in Skull and Bones, offering players a systematic approach to acquiring wealth and advancing their naval careers. This core gameplay mechanic transforms ordinary settlements into lucrative targets for ambitious captains seeking to build their infamy and expand their fleets.
Successful plundering operations yield substantial benefits including rare crafting materials, valuable commodities, reputation gains for your Infamy Rank, and substantial experience points to accelerate your progression through the game’s ranking system. The risk-reward balance demands careful consideration, as poorly executed raids can result in significant ship damage and resource loss.
The strategic depth of plundering extends beyond simple combat encounters, requiring players to assess settlement defenses, anticipate enemy reinforcements, and manage their ammunition and repair resources throughout extended engagements. Understanding these mechanics separates successful pirates from those who end up at the bottom of the sea.
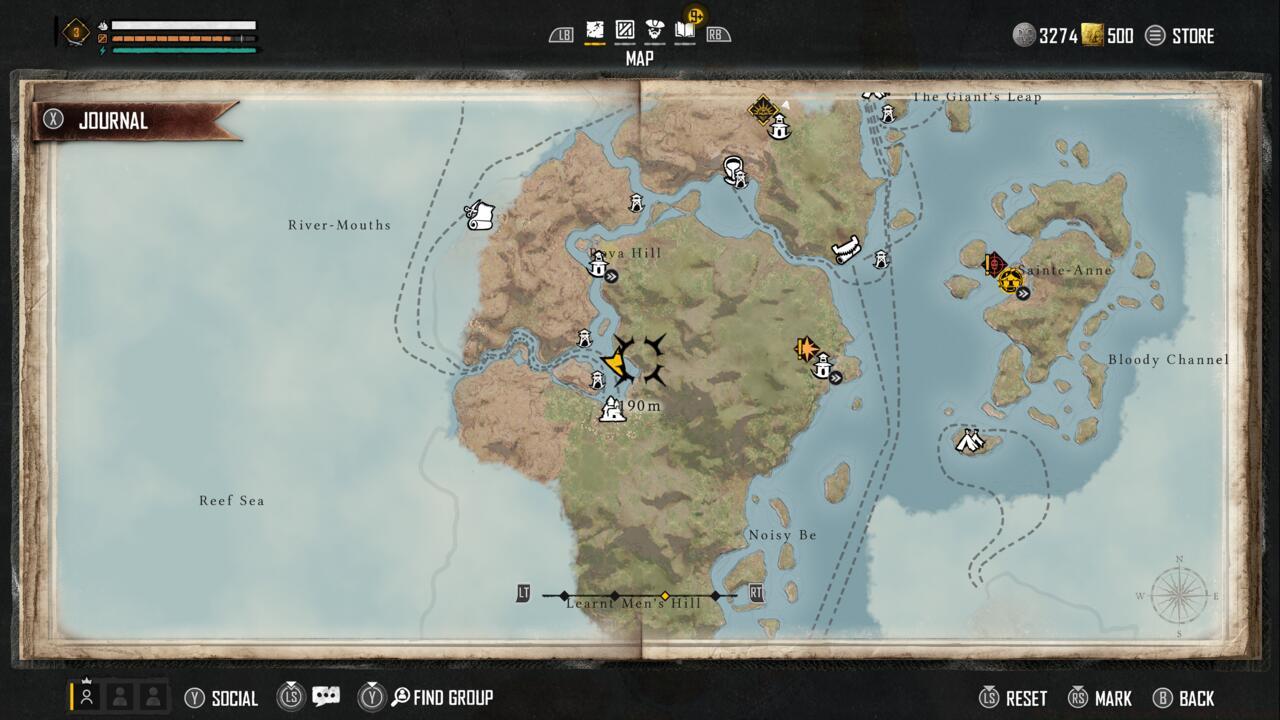
Target selection constitutes the foundational element of successful plundering operations. Only specific settlements marked by distinct visual characteristics qualify as viable targets for your naval assaults. Major hubs like Sainte-Anne or the Sacred Tree maintain protected status and cannot be attacked, serving as safe zones for players to regroup and resupply.
Identify potential plunder locations by scanning your map for settlements that conspicuously lack the fast travel icon and typically feature defensive structures like guard towers. These military installations signal both the settlement’s vulnerability and its defensive capabilities, requiring careful assessment before engagement.
Strategic reconnaissance involves evaluating the number and placement of guard towers, as well as assessing the likely naval patrol routes in the surrounding waters. Settlements with multiple defensive towers often contain more valuable loot but present significantly greater combat challenges for unprepared captains.
Approaching a viable settlement triggers the appearance of two distinct interaction options: “Interact” for peaceful trading and quest completion, or “Plunder” to initiate combat operations. Selecting the plunder option activates an immersive cutscene depicting your crew disembarking to begin the assault.
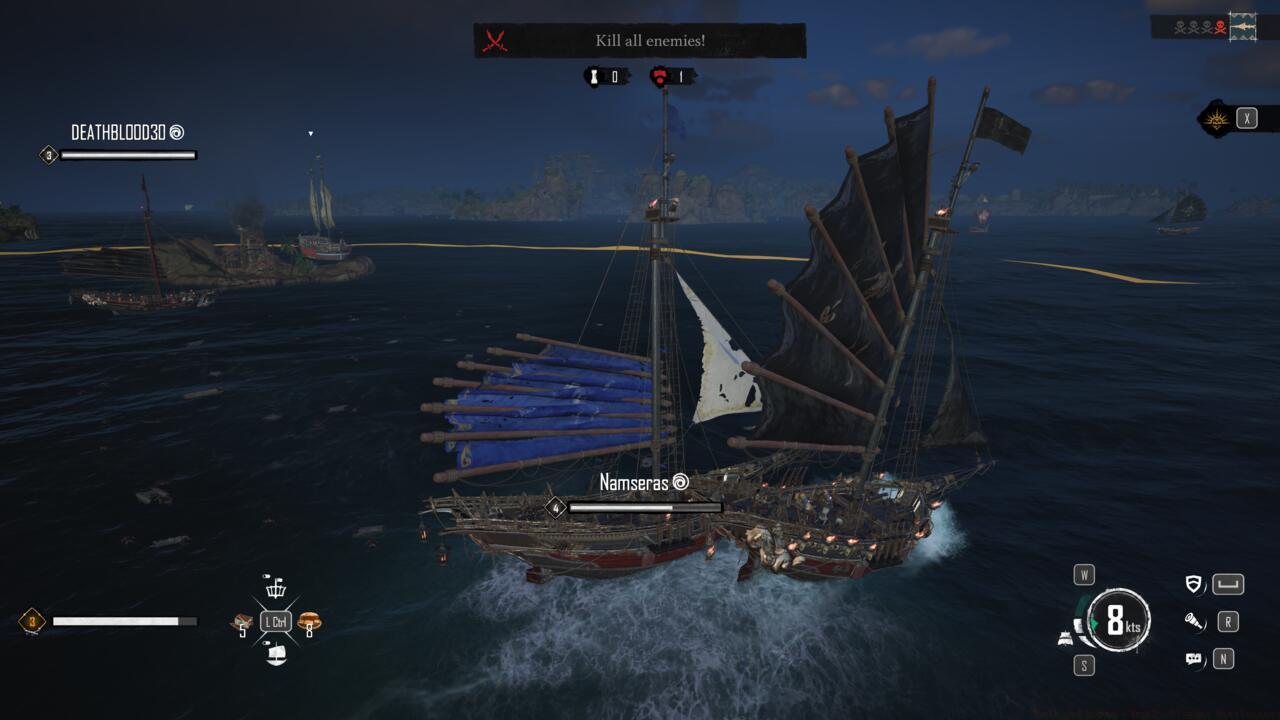
Once combat commences, your HUD displays the primary objective “Kill all enemies” alongside two critical status icons representing towers and ships. When either icon appears illuminated in red with accompanying numerals, you must eliminate the indicated threats to advance the engagement.
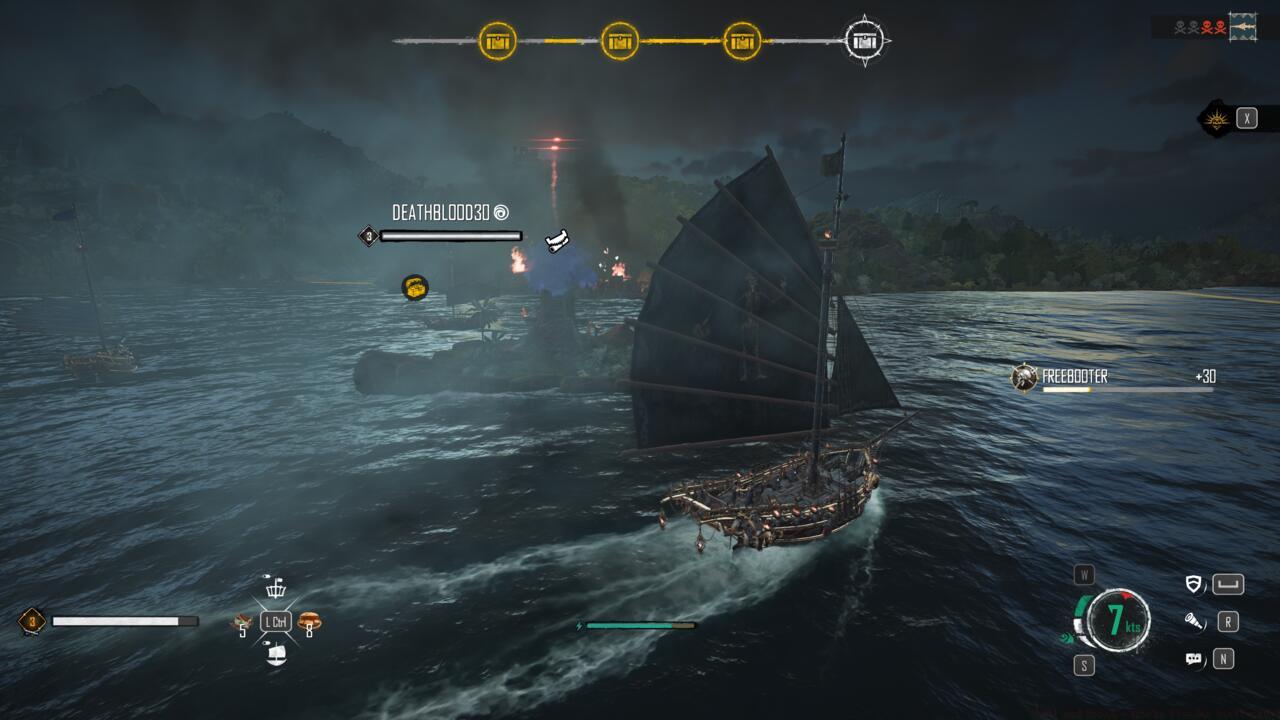
The plunder progression system operates through four distinct combat stages, each marked by a treasure chest icon at your screen’s top. Completing each phase requires defeating all designated enemies, after which a new treasure chest materializes in the water for immediate looting. This structured approach ensures methodical progression through increasingly challenging enemy waves.
Upon defeating the final wave and collecting the fourth chest, a concluding cinematic shows your crew returning victorious, accompanied by the “Plunder Completed” notification. Each location features a cooldown period before becoming available for subsequent attacks, requiring strategic rotation between multiple targets for continuous resource acquisition.
Ship preparation fundamentally determines plunder success rates. Prioritize upgrading your vessel’s armor plating and offensive capabilities before attempting higher-level settlements. The difference between success and catastrophic failure often lies in having sufficient hull integrity to withstand concentrated enemy fire from multiple directions.
Weapon selection requires careful consideration of engagement ranges and enemy types. Long-range artillery proves invaluable against stationary guard towers, while broadside cannons deliver devastating damage against hostile ships during close-quarters combat. For comprehensive armament guidance, consult our BF6 Weapons Unlock Guide to understand optimal loadout configurations.
Progression strategy should begin with lower-level territories to accumulate resources and experience before advancing to more fortified settlements. This graduated approach allows captains to refine their combat techniques while minimizing the risk of overwhelming enemy encounters that could deplete valuable resources.
Advanced captains should develop specialized approaches for different settlement types, adjusting tactics based on defensive layouts and enemy composition. Mastering these variations significantly improves efficiency and reduces completion times for repeat plundering operations.
Action Checklist
- Scan map for settlements without fast travel icons and with visible guard towers
- Approach target and select ‘Plunder’ option to initiate combat sequence
- Monitor red-lit tower and ship icons, eliminating all indicated enemies
- Collect treasure chest after each completed stage (four total required)
- Complete final stage and await ‘Plunder Completed’ notification
- Note cooldown period and rotate to alternative targets for continuous farming
No reproduction without permission:SeeYouSoon Game Club » Skull And Bones – How To Plunder Settlements Master Skull and Bones plundering with strategic combat tactics, settlement targeting, and loot optimization