TL;DR
- Harriet remains stationary in Karl’s Bay Hangar 2 during morning hours only
- Multiple infiltration routes available including stealth, vertical, and direct assault
- Her poison cloud weapon requires specific countermeasures and positioning
- Optimal execution requires careful timing and route selection based on your loadout
- Advanced players can complete the takedown in under 5 minutes with proper planning
This formidable Visionary leader has established her stronghold within Karl’s Bay, presenting a challenging but manageable elimination target for skilled operatives.
Mastering Harriet’s elimination in Deathloop demands strategic planning and precise execution, similar to other Visionary targets. For players pursuing an optimized playthrough sequence, Harriet typically becomes your initial primary target when systematically gathering Visionaries. The approach to her location involves complex navigation, consistent with Deathloop’s intricate level design. This guide details her elimination through the Chaos Theory narrative mission framework.
Harriet represents a distinctive assassination objective within Arkane’s immersive sandbox environment because she maintains permanent residence at her Karl’s Bay command center. Here she commands a devoted group of Eternalist followers, creating an isolated community reminiscent of historical cult leaders. Consequently, you must confront her specifically within Karl’s Bay, exclusively during morning operational windows.
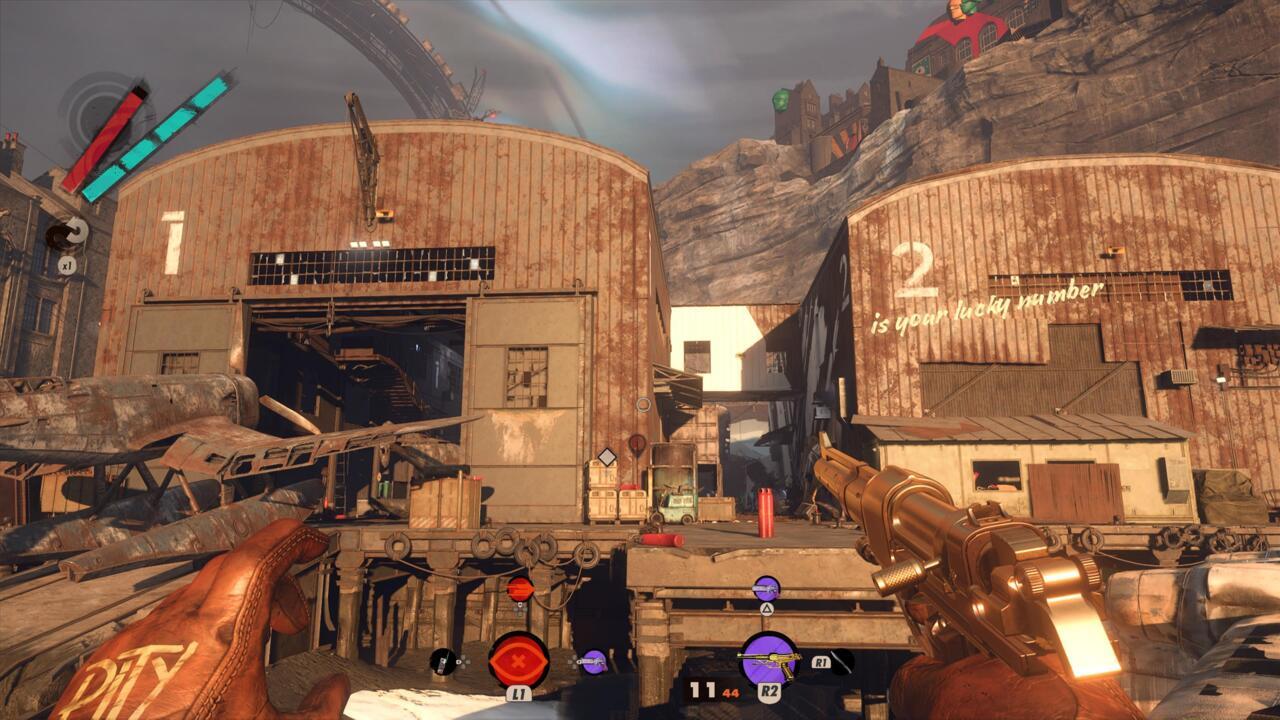
Harriet’s predictable stationary behavior simplifies target tracking, though her fortified position presents significant entry challenges. At Karl’s Bay’s remote sector, you’ll encounter two substantial aircraft hangars, clearly marked with numerical identifiers 1 and 2. Harriet consistently occupies hangar number 2. Multiple infiltration methodologies exist for accessing this structure, reflecting Arkane’s signature gameplay philosophy.
Harriet maintains permanent residence within hangar 2, providing consistent target location.
Harriet waits in hangar 2, always.
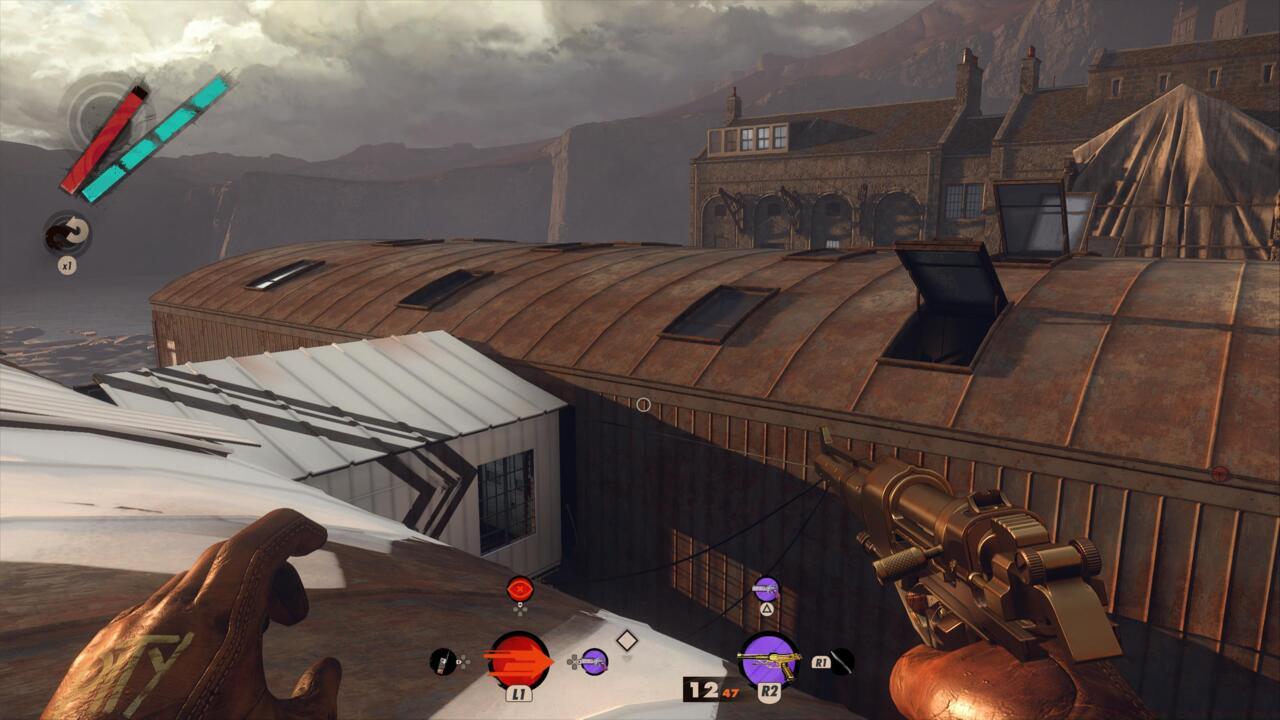
Operators can ascend to the hangar’s rooftop utilizing enhanced mobility through double-jump capabilities and Shift slab functionality. The Aether Slab enables covert movement past numerous security personnel in hangar 1, followed by transition through the inter-hangar connector corridor. Alternatively, you might employ direct assault tactics, eliminating all opposition and proceeding through the main entrance.
Regardless of your selected methodology, Harriet will be present at the location, though her alert status and combat readiness will vary based on your approach. Successful stealth infiltration reveals her positioned within a suspended aircraft cockpit, addressing her disciple followers. Approaching from frontal or lateral directions reveals no accessible entry points on her right side, though left-side covert access presents several possibilities.
My recommended approach involves crouching beneath the partially elevated garage-style door at ground level. While appearing marginally insufficient for passage, one specific location permits squeezing underneath due to terrain deformation—or simply utilizing Shift translocation to bypass the obstacle. Another option involves ascending structural supports and overhead framework to access her upper-level bedroom window, though this demands Aether Slab utilization for silent operation, given the window’s tripwire security system.
There are always many right answers to a problem in an Arkane game.
Arkane’s design philosophy consistently provides multiple viable solutions for every tactical challenge.
After achieving infiltration and establishing position behind defensive lines on the left flank, you can advance to her operational level. Her chamber typically contains two or three Eternalist subordinates. Eliminate them using your preferred methodology, but recognize that audible engagement will trigger Harriet’s aggressive response; she employs specialized ammunition generating toxic cloud formations, causing rapid health deterioration.
Advanced operators should consider bringing toxin-resistant equipment or utilizing ranged weaponry to maintain distance from her chemical attacks. Her poison clouds persist for approximately 8-10 seconds, creating area denial zones that complicate close-quarters combat. The Strelak Verso pistol’s dual-wield capability proves particularly effective for rapid target elimination before she can deploy her chemical arsenal.
For stealth-focused approaches, the Sepulchra Breteira sniper rifle enables elimination from the hangar’s upper catwalks, though this requires precise positioning and timing to avoid alerting other guards. The Nexus Slab presents another strategic option, allowing you to link multiple Eternalists and eliminate them simultaneously when you dispatch one.
Seasoned players can optimize this elimination by combining Shift and Aether slabs for nearly undetectable infiltration. The entire operation, from map entry to target confirmation, can be completed in under five minutes with proper route planning. Common mistakes include triggering the hangar’s alarm system, which reinforcements from adjacent areas, or attempting direct confrontation without countermeasures for Harriet’s poison weaponry.
Strategic timing within the morning window proves crucial—arriving too early results in insufficient Intel gathering, while delayed arrival reduces available extraction time. The connecting hallway between hangars 1 and 2 often contains valuable intelligence documents that can inform your approach to other Visionary targets.
For players struggling with this elimination, consider revisiting during afternoon hours to gather additional reconnaissance about guard patrol patterns and environmental hazards. This intelligence significantly improves success probability during subsequent morning attempts.
Action Checklist
- Select morning time period and travel to Karl’s Bay
- Approach Hangar 2 using preferred infiltration method (stealth recommended)
- Eliminate Eternalist guards silently using Nexus or Aether slabs
- Engage Harriet with rapid-fire weapons before she deploys poison clouds
- Collect loot and utilize any available escape routes
No reproduction without permission:SeeYouSoon Game Club » How To Kill Harriet In Deathloop: Chaos Theory Guide Master the strategic takedown of Harriet in Deathloop with optimal routes, timing, and loadout recommendations