TL;DR
- Six Mythic Tales offer legendary weapons and techniques through extended side quests
- Complete main story missions and Tales of Tsushima to unlock Mythic Tales naturally
- Each region contains specific Mythic Tales that become available as you progress
- Strategic preparation and NPC interaction are key to locating and completing quests
- Mythic rewards significantly enhance combat capabilities against Mongol forces
Ghost of Tsushima features an extensive collection of side content that expands beyond the main narrative, with Mythic Tales representing the most rewarding optional quests available. These extended missions provide access to legendary weapons and combat techniques that dramatically improve your effectiveness against the Mongol invasion forces.
Important Note: This guide maintains minimal spoiler content to preserve your gameplay experience while providing essential assistance. If you prefer completely blind exploration, bookmark this resource for later reference when you need direction finding these challenging quests.
While exploring Tsushima, you’ll encounter standard Tales of Tsushima that offer character development and world-building through vignette-style missions. Mythic Tales constitute a separate category of premium side content featuring more complex objectives and substantially greater rewards. Successfully completing these quests grants access to game-changing abilities and equipment unavailable through other means.
The game contains exactly six Mythic Tales scattered across the island, with availability primarily gated by your progression through both main story missions and regular side content. Each quest follows a structured unlocking pattern that becomes accessible after reaching specific milestones in your journey.
Unlocking mechanics for Mythic Tales follow a predetermined mission completion threshold that can be challenging to track manually. However, consistent engagement with story content and standard Tales of Tsushima will naturally trigger their appearance. A reliable verification method involves visiting settlement areas after completing significant story segments to check for NPCs who may provide location hints through dialogue cues.
For comprehensive assistance beyond Mythic Tales, explore our extensive Complete Guide covering all aspects of gameplay from basic mechanics to advanced strategies.
Mythic Tales distribute across Tsushima’s three main regions according to your story progression through the game’s acts. Each geographical area contains specific legendary quests that become available as you advance the main narrative.
- Izuhara Region — Act 1
- The Legend of Tadayori
- The Heavenly Strike
- The Curse of Uchitsune
- Toyotoma Region — Act 2
- The Unbreakable Gosaku
- The Spirit of Yarikawa’s Vengeance
- Kamiagata Region — Act 3
- The Six Blades of Kojiro
Regional Progression Strategy: Focus on completing all available content within each region before advancing to the next story act. This approach ensures you don’t miss any Mythic Tales that may become inaccessible later. Izuhara contains the highest concentration with three quests, while Toyotoma offers two, and Kamiagata concludes with one final legendary tale.
Location discovery often occurs organically through exploration, but targeted searching around temples, sacred sites, and populated settlements increases your chances of encountering the NPCs who initiate these quests. Pay particular attention to musicians telling stories at crossroads, as they frequently provide the starting points for Mythic Tales.
The Legend of Tadayori
This archery-focused quest becomes available early in Act 1 after completing the first few main story missions. Located in the Azamo region of Izuhara, it rewards players with Tadayori’s Armor, which significantly enhances archery capabilities including increased concentration duration and arrow damage.
The Heavenly Strike
Accessible in the Komoda region of Izuhara during Act 1, this quest teaches a powerful sword technique that can break through enemy guards. The Heavenly Strike consumes resolve but proves invaluable against heavily armored opponents throughout your journey.
The Curse of Uchitsune
Found in the Hiyoshi region during Act 1, this quest grants the legendary Half Bow upgrade and explosive arrows. The challenging platforming sections require precise movement and timing to navigate the cursed areas successfully.
The Unbreakable Gosaku
This Toyotoma Region quest available in Act 2 provides Gosaku’s Armor, which enhances staggering capabilities and restores health upon breaking enemy guards. This defensive armor set becomes essential for melee-focused combat styles.
For weapon-specific strategies and unlock requirements, consult our detailed Weapons Unlock guide covering optimal loadouts for different playstyles.
Quest Progression Optimization: Complete 2-3 main story missions and 4-5 Tales of Tsushima between checking for new Mythic Tale availability. This balanced approach ensures steady progression without excessive grinding or backtracking.
Common Mistakes to Avoid: Many players attempt Mythic Tales underprepared, leading to frustrating failures. Ensure your character has adequate combat skills, necessary equipment upgrades, and sufficient resolve capacity before undertaking these challenging quests.
Combat Preparation: Before starting any Mythic Tale, upgrade your preferred weapons and armor to at least mid-tier levels. Stock up on ammunition and consumables, as several quests feature extended combat sequences without resupply opportunities.
Time Investment: Each Mythic Tale typically requires 30-45 minutes to complete, with some more complex quests taking up to 60 minutes. Plan your gameplay sessions accordingly to avoid中途放弃 due to time constraints.
Class and Loadout Considerations: While Ghost of Tsushima doesn’t feature traditional classes, your equipment choices create distinct playstyles. For guidance on optimizing your approach, reference our comprehensive Class Guide for strategic recommendations.
Exploration Benefits: Thoroughly investigate the areas surrounding Mythic Tale locations, as many contain hidden supplies, vanity items, and additional lore that enhances the overall experience.
Ghost of Tsushima’s Mythic Tales represent some of the most rewarding side content in the game, offering legendary equipment and powerful techniques that dramatically enhance your combat effectiveness. These multi-stage quests are scattered across all three regions and become available as you progress through the main story missions. Successfully completing these challenges requires both exploration skills and combat mastery.
Each Mythic Tale follows a structured format: you’ll first encounter the storyteller Yamato, follow environmental clues using the Guiding Wind mechanic, and ultimately face formidable opponents in intense duels.
The Legend of Tadayori
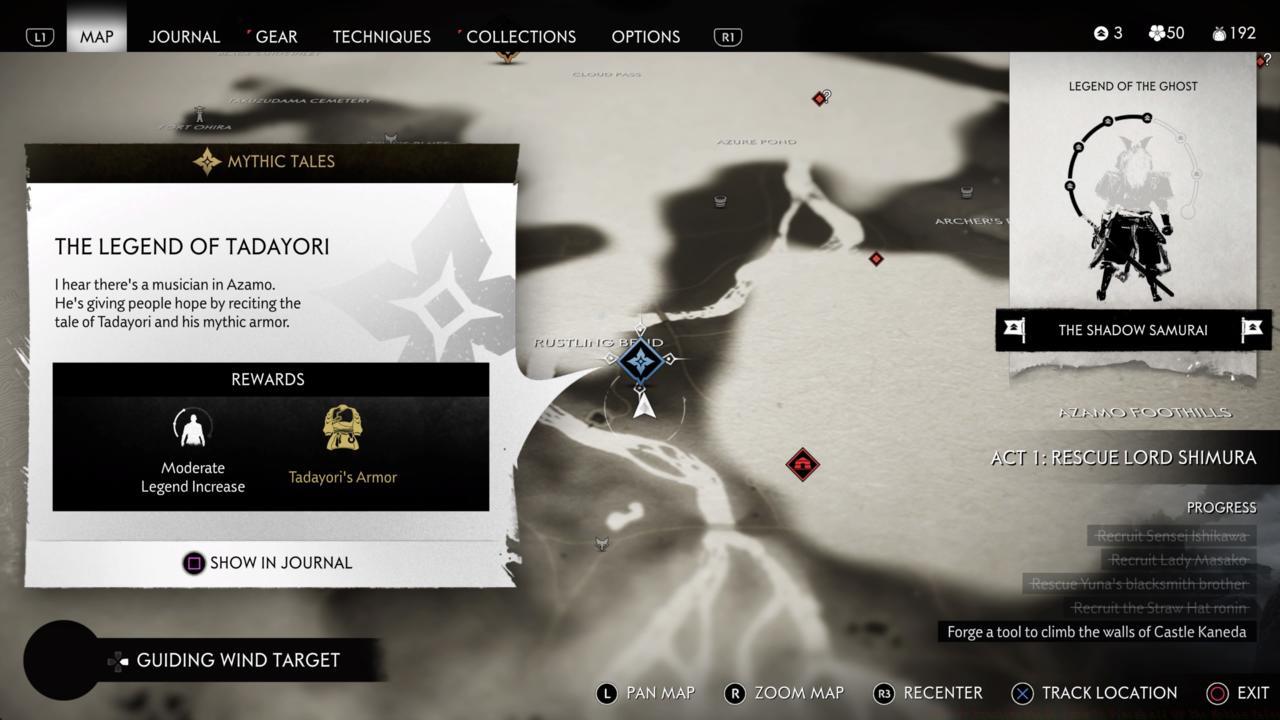
Location: South of the river at the Rustling Bend
Begin by speaking with Yamato, then utilize the Guiding Wind navigation system to locate violet flowers east of Archer’s Rise. These floral markers guide you toward Crown of Violets hilltop, where examining the altar reveals a painting directing you to the subsequent destination. Navigate northward to Houren’s Pasture, searching for the distinctive mountain blanketed in purple blossoms.
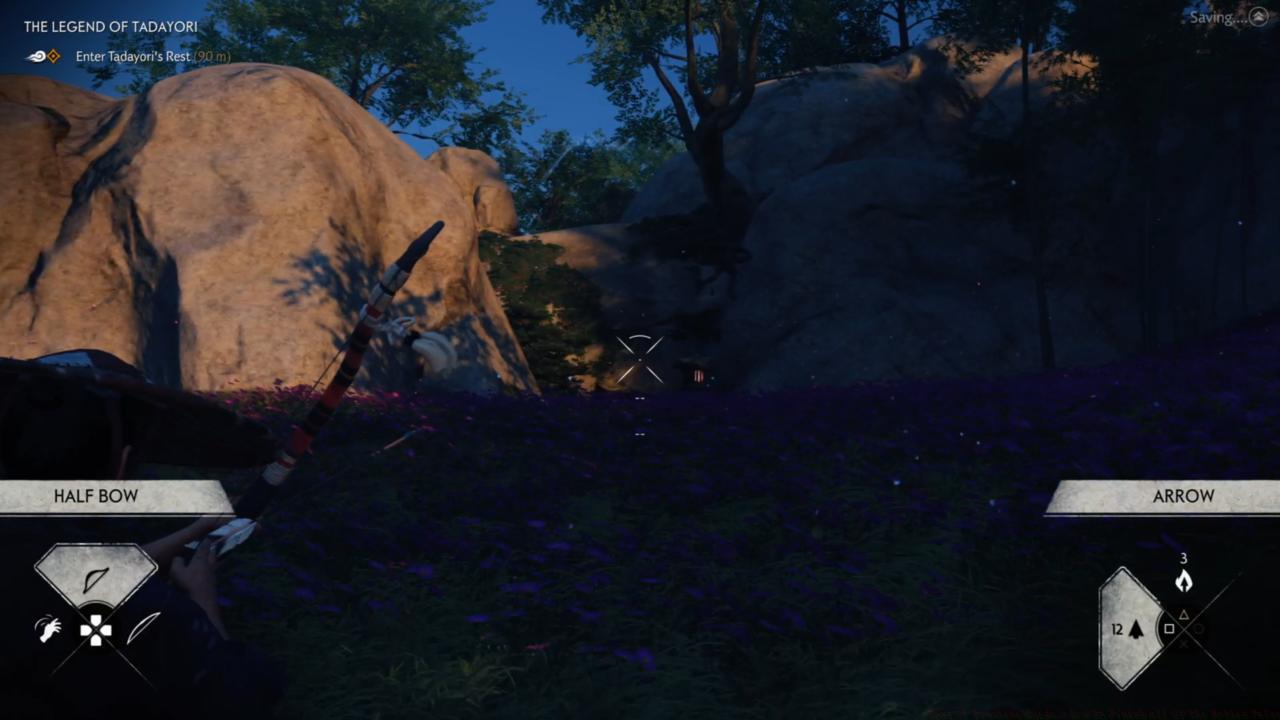
Alternative entry points exist, but this specific cliff face contains the primary access point.
Upon entering Tadayori’s Rest, thoroughly search the area for valuable supplies before approaching the distant altar. This triggers an immediate duel sequence against Kaeda, whose combat pattern features predominantly unblockable strikes that require precise parrying timing. Defeating her reveals your next objective: Azamo Bay.
Travel southward toward Azamo Bay, ascending the mountain directly north of the settlement until violet flowers become visible. At the summit, you’ll discover Mongols holding Yamato captive. Employ stealth tactics by eliminating archers positioned on elevated terrain first, then systematically dispatch remaining guards while preventing them from executing their hostage.
Maintain constant awareness of Mongol movements toward Yamato to ensure his survival.
After securing Yamato’s freedom and obtaining Tadayori’s Armor, prepare for an additional Mongol assault. This specialized armor significantly improves arrow draw speed, reload velocity, and extends Concentration duration. Headshot eliminations now replenish more of your Concentration meter, enabling extended slow-motion aiming periods. Leverage these enhanced capabilities to neutralize approaching enemies from distance whenever feasible. Your primary objective remains protecting Yamato from harm throughout this engagement.
The Heavenly Strike
Location: South of River Falls Bridge (Unlocked only after completing enough missions. For us, it became available after completing The Tale of Sensei Ishikawa)
Converse with Yamato initially, then track the Guiding Wind to a bridge area where weeping sounds emanate. Descend to engage with the distressed woman beneath the bridge structure. Cross the waterway and return to surface level to identify horse tracks along the earthen path. Pursue these markings to their terminus at a Mongol encampment, eliminating all hostile forces present.
Proceed westward along the path leading to Plum Blossom Shinto Shrine, ascending completely until reaching the shrine containing Charm of Kagu-Tsuchi. From this vantage point, identify the mountain featuring the distinctive white-leafed tree you’re seeking. Survey the surrounding terrain to locate additional specimens of these rare trees.
Continue eastward along the trail until encountering a Mongol outpost where peasants endure torture. Liberate the camp and free the captive to obtain additional directional information pointing toward a southeastern beach location.
Maintain optimal combat spacing when confronting Yasuhiro to effectively counter his techniques.
With the area secured, you’ll immediately engage in a boss confrontation against the ronin Yasuhiro. His combat style emphasizes speed, though his move set remains manageable with proper attention. He frequently employs the Heavenly Strike technique, which cannot be blocked—requiring timely evasion followed by counter-attacking as he passes. Standard attacks can be parried for significant damage, or you may attempt to disrupt his balance using heavy strikes. Avoid overextending your offensive maneuvers and create distance when requiring healing opportunities. Once sufficient damage is inflicted, you’ll acquire the Heavenly Strike ability; utilize this new technique to conclude the engagement.
The Curse of Uchitsune
Location: Hiyoshi Springs (Unlocked only after completing enough missions. For us, it became available after completing the Blood on the Grass)
Listen to Yamato’s narrative at Hiyoshi Springs, then track the Guiding Wind toward blue floral concentrations along the coastline. Travel east from Hiyoshi Springs to discover Uchitsune’s Tomb cave entrance. Interior examination reveals a painting directing you toward an island completely covered in blue blossoms.
The illustrated island resides southeast of Castle Kaneda, requiring northward coastal navigation until visual contact is made, then swimming to reach it. Another painting inside guides you back toward Hiyoshi Springs, specifically targeting a mountain featuring blue flowers. Return to Hiyoshi Springs via fast travel, then proceed due west to locate the mountain and claim the longbow from its shrine.
Success hinges on reaching the approximate location, then precisely following the blue floral trail markers.
This sequence culminates in a boss encounter against the enigmatic Tengu Demon you’ve previously encountered. His rapid assault patterns pose challenges, though only his swift strike maneuver presents significant threat. Parrying his standard attacks proves relatively straightforward, while his kicking techniques require dodging. When he positions his hand on his sword hilt, immediately create distance and prepare for evasion, as he’s initiating a powerful offensive sequence. If you possess Heavenly Strike capability, this represents an ideal opportunity to deploy it for rapid damage infliction.
The Unbreakable Gosaku
Location: A short ways southeast of Akashima village. You’re likely to run into it on your way through the area. This Mythic Tale can be found immediately after starting Act 2.
Engage Yamato in conversation to learn about the legendary armor set once worn by farmer Gosaku. Following his narrative completion, your mission objective becomes locating Gosaku’s legendary armor. This requires obtaining specialized keys safeguarded at six distinct agricultural settlements across the island.
A noteworthy aspect of this quest involves the potential to discover the required keys organically before initiating the formal mission. However, accessing Gosaku’s Armor ultimately requires the initial conversation with Yamato to activate the complete quest chain.
After clearing each location, direct your attention toward the staircase accessing the secured stone entrance.
Upon successfully retrieving all six keys, journey to the Togo Rice Fields in Toyotoma’s southern sector. Proceed eastward to identify the hilltop concealing Gosaku’s armor. Multiple Mongol sentries protect the entrance, though you can efficiently eliminate them using ranged weapons if preferring to avoid direct confrontation.
The Six Blades of Kojiro
Location: Umugi Cove after clearing the first section of the story mission there called A Message in Fire.
Locate Yamato near Lady Sanjo’s establishment on Umugi Cove’s ground level. Through dialogue, you’ll learn about six ronin actively hunting you. Their leader Kojiro plans to personally eliminate you, employing his five subordinates to commit atrocities throughout the island, thereby challenging you to individual combat at predetermined locations.
Similar to The Unbreakable Gosaku, this quest necessitates completing distributed objectives across the game world before unlocking the finale. The primary distinction involves engaging in demanding duels rather than liberating occupied territories.
Although each ronin opponent demonstrates unique attack patterns, the fundamental combat strategy remains consistent across encounters. Victory depends on maintaining appropriate spacing, executing well-timed evasions, and delivering effective counter-strikes. Exercise restraint during retaliation phases, limiting yourself to two or three strikes before resetting position—though successfully staggering opponents creates ideal opportunities for extended assault combinations.
Kojiro’s lunging maneuver represents his most frequently utilized and dangerous attack, making it your highest priority for parrying execution.
Following all five ronin defeats, return to Umugi Cove to consult with Yamato, who reveals Kojiro’s location at Omi monastery northwest of Lucky Genzo’s Inn. Upon arrival, follow the Guiding Wind toward a small mountain adjacent to water, containing an accessible opening.
The Spirit of Yarikawa’s Vengeance
Location: West of Rebel’s Last Stand, and it can be found immediately after starting Act 2.
Locate Yamato positioned just west of Rebel’s Stand. After receiving the narrative, enter Old Yarikawa searching for prominent white smoke plumes in the northwestern sector near the riverbank. Scroll examination provides additional guidance: the Spirit of Yarikawa is being petitioned to assault Mongol forces camped along the river. Proceeding forward, you should observe fire and ember effects highlighting your destination path.
Identify billowing white smoke columns matching this visual description to progress.
Your subsequent shrine destination lies directly north. This directs you toward Garden of the Gods at Old Yarikawa’s southern extremity. While conversing with peasants yields informational benefits, the smoke and firefly visual cues provide more substantial directional assistance.
The Undying Flame
Location: North of Jogaku Temple
Travel to Mount Jogaku’s base to hear Yamato recount the Undying Flame legend. This ascent introduces unique environmental hazards: extreme cold conditions that progressively damage Jin unless he regularly warms himself at bonfires. Navigate from fire to fire, carefully plotting each segment of your route while maintaining awareness of retreat options if temperatures become dangerously low.
The mountain climb also features strategically positioned canine enemies that will aggressively attack. Optimal strategy involves scouting their positions from safety, then returning to your previous fire location to eliminate them using projectile weapons before proceeding.
Maintain consistent forward momentum while carefully managing temperature exposure risks throughout the ascent.
Continue progressing until reaching a gap requiring iron hook traversal. From this point, scale the cliffside to reach the subsequent fire location. The upcoming section contains multiple canine threats; attempt to draw them toward your position before advancing—you’ll need to eliminate approximately four before reaching the next warming point.
Following your arrival at the samurai-guarded fire, the route continues leftward toward rock formations featuring a fallen tree trunk summit. Ascend and cross the tree, then identify an appropriate location for deploying the iron hook leftward to cross the chasm. The following fire remains invisible until reached, requiring you to activate it before regaining warmth, potentially sustaining damage during this process.
Next, proceed forward and ascend to reach a slackline crossing. Follow this to an iron hook jump location, then another leftward jump. Two consecutive swings are necessary to completely traverse the gap and ignite the subsequent fire.
This represents the final segment. Advance rapidly and utilize the iron hook to swing toward wall handholds. Climb upward, remaining vigilant for the bear that has captured another climber. At this juncture, leap the gap and sprint directly toward the ahead dojo structure.
Remain extremely cautious of Bettomaru’s unblockable flaming attacks throughout the engagement.
Bettomaru’s standard combat form presents moderate difficulty—his most threatening maneuver being a rapid thrust attack that may surprise you. When his blade ignites, the encounter transforms dramatically, as all his strikes become unblockable and will set you ablaze upon contact. He employs three- and four-strike combinations, with the fourth attack deliberately delayed to disrupt your evasion timing. Rather than maintaining close proximity and attempting to dodge all assaults, prioritize repeated rolling maneuvers to maintain safe distance. You might identify brief attack windows following his fourth strike, though parrying during his non-flaming phases proves more reliable.
Mid-engagement, you’ll acquire the Way of the Flame technique. When activated, your own attacks become unblockable, enabling you to retaliate with equivalent force. Exercise caution to avoid being struck by his rapid thrust or flaming sword techniques, but when opportunities arise, aggressively assault him until the confrontation concludes. Since this constitutes training rather than lethal combat, you only need to deplete approximately two-thirds of Bettomaru’s health pool to achieve victory.
Mastering Mythic Tales requires more than basic sword skills—you need strategic approaches to each unique challenge. For duels against ronin like Yasuhiro and Kojiro, focus on identifying their specific attack tells rather than relying on reaction speed alone.
Stealth Optimization: When facing multiple enemies, always prioritize eliminating archers and ranged threats first. Their elevated positions and distance attacks pose the greatest threat to both you and any hostages you must protect.
Environmental Awareness: The Undying Flame demonstrates how terrain hazards can be as dangerous as enemy blades. Always plan your route with retreat options in mind, especially when environmental damage accumulates over time.
Resource Management: Thoroughly explore each area before progressing—many Mythic Tale locations contain valuable supplies that significantly aid your journey.
For players seeking comprehensive guidance through Tsushima’s legendary narratives, our detailed Tales of Tsushima walkthrough provides extensive coverage. We offer numerous specialized guides to maximize your gaming experience, including our complete Ghost of Tsushima guide compendium and in-depth game analysis reviews.
The initial game region features multiple Mythic Tales, with The Legend of Tadayori serving as your introductory encounter. This quest becomes accessible on your map after completing one primary story mission during Act 1. Additional mythic tales progressively unlock as you advance through main narrative arcs and secondary storylines.
Location: South of the river at the Rustling Bend
Upon conversing with Yamato, utilize the Guiding Wind navigation system to travel east from Archer’s Rise. You’ll discover violet blossoms forming a visible trail ascending toward a modest elevation known as the Crown of Violets. Scale this summit and inspect the ceremonial platform at its peak to uncover pictorial guidance directing you toward subsequent destinations. Your objective involves locating a mountain abundantly covered with purple flora—proceed northward to identify this landmark within Houren’s Pasture. Navigate to the mountain’s foundation at Tadayori’s Rest, where a sacred site awaits, permitting access through a crevice in the rock formation to discover the interior passageway.
Resourceful explorers might identify alternative entry points to Tadayori’s Rest, though this specific cliffside contains the primary aperture granting interior access.
Pro Tip: The violet flower trails serve as critical visual markers—following them precisely prevents unnecessary detours and ensures efficient quest progression. Many players waste valuable time exploring incorrect paths when the floral guidance provides the most direct route.
Proceed to the central area of Tadayori’s Rest and thoroughly search for provisions and additional items, then examine the ceremonial platform at the distant extremity. You’ll immediately engage in combat afterward. Defeating Kaeda presents moderate challenge, as she employs limited unstoppable attacks, enabling effective counter maneuvers to secure relatively swift victory. She provides your subsequent objective direction: Azamo Bay. Journey southward toward the settlement.
Combat Strategy: Kaeda’s attack pattern features three distinct unblockable strikes preceded by specific animation cues. Learning these visual signals allows precise parry timing, transforming the duel from challenging to manageable. Advanced players can complete this encounter in under 90 seconds with proper timing.
Travel south toward Azamo Bay and ascend the elevation immediately north until violet blossoms become visible. At the summit, you’ll discover Mongolian forces have captured Yamato, your initial quest provider. Eliminate them while ensuring they cannot harm their captive. We recommend stealthily scaling the slopes initially and silently dispatching the bowmen positioned on both flanks before confronting remaining combatants.
Remain vigilant for Mongolian soldiers directly advancing toward Yamato.
Stealth Approach: The elevated archers possess extended sightlines that can compromise your approach. Utilizing tall grass and terrain features for concealment while systematically eliminating ranged threats first significantly increases mission success probability. Failing to prioritize archer removal often results in Yamato’s premature death and quest failure.
After conversing with Yamato and acquiring Tadayori’s legendary armor, you must repel an additional Mongolian assault wave. The armor enhances your arrow drawing and reloading velocity while extending your total Concentration duration. Precision headshots additionally replenish greater portions of your Concentration gauge, guaranteeing maximum available time for accurate targeting. Leverage these advantages to eliminate approaching adversaries from distance when feasible. Your principal objective remains preventing Mongolian forces from slaying Yamato. After dispatching sufficient enemies, you’ll conclude the Tale and obtain substantial Legend advancement.
Ghost Of Tsushima News
Advanced Tactics: The Tadayori Armor’s concentration extension enables chain headshot sequences against multiple targets. Combining this with appropriate Class Guide strategies creates devastating ranged combat effectiveness. For players seeking comprehensive weapon mastery, our Weapons Unlock guide provides additional combat optimization techniques.
Prepare to confront the elusive Tengu Demon in an intense boss encounter that tests your combat reflexes. While his speed can be intimidating, focus primarily on countering his rapid sword strike – this is his most dangerous move. Most of his kick combinations and standard attacks can be reliably parried with proper timing. When you observe him placing his hand on his sword hilt, immediately create distance and ready your dodge maneuver, as this signals an imminent powerful charge attack. If you’ve unlocked the Heavenly Strike technique, deploy it strategically during openings to inflict significant health damage quickly.
Upon defeating the Tengu Demon, you’ll be rewarded with Uchitsune’s Longbow alongside the capability to shoot explosive arrows. Additionally, you’ll receive a substantial Legend progression boost that advances your character development.
The Toyotoma territory features a limited number of Mythic Tales, all conveniently accessible from the beginning of Act 2. These particular questlines reward you with some of the most formidable abilities and protective gear available throughout your journey.
Location: Situated slightly southeast of Akashima village. You’ll likely encounter this quest naturally while exploring the region. This Mythic Tale becomes available immediately upon starting Act 2.
Speak with Yamato to learn about the legendary armor ensemble once worn by a farmer warrior named Gosaku. After he completes the tale, your objective becomes locating Gosaku’s protective gear. To achieve this, you must secure special keys held at six distinct agricultural settlements across the island. While this sounds straightforward, the Mongol occupation of all local farms necessitates their liberation before you can acquire any keys. The required farms are automatically marked on your map after starting the Mythic Tale, eliminating the need for manual discovery.
An intriguing aspect of this quest is that you can accidentally discover the necessary keys before conversing with Yamato. However, to ultimately claim Gosaku’s Armor, you must initiate the quest through dialogue with him first.
After clearing the area of Mongol forces, direct your attention to the staircase that leads toward the sealed stone entrance.
Once you’ve meticulously gathered all six keys, journey to the Togo Rice Fields in Toyotoma’s southern district. Travel eastward to locate the elevated terrain where Gosaku’s armor remains concealed. Several Mongol sentries protect the entrance, but you can efficiently eliminate them using ranged bow attacks if you prefer avoiding direct confrontation. After neutralizing the guards, access the hill through the secured door at its foundation and ascend to the summit to claim the legendary armor. You’ll also obtain a minor Legend enhancement for your efforts.
Location: Umugi Cove, accessible after completing the initial segment of the A Message in Fire story mission.
You’ll discover Yamato positioned near Lady Sanjo’s establishment on the ground level in Umugi Cove. Engage in conversation, and he’ll inform you about six ronin actively pursuing you. Their commander Kojiro plans to eliminate you personally, but he’s baiting you by having his five subordinates commit violent acts across the island to provoke individual duels at specified locations. This elaborate scheme aims to verify your worthiness to confront him in final combat.
Kamigata region contains one exclusive Mythic Tale that becomes available once you gain entry to Jogaku Temple in the game’s third act. This challenging quest offers substantial rewards for those who complete its treacherous mountain climb.
Location: Northern sector beyond Jogaku Temple
Your journey begins at Mount Jogaku’s base where Yamato recounts the legend of the Undying Flame. Unlike standard exploration sequences, this ascent introduces environmental survival mechanics that demand strategic planning and careful resource management throughout the climb.
The vertical climb presents unique survival challenges with Jin’s body temperature constantly dropping in the frigid conditions. You must navigate between strategically placed bonfires to maintain warmth, as prolonged exposure leads to hypothermia and eventual death. Thermal management becomes your primary concern, requiring you to plot each segment carefully before departing from safety.
Before leaving any bonfire, identify your next thermal objective and assess the route complexity. The critical strategy involves retreating to your previous fire when your cold meter reaches 50% capacity if the next checkpoint appears distant. This conservative approach prevents unnecessary health loss and ensures steady progress.
Hostile canine patrols populate the ascent path, presenting additional hazards. These aggressive animals can immobilize you in freezing conditions, making ranged elimination from bonfire safety zones your optimal tactic. Use your bow to clear paths before advancing, as close combat in open areas risks rapid temperature depletion.
Maintain consistent movement between thermal stations but remain prepared to reverse course when disoriented or excessively chilled. Successful climbers prioritize survival over speed, recognizing that backtracking often proves smarter than pushing forward unprepared.
The climb intensifies with gap-jumping sequences requiring the iron hook tool. After scaling the cliff face to reach the next bonfire, you’ll encounter concentrated canine threats. Lure approximately four dogs toward your position using sound or movement before engaging them from protected areas.
Visibility limitations become significant obstacles as some bonfires remain concealed until you’re practically upon them. Follow the primary path while scanning for climbable surfaces that lead to your next thermal refuge.
Upon reaching the samurai-guarded fire, proceed leftward toward rock formations featuring a collapsed tree trunk summit. Ascend this natural bridge, then identify anchor points for your iron hook to traverse left across the chasm. The subsequent bonfire requires activation upon arrival, potentially incurring health damage during the ignition process.
The route continues upward to a tension line crossing, followed by consecutive iron hook maneuvers. Execute two precise swings to completely clear the gap and access the next thermal station.
Final segment navigation demands rapid forward movement with iron hook utilization to reach wall grips. Scale carefully while remaining vigilant for the territorial bear that claimed previous climbers. After leaping the last chasm, sprint directly toward the mountain summit dojo for your ultimate challenge.
Within the summit dojo awaits Bettomaru, the master guardian who must be defeated to learn the Way of the Flame technique. This duel tests all combat skills acquired throughout your journey, with particular emphasis on defensive timing and counter-attack precision.
Bettomaru employs distinctive unblockable fire-based attacks that demand evasive maneuvers rather than parrying. Study his movement patterns and attack telegraphing to identify safe engagement windows. The battle represents the culmination of your mountain ascent, rewarding perseverance with advanced combat capabilities.
Success in this encounter requires adapting to his unique offensive style while managing the limited space within the dojo environment. Victory grants access to legendary techniques that significantly enhance your combat effectiveness throughout remaining gameplay.
Action Checklist
- Complete 2-3 main story missions to unlock Mythic Tale availability
- Visit settlements after story progression to check for NPC quest givers
- Upgrade primary weapons and armor before attempting Mythic Tales
- Stock up on ammunition and consumables specific to your playstyle
- Allocate 45-60 minutes uninterrupted time for each Mythic Tale completion
- Explore areas surrounding completed Mythic Tales for hidden collectibles and resources
- Complete main story missions to unlock Mythic Tales progressively across all three acts
- Always prioritize eliminating archers first in hostage rescue scenarios
- Utilize environmental markers (flowers, smoke) for navigation
- Master parry timing for ronin duels – practice against regular enemies first
- Thoroughly search each area before progressing to find valuable supplies
- Complete one main story mission in Act 1 to unlock the quest
- Locate Yamato south of Rustling Bend river and initiate dialogue
- Follow violet flower trail to Crown of Violets and examine altar
- Navigate to Tadayori’s Rest, collect resources, and defeat Kaeda in duel
- Rescue Yamato at Azamo Bay using stealth archer elimination strategy
- Utilize Tadayori’s Armor to defeat final Mongol wave while protecting Yamato
- Defeat Tengu Demon using parry tactics and Heavenly Strike
- Liberate all six Mongol-occupied farms marked on your map
- Collect all keys from liberated farms for Gosaku’s Armor
- Travel to Togo Rice Fields and eliminate Mongol guards
- Retrieve Gosaku’s Armor from hilltop location
- Reach Jogaku Temple in Act 3 to unlock the Mythic Tale
- Listen to Yamato’s story at Mount Jogaku base
- Plan bonfire routes and retreat at 50% cold meter
- Eliminate canine patrols from bonfire safety using arrows
- Master iron hook sequences with multiple swings for gap traversal
- Defeat Bettomaru while evading his unblockable fire attacks
No reproduction without permission:SeeYouSoon Game Club » Ghost Of Tsushima Guide – How To Finish All Of The Mythic Tales