TL;DR
- Forsaken features continuous round progression requiring immediate teleporter activation
- Navigate through three teleporter zones with escalating point costs to reach Observation Tower
- Strategic door choices save resources and optimize lockdown lift efficiency
- Teleporter repair requires four components found in specific map locations
- Pack-a-Punch activation enables weapon upgrades essential for late-game survival
This comprehensive guide provides essential strategies for mastering Black Ops Cold War’s final Zombies map, Forsaken, focusing on the critical lockdown lift sequence and Pack-a-Punch activation that transforms your gameplay experience.
Call of Duty Season 6 introduces Forsaken as the concluding round-based Zombies experience in Black Ops Cold War, featuring distinct mechanics that differentiate it from traditional maps. Unlike conventional Zombies gameplay where power activation serves as the primary objective, Forsaken requires players to navigate objective markers systematically to reach the Observation Tower and eliminate the facility lockdown.
The map initiates with an immediate pressure scenario where rounds progress continuously from the outset, creating an urgent need for rapid movement and strategic decision-making. Zombie swarms become increasingly aggressive, making early teleporter activation your top survival priority.
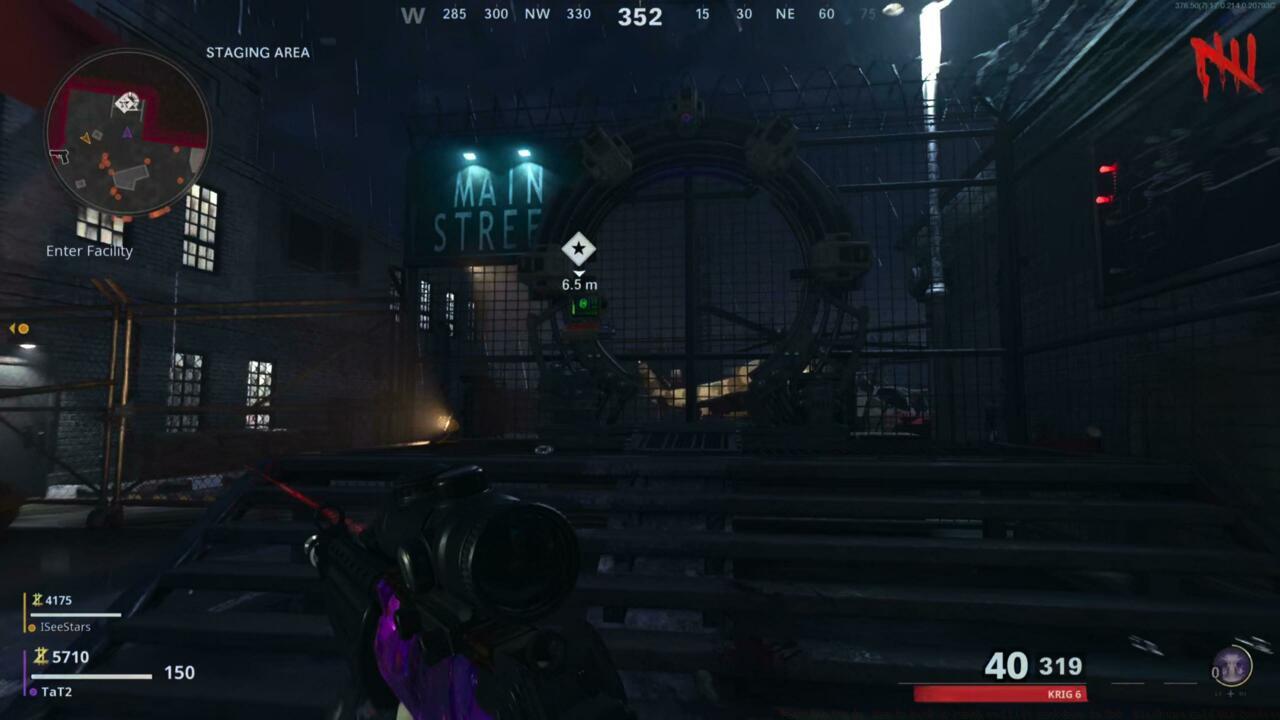
Starting Area teleporter – Your immediate escape route from the initial zombie onslaught
Common early mistakes include wasting time on weapon upgrades before teleporter activation or underestimating the continuous round progression. Advanced players should prioritize acquiring at least 500 points before the first teleporter while maintaining constant movement to avoid being overwhelmed.
The initial teleporter, marked clearly with objective symbols on your minimap, resides immediately to the left of your spawn location. Activation requires no point expenditure but demands strategic timing – interact with the device immediately, then survive the 30-second warmup period while fending off increasingly aggressive zombie waves.
Upon teleportation completion, you’ll emerge in a new area where round progression normalizes, allowing for exploration and strategic planning. Immediately ascend the staircase directly ahead, where your first point investment becomes necessary.
The initial barrier requires 500 points in solo play or 750 points in cooperative modes. This investment grants access to Main Street, where strategic navigation becomes crucial for resource conservation.
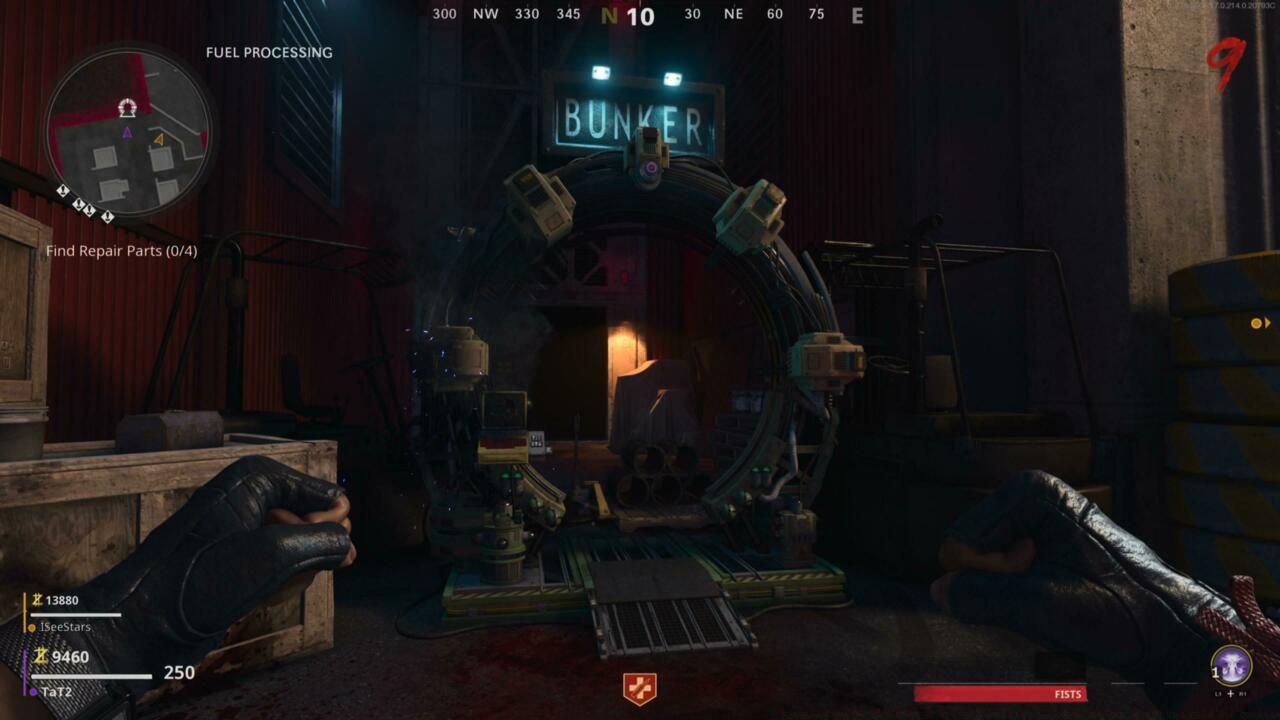
Broken bunker teleporter – The next critical objective requiring component collection
Descend to Main Street’s terminus and locate the High Tide establishment on your left. This secondary barrier demands 750 points (solo) or 1,000 points (co-op), leading to rooftop access and subsequent teleporter activation.
The rooftop presents another obstruction requiring 750 (solo) or 1,000 (co-op) points to proceed. Successful payment enables teleportation to the map’s subsequent sector, where strategic path selection significantly impacts your resource management.
Three distinct routes become available at this juncture: Cinema entrance, TV Repair Shop access, or Video Store Rooftop pathway. Each option consistently costs 1,250 points regardless of play mode or player count.
Strategic optimization favors Cinema or TV Repair Shop selections, as rooftop access provides minimal tactical advantage during initial lockdown lifting. This decision point represents one of several strategic elements that separate novice and expert Forsaken players.
Upon reaching the map’s opposite sector via your chosen pathway, diligently follow objective markers to locate the malfunctioning teleporter unit. This device requires four distinct components scattered throughout the environment to restore functionality.
Cinema’s Focusing Lens highlighted yellow – One of four essential teleporter repair components
Component retrieval typically requires thorough area exploration and often involves minor puzzle-solving elements. Efficient players can complete collection within 2-3 rounds with proper route planning and zombie management.
Teleporter restoration triggers the emergence of Forsaken’s Abomination boss entity. Preparation should include upgraded weaponry, full armor, and strategic positioning near ammo resupply locations.
Forsaken’s Abomination emerging from the teleporter – The boss encounter preceding Pack-a-Punch access
Successful Abomination elimination permanently lifts the facility lockdown and activates the Observation Tower’s Pack-a-Punch machine, enabling weapon upgrades essential for surviving higher rounds.
Forsaken’s Pack-a-Punch machine in the Observation Tower – Your reward for completing the lockdown sequence
Advanced strategy involves preparing specific weapon loadouts before Pack-a-Punch activation. Understanding weapon upgrade mechanics becomes crucial for maximizing your combat effectiveness in subsequent rounds.
Post-activation, the entire map becomes accessible, including previously locked areas containing valuable resources, Easter egg components, and strategic defensive positions for high-round attempts.
Action Checklist
- Immediately activate starting teleporter and survive 30-second warmup
- Navigate through three teleporter zones with escalating point investments
- Choose optimal path (Cinema/TV Repair) saving 1,250 points
- Collect four teleporter repair components while managing zombie waves
- Defeat Abomination boss and activate Pack-a-Punch for weapon upgrades
No reproduction without permission:SeeYouSoon Game Club » Forsaken Guide: How To Pack-A-Punch And Lift Lockdown In CoD: Black Ops Cold War Zombies Master Forsaken's unique lockdown mechanics and Pack-a-Punch activation with advanced strategies