TL;DR
- Proper weight distribution directly affects Sam’s balance, speed, and stamina recovery rates
- Auto-arrange optimizes basic layout but ignores fragile cargo and terrain-specific needs
- Accessory pouches and tool racks provide essential space-saving opportunities for frequent-use items
- Advanced players should manually organize cargo based on delivery priority and environmental challenges
- Mastering manual balance correction prevents falls and protects cargo condition ratings
Effective cargo management forms the core gameplay loop in Death Stranding: Director’s Cut, where every delivery decision impacts Sam’s physical capabilities. Unlike traditional inventory systems, this game implements realistic physics where weight distribution affects not just carrying capacity but movement fluidity and stability. Each additional kilogram alters Sam’s center of gravity, creating tangible consequences for overloaded expeditions.
Monitoring your carried items requires constant vigilance, as even minor additions can create cumulative effects on mobility. The game’s advanced physics engine calculates real-time balance adjustments based on item placement, weight concentration, and terrain elevation changes. Experienced porters learn to anticipate how different cargo combinations will perform across varied landscapes.
Weight directly influences several key metrics: movement speed decreases by up to 40% at maximum capacity, stamina drains 25% faster when overloaded, and balance becomes increasingly precarious with uneven weight distribution. Strategic planning before departure prevents mid-journey adjustments that risk cargo damage.
Below you’ll discover comprehensive strategies for mastering inventory management in Death Stranding, including advanced techniques for handling complex delivery scenarios. These methods build upon fundamental principles while introducing expert-level optimization approaches.
For additional Death Stranding content, explore our detailed beginner’s guide and celebrity cameo compilation. Despite new gameplay elements and Buddy Bot assistance, our original PS4 walkthrough advice maintains its relevance for the Director’s Cut edition.
Maintaining awareness of your current loadout proves crucial during exploration phases. Random cargo collection during travel can rapidly degrade Sam’s physical condition, with stamina depletion and balance impairment occurring gradually then suddenly. Every inventory addition carries consequences that skilled players learn to anticipate and mitigate.
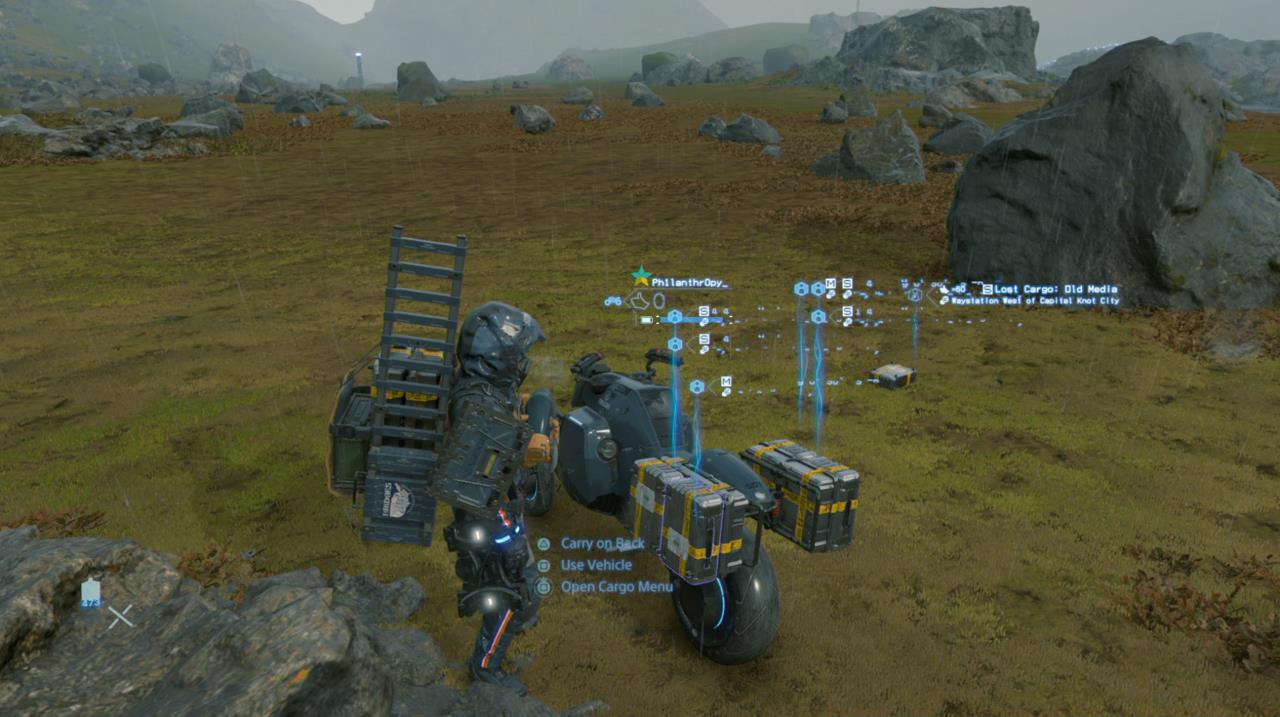
When Sam’s primary backpack compartments reach capacity, additional items stack vertically atop the existing load. While manageable for 2-3 lightweight objects, full stacking creates significant balance challenges that require active compensation. The instability becomes particularly evident during traversal, where minor directional adjustments can trigger severe wobbling, forcing players to manually stabilize the load or risk complete collapse.
Center of gravity mechanics operate with remarkable realism in Death Stranding. Observe Sam’s leaning patterns carefully and respond immediately to the game’s balance correction prompts. Falling not only wastes time but can permanently damage delicate cargo, reducing delivery rewards and reputation gains.
Manual backpack organization provides precision control, but the triangle button auto-arrange function offers quick optimization. This automated system positions heavy items at the bottom while efficiently utilizing all available suit storage slots. It serves as an excellent baseline for load management, though experienced porters often prefer manual adjustments for specialized situations.
The auto-arrange feature’s primary limitation involves its inability to recognize fragile cargo requirements. Automated sorting may place delicate equipment in vulnerable positions or mix incompatible item types. Understanding when to override automated systems separates competent players from delivery masters.
Progression unlocks specialized accessory upgrades that dramatically improve inventory efficiency. Utility pouches automatically consolidate specific item categories like blood packs, creating dedicated storage that doesn’t compete with primary cargo space. These specialized containers receive automatic loading during auto-arrange operations, simplifying management of essential supplies.
Weapon storage represents another significant optimization opportunity. The Bola Gun occupies two case slots in your backpack but only requires one when mounted on your tool rack. Similar space-saving benefits apply to other equipment like grenade pouches and battery packs when properly positioned.
A crucial consideration involves equipment swapping mechanics. When you equip an alternative tool during gameplay, any weapon stored on your tool rack automatically returns to backpack storage. This can create unexpected space issues during combat transitions, so plan tool changes during stable positioning opportunities.
Advanced players should prioritize unlocking all available accessory slots early, as the compounding benefits significantly enhance delivery capacity. The utility pouch alone can free up to 15% of backpack space when fully utilized for medical supplies and repair tools.
Seasoned porters develop cargo organization strategies that account for multiple delivery parameters. Prioritize placement based on destination proximity, cargo fragility, and environmental hazards you’ll encounter. Mountain routes demand different load configurations than river crossings or BT territories.
Common mistakes include over-reliance on auto-arrange, improper fragile item placement, and underestimating terrain-specific challenges. Novice players often maximize carrying capacity without considering how weight distribution affects navigation through specific obstacles.
For maximum efficiency, establish a personal organization template: place frequently accessed tools on outer slots, balance weight evenly left-to-right, and reserve top-stack positions for durable, low-priority items. This systematic approach reduces adjustment frequency and improves overall delivery speed.
Time estimates for mastering these techniques vary, but most players achieve proficiency within 10-15 hours of focused practice. The investment pays substantial dividends through improved delivery ratings and reduced cargo damage incidents.
Death Stranding Guides
Action Checklist
- Manually organize cargo before difficult terrain sections, placing heavy items low and fragile equipment centrally
- Utilize tool racks for weapons and accessory pouches for consumables before resorting to backpack storage
- Practice manual balance correction during light loads to build muscle memory for critical situations
- Establish cargo priority system based on delivery deadlines, fragility, and reward value
- Monitor stamina consumption rates with different load configurations to identify optimal weight thresholds
No reproduction without permission:SeeYouSoon Game Club » Death Stranding Inventory Tips: How Your Inventory Works And How To Best Manage Your Weight Master Death Stranding cargo management with advanced balancing techniques and inventory optimization strategies