TL;DR
- Strategic positioning on the gate ramparts provides critical combat advantages
- Companion selection significantly impacts both battle effectiveness and story outcomes
- Environmental manipulation and area control spells can neutralize enemy advances effectively
- Proper pre-battle preparation reduces casualties and unlocks valuable post-battle rewards
- Understanding faction dynamics prevents permanent party member loss and quest failures
Successfully defending the Tiefling refugees against the relentless Goblin assault represents one of Baldur’s Gate 3’s most emotionally impactful narrative moments. This pivotal conflict during Act 1 forces players to make consequential decisions that permanently shape their playthrough’s trajectory. Our comprehensive guide delivers actionable strategies for securing victory while preserving maximum story content and companion relationships.
The Druid Grove siege presents a complex moral dilemma where your choices determine faction survival rates. Each decision carries weighty repercussions, from permanent companion departures to altered quest availability in later acts. Mastering this encounter requires understanding both combat mechanics and narrative consequences.
The Save the Refugees quest unfolds through multiple interconnected phases, with our focus centered on optimizing the climactic battle sequence. Here’s what strategic preparation entails:
Strategic wizardry becomes indispensable for controlling the battlefield. Characters like Gale, or any wizard-class protagonist, provide essential capabilities through spells such as Scorching Ray and area denial options.
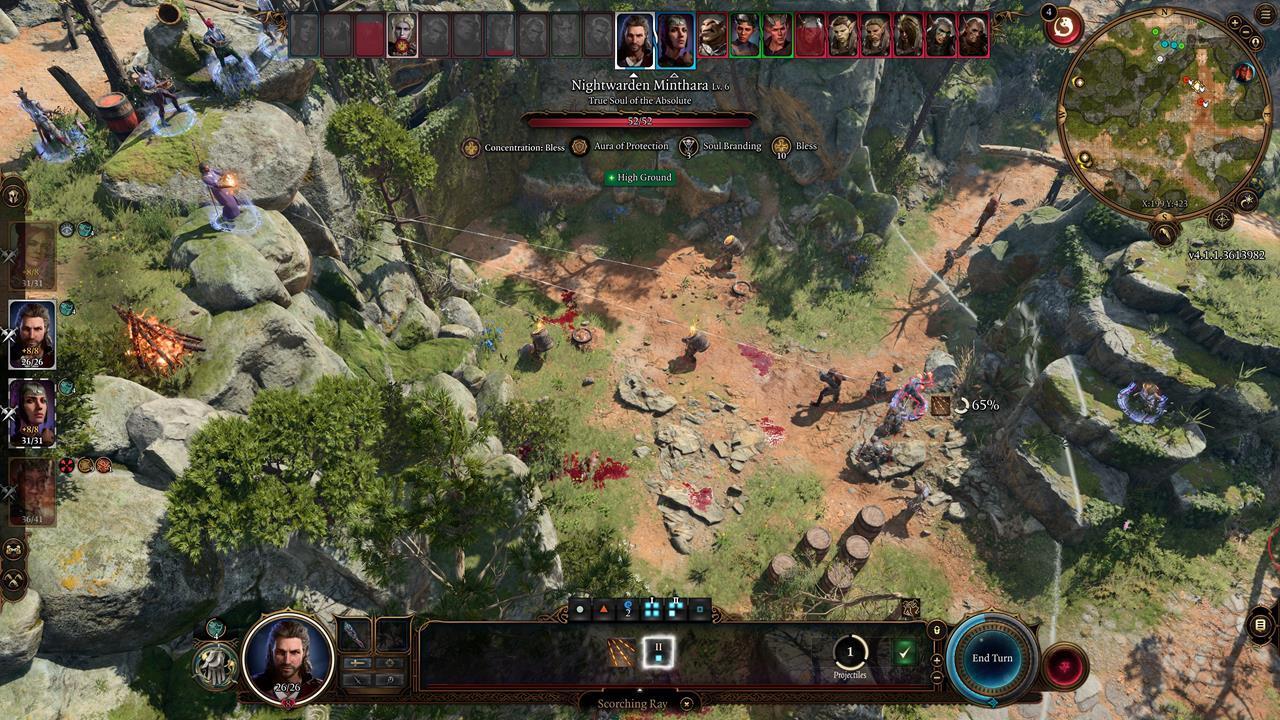
Position casters on elevated positions to maximize spell effectiveness and minimize enemy retaliation.
Assuming Minthara’s invasion force stands ready to attack, and you’ve successfully deceived her regarding your allegiance, simply complete a long rest cycle before initiating the refugee rescue operation. Critical preparatory actions include:
Advanced Preparation Tactics: Before triggering the confrontation, strategically position explosive barrels along the primary invasion routes. Assign characters with high strength ratings, like Karlach, to hurl these environmental hazards when enemy clusters form. Additionally, utilize characters with ritual spells to create protective wards around defensive choke points.
Common Strategic Errors: Many players underestimate the importance of elevation advantages, leaving casters vulnerable to melee assaults. Another frequent mistake involves poor action economy management, wasting valuable turns on suboptimal positioning instead of eliminating high-priority targets.


Left: Gale deploys Cloud of Daggers to block advancing forces; Right: Karlach utilizes explosive barrel throws to decimate grouped enemies.
Left: Gale deploys Cloud of Daggers to block advancing forces; Right: Karlach utilizes explosive barrel throws to decimate grouped enemies.
Optimal Character Deployment: Position archers and spellcasters on the elevated gate ramparts where they enjoy protection from melee attacks while maintaining clear firing lines. Place tank-style companions like Lae’zel at stairwell access points to create impassable barriers. Designate one mobile character to eliminate siege ladders that enemies deploy to bypass your defenses.
Enemy Prioritization Protocol: Focus initial attacks on Goblin shamans and their healing capabilities. Secondary priority targets include ranged attackers positioned on distant cliffs. Standard grunt forces should be handled through area-effect damage and environmental hazards.
Spell Combination Strategies: Layer control effects by combining Grease with ignition sources, or use Entangle to immobilize groups followed by concentrated ranged attacks. For players seeking advanced tactical approaches similar to those found in our Class Guide, understanding synergistic ability combinations proves crucial for overwhelming numerical disadvantages.
Successfully repelling the Goblin assault unlocks substantial narrative and gameplay benefits. Surviving Tieflings provide unique merchant services, quest opportunities, and potential companion interactions throughout subsequent acts. The political landscape within the Druid Grove undergoes permanent transformation based on your combat performance and previous choices.
Companion Relationship Impact: Characters who advocated for refugee protection, particularly Wyll and Karlach, develop deepened loyalty and approval. Conversely, shadowy companions like Astarion may express dissatisfaction, though their departure remains unlikely unless directly antagonized.
Long-term Consequence Management: Your actions during this sequence influence availability of certain story paths in Acts 2 and 3. Rescue operations create alliance opportunities with factions that provide assistance during climactic confrontations. For comprehensive guidance on managing game progression, consult our Complete Guide to understand how early decisions propagate through your campaign.
Reward Optimization: Maximize survival rates to access exclusive equipment, including the powerful Hellrider’s Pride gloves from Zevlor and specialized spell scrolls from various grateful refugees.
Action Checklist
- Position archers and casters on gate ramparts for elevation advantages
- Set explosive barrels along main approach routes and assign strong characters to hurl them
- Deploy area control spells like Cloud of Daggers at choke points
- Prioritize elimination of enemy shamans and ranged units first
- Secure stairwell access with tank companions and destroy siege ladders promptly
No reproduction without permission:SeeYouSoon Game Club » Baldur’s Gate 3 – How To Save The Refugees In Druid Grove Master the Druid Grove defense with strategic positioning, companion optimization, and tactical combat techniques