TL;DR
- Strategic positioning before the boss fight is crucial for success
- Multiple dialogue choices significantly impact quest outcomes and rewards
- The lair contains hidden Underdark access and valuable permanent items
- Combat tactics must prioritize clone elimination and cage preservation
- Post-rescue decisions affect both immediate rewards and future storylines
Embark on the challenging rescue mission to free Mayrina from the clutches of Auntie Ethel in Baldur’s Gate 3, a quest that tests both your combat prowess and moral decision-making.
Baldur’s Gate 3 presents players with numerous intricate quests to undertake. One particularly memorable adventure unfolds in the treacherous Putrid Bog, leading to one of the game’s most bizarre encounters. This comprehensive guide details the strategic approach to successfully rescue Mayrina by overcoming the formidable hag known as Auntie Ethel.
The Baldur’s Gate 3 Save Mayrina quest activates as you approach the Putrid Bog region. To reach this area, travel westward from the Druid Grove, then proceed south after crossing the stone bridge that connects to the Blighted Village.
While descending the sloped terrain, you’ll encounter two men confronting an elderly woman from the Druid Grove. They demand she disclose their sister’s whereabouts. If you reprimand the men, combat becomes inevitable. Alternatively, if you chastise the old woman, she will instantly teleport away. Continue moving southwest until you discover a waypoint marker and the distinctive Gnarled Treehouse structure.
Upon entering the Gnarled Treehouse, you’ll meet Mayrina directly. This moment presents a pivotal narrative choice:
- Disclose information about her brothers – Auntie Ethel will react with hostility, transforming into her true hag form before turning invisible and escaping with Mayrina. You must then battle several Redcap Goblins in the vicinity. Following this skirmish, you can pursue them by navigating through the fireplace within her dwelling (detailed instructions follow).
- Withhold information about her brothers – Ethel will teleport Mayrina to safety. If you subsequently mention the tadpole parasite infecting your brain, she indicates potential assistance capabilities.
You face three potential responses: assault Ethel immediately, decline her proposal, or permit her swamp witchcraft procedure. Should you proceed with the ritual, she will forcibly remove one of your character’s eyes. This action permanently grants the Hag-Eye status condition, providing +1 to Intimidation checks while imposing -1 to Perception checks. Most detrimentally, your character loses the ability to score critical hits entirely. You simultaneously receive Auntie Ethel’s Charm, conferring all benefits from the Enhance Ability spell until your next extended rest period.

Auntie Ethel will poke out your eye if you’re not careful.
If hostilities with Ethel have commenced, you can track her by traversing the fireplace passage. This advances the Baldur’s Gate 3 Save Mayrina quest to its next phase. Key navigation insights:
- The Entrance Gallery showcases Ethel’s previous victims. Successfully passing the skill check when interacting with the facial tree wall reveals its illusory nature, permitting passage.
- In the subsequent chamber, you must eliminate four Masked Victims. Crucially avoid equipping masks from the prior room, as Ethel will mentally dominate characters wearing them during this confrontation.
- The following section contains numerous vines and toxic gas emissions. At the lowest level, you’ll locate Mayrina and Ethel.
- Before descending, inspect the upper-left area. A reachable ledge exists there. If one party member dons a mask, your group can penetrate the illusory tree barrier. The teleportation device in this chamber provides access to the Underdark.
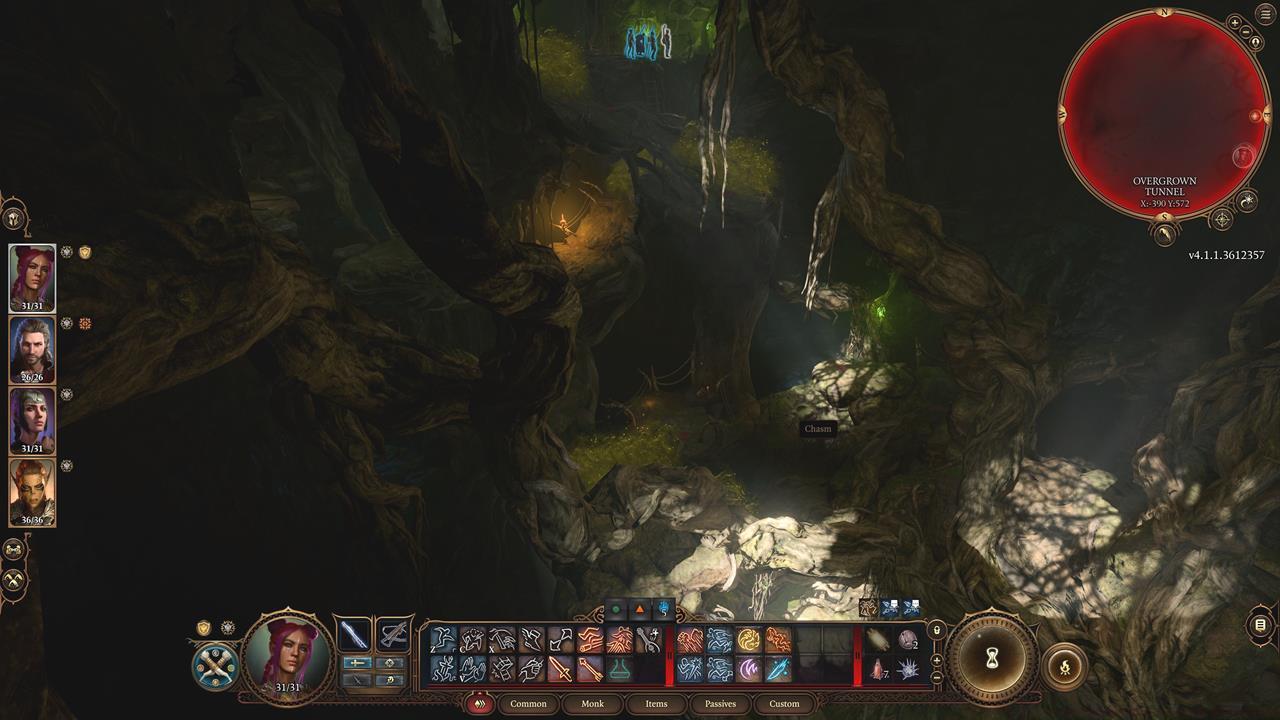
The left side of the vines area has a portal that leads to the Underdark. You need to wear a mask to pass through the illusory wall.
At the base of the arboreal vine chasm, observe that Mayrina remains confined within a cage. Avoid immediate approach, as this initiates the boss encounter. Instead, strategically position your party members as follows:
- Isolate Gale independently (ungrouped) along the right flank. Ensure he possesses the Magic Missiles spell preparation.
- Position three additional companions, ideally melee-capable fighters, along the left perimeter.
Commence hostilities by advancing Gale forward. This triggers Auntie Ethel’s appearance and ignites Mayrina’s enclosure. The cage sustains destruction within several combat rounds, necessitating rapid intervention.
Additionally, Ethel conjures three duplicate copies before teleporting to one chamber side. Since Gale maneuvered along the right boundary, she relocates to the left sector, positioning her nearer your other characters. Gale can efficiently target all simulacra with Magic Missile, as individual projectiles sufficiently eliminate them.
Your remaining party members should concentrate firepower on the primary hag target. If time constraints concern you, Gale can alternatively activate the northern chamber mechanism to liberate the captive. This tactical approach ensures successful Mayrina rescue in Baldur’s Gate 3.
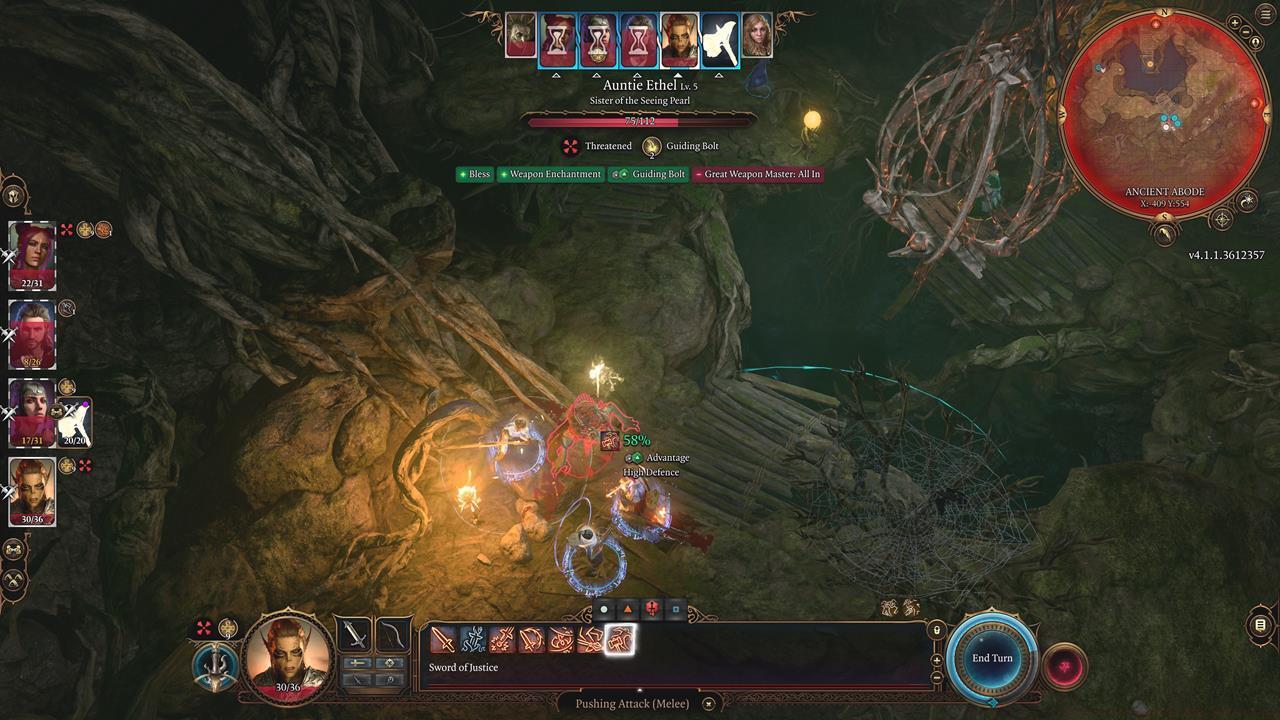
Having a spellcaster take out the clones helps you corner Auntie Ethel with your melee warriors.
Upon concluding the battle, Auntie Ethel presents a final bargaining opportunity: she offers exclusive compensation in exchange for retaining the girl. Create a save file at this juncture. Select the Intimidation dialogue option (requiring successful Intimidation 15 skill check). Achieving this forces her to surrender Mayrina while providing Auntie Ethel’s Hair. This single-use artifact grants +1 to any character attribute you select.
Finally, investigate the compact chamber at the arena’s foundation. Inside, you’ll discover the Staff of Crones alongside the Bitter Divorce wand, inscribed with Mayrina’s husband’s identity. Utilize the portal to return exteriorly, where Mayrina awaits before her spouse’s burial site.
If you employ the wand on the gravesite, her husband reanimates as undead. You may alternatively transfer the wand to Mayrina, enabling her to seek remediation for her husband’s “condition.” The narrative indicates her destination is Baldur’s Gate, suggesting potential future encounters upon reaching the metropolitan area.
This concludes the complete strategic knowledge required for the Save Mayrina quest in Baldur’s Gate 3. Remember the portal within Auntie Ethel’s hideout, particularly when requiring Underdark access during later campaign segments.
Baldur’s Gate 3 overflows with diverse activities and concealed secrets. You’ll undoubtedly participate in an epic journey consuming innumerable hours to finish. For additional strategic guidance, explore our Complete Guide for additional gaming expertise.
Action Checklist
Executable step checklist
No reproduction without permission:SeeYouSoon Game Club » Baldur’s Gate 3 – How To Save Mayrina From Auntie Ethel Master the strategic rescue mission to save Mayrina from Auntie Ethel's swamp lair in Baldur's Gate 3