TL;DR
- Begin the quest by speaking with Lady Esther near Trielta Crags waypoint in the mountain pass
- Navigate through Rosymorn Monastery to find the basement entrance to Creche Y’llek
- Locate the hatchery room with acid pools where the single Githyanki Egg incubates
- Use stealth or combat to bypass three vigilant guards protecting the valuable egg
- Avoid the teleportation trap rock and approach from the western side for successful extraction
When exploring the treacherous mountain pass region in Baldur’s Gate 3, you’ll encounter Lady Esther positioned strategically near the Trielta Crags waypoint. This mysterious woman represents a shadowy organization seeking rare biological specimens for their controversial experiments. Her specific request involves procuring a Githyanki Egg from the nearby Creche Y’llek facility, initiating one of the game’s more ethically complex side missions.
The “Steal a Githyanki Egg” assignment stands out among Baldur’s Gate 3’s numerous quests due to its morally ambiguous nature and the significant risks involved. Before accepting this dangerous task, consider your party composition and available resources, as the Githyanki warriors guarding their precious offspring are notoriously formidable opponents. The quest becomes available once you’ve progressed sufficiently through Act 1 and reached the mountain pass area.
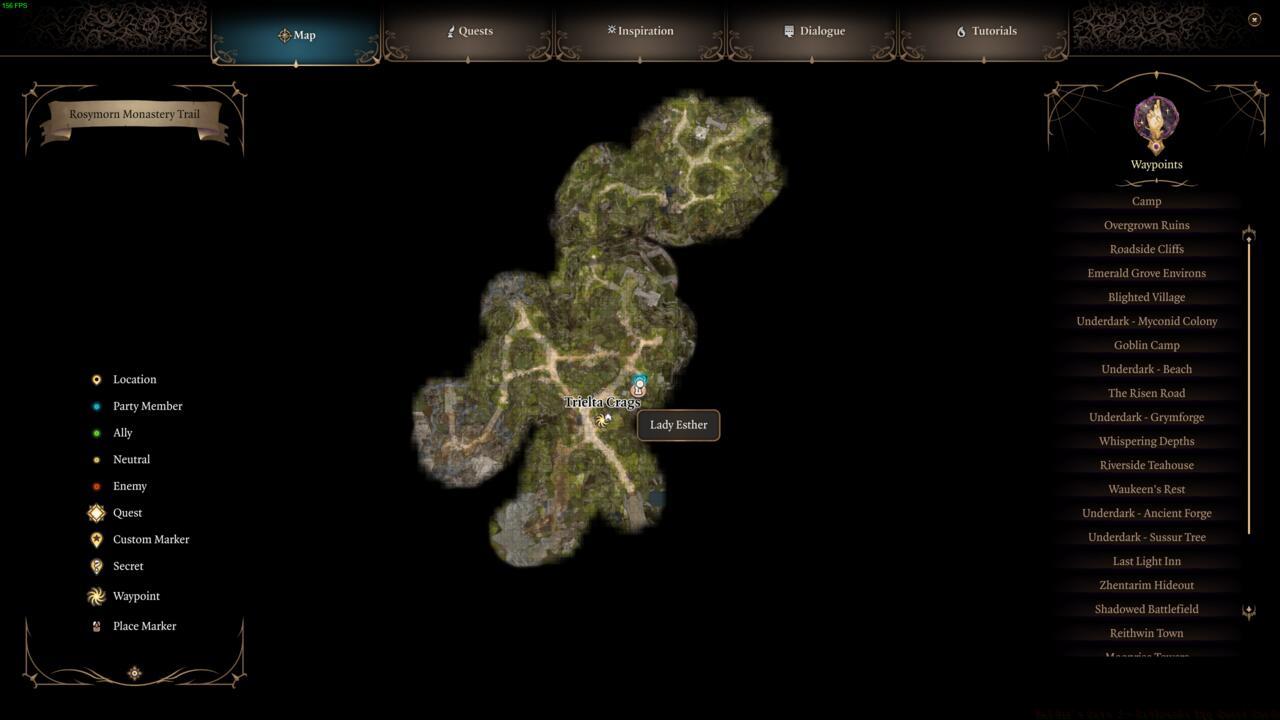
The location of Lady Esther in the mountain pass.
Preparation proves crucial for this undertaking. Ensure your party members possess adequate stealth capabilities, dialogue skills for potential persuasion attempts, and combat readiness for inevitable confrontations. Stock up on healing potions and scrolls, as the journey through Githyanki territory presents numerous environmental hazards and hostile encounters.
Your expedition to acquire the Githyanki Egg begins with traversing the ancient Rosymorn Monastery, which serves as both a historical site and the gateway to Creche Y’llek. This location also hosts the beginning of the Blood of Lathander questline, providing opportunities to uncover fascinating lore about Githyanki culture and their conflict with mind flayers.
Access the monastery through one of two primary routes: utilizing the cable car system that requires a successful Strength check to activate the transport mechanism, or following the less demanding western trail that offers scenic views but potentially more random encounters. Both paths eventually converge at the monastery’s main entrance, though the cable car approach may yield additional exploration opportunities.
Once inside Rosymorn Monastery, navigation focuses predominantly on descending through the complex. Look for staircases, climbable vine-covered walls, and hidden passages that lead downward. The entrance to Creche Y’llek manifests as an unassuming basement door, requiring passage through multiple underground levels. Key landmarks include a prominent statue of Lathander positioned beyond a peculiar talking skull encounter.
Upon reaching the Lathander statue, proceed to its left side to discover a descending staircase. This stairway ultimately leads to what appears to be a simple basement entrance but actually serves as the gateway to the Githyanki creche. The architectural design deliberately conceals the true nature of this access point to maintain security.
Entering Creche Y’llek triggers an immediate confrontation with vigilant Githyanki guards who demand explanation for your presence. Successful passage typically requires either a convincing deception, intimidation through displayed strength, or leveraging specific story-related credentials. Passing this initial security checkpoint grants limited freedom to explore the creche’s restricted areas.
From the Creche Y’llek entrance waypoint, navigate northwest through the main corridor. Be cautious not to mistakenly enter the Hatchery room prematurely – if you find yourself in this location, retreat and take the adjacent left passageway. This alternative route leads to the actual egg incubation chamber characterized by extensive acid pools that form natural protective barriers.
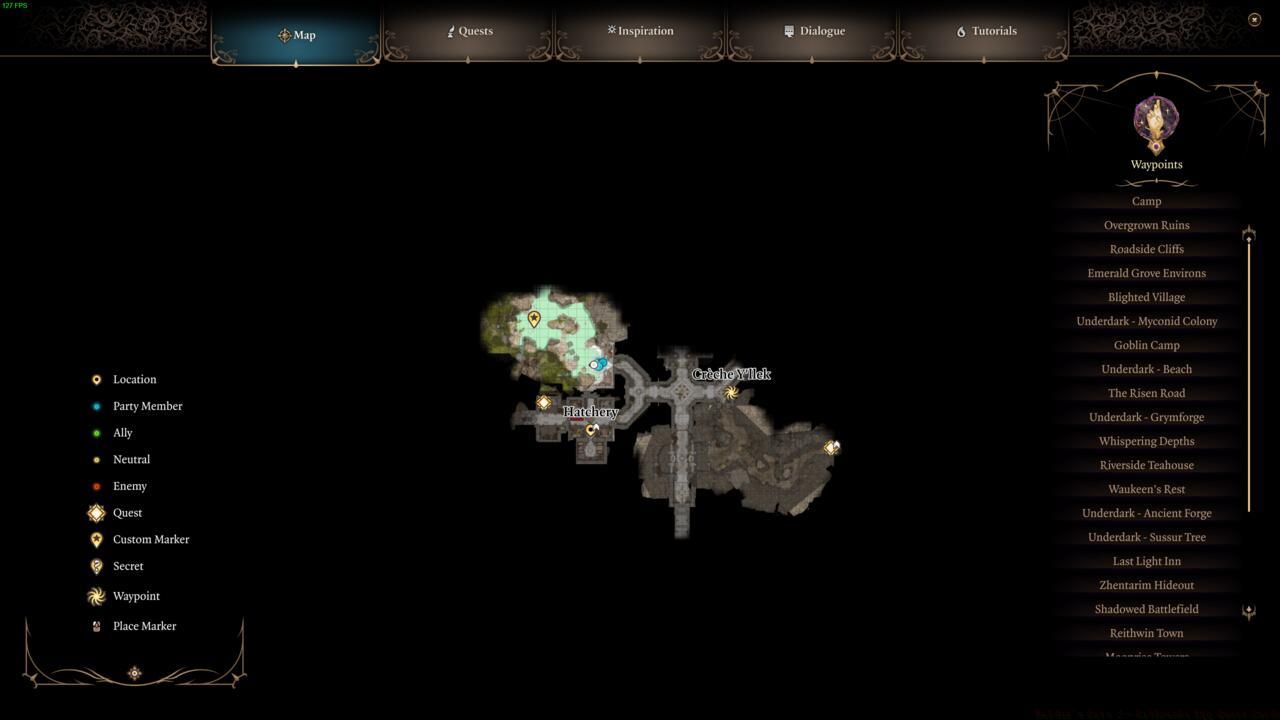
The location of the Githyanki Egg is where the yellow marker is placed.
The hatchery environment contains exactly one Githyanki Egg currently undergoing incubation, submerged within the acidic solution that facilitates proper development. Three dedicated guards maintain constant surveillance, with one positioned strategically atop a central cliff formation that provides optimal visibility over the entire chamber.
Direct confrontation with the guardians represents the most straightforward approach, though this demands substantial combat prowess as Githyanki warriors possess enhanced mobility, psionic abilities, and coordinated tactical awareness. Dialogue with the elevated guard reveals the egg’s unusually prolonged incubation period and their unwavering protective commitment.
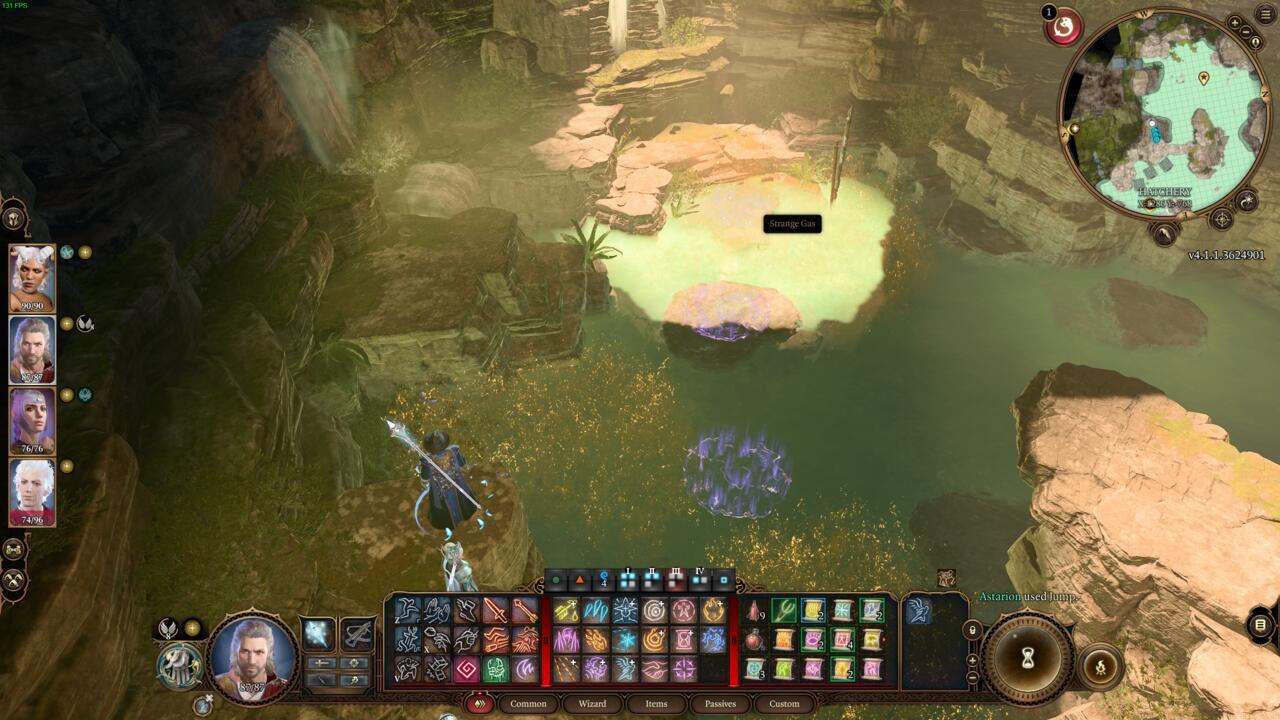
The location of the Githyanki Egg (we had already taken it when this screenshot was taken)
Stealth extraction offers a viable alternative for parties specializing in subterfuge. Utilize invisibility spells, distraction techniques, or environmental cover to approach the egg undetected. Critical awareness: stepping on the suspicious rock formation nearest the egg activates a magical teleportation trap that instantly transports intruders to a secured containment cell while alerting all guards. Circumnavigate the perimeter and approach the target from the western flank to bypass this security measure entirely.
Successfully obtaining the Githyanki Egg requires careful consideration of your party’s strengths and preferred playstyle. The combat approach, while riskier, may yield additional experience points and loot from defeated guards. However, engaging in hostilities within the creche can trigger broader alarms, potentially complicating other objectives you might pursue in this location.
Stealth specialists should prioritize abilities like Pass Without Trace, enhanced mobility options, and distraction tools. Timing your movement to coincide with guard patrol patterns significantly increases success chances. Remember that the Githyanki possess keen observational skills, making conventional hiding less effective against their heightened perceptions.
The quest’s narrative consequences extend beyond immediate rewards. Your decision to assist Lady Esther’s organization and the method employed for acquisition can influence later interactions with Githyanki characters, particularly companion Lae’zel whose personal storyline deeply connects to her people’s culture and traditions.
Post-acquisition, consider the ethical implications of delivering a sentient species’ offspring for experimentation. Alternative resolutions exist, including confronting Lady Esther about her motives or pursuing different outcomes through dialogue choices that acknowledge the moral complexity of the situation.
For players seeking comprehensive Complete Guide approaches to complex missions, this egg retrieval operation exemplifies Baldur’s Gate 3’s commitment to providing multiple solutions reflecting different character specializations and moral alignments.
Action Checklist
- Locate Lady Esther near Trielta Crags waypoint and accept the egg retrieval quest
- Navigate through Rosymorn Monastery using either cable car or western trail
- Find the basement entrance to Creche Y’llek beyond the Lathander statue
- Pass the Githyanki guard interrogation at the creche entrance
- Locate the hatchery with acid pools and identify the single egg
- Choose combat or stealth approach to bypass the three guards
- Avoid the teleportation trap rock and extract the egg from western approach
No reproduction without permission:SeeYouSoon Game Club » Baldur’s Gate 3 – Githyanki Egg Quest Guide Complete guide to locating and acquiring the Githyanki Egg in Baldur's Gate 3 with stealth and combat strategies