TL;DR
- Abyssal Forest contains only two collectibles but requires precise shield mechanics
- First Codex entry found early using shield bash on destructible wall sections
- Witch Toy requires complex chain-shield puzzle in barracks mountain path area
- Master shield throwing angles for the chain mechanism to avoid frustration
- Complete both collectibles in 10-15 minutes with proper route optimization
GameSpot may receive revenue from affiliate and advertising partnerships for sharing this content and from purchases through links.
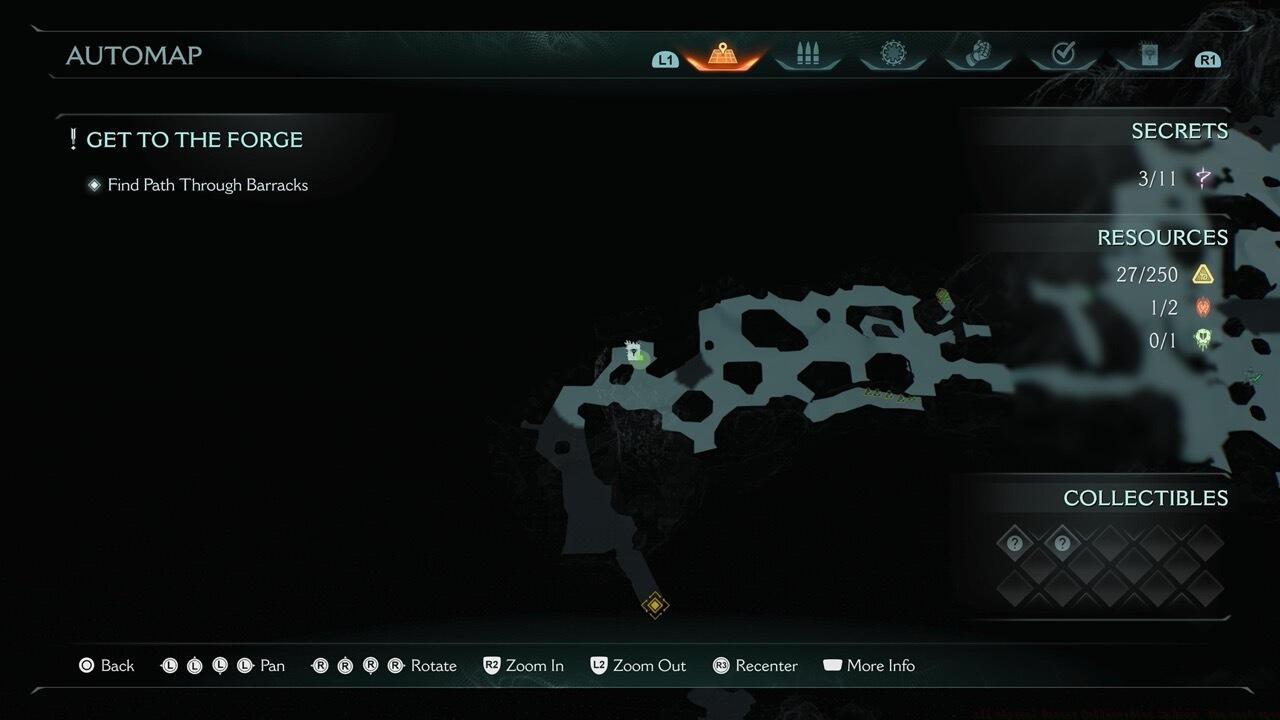
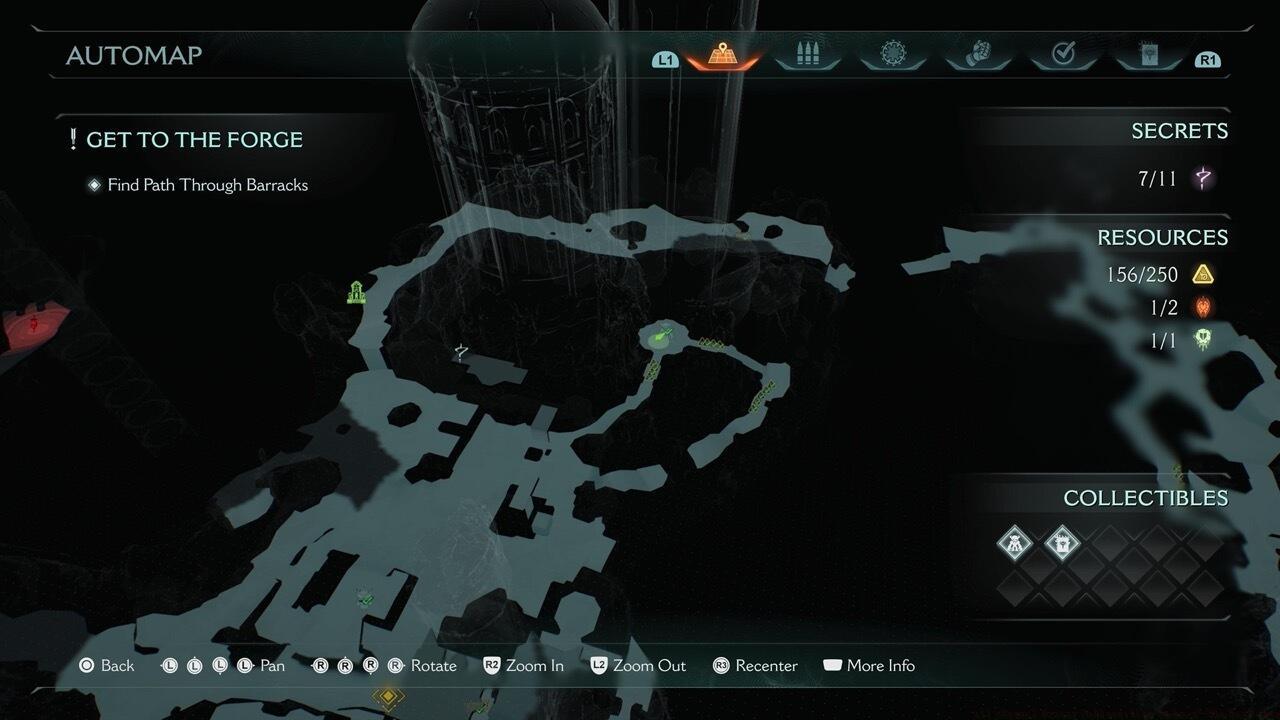
Positioned as the eighth campaign stage in Doom: The Dark Ages, the Abyssal Forest presents a more condensed experience compared to previous levels. This biome features only two hidden items to discover, making it ideal for focused collection runs. The available collectible categories include Codex lore entries, character toys, and cosmetic weapon skins. Players can monitor their progress through the level completion tracker located in the map interface’s bottom-left corner.
For comprehensive coverage across all campaign missions, consult our Doom: The Dark Ages Collectibles Guides Hub containing detailed walkthroughs for every stage.
Strategic preparation significantly enhances collection efficiency in this environment. The forest’s verticality and obscured pathways demand careful navigation rather than rushed progression. Understanding the shield mechanics becomes crucial here, as both collectibles require advanced applications of your defensive tool.

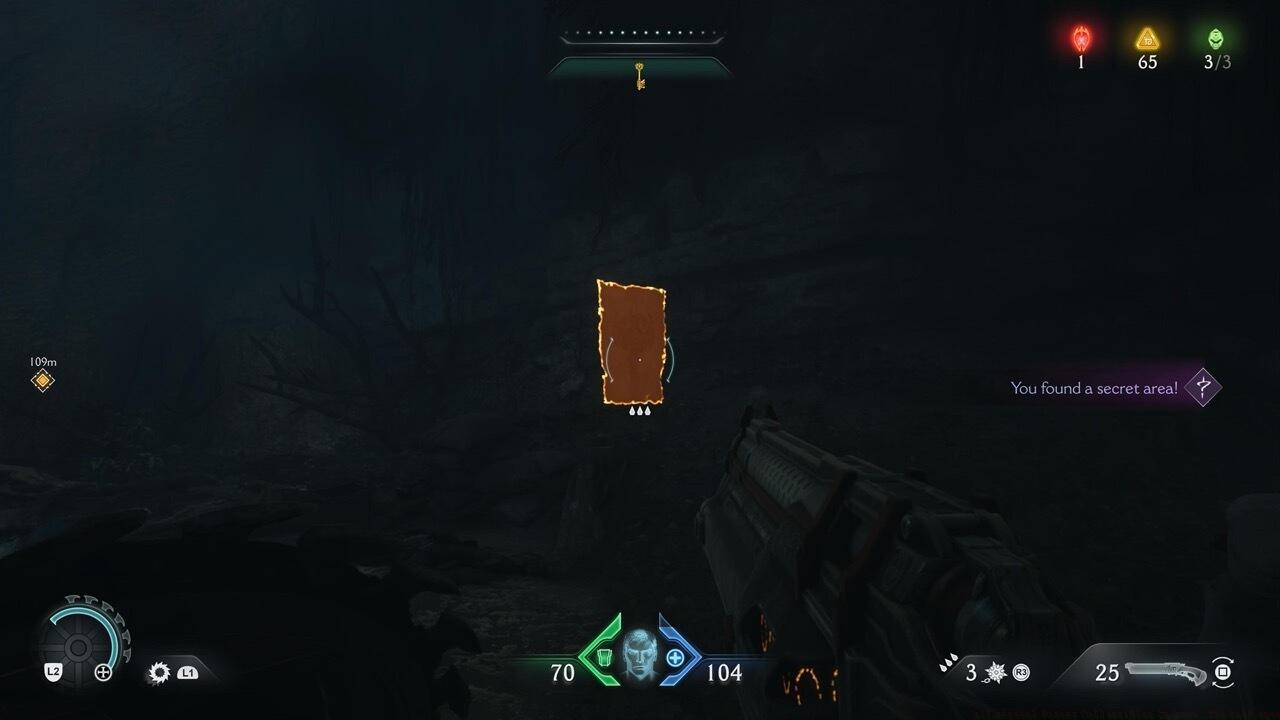
During the initial forest traversal segment, vigilant players will notice a distinctive cracked wall section that responds to shield impacts. This destructible surface conceals the first Codex entry, accessible only through precise shield bash execution. The vulnerable wall texture features subtle visual cues—slight discoloration and hairline fractures—that distinguish it from indestructible environments.
Position yourself approximately 5-7 meters from the target surface for optimal charging distance. The shield bash requires full momentum to penetrate successfully; partial charges will result in ineffective impacts. Upon destruction, the revealed chamber contains the Codex entry positioned on a central pedestal for immediate collection.
Common errors include misjudging the charge distance or attempting standard melee attacks instead of the specialized shield bash. The technique demands both proper positioning and timing to execute flawlessly without taking environmental damage from nearby hazards.
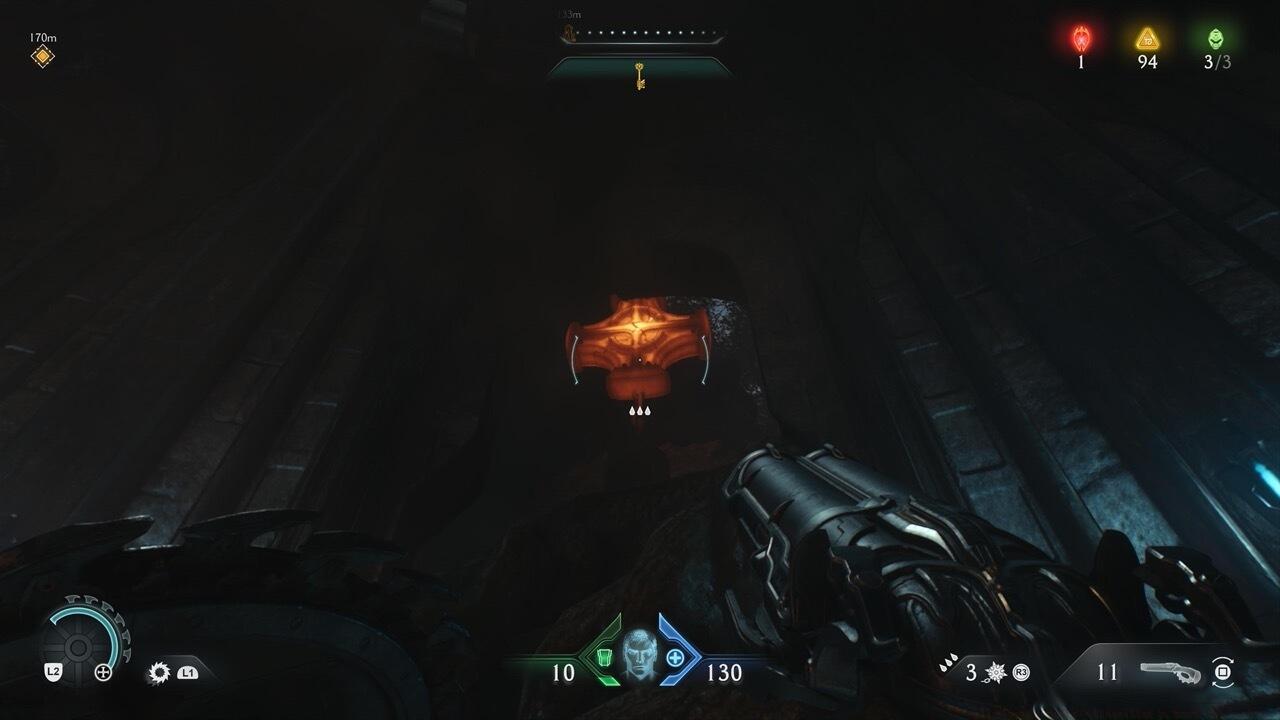
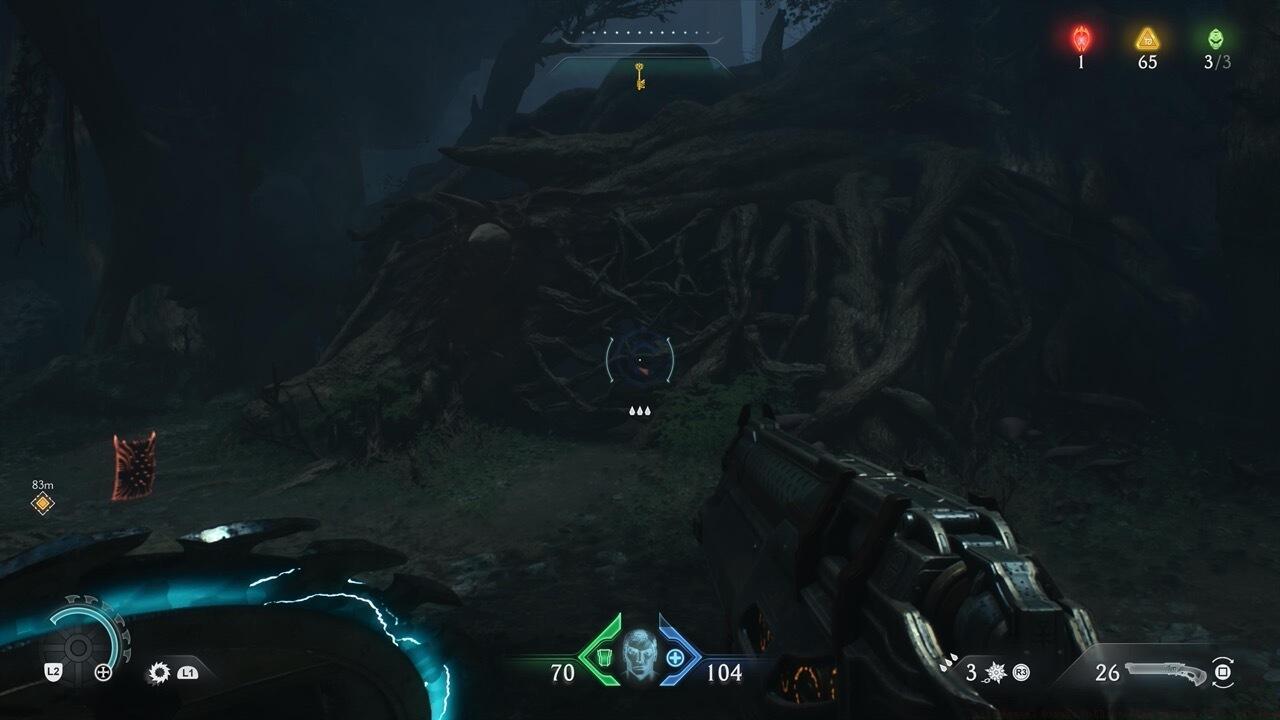
The second collectible—a Witch Toy figurine—resides within the military barracks complex where ascent to cannon positions becomes necessary. Adjacent to this primary structure, an inconspicuous mountain trail winds around the rock formation’s perimeter. Following this concealed route leads to a sealed chamber containing the locked collectible item.
Solving this environmental puzzle requires precise shield deployment mechanics. Initially, target the suspended chain mechanism within the room using a thrown shield attack. Successful impact activates a hidden shield receptacle that must remain occupied to maintain access to the collectible.
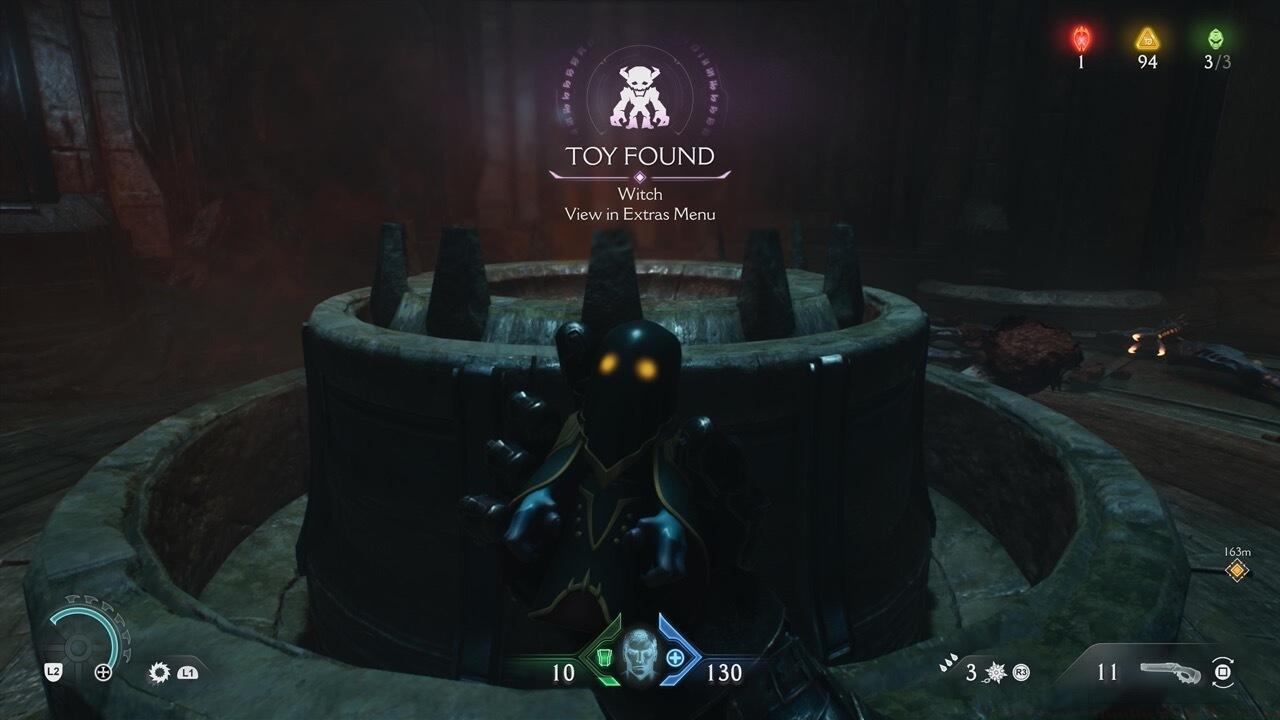
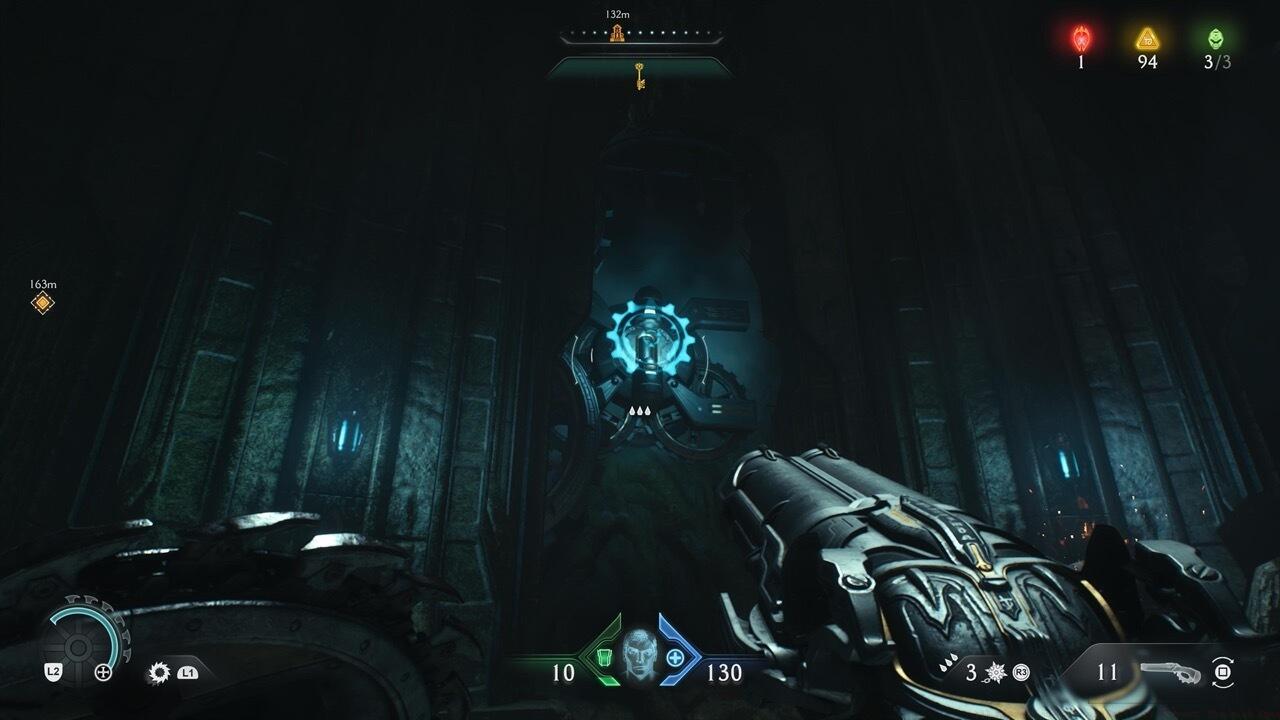
The sequence demands strategic execution: first eliminate the chain obstruction, then immediately redirect your shield to the newly revealed switch mechanism. While the shield remains lodged in the activator, quickly retrieve the Witch Toy from the chamber’s center platform. The switch deactivates upon shield removal, potentially trapping players if they fail to coordinate the retrieval process efficiently.
Advanced players should note the chain’s specific hitbox—aim for the central metallic section rather than the wooden supports. The throwing angle should be slightly upward to account for the chain’s suspension height. Failed attempts typically result from improper trajectory or delayed secondary throws.
Seasoned Doom veterans recommend completing the Abyssal Forest collectibles during a dedicated exploration run rather than attempting collection during intense combat sequences. The shield-dependent puzzles demand uninterrupted focus and precise execution that combat distractions frequently compromise.
Optimal route efficiency suggests securing the Codex entry first during natural progression, then returning for the Witch Toy after acquiring additional mobility upgrades. This approach minimizes backtracking and ensures optimal resource management.
Critical errors to avoid include: attempting the Witch Toy puzzle without full health reserves, misallocating shield energy between attacks and defense, and overlooking the subtle visual indicators for destructible surfaces. The forest’s atmospheric lighting can obscure critical environmental clues, making systematic exploration essential.
For players struggling with the shield mechanics, practicing in earlier levels with similar environmental puzzles provides valuable experience. The chain-throwing technique particularly benefits from prior experimentation in less hazardous environments.
Completion time for both collectibles typically ranges between 10-15 minutes for experienced players, while newcomers may require 20-25 minutes to master the sequence. The compact nature of this level makes it ideal for achievement hunters focusing on completionist runs.
Action Checklist
- Scan for cracked walls during initial forest traversal, using shield bash on identified surfaces
- Navigate to barracks area, locate concealed mountain path around structure perimeter
- Execute precise shield throw at chain mechanism, then immediately target revealed switch
- Retrieve Witch Toy while shield remains activated in switch mechanism
No reproduction without permission:SeeYouSoon Game Club » All Abyssal Forest Collectibles In Doom: The Dark Ages Master the Abyssal Forest level with expert collectible locations and advanced shield mechanics