TL;DR
- King Gleeok combines fire, frost, and shock elements in devastating triple-beam attacks
- Access requires creative sky navigation using Zonai devices and Ascend abilities
- Strategic rock formations provide safe zones to avoid instant-kill elemental combinations
- Advanced cheese methods utilize springs and updrafts for optimal weak point targeting
- Phase 2 introduces aerial combat requiring precise timing and resource management
Confronting the formidable King Gleeok requires reaching a secluded floating arena positioned in the southwestern quadrant of Tears of the Kingdom’s sky realm. This colossal creature occupies an island suspended significantly above the Lightning Temple, presenting substantial navigation hurdles for unprepared adventurers.
King Gleeok location
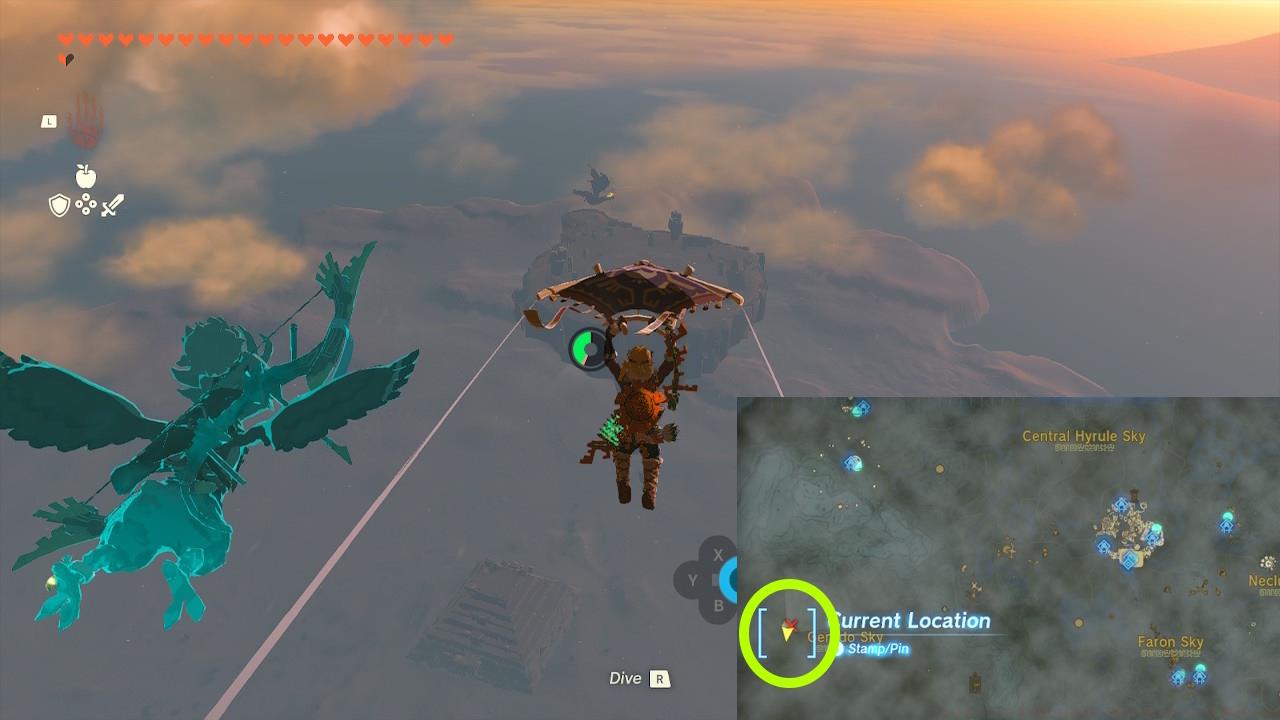
Optimal access begins at the North Gerudo Sky Archipelago, where a massive circular structure resembling a Death Star serves as your primary landmark. Upon reaching this location through various traversal methods, employ the Ascend ability to scale the structure’s interior and emerge atop its surface. Experimentation with Zonai Devices and creative contraptions proves essential for southwestern progression. A particularly effective technique involves attaching individual Rockets sequentially to Hover Stones, creating a reliable aerial transport system.
Many players underestimate the vertical distance involved, leading to failed attempts. Always carry multiple Rocket devices and ensure your energy reserves can sustain extended Zonai device usage. For those struggling with the standard approach, consider utilizing nearby skyview towers for initial elevation gains before transitioning to aerial vehicles.
Upon arrival at the combat arena, you’ll encounter the massive King Gleeok patrolling the skies. This unique variant features three distinct heads, each specializing in a specific elemental discipline: Shock, Fire, and Frost. Unlike standard Gleeok encounters focusing on singular elements, this monarch commands all three simultaneously.
Exercise extreme caution when initiating combat, as the creature immediately unleashes all three elemental beams concurrently upon detecting your presence. This triple-beam assault typically results in instant elimination due to overwhelming damage output. Additionally, the boss employs secondary elemental breaths possessing area-of-effect properties and debilitating status effects that can impact you even at moderate distances.
Traditional engagement tactics involve utilizing the arena’s pillars for protective cover while executing mid-air aimed shots. However, our refined approach incorporates strategic modifications to this conventional methodology.
The shock element can paralyze Link, leaving him vulnerable to follow-up attacks. Frost applications freeze characters in place, while fire inflicts continuous damage over time. Understanding these elemental interactions is crucial for survival, as combined effects can create nearly inescapable situations.
When combat initiates, immediately reposition to the northern portion of the island. Here you’ll discover a modest rock formation that, while not a conventional pillar, effectively blocks the boss’s devastating beam attacks. Designate this geological feature as your primary “safe zone rock” for the encounter’s duration.
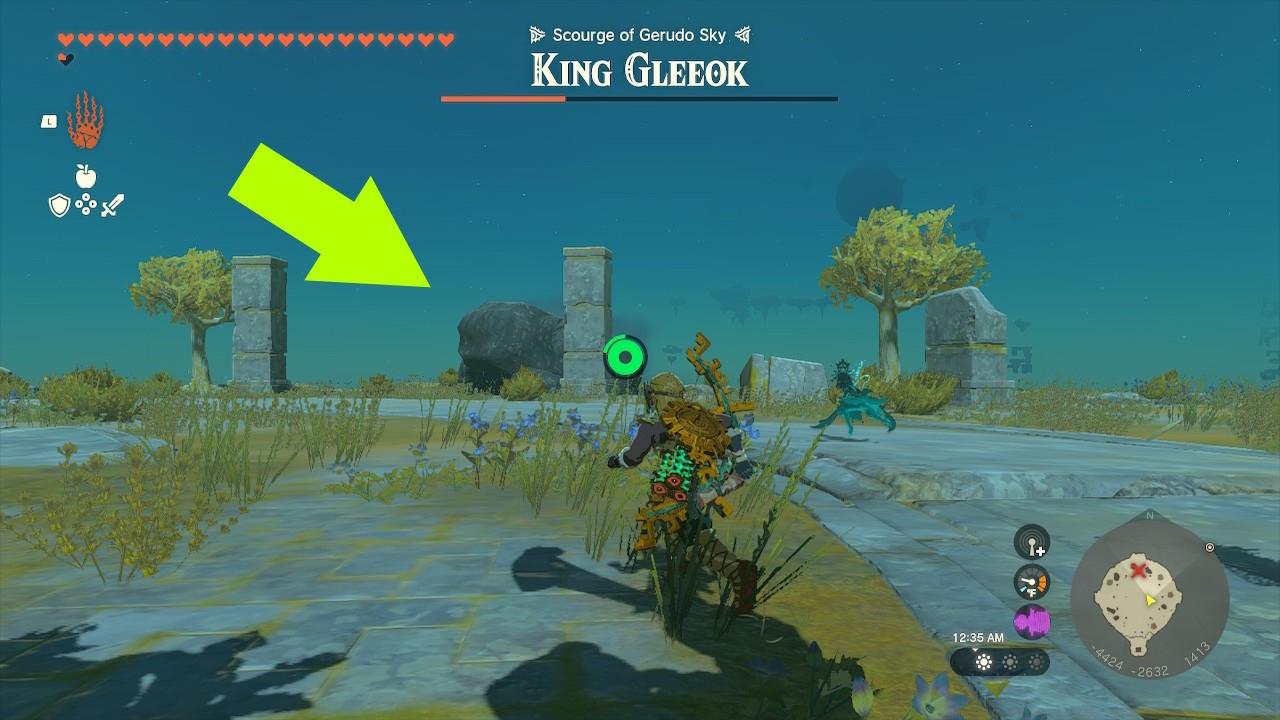
This rock will keep you safe for the most part.
Our enhanced cheese methodology incorporates two primary Zonai device configurations for optimal weak point targeting. The first approach utilizes fans to generate updrafts, enabling sustained aerial positioning for precise bow shots.
Ride the fan’s updraft and do an aimed shot. Cycle between your elemental fruits as you shoot each head’s weakness.
The secondary technique involves deploying two interconnected springs to create a super bounce mechanism. This configuration provides superior elevation angles for executing aimed shots during critical combat phases.
Plop down two springs and attach them to each other. Use them to do a super bounce, allowing you to have a better angle when doing an aimed shot.
Strategic elemental fruit cycling proves essential when targeting each head’s specific vulnerability. Fire arrows neutralize frost heads, ice arrows counter fire heads, and shock arrows disrupt lightning heads. Mismanagement of this rotation represents the most common failure point for players attempting this strategy.
Upon depleting approximately sixty percent of the boss’s health reservoir, King Gleeok initiates a dramatic phase transition. The creature ascends to higher altitudes, fundamentally altering engagement dynamics and requiring adjusted tactical approaches.
During this elevated phase, the boss incorporates new aerial maneuvers and enhanced attack patterns. Traditional ground-based strategies become increasingly ineffective, necessitating greater reliance on Zonai device aerial mobility solutions.
Maintain constant awareness of your remaining Zonai energy reserves and arrow inventory. Many successful attempts fail during this phase due to resource depletion rather than technical execution errors. Prepare by stocking at least 50 arrows and multiple energy cells before initiating the encounter.
The triple-beam attack frequency intensifies during phase 2, with reduced telegraphing windows. However, the safe zone rock remains partially effective against these enhanced assaults when positioned correctly.
Execution timing becomes increasingly critical as the battle progresses. Wait for the boss to complete its attack animations before emerging from cover to execute your counterattacks. Rushed responses often result in preventable damage accumulation and eventual failure.
Action Checklist
- Gather 50+ arrows, multiple Zonai devices, and full energy cells
- Navigate to North Gerudo Sky Archipelago using skyview towers
- Use Ascend ability inside circular structure to reach arena platform
- Immediately move to northern rock formation when combat initiates
- Deploy springs or fans for aerial positioning and execute elemental weak point shots
No reproduction without permission:SeeYouSoon Game Club » Zelda: Tears Of The Kingdom – King Gleeok Secret Boss Guide Master the triple-element King Gleeok boss with proven cheese strategies and location guides