TL;DR
- Locate the shrine in Tanagar Canyon West Cave after clearing boulder obstacles
- Use Ultrahand’s attachment function to create stable ball contraptions
- Master the physics of rolling objects for precise target alignment
- Complete main quests first for companion abilities that simplify access
- Employ strategic timing and angle adjustments for optimal puzzle completion
Successfully navigating to the Iun-Orok Shrine requires careful planning and preparation. The shrine entrance is cleverly concealed within the Tabantha Frontier region, specifically hidden among the dramatic rock formations of Tanagar Canyon.
You’ll discover a cave opening that leads to Tanagar Canyon West Cave, but reaching it demands strategic thinking about both timing and equipment.
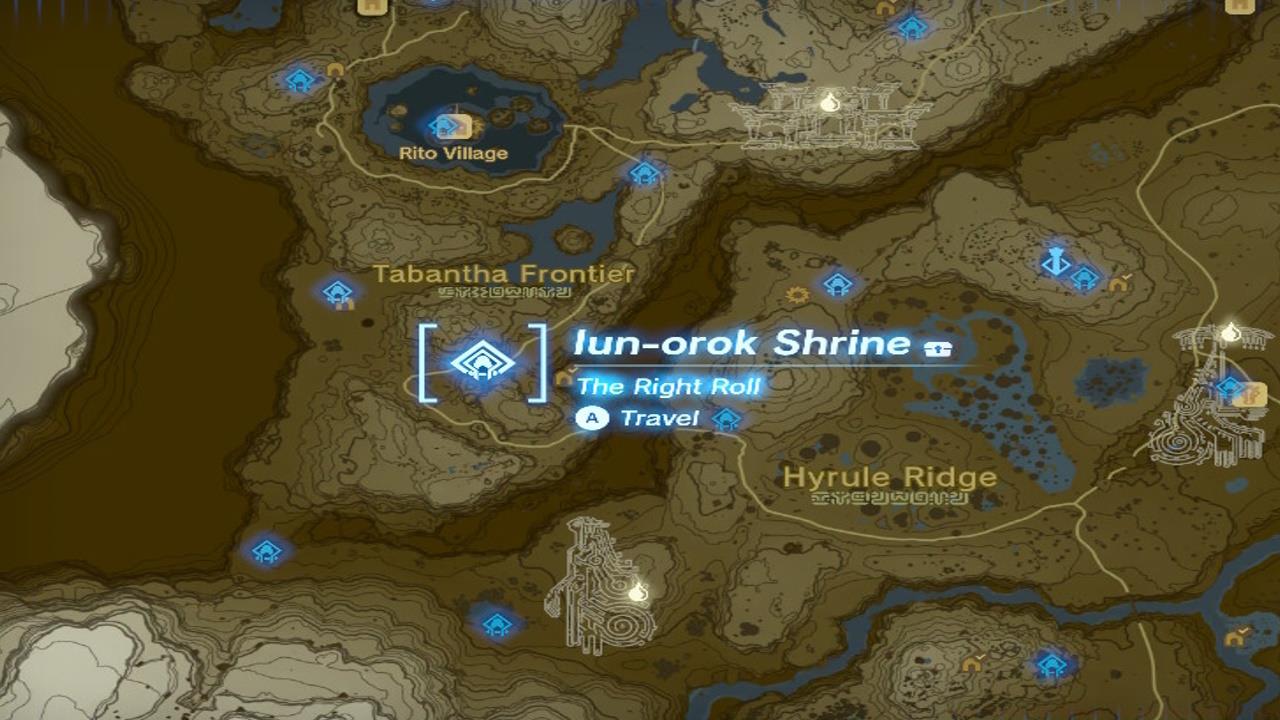
Iun-Orok Shrine location
The underground passage system presents multiple challenges including aggressive Like Like enemies that can consume your equipment and numerous collapsed sections requiring demolition. For efficient navigation, equip multiple weapons fused with boulders and carry ample Bomb Flowers for rapid obstacle clearance.
Pro Tip: Consider delaying your shrine attempt until after completing either the Eldin or Gerudo main story arcs. The companion abilities unlocked through these quests provide significantly improved boulder-destruction capabilities.


Left: Tanagar Canyon West Cave exterior; Right: Tanagar Canyon West Cave interior
At the deepest section of this multi-branch tunnel network, you’ll encounter a centrally blocked passage. Destroy these final barriers to reveal the shrine chamber in the compact cavern beyond.
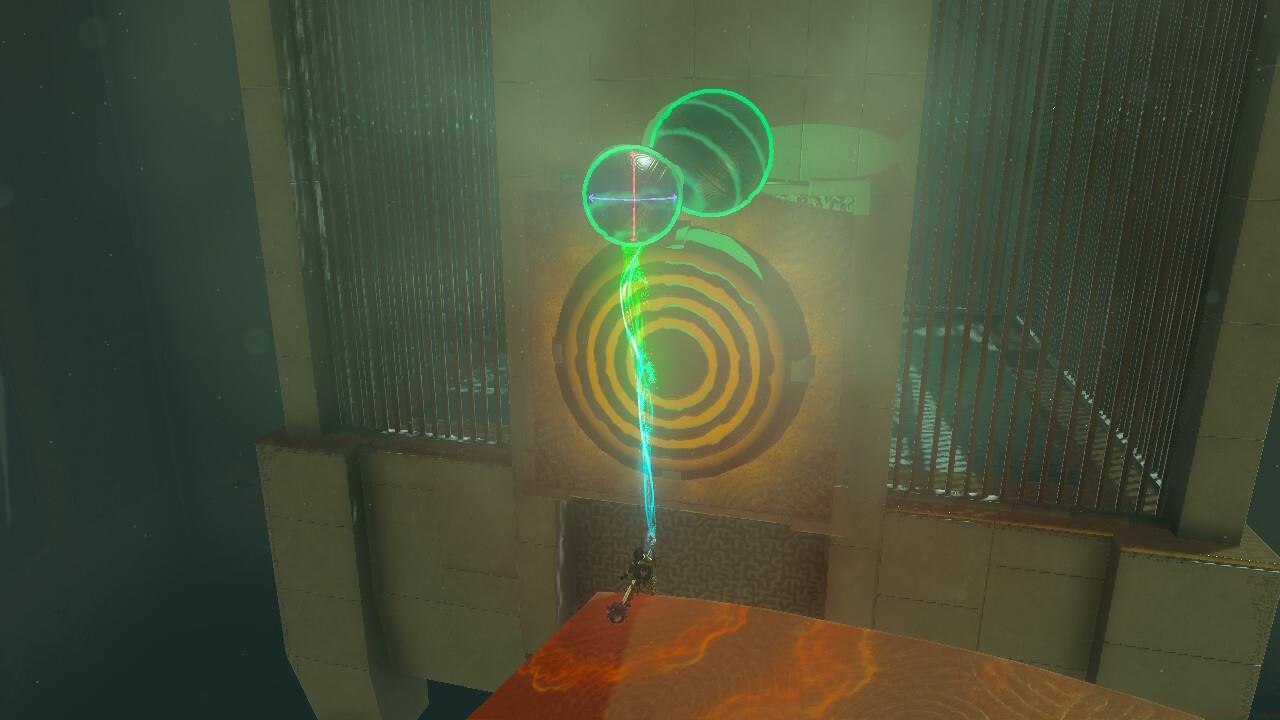
The Right Roll challenge centers around mastering Zelda: Tears of the Kingdom’s physics engine through creative use of the Ultrahand ability. Each chamber presents increasingly complex ball-rolling puzzles that test your understanding of momentum, balance, and trajectory.
Understanding the core mechanics is crucial: balls gain speed on downward slopes, maintain momentum on flat surfaces, and can be redirected using strategic ramp placements.
Common Mistake: Many players create overly complex contraptions when simpler, more stable designs often prove more effective. The key is achieving consistent, predictable movement rather than elaborate constructions.
For optimal results, focus on creating balanced structures that distribute weight evenly. Attach balls securely at their centers rather than edges to prevent wobbling and erratic movement patterns.
Advanced players should experiment with slight angle adjustments during the attachment phase. A mere 5-10 degree tilt can dramatically alter the ball’s path and significantly improve accuracy.


Left: Second puzzle solution; Right: Chest solution
Each shrine chamber builds upon the previous one, introducing new mechanics while reinforcing core principles. Follow this comprehensive approach to navigate all three puzzle sections efficiently.
First Chamber Strategy: This introductory room teaches fundamental ball-rolling concepts. Simply position the single ball to roll directly toward the target platform. The straightforward design allows you to familiarize yourself with the basic controls without pressure.
Second Chamber Technique: Connect both orbs together using Ultrahand’s attachment function, ensuring they’re aligned to roll smoothly along the central pathway. The dual-ball configuration introduces balance considerations that become crucial in later challenges.
Final Chamber Mastery: The last puzzle demands precise alignment and careful timing. Construct your contraption with attention to the starting angle, as even minor miscalculations can cause the balls to veer off course.
Time-Saving Tip: Experienced players can complete all three chambers in approximately 8-12 minutes, while newcomers should budget 15-20 minutes for trial and error.
Last puzzle solution
For players struggling with the final alignment, remember that the game’s physics allows for creative solutions. Sometimes approaching from an unexpected angle or using a slightly different attachment point can yield dramatically better results.
If you’re enjoying these physics-based puzzles, our Complete Guide offers additional strategic insights for mastering game mechanics across various challenges.
Action Checklist
- Gather boulder-fused weapons and Bomb Flowers before attempting shrine access
- Navigate Tanagar Canyon West Cave while managing Like Like encounters
- Master Ultrahand attachment techniques in first chamber
- Solve dual-orb challenge in second chamber with balanced construction
- Complete final alignment puzzle with precise angle adjustments
No reproduction without permission:SeeYouSoon Game Club » Zelda: Tears Of The Kingdom – Iun-Orok Shrine Puzzle Guide Master the Iun-Orok Shrine's ball-rolling puzzles with expert strategies and location guidance