TL;DR
- Use Yunobo’s Rolling Fireball to strike five gongs and release locks throughout the temple
- Master rail switching mechanics to navigate between floors and access hidden areas
- Combine Zonai devices like Hydrants and Rockets to overcome environmental obstacles
- Prioritize main objectives while noting chest locations for optional rewards
- Complete the temple in 45-60 minutes with proper route planning and ability timing
Conquer the challenging Fire Temple puzzles in The Legend of Zelda: Tears of the Kingdom with this comprehensive navigation guide.
Deep within the Eldin region’s chasm system lies the Fire Temple, an expansive underground complex that serves as the climactic destination for Goron City’s main regional storyline. This multi-level dungeon presents one of the game’s most complex environmental puzzles, requiring strategic thinking and mastery of companion abilities.
The primary objective involves striking five distinct gongs using Yunobo’s Rolling Fireball technique to release corresponding locks. This specialized ability proves equally effective for demolishing obstructive boulders blocking rail pathways and activating track-switching mechanisms that reconfigure the entire transportation network.
Given the temple’s massive scale and intricate layout, this guide concentrates exclusively on the essential lock-release mission, though numerous treasure chests containing valuable items are scattered throughout for thorough explorers. Reference the provided map visualization to identify general lock positions and plan your route accordingly.
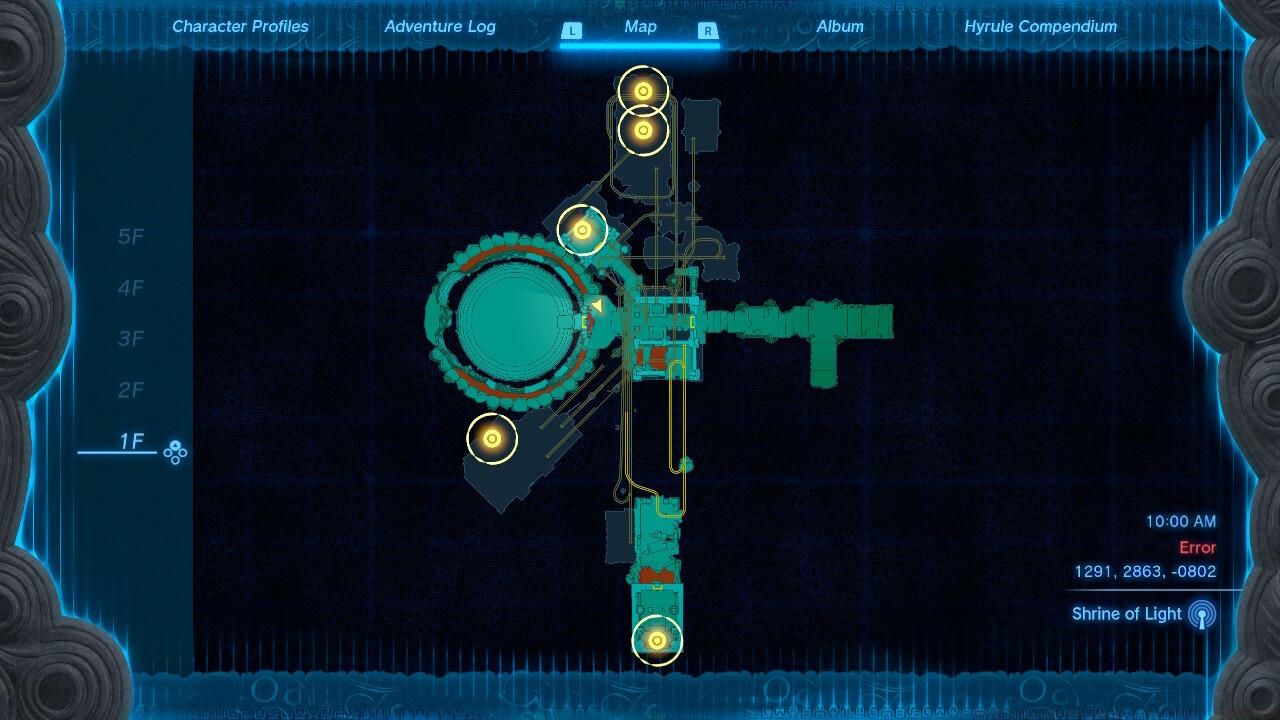
Fire Temple map showing lock distribution across multiple levels
First Floor (1F) Gong Access
Begin your ascent from the fast travel point by turning left and traversing lava rivers using strategically positioned Zonai Hydrants. Board the minecart system ensuring directional arrows align perfectly forward for correct trajectory.
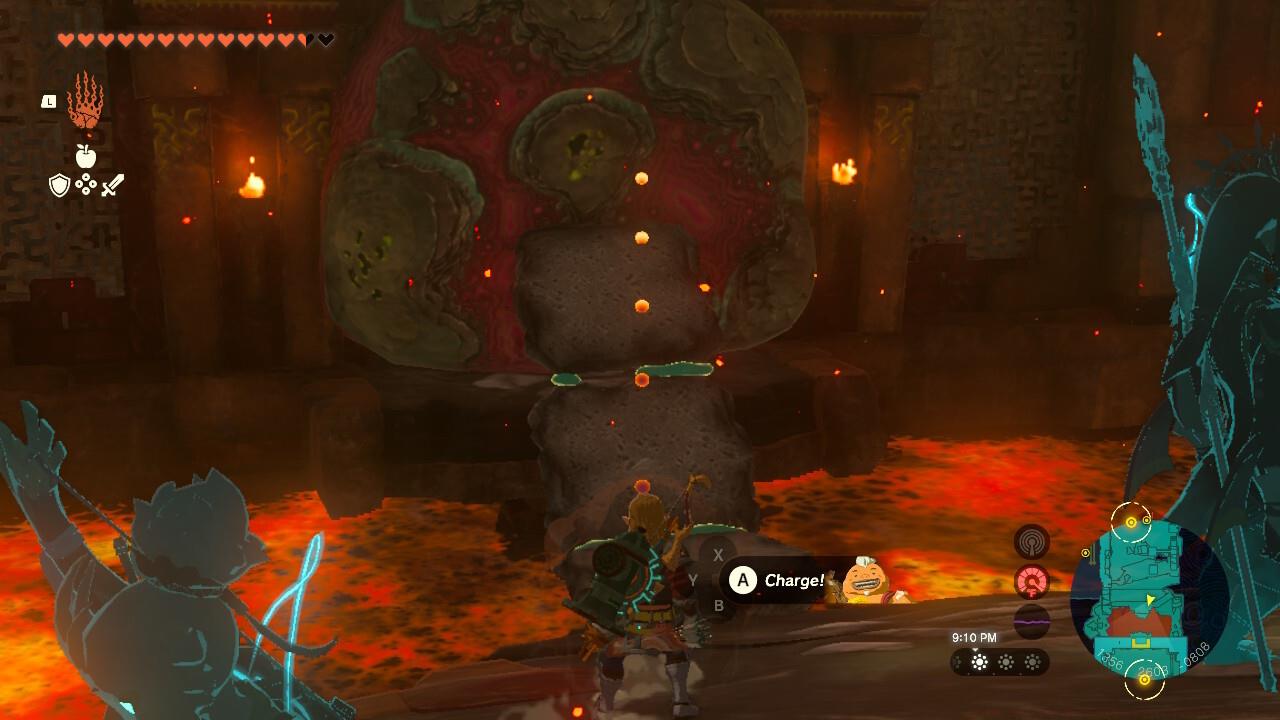
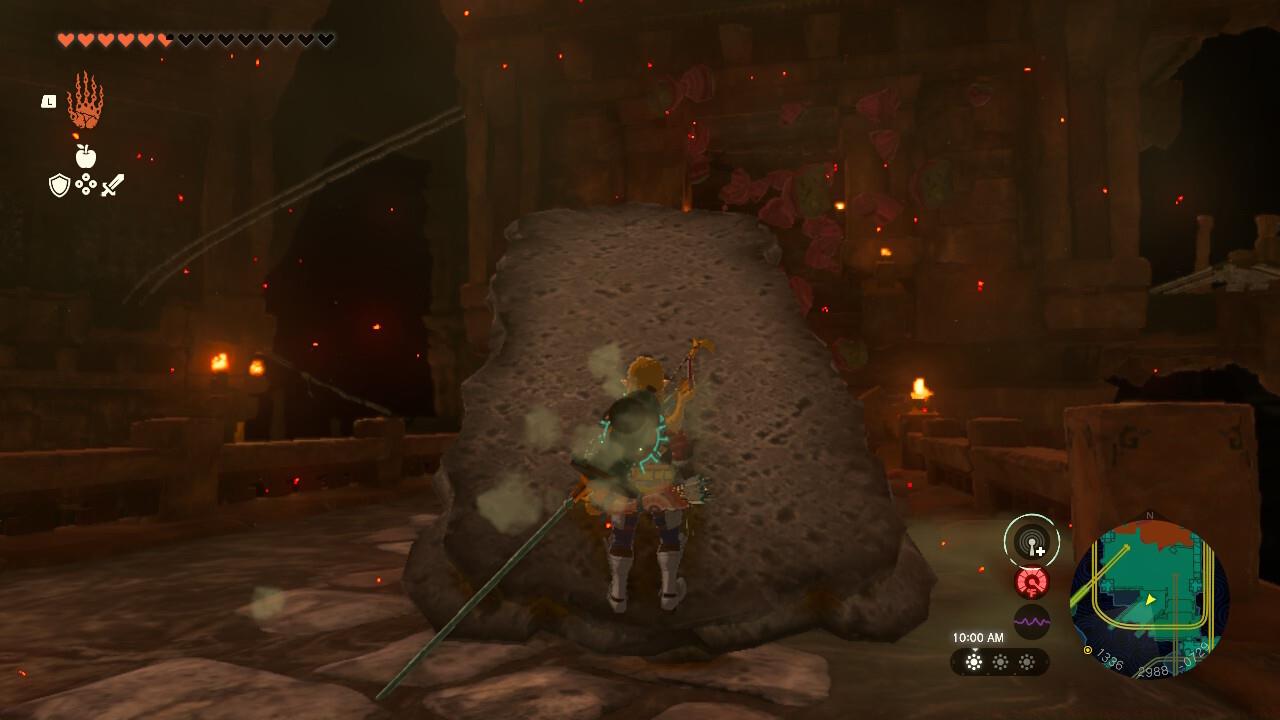
1F gong/padlock concealed behind destructible rock formation
At the initial stopping platform, descend to lower terrain containing a vulnerable boulder barrier. Deploy Yunobo’s Rolling Fireball to shatter the obstruction, revealing your first target gong.
Second Floor (2F) Rail Manipulation
Proceed along rail routes until reaching the subsequent transfer point. Rotate completely around and reconfigure the arrow indicator to point rightward, enabling cart transport to the 2F intersection zone.
2F gong/padlock protected by barrier system
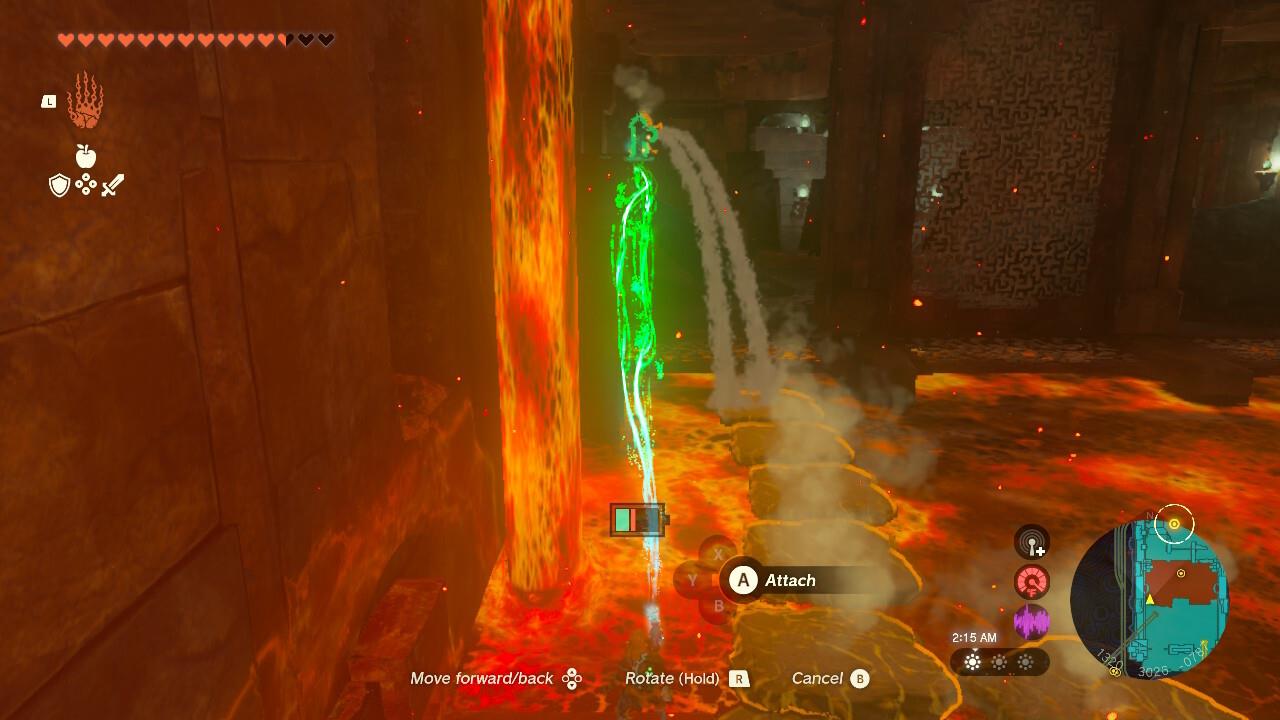
Navigate to the left sector and activate the arrow switch mechanism. This action lowers the rail bridge, permitting cart passage across the gap. Observe the second gong positioned behind protective shielding, requiring strategic Zonai Hydrant repositioning to create continuous igneous rock stepping stones for safe crossing.
Third Floor (3F) Junction Navigation
While positioned at the 2F locking mechanism, pivot to view the opposing chasm wall. Re-activate the previously used switch to elevate tracks to upper levels. Ride the ascending cart to the summit, arriving at the complex 3F junction point.


Left: 3F junction; Right: 5F gong/padlock
Temporarily disregard the two proximate switches. Instead, advance toward the Construct entity stationed near storage shelving. To the right flank, notice multiple carts alongside fractured track segments. Affix a Rocket device to a cart angled diagonally upward, providing sufficient propulsion to reach the 4F sector.
Fourth Floor (4F) and Final Lock
4F gong/padlock requiring rocket-assisted approach
Opening to the other 1F gong/padlock demonstrating alternate access routes
Efficient Route Planning
Optimize your temple traversal by identifying the most direct path between gong locations. Experienced players can complete the main puzzle sequence in approximately 45 minutes with proper planning, while thorough exploration may extend to 90 minutes. The key is understanding that the temple’s vertical design often requires backtracking with newly unlocked pathways.
Avoid These Common Mistakes
Many players waste resources by using multiple Rockets unnecessarily. Remember that most cart journeys require only single Rocket assistance if properly aligned. Another frequent error involves misjudging Yunobo’s cooldown period – time your fireball deployments between other activities to maintain steady progress.
Companion Ability Optimization
Yunobo’s Rolling Fireball serves multiple functions beyond gong activation. Use it proactively to clear potential obstructions before they block your path, and always survey tracks ahead for breakable boulders that might interrupt your journey. For players seeking broader adventure knowledge, our Complete Guide offers comprehensive gameplay systems analysis.
Strategic Zonai device application significantly reduces completion time. Position Hydrants to create permanent pathways rather than temporary solutions, and conserve Rocket devices for essential vertical transitions where no alternatives exist.
Mastering these temple mechanics provides excellent preparation for complex environmental challenges throughout Hyrule. The puzzle-solving skills developed here will prove invaluable when tackling other divine beasts and ancient complexes. If you’re enjoying this strategic approach to gaming challenges, you might appreciate our Class Guide for tactical team-based gameplay.
Action Checklist
- Master Yunobo’s Rolling Fireball timing for gong strikes and boulder destruction
- Navigate 1F lava flows using Zonai Hydrants and locate first gong behind breakable rock
- Manipulate 2F rail switches to access second gong across chasm
- Reconfigure 3F junction tracks and apply Rocket propulsion to reach upper levels
- Strike final gongs on 4F and 5F to complete temple objective
No reproduction without permission:SeeYouSoon Game Club » Zelda: Tears Of The Kingdom – Fire Temple Puzzle Guide Master the Fire Temple's five gong puzzles with strategic Yunobo usage and efficient navigation techniques