TL;DR
- Access the Inventor’s island immediately in Chapter 3 for crucial equipment upgrades
- Use your Odradek scanner to navigate tar ocean safely by following yellow path indicators
- Collect Inventor-bound cargo before crossing to ensure immediate dialogue access
- Multiple crossing methods available including vehicles, ziplines, and monorail systems
- Strategic timing affects available upgrades and progression efficiency
Hideo Kojima continues his tradition of hiding valuable non-player characters behind environmental puzzles, and the Inventor represents one of Death Stranding 2’s most rewarding challenges. This reclusive genius provides access to game-changing equipment enhancements that significantly improve Sam’s capabilities throughout the Australian expedition.
The isolated figure known as the Inventor operates from a remote northern island and offers premium gear modifications that can transform your traversal experience. These upgrades become available during Chapter 3: Drawbridge, though visiting immediately versus delaying your approach carries distinct strategic implications for your playthrough progression.

Our comprehensive Death Stranding 2: On The Beach guide delivers optimized routing to locate the Inventor efficiently, while also presenting alternative discovery methods for players who prefer organic exploration while establishing Chiral Network connectivity across Australia’s challenging terrain.
Immediately after passing through the Plate Gate into Australia, consult your map to identify the Inventor’s isolated landmass positioned at the extreme northern boundary. The journey from entry point to destination represents a substantial徒步 expedition, though it remains achievable through persistent navigation without specialized equipment requirements.
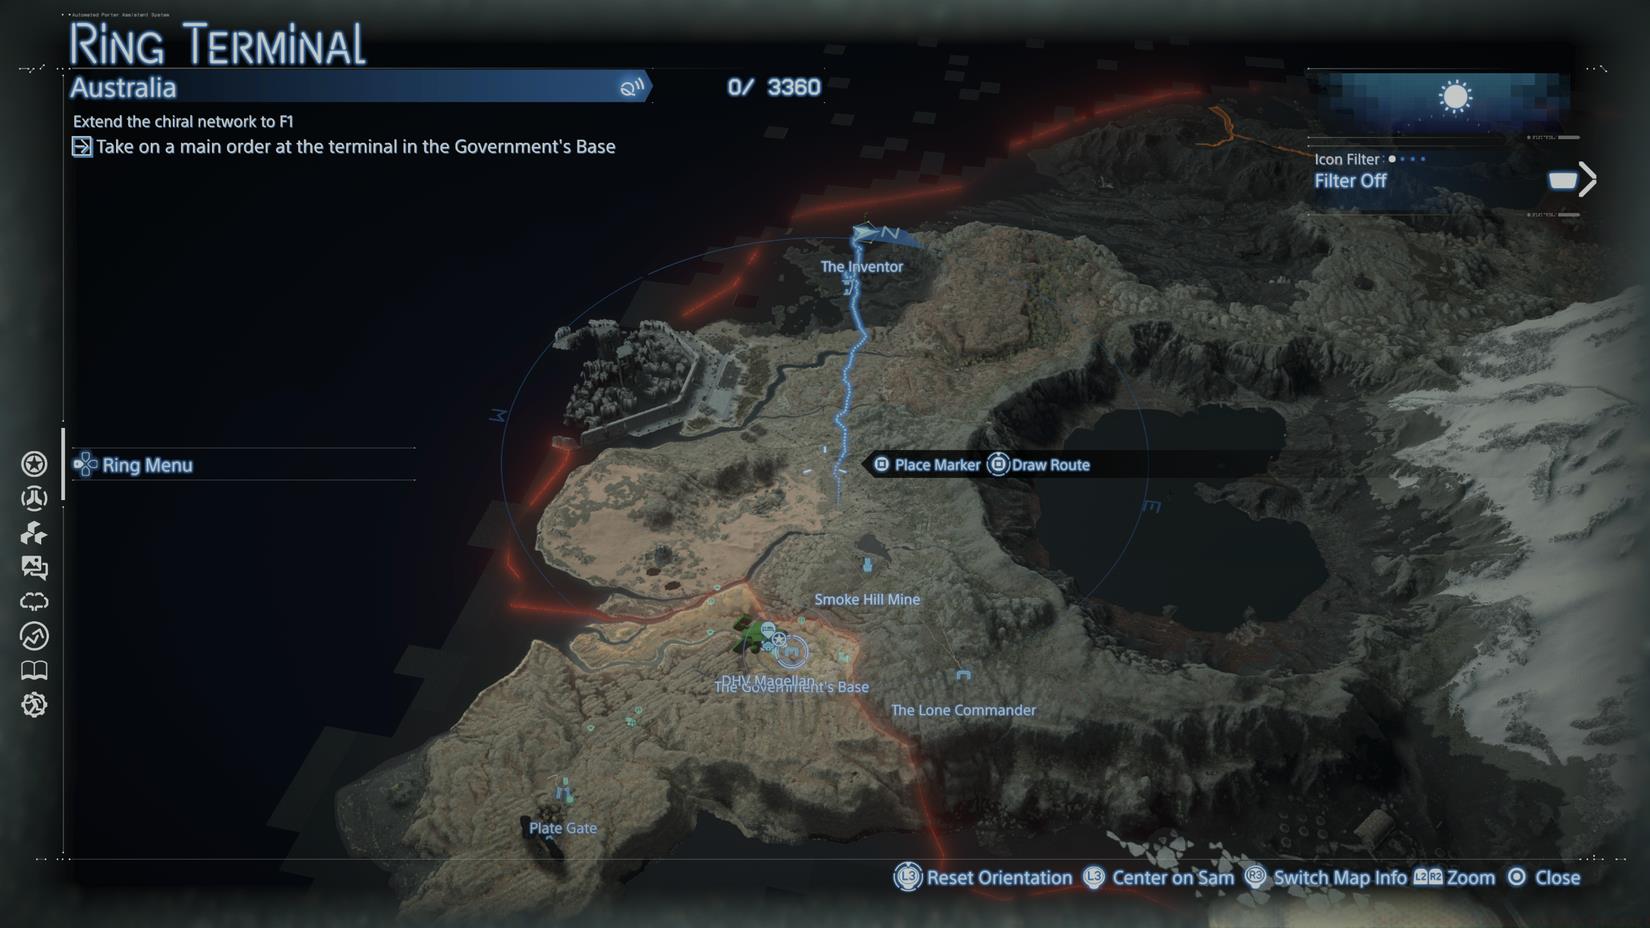
Image: Kojima Productions / Sony Interactive Entertainment via Polygon
Navigation confirmation arrives when you encounter the Special Alloy Mine, signaling proper directional progress. Upon reaching the northern coastline, you’ll confront the central challenge: the Inventor’s island sits separated by expansive tar oceans without conventional bridging infrastructure. This environmental puzzle demands creative problem-solving to establish safe passage across the hazardous terrain.
Pro Tip: Before attempting the crossing, ensure you’ve stocked adequate hydration and stamina restoration items. The journey demands considerable endurance, and running out of supplies mid-crossing could strand you in dangerous territory. Consider consulting our Class Guide for loadout optimization strategies that translate well to Death Stranding’s logistics challenges.
The most accessible crossing technique involves navigating the tar ocean on foot using your Odradek scanning functionality to identify stable pathways. The scanner’s interface provides crucial environmental feedback: yellow indicators designate shallow tar regions that support safe traversal, while red markers warn of dangerously deep areas that will immobilize Sam. Multiple viable routes extend from the coastline, though continuous scanner activation via L1 remains essential to prevent accidental deviation from secure paths.
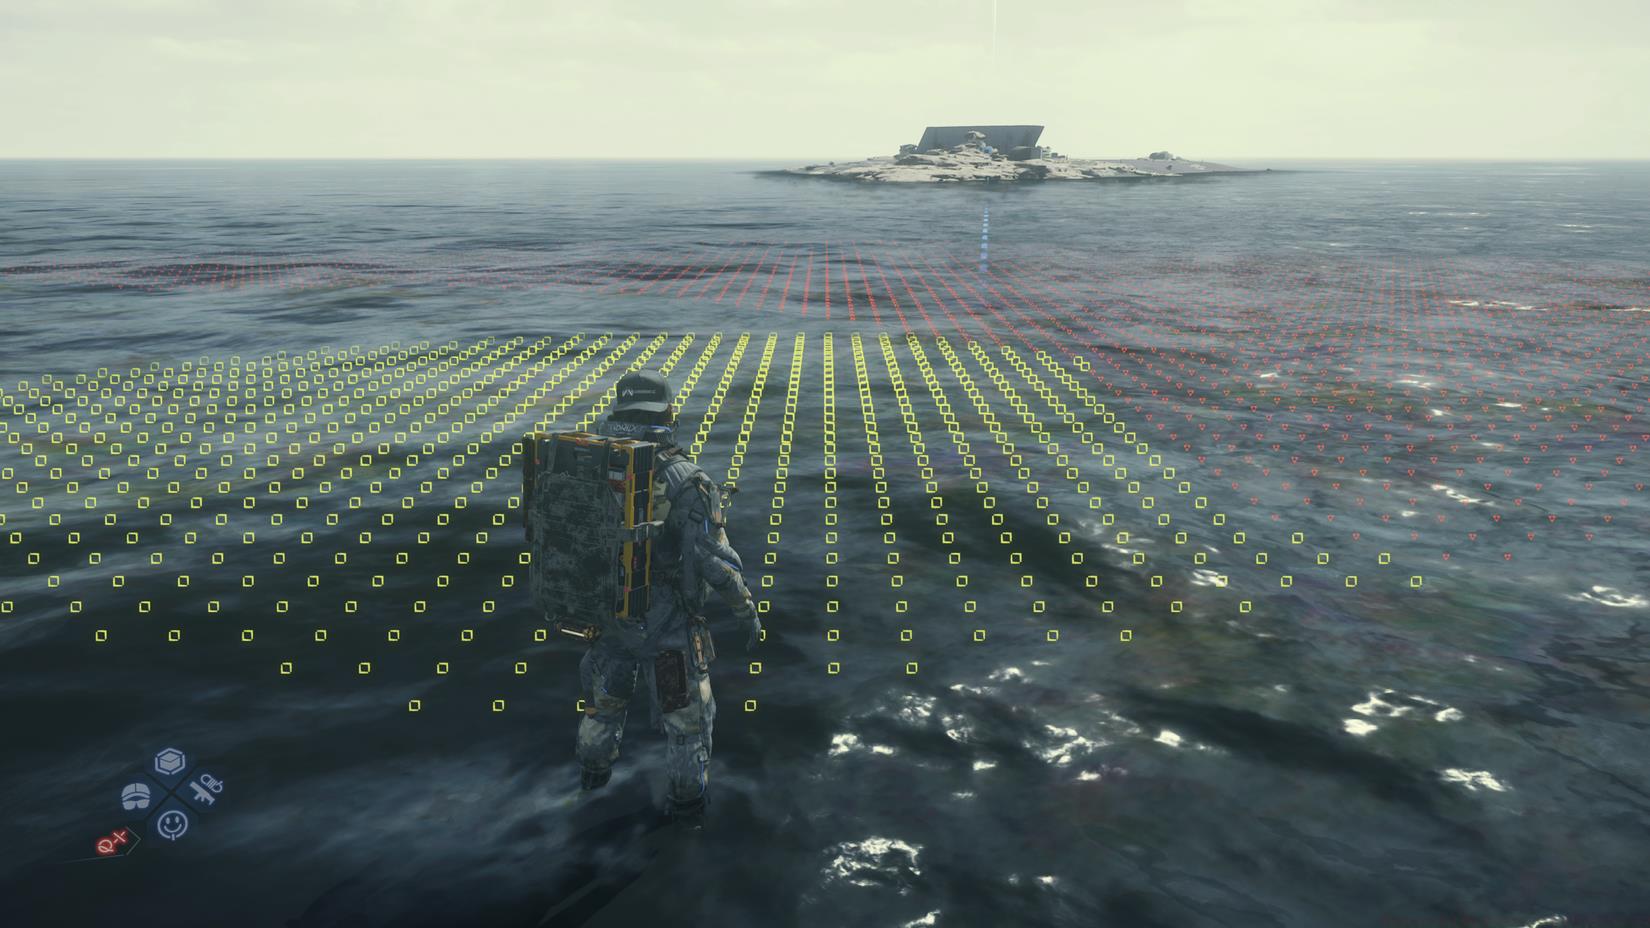
Image: Kojima Productions / Sony Interactive Entertainment via Polygon
Vehicular transport dramatically accelerates the crossing process, though most players won’t possess access to land vehicles during initial Chapter 3 exploration. While automobiles provide faster tar navigation, their acquisition typically requires substantial storyline advancement. Without vehicle access, pedestrian crossing represents your most practical immediate option.
Advanced infrastructure solutions include monorail networks or specialized traversal equipment like zipline systems and the Transponder device. Your chosen methodology will naturally evolve based on Australia’s Chiral Network connectivity level. These advanced methods mirror the strategic infrastructure planning found in our Complete Guide to military tactical positioning.
Common Mistake: Many players attempt to rush through tar sections without methodical scanning, resulting in frustrating immobilization. Move deliberately, scan constantly, and always have an escape route planned. The tar behaves differently than water – once caught, extraction becomes significantly challenging without assistance.
Successfully reaching the island represents only the initial phase of engaging with the Inventor. Many players experience confusion upon arrival when they find the terminal accessible but the Inventor unresponsive. The crucial activation requirement involves arriving with designated cargo shipments addressed specifically to the Inventor. Without these delivery items, the character remains inaccessible despite your successful navigation achievements.
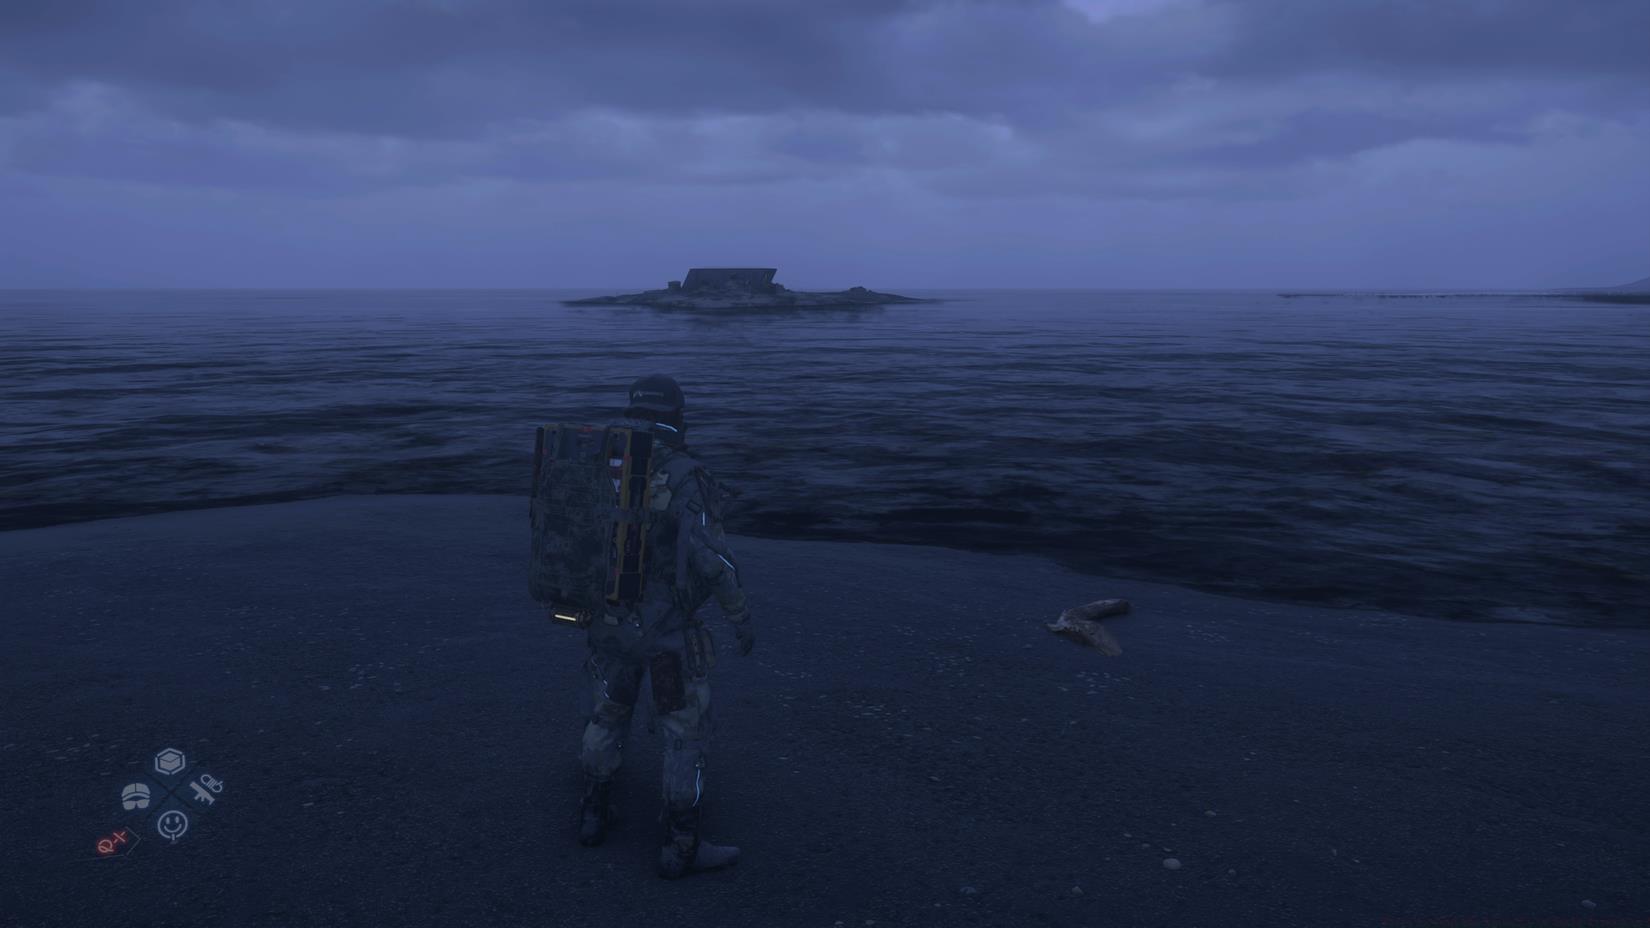
Image: Kojima Productions / Sony Interactive Entertainment via Polygon
Throughout your Australian exploration, you’ll encounter delivery missions specifically targeting the Inventor’s location. Strategic cargo collection along the coastline before attempting the tar crossing ensures immediate dialogue access upon arrival. These packages often contain specialized components that the Inventor requires for crafting the upgrades he provides in return.
The delivery mechanic emphasizes Death Stranding’s core connectivity theme while providing tangible rewards for thorough exploration. This progression system shares philosophical similarities with the unlock mechanisms detailed in our Weapons Unlock guide, where specific challenges yield specialized equipment access.
Optimization Tip Plan a multi-objective route that collects Inventor-bound cargo while connecting nearby prepper stations. This approach maximizes efficiency by solving multiple objectives simultaneously. Most Inventor delivery missions become available after activating the first few Chiral Network nodes in northern Australia.
Action Checklist
- Activate Chapter 3 and immediately plot course to northern island via map
- Collect Inventor-specific cargo packages along coastline before crossing
- Navigate tar ocean using Odradek scanner, following yellow path indicators
- Deliver cargo to activate dialogue and access upgrade options
- Return with additional deliveries to unlock advanced equipment modifications
No reproduction without permission:SeeYouSoon Game Club » Where to find the Inventor in Death Stranding 2 Master the Inventor's Island puzzle in Death Stranding 2 with advanced navigation strategies and cargo delivery tactics