Master Death Stranding 2 with essential beginner strategies for cargo management, stealth, and world navigation
Understanding the Core Systems
Death Stranding 2 presents an intricate gameplay experience that can initially feel daunting for newcomers. The expansive open-world environment combines exploration, survival mechanics, and strategic decision-making that significantly impacts your progression. Taking time to acclimate to these systems is crucial for success.
Your Odradek scanner serves as your primary navigation tool, providing real-time hazard detection while displaying your planned route as a visible guidance system. Regular environmental scanning helps identify terrain challenges, BT presence, and optimal pathways. Additionally, monitoring weather patterns is essential—Timefall precipitation gradually deteriorates cargo containers, while other weather events may create temporary obstacles or opportunities.
The Corpus functions as your comprehensive digital encyclopedia, cataloging narrative progression, character dossiers, mission logs, and terminology definitions. This resource becomes invaluable when you need to revisit story details or understand complex game mechanics. Many players overlook regularly consulting the Corpus, missing critical contextual information that enhances gameplay understanding.
Complementing this, the Social Strand System operates as an interactive network feed that tracks NPC activities and developments. This system reveals hidden opportunities, connection events, and community developments that aren’t highlighted in main missions. Proactive monitoring of this social layer can uncover valuable resources, alliance opportunities, and narrative threads that enrich your overall experience.
Advanced Cargo Management
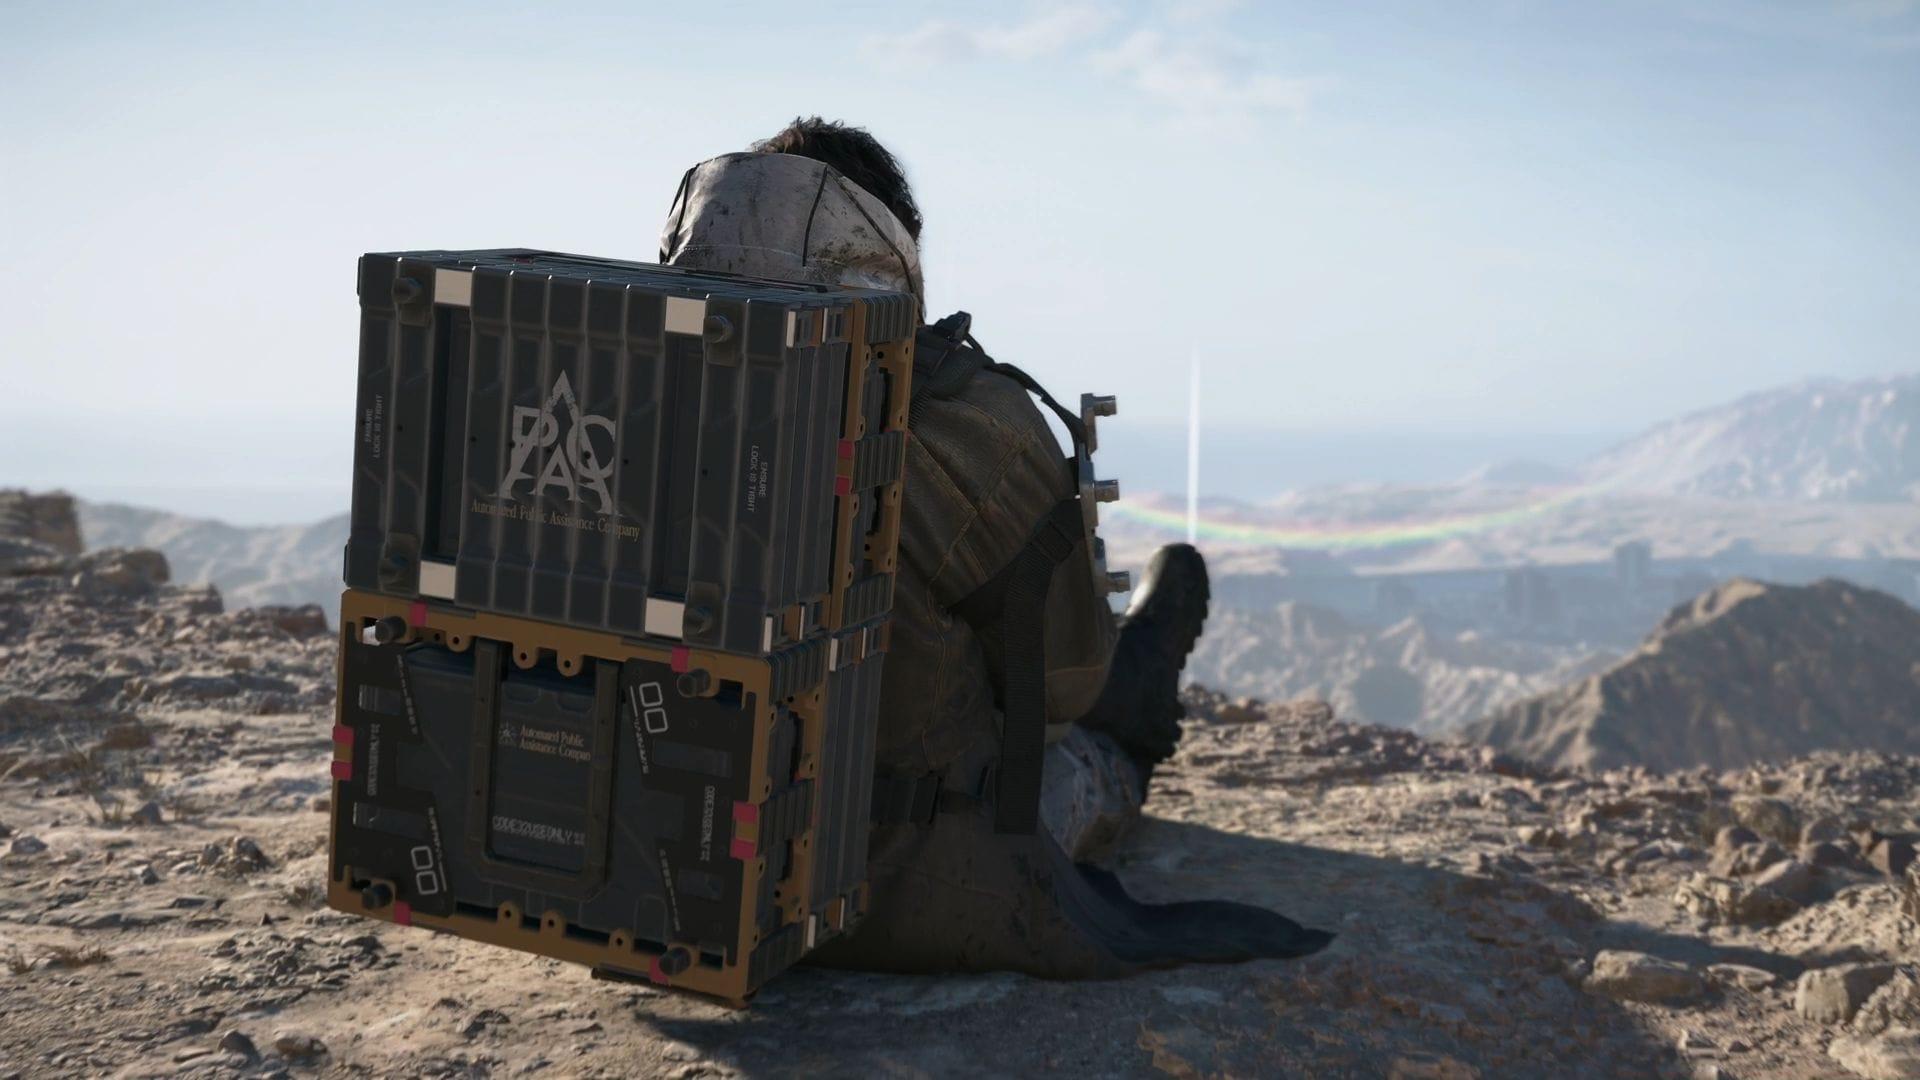
As a porter, effective cargo management represents one of your most critical responsibilities in Death Stranding 2. Proper weight distribution directly influences stability, movement speed, and stamina consumption. Heavier items should always occupy the lower backpack compartments, creating a stable foundation, while medium-weight cargo fills middle slots. The lightest equipment belongs on shoulder mounts or upper backpack areas to maintain center of gravity.
When manual organization becomes tedious, the Auto-Arrange function (activated by holding Triangle) provides intelligent cargo sorting. However, experienced porters often prefer manual arrangement for specific route optimization. For excessively tall cargo stacks, temporarily removing your backpack and using the Strand tool to secure loads prevents items from shifting during difficult terrain navigation.
Floating Carriers offer indispensable support for transporting surplus cargo across challenging landscapes. These robotic assistants not only carry additional weight but can be ridden downhill for rapid descent. Strategic players deploy multiple carriers for major deliveries, creating supply chains between distribution centers. Advanced techniques include using carriers as mobile cover during hostile encounters or positioning them as temporary storage during complex multi-stage deliveries.
Common Cargo Mistakes to Avoid: Overloading beyond capacity limits, ignoring container damage warnings, stacking asymmetrically causing balance issues, and failing to use carrier networks for long-distance hauls. These errors frequently lead to avoidable cargo damage, extended delivery times, and unnecessary resource expenditure.
Stealth and Combat Strategies
Early gameplay emphasizes stealth approaches when encountering both supernatural BTs and human adversaries. Against BTs, crouching movement combined with continuous Odradek scanning provides the safest engagement method. The scanner reveals spectral locations and movement patterns, allowing careful path planning. When proximity becomes dangerous, holding R1 to hold your breath temporarily masks your presence from nearby entities.
Human threats require different tactical considerations. Scout enemy positions using watchtowers or the Dollman device before engagement. Marking hostile locations enables informed decisions about infiltration routes or engagement points. Non-lethal weaponry like the Bola Gun immobilizes targets temporarily, while the Maser Gun delivers stunning electrical charges. Lethal force creates complications—corpse disposal becomes necessary to avoid voidout events that permanently alter game areas.
Advanced Stealth Techniques: Use environmental sounds to mask movement, time actions during weather events that reduce enemy awareness, employ decoy cargo to distract patrols, and utilize terrain elevation for observational advantages. These methods significantly improve success rates in hostile territories without escalating conflicts unnecessarily.
Resource conservation remains crucial during encounters. Ammunition and specialized equipment have limited availability early game, making avoidance often preferable to confrontation. Later gameplay may permit more aggressive approaches as your arsenal expands, but initial hours benefit from cautious, measured interactions with all threats.
Mission Optimization
While main story orders drive narrative progression, side content provides substantial gameplay benefits. Sub orders and lost cargo deliveries yield exclusive gear, weapon enhancements, and cosmetic items like the Otter Hood. These optional activities frequently introduce gameplay mechanics not encountered in primary missions, broadening your skill set.
Lost cargo retrieval establishes relationships with isolated facilities, gradually expanding your connection network. Some prepper outposts remain inaccessible through main storyline progression alone, requiring repeated side mission completion to unlock. These connections often provide unique blueprints, specialized equipment, and narrative insights that enrich the overall Death Stranding 2 experience.
Efficiency Strategies: Combine multiple delivery routes to maximize efficiency, prioritize time-sensitive cargo during favorable weather windows, use zipline networks once established for rapid transport, and maintain equipment repair stations along frequently traveled routes. These practices transform tedious deliveries into streamlined operations that support broader exploration and connection-building objectives.
Regular facility visits replenish resources and provide opportunities to fabricate new equipment. Advanced players establish routine maintenance circuits that keep supplies stocked while gradually expanding their operational range. This systematic approach prevents resource shortages during critical missions and ensures preparedness for unexpected challenges.
No reproduction without permission:SeeYouSoon Game Club » 5 best tips and tricks for Death Stranding 2 beginners Master Death Stranding 2 with essential beginner strategies for cargo management, stealth, and world navigation