TL;DR
- Your choice between Hunter and Emissary in Unearthed dramatically affects Revelation mission allies and difficulty
- The Robot Room encounter can be trivialized by hacking the control terminal to turn robots against Starborn
- Persuasion requires 8 skill points but offers peaceful resolution without legendary weapon rewards
- Combat path provides unique legendary weapons but requires mastering Starborn abilities and phase-shifting mechanics
- Vision sequences reveal crucial multiverse lore and provide unique gear opportunities from alternate realities
The Revelation mission represents the climactic conclusion to your Starfield journey, bringing the main campaign to its dramatic finale. This pivotal quest demands thorough preparation as it culminates your entire adventure across the Settled Systems.
This Starfield final mission occurs immediately following resolution of the Entangled dilemma on Freya III. You possess nearly all artifacts except those controlled by your two primary Starborn adversaries. Crucially, your decision during Unearthed’s conclusion—specifically whether you side with the Hunter or Emissary—will fundamentally shape how the Revelation mission unfolds.
Essential Preparation Checklist:
- Stockpile at least 15-20 medpacks and emergency healing items
- Ensure your best weapons are fully upgraded and ammunition stocked
- Consider ranking Persuasion skill if pursuing diplomatic resolution
- Complete companion quests for maximum affinity benefits
- Have multiple digipicks available for hacking opportunities
Critical Warning: This guide contains comprehensive mission spoilers that reveal major plot developments.
Initiating the Starfield Revelation mission requires traveling to Masada III within the Masada system, positioned at the galaxy’s southeastern extremity. Prepare for immediate combat upon arrival, as hostile Starborn forces await your appearance.
- If you aligned with either the Hunter or Emissary previously, your chosen ally will provide substantial support against their rival’s fleet.
- Choosing neither faction means confronting both Starborn leaders simultaneously alongside their substantial reinforcements. Both key characters will retreat once their vessels sustain critical damage.

Masada III’s orbital space provides the perfect arena for your final space combat engagement.
Advanced Space Combat Tactics:
- Prioritize eliminating smaller escort vessels before engaging capital ships
- Use asteroid fields and planetary debris for tactical cover during dogfights
- Monitor shield systems carefully and disengage to recharge when necessary
- Allied Starborn ships can draw enemy fire, creating flanking opportunities
The First Encounter: Loading Docks
After touching down at the Ecliptic Base, you’ll encounter numerous fallen mercenaries. Selecting a Starborn ally during Unearthed’s conclusion means they’ll welcome you upon arrival and join your squad as a permanent NPC companion.
Progressing toward the Loading Docks zone triggers multiple Starborn appearances. Utilize environmental barriers and structural walls for projectile defense while systematically eliminating opponents. Soon you’ll access an expansive area containing additional deceased mercenaries, though one Starborn will resurrect several corpses.
Your objective involves exterminating every visible Ecliptic mercenary. The Starborn will persistently reanimate fallen combatants until they remain as the sole survivor. Upon defeating this entity, they’ll relinquish a key granting access to subsequent areas.
Strategic positioning allows Starborn adversaries to absorb concentrated firepower from multiple angles.
The Second Encounter: Robot Room
The subsequent confrontation unfolds within an enormous chamber housing numerous robotic sentries, canine units, and automated turrets. Two Starborn combatants also occupy this space. Interestingly, many players consider this the mission’s most manageable encounter due to a clever bypass strategy: rapidly advance to the central control room, unlock the door using a digipick, and compromise the terminal to modify friend/foe parameters. This maneuver redirects all automated systems to assault the Starborn instead, resulting in a swift and relatively uneventful engagement.
Expeditious terminal hacking enables robotic units to target Starborn forces automatically.
The Third Encounter: The Cave
The penultimate confrontation occurs within a massive cavern system. Only one Starborn occupies this area, but they command significant reinforcements: duplicate versions of every Constellation companion. This represents the most challenging battle encountered thus far, as every hostile entity employs firearms, making complete avoidance of projectiles impossible.
We recommend initial aggressive advancement to establish targeting on the primary Starborn. Once identified, unleash your complete arsenal against this target. If sustaining substantial damage, administer medpacks and seek cover before resuming attacks against the Starborn. Eliminating this entity causes all mirror images to simultaneously vanish.
Deploying against multiple duplicate companions requires precise targeting and tactical positioning.
Visions
Advancing deeper into the facility requires traversing spatial ripples and dimensional distortions throughout the area. These phenomena provide glimpses into historical events that have occurred, though they apparently transpire within parallel universes. For example, recall the segment in A High Price to Pay where one companion perished? The vision now depicts your character’s death, which prompted your highest-affinity companion to continue their journey, ultimately transforming into the Emissary.
Additionally, it appears possible to combat and eliminate Vladimir Sall within this sequence. This permits acquisition of his distinctive outfit—since these events occur in an alternate reality, the Vladimir Sall in your primary universe likely remains unaffected.
Witnessing your character’s demise doesn’t constitute game over but provides crucial narrative context.
Vision Sequence Strategic Insights:
- These sequences offer profound multiverse lore revelations critical to understanding Starborn motivations
- Combat encounters within visions yield unique gear unavailable through conventional gameplay
- Pay close attention to dialogue variations for additional storyline comprehension
Boss Fight: Starborn Skip or Starborn Showdown
Enter Temple Mu to conclude your Starfield Revelation mission. Inside, you’ll engage in dialogue with both the Hunter and Emissary. You face these critical decisions:
- Attack — You must engage the Starborn you didn’t align with, or confront both if rejecting their Unearthed proposals.
- Persuade — This demonstrates why Persuasion ranks among the best skills available. You can persuade your opponent(s) to cease hostilities. This action demands eight skill points, though you’ll achieve high success probability with properly ranked ability. Consuming Hippolyta (located in your inventory’s Aid category) enhances your success chances.
Successfully convincing the Starborn to abandon conflict means they’ll surrender their artifacts. You can then collect Artifact Mu from the pedestal to finalize your assemblage. The primary drawback involves inability to acquire their exclusive legendary armaments unless you assault them or employ console commands.
Diplomatic resolution enables peaceful artifact acquisition without combat engagement.
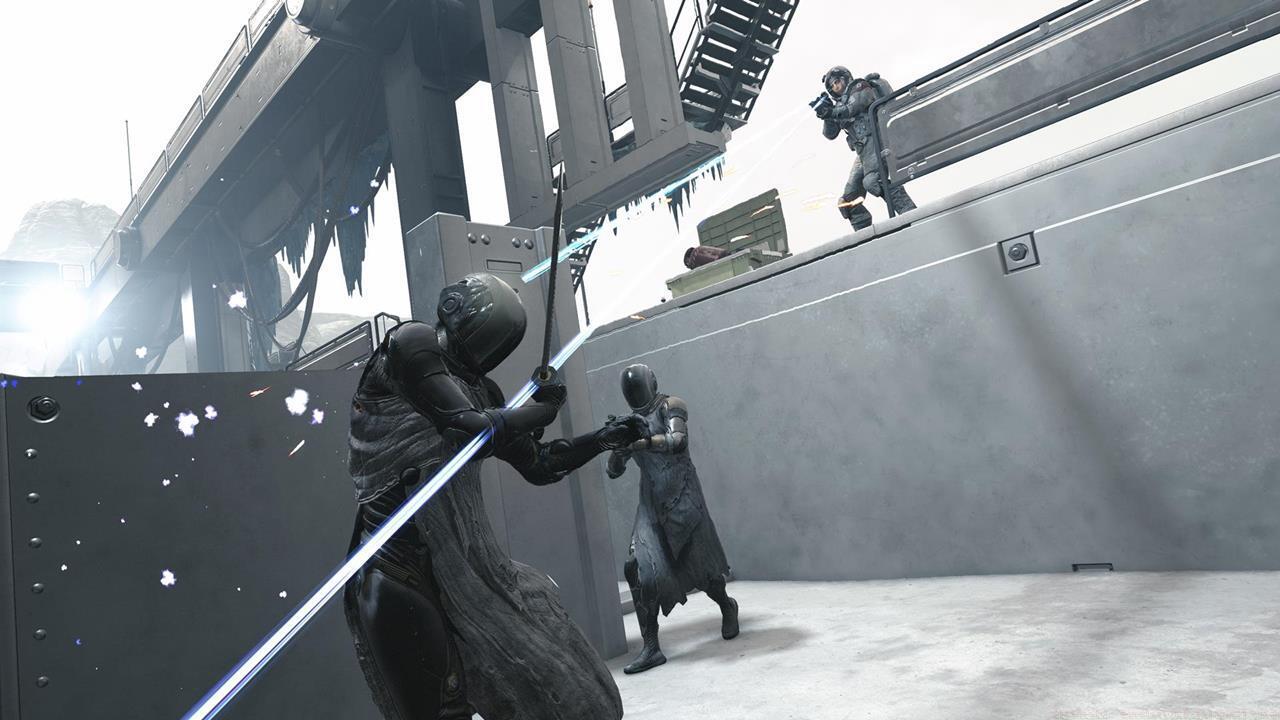
Naturally, you might select violent confrontation during the Starfield Revelation mission. If determined to defeat the Hunter and/or Emissary in Starfield, prepare thoroughly for an epic concluding battle. Essential knowledge includes:
- Both Starborn employ diverse powers. Anticipate everything including Solar Flare and Gravity Well, alongside Parallel Self duplicates and the Gravity Wave Fus Ro Dah ability.
- Allying with either Starborn means they’ll support you and continue utilizing their abilities. For instance, we’ve observed the Emissary frequently employing Sunless Space attempting to immobilize targets.
- You’ll experience continuous reality shifts while damaging opponents. These transitions transport you to previously visited locations, though within alternate dimensions. Representative examples:
- The Lodge in New Atlantis, where Constellation members abruptly become hostile since they lack recognition of your identity or the sudden appearance of mysterious individuals.
- The NASA Landmark, encompassing both zero-gravity chambers and exhibition galleries.
- The Well in New Atlantis and Neon’s Astral Lounge, causing civilian panic and evacuation.
Left: Combat continues within NASA facilities; Right: Eliminate adversaries upon returning to Temple Mu.
The confrontation reaches its ultimate intensity as all participants return to Temple Mu. After eliminating your target(s), you can collect their artifacts alongside their respective weaponry, which we naturally classify among the best weapons available. This logical conclusion aligns with the campaign’s completion.
- The Hunter relinquishes Unmitigated Violence, an exceptional legendary laser rifle.
- The Emissary surrenders Eternity’s Gate, a premium legendary particle beam rifle.
- We’ve additionally witnessed the Emissary yield three Starborn Spacesuit Gravitas outfits, though this occurred utilizing console commands to remove NPC essential status.
You now possess comprehensive knowledge regarding Starfield’s Revelation final mission completion. With this accomplishment achieved, anticipate exploring the endings, alongside preparing for New Game Plus implementation.
Starfield represents an enormous gaming experience with countless planets awaiting exploration. For additional guidance and strategic approaches, consult our guides hub for extensive coverage.
Legendary Weapon Analysis:
- Unmitigated Violence: High-damage laser rifle perfect for sustained engagements
- Eternity’s Gate: Particle beam weapon offering exceptional range and penetration
- Starborn Spacesuit Gravitas: Superior protective gear with unique gravitational properties
New Game Plus Preparation Tips:
- Complete all companion quests before transitioning to maximize relationship benefits
- Stockpile rare resources and credits since some carry over between cycles
- Experiment with different dialogue choices to uncover alternative narrative pathways
Action Checklist
- Complete essential preparation: stockpile medpacks, upgrade weapons, ensure digipick availability
- Navigate space battle using asteroid cover and prioritizing escort elimination
- Execute robot room terminal hack strategy to bypass combat encounter
- Prioritize Starborn elimination in cave encounter to instantly remove companion duplicates
- Choose between persuasion (skill check) or combat (legendary weapons) for final confrontation
No reproduction without permission:SeeYouSoon Game Club » Starfield – Revelation Final Quest Guide Master Starfield's final mission with expert strategies for combat, persuasion, and alternate endings