TL;DR
- Legendary enemies include enhanced creatures and unique droids requiring specialized tactics
- Proper stance selection and Force power timing are critical for success in these encounters
- Environmental awareness and positioning can turn difficult battles in your favor
- Preparation through skill tree optimization significantly increases your chances of victory
- Legendary enemies are hidden across Koboh, Jedha, and Coruscant requiring specific abilities to access
Confront the most formidable adversaries scattered throughout the galaxy in Star Wars Jedi: Survivor. These exceptional combatants will push your skills to their absolute limits.
Within Star Wars Jedi: Survivor, you’ll encounter numerous Legendary Enemies that demand strategic mastery. Referred to as Legendary Beasts within the game’s mechanics, these opponents encompass diverse biological creatures alongside advanced mechanical constructs. Each encounter presents unique challenges, with certain foes representing enhanced iterations of standard enemies while others constitute completely original designs with devastating attack patterns. This comprehensive battle manual provides the essential knowledge needed to overcome every Legendary Enemy encounter in Star Wars Jedi: Survivor.
Tracking down Star Wars Jedi: Survivor’s Legendary Enemies requires strategic exploration beyond main story paths. These formidable adversaries typically inhabit secluded zones that demand specific Force abilities to reach. Understanding the core mechanics of legendary hunting will significantly improve your success rate.
Mosey, the knowledgeable NPC stationed at Pyloon’s Saloon, serves as your primary information source. As you advance through the campaign narrative, she progressively reveals additional enemy locations on your map. Each successful confrontation yields valuable rewards that enhance your combat capabilities throughout the game.
Essential Preparation Strategies
Before embarking on legendary hunts, ensure you’ve acquired critical movement and combat abilities. The Lift and Slam power proves essential for accessing several encounters, while the Electro Dart ability becomes necessary for Coruscant-based challenges. Proper ability timing often determines victory against these powerful foes.
Rewards from legendary battles fall into three categories: Essence Crystals for experience points, new perk unlocks that modify gameplay mechanics, and additional Stim containers to increase your healing capacity.
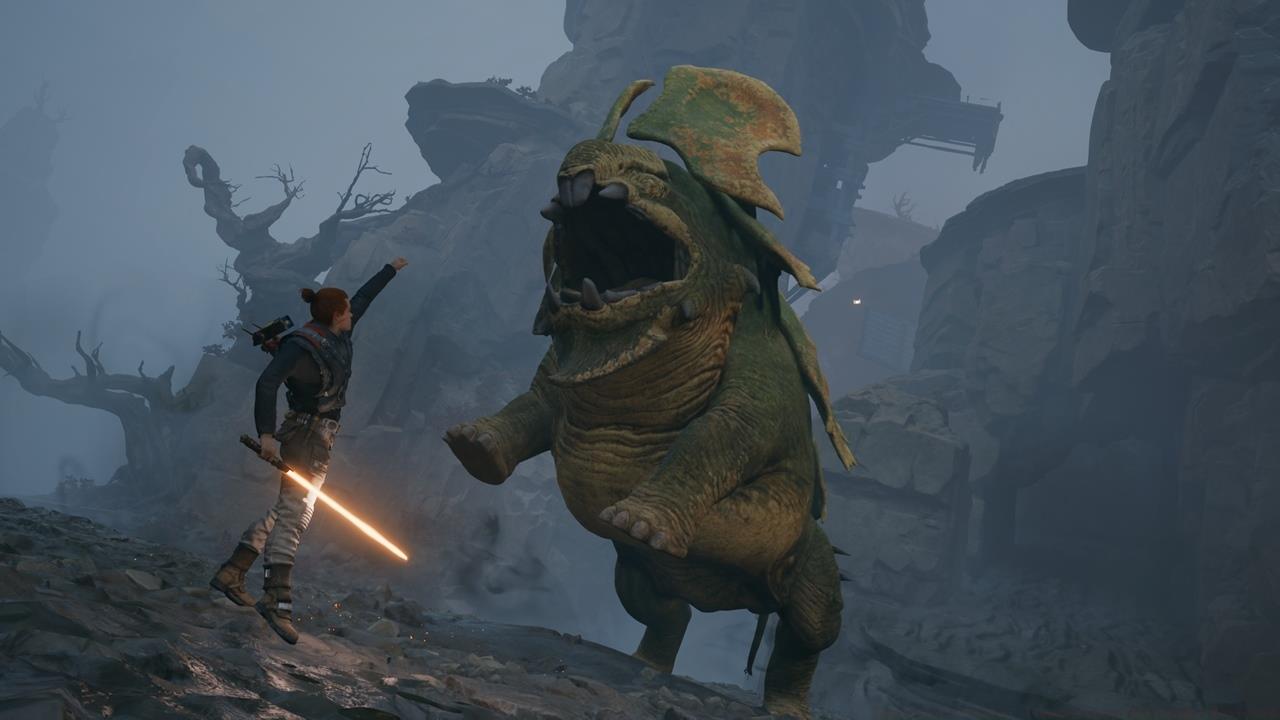
Rancor
- Location: Koboh – Sodden Grotto
- Reward: Shatter perk – Increases the damage of your attacks against enemy guard meters.
The initial Rancor encounter activates after conversing with concerned citizens near Rambler’s Reach who mention trapped miners. Venturing into the adjacent cave system leads to the Sodden Grotto, where this terrifying predator emerges from the darkness. Proper positioning becomes critical against its devastating area attacks.
This creature’s combat pattern includes brutal sweeping strikes that can eliminate substantial health segments instantly. Its most lethal maneuver remains the grab attack – failure to evade results in instant death for Cal. Many players underestimate the attack range, leading to unnecessary fatalities.
Advanced players should note that multiple Rancor encounters exist throughout the game. A secondary battle occurs deeper within Phon’qi Caverns, while a particularly challenging Force Tear pits you against two simultaneously. Access this by returning to the initial Coruscant level chamber and utilizing Force lift on the sealed doorway.


Left: Rancor location; Right: Rancor battle.
Spawn of Oggdo
- Location: Koboh – Fort Kah’lin
- Reward: Poncho unique outfit and Force Tear (secret)
Veterans of Fallen Order will recognize this amphibious menace, now returning with enhanced aggression. Locating this creature requires navigating to Fort Kah’lin, a Bedlam Raider encampment accessible through Untamed Downs. Grapple upward to the towers upon arrival, then proceed to the circular combat arena where you’ll descend into the confrontation.
Overcoming the Spawn of Oggdo demands precise reaction timing. Key threats include the Bile Vomit area denial attack and the Leaping Lunge gap closer. However, the most dangerous technique remains the Scorpion-inspired Tongue Lash that pulls Cal toward the creature for multiple biting strikes.
Post-victory, interact with the frog statue in the arena, then visit Doma’s Shop to activate the hidden Secret Force Tear challenge featuring simultaneous combat against Oggdo Bogdo and Spawn of Oggdo.


Left: Spawn of Oggdo location; Right: Spawn of Oggdo battle.
The Massiff
- Location: Koboh – Lucrehulk Core/Yurt Barracks
- Reward: XP Essence
The Massiff encounter occurs during the Lucrehulk storyline segment. Progress through the interior until reaching the Yurt Barracks, where you’ll discover an initially inaccessible doorway. The required Lift and Slam ability unlocks later in your progression.
This modified Magnaguard variant exhibits exceptional combat speed and defensive capabilities. Its attack patterns include rapid strikes combined with consistent evasion maneuvers. Successful engagement requires patience rather than aggressive offense patterns.


Left: The Massiff location; Right: The Massiff battle.
Beetu Deetu
- Location: Koboh – Southern Reach
- Reward: N/A
The spawning conditions for Beetu Deetu remain somewhat mysterious. These enhanced B2 Battle Droids materialize unexpectedly along the Southern Reach pathway beyond the Trontoshell dinosaur. Their combined firepower presents significant challenge due to simultaneous rocket and blaster assaults.
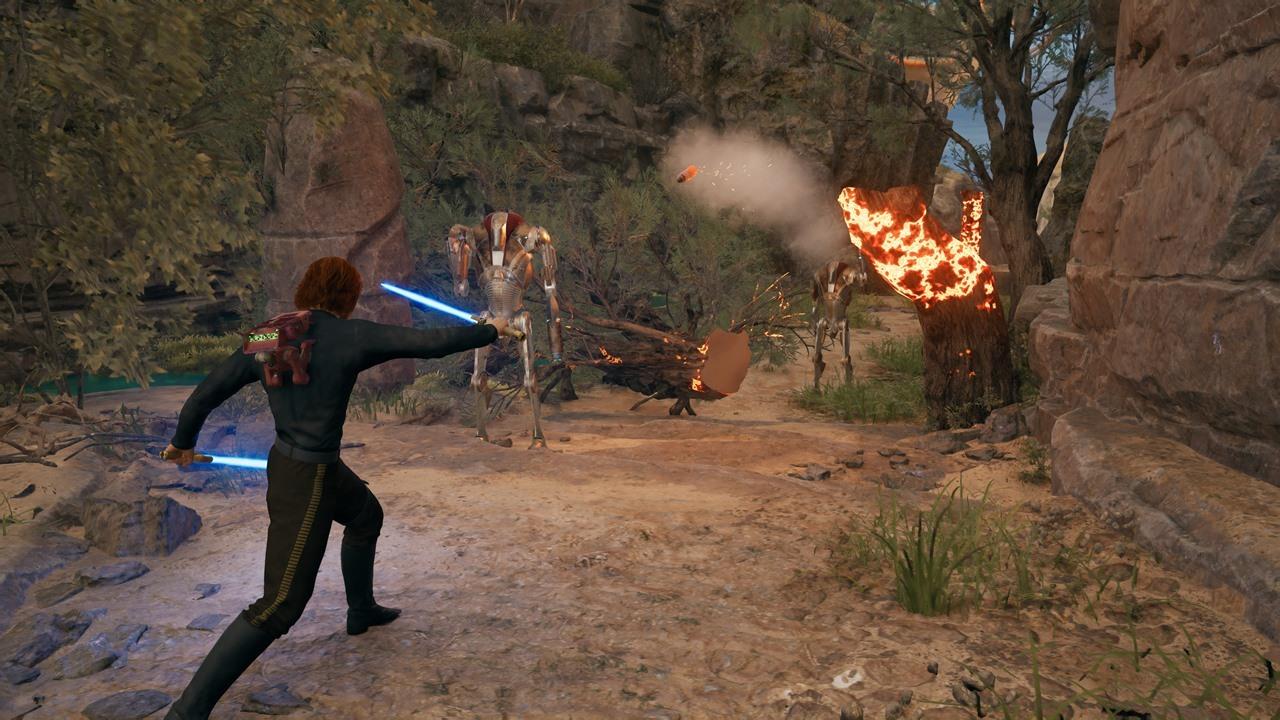
These two droids will pop up when you approach the Southern Reach fast travel point.
Gorocco Matriarch
- Location: Koboh – Southern Reach
- Reward: Stim container
Following your second Shattered Moon expedition, Mosey reveals the Gorocco Matriarch’s location. Access the path from Derelict Dam fast travel point, navigating through the Rolling Mine tunnel. Lure the mine to the right-side area containing the workbench and elevator mechanism.
Upon reaching the edge, utilize Force grab to propel the explosive device against the wall, creating a new passageway. Ascend to the summit while engaging enemies and activating the elevator shortcut. Finally, employ Lift and Slam to breach the sealed door and confront this creature for an additional Stim charge reward.


Left: Gorocco Matriarch path; Right: Gorocco Matriarch battle.
Mire Terror
- Location: Koboh – Viscid Bog
- Reward: Stim container
The Mire Terror presents unique accessibility challenges. Mosey provides the rumor after completing the Lucrehulk sequence, indicating the target inhabits Viscid Swamp region.
Standard navigation proves impossible for reaching this adversary. Instead, return to Gorge Crash Site, Koboh’s initial fast travel location. Utilize Lift and Slam to open the metallic door, descending via elevator to the lower level.
To the left, locate stone pillars that respond to your Lift ability. Beyond this section awaits the Mire Terror confrontation, featuring simultaneous combat against two Mogu specimens. Their signature grab attack demands rapid button input sequences for Cal to escape and disable their limbs.


Left: Mire Terror location; Right: Mire Terror battle.
E3-VE3
- Location: Koboh – Untamed Downs
- Reward: XP Essence
This enhanced Droideka variant resides within the Untamed Downs central rock formation. A base protected by green energy barriers requires Merrin’s Charm for entry, followed by Lift power to open the doorway. Prepare for engagement as several B1 Battle Droids accompany this mechanical foe.
Strategic positioning becomes crucial during this encounter. The staircase area serves as the primary weakness – when attempting rolling maneuvers, the droid becomes temporarily immobilized, creating attack opportunities.
Looks like E3-VE3 won’t be evolving today.
Urgost, Fist of Rayvis
- Location: Koboh – Mountain Observatory
- Reward: N/A
This specialized Bedlam Smasher awaits confrontation within the Mountain Observatory complex. This engagement occurs as an integral campaign narrative component.
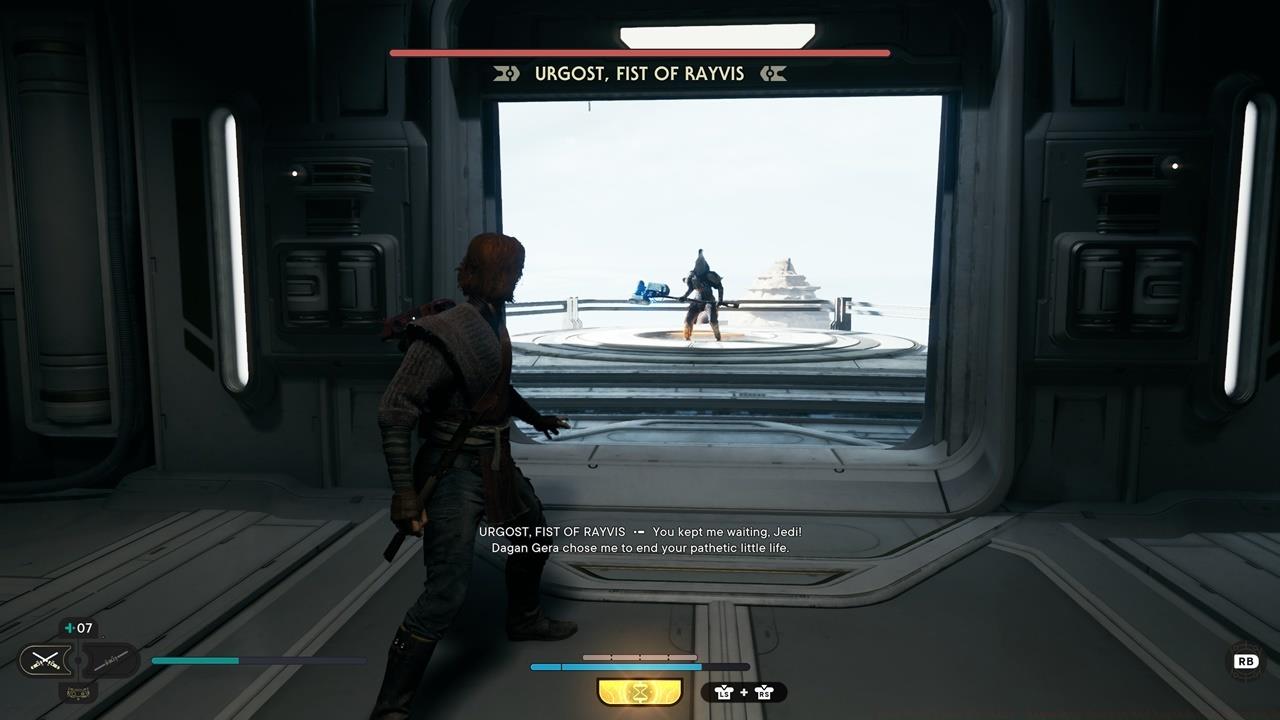
Don’t let this Bedlam Raider smash you to pieces.
Vile Bilemaw
- Location: Koboh – Fogged Expanse
- Reward: Fortitude perk – Increases the damage of your Lightsaber, as well as incoming damage from enemies.
Navigate through this misty region until discovering an openable doorway revealing a Mogu adversary. Rather than proceeding down that corridor, locate the cliffside zone populated with multiple Roller Mines. Adjacent to this area, identify the ledge that descends via mudslide into the creature’s lair.
Standard Bilemaw combat tactics apply here: evade poison breath discharges and frustrating rolling assaults.
Avoid the this Bilemaw variant’s annoying rolls.
Sutaban Alpha
- Location: Jedha – Crypt of Uhrma
- Reward: Gambler perk – Increases the XP you gain, but you can no longer Restore on death.
Reaching the Sutaban Alpha Legendary Beast demands considerable progression investment. The Crypt of Uhrma area becomes accessible while journeying toward Pilgrim’s Sanctuary. A puzzle mechanism requires resolution before progression becomes possible.
During earlier campaign phases, this location only provides access to a Stimpack and Aquarium Fish collection. Remember to activate the shortcut mechanism connecting back to the nearest fast travel location.
Advanced progression unlocks the capability to pass through green barriers. Once acquired, traverse the barrier within the pool section to encounter this enhanced Sutaban specimen featuring aggressive sweeping maneuvers and aerial assault capabilities.


From left to right: Crypts of Uhrma puzzle solution; Sutaban Alpha location; Sutaban Alpha battle.
Golden Skriton
- Location: Jedha – Desert Ridge
- Reward: Unflinching perk – Absorb one hit while charging the blaster without being interrupted.
The Desert Ridge zone neighbors the Anchorite Base settlement. Journey to this area’s farthest corner, proximate to the pathway leading toward Sheltered Hollow. Distantly visible crystals attract approach, triggering the Golden Skriton’s emergence from the sands.
Standard Skriton combat principles apply: evade claw swipes and tail whip attacks. Remain particularly vigilant against the skewering maneuver, which delivers multiple consecutive damage instances.
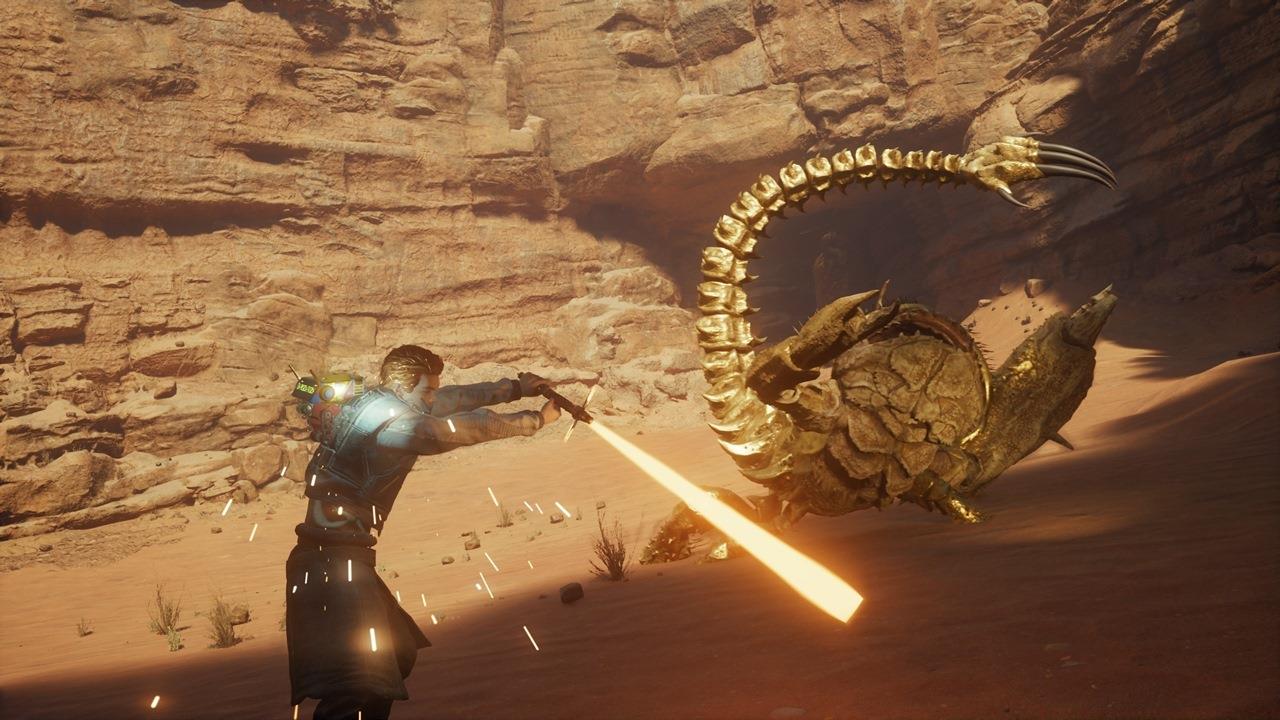
You might think that crystal in the distance is a freebie, until this thing shows up.
Frenzied Jotaz
- Location: Coruscant – Undercity Meats
- Reward: XP Essence
Although Coruscant becomes revisit-able during mid-campaign progression, this specific Legendary Enemy remains inaccessible until acquiring the Electro Dart ability during the Mountain Observatory sequence. Locate this creature within the Undercity Meats district, proceeding to the chamber containing both green energy barrier and electrical power source.
Utilize the Electro Dart on the battery mechanism to deactivate the barrier and initiate combat. The Frenzied Jotaz exhibits distinctive orange striping patterns resulting from previous Lightsaber engagements.

The Frenzied Jotaz’s orange stripes are just Lightsaber cuts.
D-L1t
- Location: Coruscant – Hangar 2046-C
- Reward: BD-1 Ability – Slice DT Sentry
Similar to the previous encounter, the Electro Dart proves essential for activation. Travel to Hangar 2046-C fast travel location, ascending via elevator to the upper level. Target the battery with your Electro Dart to summon this powerful DT Sentry variant.
Standard DT Sentry combat protocols apply: avoid spinning area attacks and disruptive stomping maneuvers. Your reward includes a specialized BD-1 capability enabling your companion droid to hack DT Sentry units during non-combat situations or when their health diminishes significantly.

Surprisingly enough, D-L1t isn’t accompanied by Botter N3-R0. We thought he’d come.
These represent the complete collection of Star Wars Jedi Survivor Legendary Enemies and Legendary Beasts. Successfully defeating every specimen unlocks the prestigious “I’m a Living Legend” achievement/trophy recognition.
Star Wars Jedi Survivor presents an expansive open-world experience filled with numerous gameplay dimensions and hidden discoveries. Expand your knowledge through our comprehensive guides hub resources.
Perk Synergy Strategies
Legendary enemy rewards often provide specialized perks that dramatically alter gameplay dynamics. The Shatter perk specifically enhances guard-breaking capabilities, while the Gambler perk modifies experience gain mechanics with significant risk-reward implications.
Advanced players should consider perk combinations that complement their preferred combat style. For aggressive players, combining Shatter with Fortitude creates devastating offensive potential, though the increased damage taken requires exceptional defensive skills.
Combat Rhythm Management
Successful legendary encounters demand mastery of attack timing and defensive spacing. Each enemy type follows distinct attack patterns that become predictable with observation. The key lies in identifying animation tells and responding with appropriate counters.
Environmental awareness proves crucial during many legendary battles. Utilize terrain features like staircases, narrow passages, and elevated platforms to control engagement parameters and create tactical advantages.
Progression Optimization
Strategic legendary hunting sequence can significantly impact your overall progression efficiency. Prioritize encounters that provide Stim containers early to enhance survivability, then focus on perk-granting battles to customize your combat capabilities. For detailed weapon progression strategies, consult our BF6 Weapons Unlock guide for complementary strategies.
Star Wars Jedi: Survivor features formidable Legendary Enemies and Beasts that inhabit remote, hard-to-reach areas throughout the galaxy. While progressing through the main narrative will naturally guide you to some locations, discovering these elite adversaries typically demands thorough exploration beyond primary objectives. Successfully engaging these powerful foes often necessitates acquiring specific Force abilities or traversal skills to overcome environmental barriers and hazards blocking access to their domains.
Mosey, the knowledgeable NPC stationed at Pyloon’s Saloon, serves as your primary resource for pinpointing these elusive targets. Her assistance becomes increasingly available as you advance through the campaign’s key milestones. Upon vanquishing these legendary opponents, you’ll be rewarded with valuable upgrades including Essence Crystals for ability enhancement, exclusive new perk abilities that provide combat advantages, or additional Stim container slots for increased survivability during intense battles.
While approaching Rambler’s Reach Outpost, you’ll encounter concerned locals discussing miners trapped within a nearby cavern system. Investigating this lead transports you into the treacherous Sodden Grotto. Navigating through this underground network culminates in a dramatic confrontation as the terrifying Rancor emerges from the shadows, initiating one of the game’s most challenging combat sequences.
The Rancor employs devastating sweeping attacks capable of depleting substantial health reserves with single strikes. Its most lethal maneuver remains the grab attack – failing to evade this grappling technique results in instant death, with Cal becoming the creature’s next meal. Master precise dodge timing and maintain optimal distance to counter this deadly ability effectively.
Notably, this initial encounter represents merely your introduction to Rancor hostilities in Star Wars Jedi: Survivor. A subsequent confrontation awaits deeper within Phon’qi Caverns, while an exceptionally demanding Force Tear challenge pits you against dual Rancors simultaneously. To access this extreme trial, return to the initial chamber encountered during Coruscant’s opening sequence and utilize Force lift to open the previously inaccessible doorway.
Left: Rancor location; Right: Rancor battle.
Before engaging legendary adversaries, ensure you’ve acquired essential combat abilities and upgrades. The Force Push and Dash Strike abilities prove particularly valuable for creating distance and interrupting enemy attack patterns. Many players underestimate the importance of properly leveled lightsaber stances – dual wield offers superior dodging capabilities while crossguard provides the raw power needed to break through tough defenses.
Common strategic errors include overly aggressive playstyles and inadequate stamina management. Legendary enemies punish recklessness severely – instead, adopt methodical approaches, studying attack animations and identifying safe engagement windows. Always maintain at least one Stim charge in reserve for emergency recovery situations.
For optimal reward acquisition, prioritize legendary encounters after obtaining key movement abilities like wall running and double jump. These foes typically require 5-10 minutes of focused combat, with preparation time varying based on your chosen difficulty setting. Advanced players should consider respecing their skill trees to maximize single-target damage output before attempting these challenging battles.
This challenging engagement pits you against a pair of Mogu adversaries that require coordinated tactical responses. While you’re already familiar with their standard attack patterns from previous encounters, maintaining constant awareness of their positioning is essential. The Mogus possess a particularly dangerous grappling maneuver that demands immediate counteraction through rapid successive button inputs. Successfully executing this quick-time event enables Cal to break free while simultaneously disabling the creature’s appendages.
Left: Mire Terror location reference; Right: Mire Terror combat scenario visualization.
Many players underestimate the importance of maintaining distance during Mogu encounters – staying too close makes you vulnerable to their devastating grab attacks while being too far allows them to utilize ranged abilities. The optimal strategy involves maintaining mid-range positioning, allowing you to react effectively to both close-quarters and projectile threats.
You’ll encounter an enhanced Droideka variant within the Untamed Downs region that presents unique combat challenges. Navigate to the prominent rock formation at the area’s center to discover a fortified outpost protected by an energy barrier. Utilize Merrin’s Charm to bypass this defensive field, then employ your Lift ability to access the interior chamber. Exercise caution as multiple B1 Battle Droid units provide additional security around the perimeter. The Droideka’s primary vulnerability manifests on staircases, where its rolling mobility becomes compromised, creating temporary attack opportunities.
E3-VE3’s evolutionary progress appears permanently halted based on current battlefield conditions.
Advanced players should note that the Droideka’s shield deployment follows a predictable pattern – it typically activates shielding after taking approximately 25% damage or when you attempt to close distance rapidly. Timing your heavy attacks to coincide with its shield recharge cycles can significantly reduce encounter duration. Additionally, the surrounding B1 droids can be eliminated before engaging the Droideka to minimize external pressure during the main confrontation.
This specialized Bedlam Smasher iteration awaits confrontation at the Mountain Observatory location. This particular enemy engagement occurs as an integral component of your primary campaign progression, ensuring you cannot bypass this combat scenario through alternative routing.
Avoid allowing this powerful Bedlam Raider to crush you into submission with its overwhelming physical assaults.
The Bedlam Smasher employs a three-attack combo that begins with a telegraphed wind-up animation. Learning to recognize these visual cues allows you to position yourself safely during its most dangerous offensive sequences. Many players fail to utilize the observatory’s vertical elements – the raised platforms and structural pillars provide excellent cover from the Smasher’s area-of-effect ground slams. Maintaining elevation advantage forces the enemy to use less effective ranged attacks while giving you better visibility of its attack preparations.
The Fortitude perk represents a significant gameplay modifier that fundamentally alters combat dynamics. This enhancement amplifies both your offensive capabilities with the Lightsaber while simultaneously increasing vulnerability to enemy attacks. The risk-reward calculation becomes particularly important in higher difficulty settings where incoming damage scaling can create dangerous situations.
Strategic implementation of the Fortitude perk requires adjusting your defensive approach – the increased damage intake means you cannot sustain as many hits before defeat. This makes perfect parrying and dodging more valuable than ever. Consider pairing this perk with defensive abilities or equipment that mitigate the additional risk, creating a more balanced combat profile while still benefiting from the enhanced offensive potential.
For players struggling with the increased damage intake, I recommend practicing against lower-tier enemies in the Class Guide to refine your defensive techniques before applying the Fortitude perk in elite encounters. Understanding your class’s defensive options through our Complete Guide can provide additional strategic context for managing this high-risk, high-reward gameplay style.
Action Checklist
- Upgrade essential Force powers and combat stances before engaging
- Study enemy attack patterns through observation before committing to full engagement
- Equip appropriate perks and skills that enhance survivability and damage output
- Visit Pyloon’s Saloon regularly to check Mosey’s updated legendary enemy intel
- Acquire essential abilities: Lift and Slam for Koboh access, Electro Dart for Coruscant challenges
- Prioritize Stim container rewards first to increase survivability
- Tackle perk-granting legendary enemies to customize your combat style
- Complete secret challenges like the Spawn of Oggdo Force Tear
- Visit Pyloon’s Saloon regularly to check Mosey’s updated legendary enemy locations
- Acquire essential traversal abilities (wall run, double jump, Force lift) before hunting
- Practice dodge timing against regular enemies to prepare for Rancor grab attacks
- Engage Sodden Grotto Rancor with at least 3 Stim containers available
- Backtrack to Coruscant’s starting area to unlock the dual Rancor Force Tear challenge
- Practice Mogu grab counter timing against lower-tier enemies
- Clear B1 Battle Droids before engaging the enhanced Droideka
- Master Bedlam Smasher attack telegraph recognition
- Test Fortitude perk in controlled environments before elite encounters
- Optimize weapon loadouts using our Weapons Unlock guide
No reproduction without permission:SeeYouSoon Game Club » Star Wars Jedi: Survivor – Legendary Enemies And Legendary Beasts Guide