TL;DR
- Essence Crystals permanently boost HP, Force, or XP when collected
- Strategic collection order significantly impacts early game survival
- Blue glowing objects require careful exploration and platforming skills
- XP crystals provide immediate skill points for ability unlocks
- Plan routes to maximize efficiency and minimize backtracking
Master the power progression system in Star Wars Jedi: Survivor through strategic collection of Essence Crystals. These distinctive blue-glowing artifacts serve as permanent character upgrades scattered throughout the game world, offering three distinct enhancement types for your Jedi capabilities.
Each Essence Crystal provides one of three critical stat boosts: maximum health increase for surviving tougher encounters, expanded Force meter for more ability usage, or immediate experience points that typically grant an additional skill point. Understanding which type to prioritize based on your playstyle and current progression stage can dramatically impact your combat effectiveness and exploration capabilities.
Unlike temporary buffs or consumable items, these upgrades remain permanently active once collected, making them essential for long-term character development. Early game emphasis on health crystals can prevent frustrating deaths, while Force-focused collection benefits ability-heavy combat styles.
Developing efficient collection routes requires understanding level design patterns and environmental storytelling. Essence Crystals often occupy out-of-the-way locations that demand platforming prowess or combat mastery to reach, rewarding thorough exploration with tangible power increases.
Before embarking on collection runs, ensure you’ve acquired essential movement abilities like double jump and force dash, as many crystals remain inaccessible until mid-game. Time your collection sessions after major story beats when new areas open up, minimizing backtracking while maximizing discovery efficiency.
Combat preparation proves crucial when collecting crystals guarded by enemy patrols or mini-boss encounters. Approach each glowing blue object with caution, scanning for ambush points and preparing appropriate force abilities for quick disengagement if overwhelmed.
Resource management extends beyond the crystals themselves—maintain ample healing items and consider difficulty settings when planning dangerous collection attempts. Higher difficulties may require additional health crystals before attempting riskier acquisitions.
Many players undermine their progression by overlooking easily accessible crystals in early areas or prioritizing the wrong stat type for their build. Health crystals often provide the most immediate survival value for new players, while experienced Jedi may benefit more from Force capacity expansions.
Avoid the temptation to rush through main story objectives without exploring side paths—approximately 30% of Essence Crystals reside in optional areas that significantly impact late-game viability. Backtracking for missed crystals becomes increasingly time-consuming as the game progresses.
Advanced optimization involves sequencing crystal collection around ability unlock points and major boss encounters. Time your exploration to acquire health boosts before difficult fights and Force expansions before areas requiring extensive power usage.
For maximum efficiency, consult holomap frequently and mark unexplored regions. The game’s mapping system reveals crystal locations after area completion, enabling targeted collection runs for missing upgrades.
In Star Wars Jedi: Survivor, Essence Crystals serve as permanent stat upgrades scattered throughout the galaxy. These valuable collectibles come in three distinct types: Health (HP), Force capacity, and Experience (XP). Strategically collecting them can dramatically improve Cal Kestis’s combat effectiveness and survivability.
This comprehensive guide focuses exclusively on Essence Crystals that enhance your core attributes. We won’t cover crystals that unlock new perks or additional perk slots, though you can reference our perk locations and best perks guide for that information. The game’s design heavily emphasizes backtracking, so many crystals remain inaccessible until you acquire specific traversal abilities later in the campaign.
Pro Tip: Prioritize Health crystals early game for survivability, then focus on Force capacity as you gain more powerful abilities.
Essence #1: Health – This will likely be your first Essence Crystal encounter in the entire game. Located in the Undercity Meats district, you’ll discover this crystal just before learning the Confuse Force Power during the opening missions.
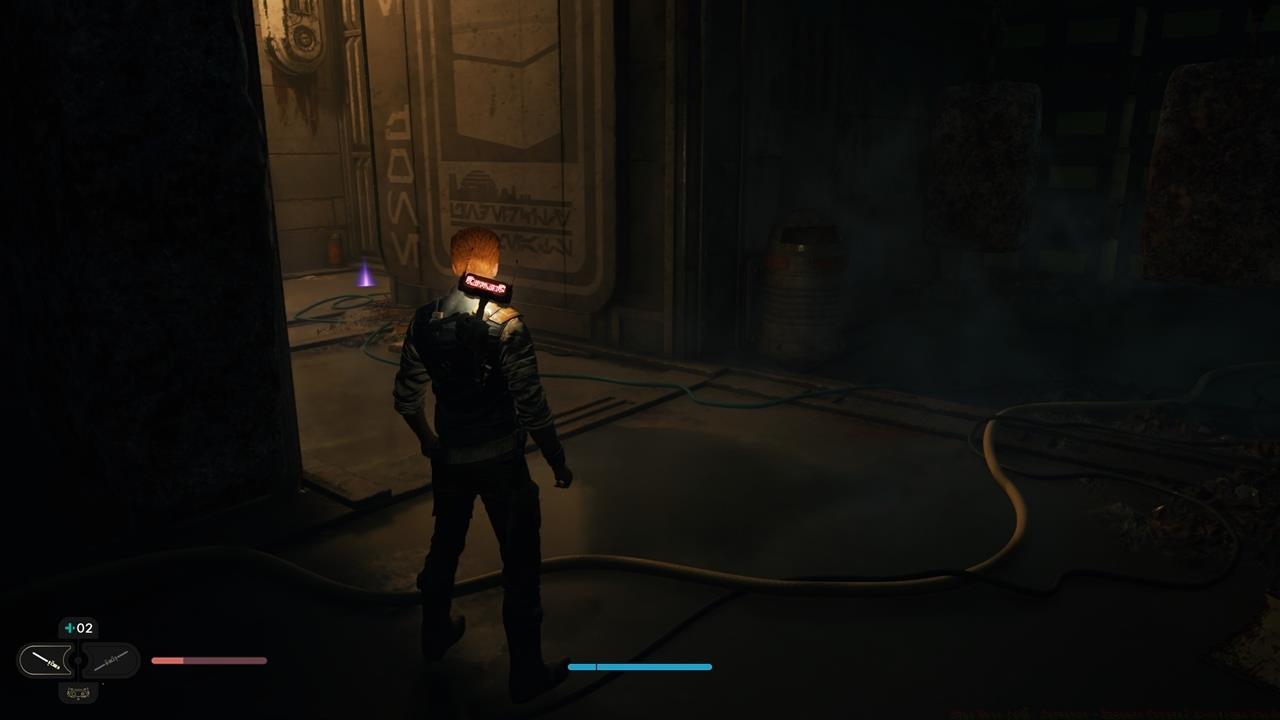
This will probably be the first Essence Crystal that you spot in the campaign.
Essence #1: XP – After landing on Koboh, proceed inland until reaching the Derelict Dam fast travel point. Face the direction you came from (where Droids and Stormtroopers are positioned) and look downward from the makeshift platform. You’ll spot both a ledge and a cosmetic chest below. After landing on solid ground, an open chamber becomes visible. Use the rope for a wall run maneuver to acquire the crystal.
Essence #2: Health – From the Derelict Dam waypoint, examine the cliffside path farthest from the dinosaur encounter. This route leads to a Gorocco enemy – defeat this boar-gorilla hybrid creature and open the door behind it to claim the Essence.
Essence #3: Force – Shortly after, you’ll enter a facility containing multiple Rolling Mines. At the terminal end (where the Tactical Jacket is located), a device continuously generates these explosive objects. Use one to demolish the wall creating an exit back to Derelict Dam. This time, guide a Rolling Mine to the right-hand cliff area near a Prospector, workbench, and elevator. When reaching the edge, employ Force Pull followed by Force Push to destroy the cliffside wall.
Follow the revealed path, combat another Gorocco opponent, and reach the hill’s summit. Collect the Essence here before utilizing the elevator for descent. Remember this location since you’ll come back here much later in the campaign.


From left to right: Koboh Essence Crystal #1; Koboh Essence Crystal #2; Destructible wall/path to Koboh Essence #3.
Essence #4: XP – Eventually, you’ll witness Koboh’s expansive landscape in a cinematic sequence while meeting NPC Mosey. Directly below the hill and to your right, vines and climbable ledges become accessible. Navigate this terrain to reach a distant cliff area overlooking Riverbed Watch outpost with its Meditation Point.
Essence #5: Force – From Southern Reach, observe Rambler’s Reach Outpost. Nearby lies Hunter’s Quarry – utilize ledges and vines to access the main building’s interior containing a Rolling Mine spawner. Guide one outside and propel it at the sludge-covered wall to reveal the crystal.
Essence #6: XP – Upon reaching Pyloon’s Saloon and encountering Greez, you’ll be directed to investigate the Smuggler’s Tunnel underground. Within the chamber housing Hardshell enemies, this crystal becomes visible.
Essence #7: Force – Return to Smuggler’s Tunnel after completing your initial Jedi Temple and meeting Zee. Despite earlier ground collapse, you can dive into the pool. A luminous spot indicates where to submerge, then ascend through the alternate opening. While you can interact with this crystal immediately, the door leading to Phon’qi Caverns remains locked until later progression.
Essence #8: Health – Continue advancement until reaching Forest Array’s summit. Following a boss encounter, this Essence becomes available for collection.


From left to right: Vines/ledges to Koboh Essence #4; Koboh Essence #4 location; Koboh Essence #5; Koboh Essence #6; Koboh Essence #7.
Essence #1: Force – While progressing deeper into the facility, you’ll grapple toward the massive centrifuge, eventually encountering an impassable green barrier. Opposite this obstruction lies a shaft populated by Shiverpede creatures. Employ grappling hooks and metal grating systems to reach this crystal.
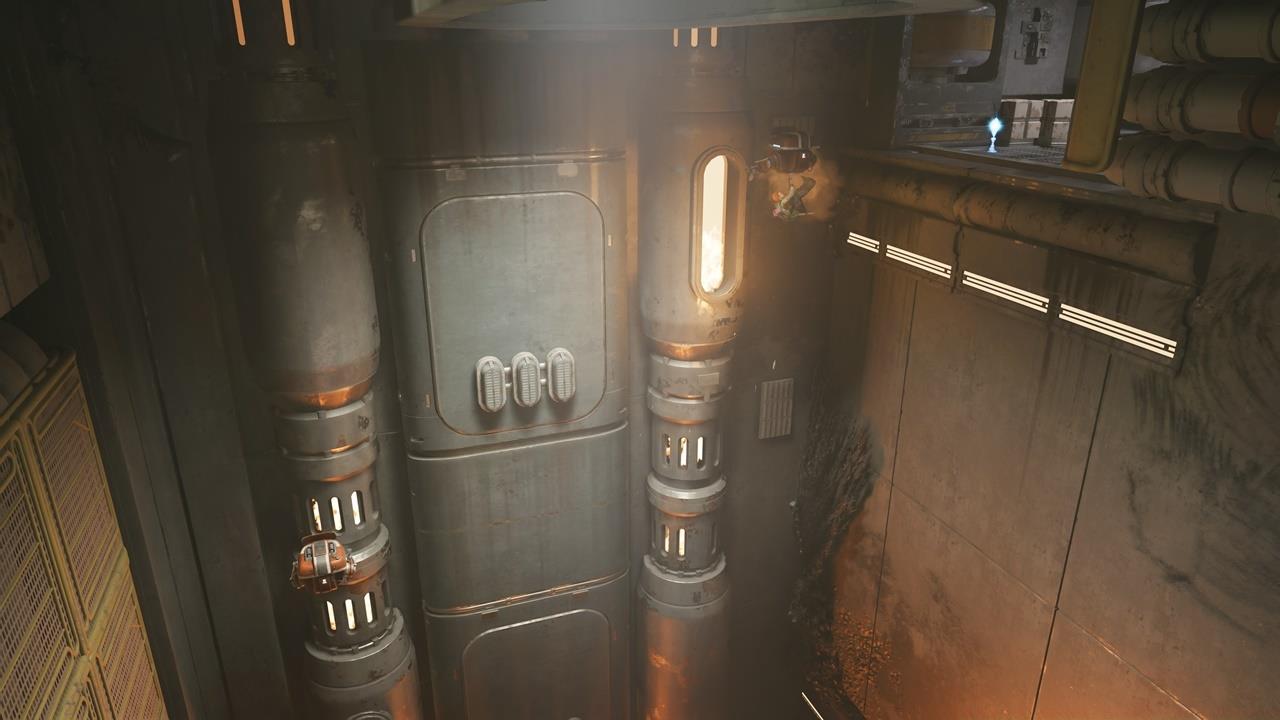
The meat grinder section might make you panic, but you can just grapple back to the top.
Essence #1: XP – Your subsequent Shattered Moon visit for narrative purposes takes you through the giant laser beam’s firing chamber. Utilize Merrin’s Charm ability to phase through green barriers during firing sequences. This Essence Crystal awaits at the terminal point of this area (the third and ultimate barrier).
 Gallery


From left to right: Koboh Essence Crystal #1 (Riverbed Watch); Koboh Essence Crystal #2 (after getting the Koboh Grinder ability); Koboh Essence Crystal #3 (after getting the Lift and Slam power); Koboh Essence Crystal #4 (The Massiff).
Essence #1: As you progress further, you’ll access the Fogged Expanse region. Follow the pathway immediately after the Mogu encounter to discover a cliff area containing multiple Rolling Mines.
Essence #2: Somewhat later but preceding arrival at the Imperial installation, navigation around the Caverns of Mari becomes necessary, coincidentally containing a Force Tear challenge. Employ the Electro Dart tool to raise the wall, then execute a wall run to reach this crystal.


Left: Koboh Essence Crystal #1 (Fogged Expanse); Right: Koboh Essence Crystal #2 (Caverns of Mari).
Essence #3: This Star Wars Jedi: Survivor Essence Crystal resides within Mountain Observatory’s Diagnostics Corridor. You’ll rotate the central component and engage successive enemy waves. This action reveals the opposite side and the “floating balloon” mechanism.
Utilize the floating balloon on the farthest side from the Meditation Point. This enables grappling and traversal through a green barrier, consequently unlocking the shortcut portal. Retrieve the floating balloon once more but now project it into the chamber containing the crystal. This permits grappling and leaping onto the elevated platform.
Advanced Technique: For Essence #3, timing your balloon throws during enemy attack patterns can create strategic advantages.

Left: Use the floating balloon to reach the opposite side; Right: Bring the floating balloon to the small room by pulling it through the shortcut.
Essence #1: Health – Employ your Lift ability on the substantial door adjacent to Gorge Crash Site fast travel point, then utilize the elevator. Rather than descending completely to the Mire Terror Legendary Beast encounter, continue forward progression to hop onto a ledge while the elevator remains in motion.
You’ll emerge at an alternate cliff area within Viscid Bog. Observe multiple grapple balloons and a Relter creature. The Relter’s flight trajectory transports you across this sector to additional balloon locations. The objective involves utilizing your grapple enhancement to circumnavigate each balloon before ziplining toward the crystal location. Departure from this position necessitates using the initial Relter to glide entirely to Zygg and Winni’s dwelling, since elevator activation remains impossible from this vantage.
Essence #2: Force – Proceed to Derelict Dam fast travel point and retrace your path to the Pit Droid with crashed ship encounter. Apply your Lift power to the vessel, securing another crystal. The Pit Droid will subsequently journey toward the Saloon.
Essence #3: XP – Recall the Derelict Dam location featuring an elevator, the one containing walls requiring demolition via Rolling Mine? Return to the summit to confront the Gorocco Matriarch Legendary Beast. Following its defeat, employ grapple balloons to access the opposing cliff face’s apex. Another Star Wars Jedi: Survivor Essence Crystal awaits discovery there.
Essence #4: Health – Within Southern Reach territory, notice a compact structure near two NPC characters. Enter this building and elevate the grate. Below lies the Flooded Bunker containing several cosmetic items, a miniboss adversary, and a crystal.


From left to right: Koboh Essence Crystal #1; Koboh Essence Crystal #2; Koboh Essence Crystal #3; Koboh Essence Crystal #4.
Essence #5: XP – The subsequent two crystals exist in close proximity within Rambler’s Reach Outpost. Initially, inspect the metallic shack behind Doma’s Shop. Multiple abilities become necessary including BD-1’s Slice, Lift, and Merrin’s Charm. Inside, you’ll encounter NPC Soont Madas. Apply your Jedi Mind Trick to compel staircase revelation. Below rests an echo and crystal, but Soont Madas will assault you. Elimination becomes unavoidable.
Essence #6: XP – This crystal lies directly behind Soont Madas’ residence. A metal door atop an inclined pathway requires lifting. Elevate the door and descend the shaft. The chamber becomes infested with Koboh Dust (recognizable as hostile bee-like entities). Advance to the opposite extremity to obtain the orb, then position it upon the pedestal. This generates a laser beam revealing the exit.
Subsequently, retrieve the orb and propel it toward the alternate section, partially dispersing the “insect” swarm. Execute double jump combined with dash maneuver to approach proximity. Then perform another double jump and dash combination to reach the crystal.
Essence #7: Health – This crystal perches atop a pillar above the Bilemaw creature in Swindler’s Wash. Technically, only Air Dash capability proves essential, though later return remains acceptable. Simply execute wall runs repeatedly, ensuring your secondary run achieves maximum jump altitude. Proceed with Air Dash execution to acquire the crystal.

From left to right: Metal Gate/Orb and Soont Madas locations; Koboh Essence Crystal #5; Koboh Essence Crystal #6; Koboh Essence Crystal #7.
These represent the Star Wars Jedi: Survivor Essence locations identified throughout the campaign. Additional discoveries remain probable, prompting future guide updates accordingly.
Star Wars Jedi: Survivor constitutes an expansive, open-world gaming experience, featuring countless facets and concealed secrets awaiting discovery. Expand your knowledge through our guides hub.
Battlefield 6 introduces a comprehensive progression framework that rewards both skill and strategic planning. Unlike previous entries, the game features interconnected systems where your performance in different modes contributes to overall advancement. The core progression revolves around three primary reward categories: weapon unlocks, equipment upgrades, and specialization options.
At the heart of BF6 progression are Assignments – structured challenges that guide your advancement path. These are carefully designed to introduce players to various gameplay aspects while ensuring steady progression. The assignment system replaces traditional linear leveling with a more goal-oriented approach that lets you focus on specific objectives.
Progression in Battlefield 6 follows a natural curve where early hours focus on foundational skills, mid-game emphasizes specialization, and late-game challenges your mastery of advanced tactics. Understanding this flow is crucial for efficient advancement.
Your initial hours in Battlefield 6 should focus on establishing a solid foundation across all combat roles. Begin by experimenting with different classes to identify your preferred playstyle while completing basic Assignments. This phase typically covers levels 1-20 and introduces core mechanics through practical application.
Essential Early Unlock: Primary Weapon – Your first major milestone will be unlocking a reliable primary weapon suited to your preferred class. This typically occurs within the first few matches as you familiarize yourself with the core combat loop. The weapon you choose here will significantly impact your early performance.
A common mistake new players make is spreading their focus too thin across multiple classes simultaneously. Instead, dedicate your first 5-10 hours to mastering one class while completing its initial Assignments. This focused approach yields faster progression and better performance outcomes.
Time management is crucial during this phase. Allocate approximately 60% of your playtime to Conquest mode, which offers the best XP-to-time ratio for new players. The remaining time should be spent on specialized modes that target specific Assignment objectives.
Once you’ve established your foundational skills, Battlefield 6 transitions into the specialization phase where you’ll focus on refining your preferred combat role. This period, spanning approximately levels 20-50, introduces more complex Assignments requiring specific tactical approaches.
The mid-game is where NATO equipment choices become critically important. You’ll need to make strategic decisions about which weapon attachments, gadgets, and specialization perks to prioritize based on your playstyle and team role.
Weapon mastery becomes a primary focus during this phase. Each weapon features its own progression tree with attachments that dramatically alter performance characteristics. A pro tip: focus on mastering 2-3 primary weapons rather than trying to level every available option simultaneously.
Conquest mode remains your most efficient progression tool, but you should now incorporate more objective-focused play. Capturing and defending objectives in Conquest provides substantial XP bonuses while advancing multiple Assignments simultaneously.
The late-game phase in Battlefield 6 challenges your understanding of advanced combat mechanics and team coordination. This is where the Pax Armata system comes into full effect, requiring strategic resource management and advanced tactical decision-making.
At this stage, your Assignments will focus on mastery-level challenges that test your skills in specific combat scenarios. These often require careful planning and may take multiple attempts to complete efficiently.
Conquest matches become increasingly complex as you encounter more experienced opponents. Your progression now depends less on raw playtime and more on strategic efficiency and objective completion quality.
Advanced players should focus on optimizing their loadouts for specific map types and game situations. This includes tailoring your NATO equipment selections based on the combat environment and opponent composition.
Maximizing your progression rate in Battlefield 6 requires understanding several optimization techniques. First, always check your active Assignments before each gaming session and prioritize those closest to completion for quick rewards.
Avoid the pitfall of ignoring game modes outside your comfort zone. Many Assignments require performance in specific modes, and avoiding these can create progression bottlenecks later.
Time estimates for completing major progression milestones: Early game (levels 1-20) typically takes 8-12 hours, mid-game (20-50) requires 15-25 hours, and late-game mastery (50+) demands 30+ hours of focused gameplay.
For weapon progression, focus on completing attachment unlocks during double XP events or while working on other Assignments. This multitasking approach significantly accelerates your overall advancement through the BF6 content.
Essence #1: XP – During your return to the Shattered Moon for narrative progression, you’ll navigate through the massive laser beam’s activation chamber. Employ Merrin’s Charm during the firing sequence to phase through emerald barriers when the weapon activates. The Essence Crystal awaits at this segment’s conclusion (specifically beyond the third and ultimate barrier).
While the primary exit lies past the second green barrier, dedicated explorers should proceed to the chamber’s farthest extent for this valuable crystal acquisition.
Pro Tip: The laser firing sequence provides approximately 8-10 seconds of barrier phasing opportunity – time your Charm activation with the weapon’s charging sound cues for optimal timing.
Essence #1: Progressing further reveals the Fogged Expanse region. Advance along the route immediately following the Mogu encounter to discover a cliffside zone populated with multiple Rolling Mines.
Essence #2: Shortly afterward but preceding your arrival at the Imperial installation, you must circumvent the Caverns of Mari, which coincidentally contains a Force Tear. Deploy the Electro Dart to elevate the barrier, then execute a wall-running maneuver to access this location.
Left: Koboh Essence Crystal #1 (Fogged Expanse); Right: Koboh Essence Crystal #2 (Caverns of Mari).
Common Mistake: Many players attempt the wall run before fully charging the Electro Dart – ensure the wall is completely raised before attempting traversal.
Essence #3: This Star Wars Jedi: Survivor Essence Crystal resides within the Mountain Observatory’s Diagnostics Corridor. Rotate the central mechanism and engage successive enemy waves. This action unveils the opposing side along with the “floating balloon” apparatus.
Utilize the floating balloon on the distal side (furthest from the Meditation Point). This enables grappling and penetration through an emerald barrier, consequently activating the shortcut portal. Retrieve the floating balloon once more but, on this occasion, project it into the chamber containing the crystal. You’ll subsequently grapple and ascend onto the platform ledge.
Left: Use the floating balloon to reach the opposite side; Right: Bring the floating balloon to the small room by pulling it through the shortcut.
Advanced Technique: Deploy the balloon mid-combat to create temporary elevated positions, granting tactical advantages against wave-based enemies while solving the environmental puzzle simultaneously.
This segment examines the Star Wars Jedi: Survivor Essence Crystals as components of the end-game content once you’ve obtained the majority of mobility capabilities. We’ll commence at the Gorge Crash Site, the initial rapid transit location on the world, and progress systematically from that point.
Essence #1: Health – Apply your Lift capability to the substantial gateway adjacent to the Gorge Crash Site fast travel marker, then ascend via the elevator. Rather than descending entirely to the Mire Terror Legendary Beast combat arena, continue progressing forward to mount a ledge during the elevator’s motion.
Timing Critical: The elevator movement cycle lasts approximately 15 seconds – you have a 3-4 second window to execute the ledge hop during its mid-ascent phase.
Action Checklist
- Scan environments for blue glow in hard-to-reach areas during main progression
- Prioritize health crystals early game, Force crystals mid-game, XP crystals as needed
- Use acquired movement abilities to revisit early areas for missed crystals
- Plan collection routes around boss fights and ability unlock milestones
- Collect Coruscant Health crystal before Confuse ability tutorial
- Mark inaccessible Koboh locations for later backtracking with new abilities
- Use Rolling Mines strategically for wall destruction puzzles
- Prioritize Health upgrades early, then Force capacity mid-game
- Complete late-game backtracking with full traversal toolkit
- Utilize grapple balloon mechanics for Mountain Observatory crystal
- Complete basic class Assignments within first 10 hours
- Master 2-3 primary weapons during mid-game phase
- Optimize NATO equipment loadouts for specific Conquest scenarios
- Complete Pax Armata mastery challenges
- Participate in double XP events for weapon attachment unlocks
- Time Merrin’s Charm with laser firing audio cues for barrier phasing
- Fully charge Electro Dart before attempting Caverns of Mari wall run
- Deploy floating balloons for both puzzle solving and combat elevation advantages
- Coordinate elevator movement timing for precise ledge access
No reproduction without permission:SeeYouSoon Game Club » Star Wars Jedi: Survivor – Essence Crystal Locations Guide