TL;DR
- Meditation Circles serve as checkpoints for fast travel, skill management, and enemy respawning
- Disable fall damage in settings to prevent unnecessary health loss during platforming
- Recover lost XP by eliminating glowing enemies or interacting with glowing spots where you died
- Stimpack charges provide emergency healing but can be upgraded throughout your journey
- Adjust difficulty anytime outside combat to match your preferred challenge level
Embarking on your galactic adventure requires mastering several fundamental systems that will significantly impact your survival and progression. Understanding these mechanics early will prevent frustration and enhance your overall experience.
Star Wars Jedi: Survivor propels players across diverse planetary systems as Cal Kestis confronts both familiar adversaries and unprecedented threats. This comprehensive beginner’s guide delivers crucial insights for navigating the game’s complex systems and overcoming early challenges.
Our strategic breakdown covers three essential pillars: survival tactics, exploration optimization, and combat proficiency. Each area demands specific approaches to maximize your effectiveness throughout the campaign.
As an open-world action-adventure title incorporating Souls-inspired mechanics, Star Wars Jedi: Survivor presents escalating difficulty, particularly during multi-enemy engagements. Fortunately, the game allows real-time difficulty adjustments via Options → Gameplay menu, accessible whenever combat isn’t active. Many players overlook that lowering difficulty temporarily during particularly challenging sections can help overcome frustrating bottlenecks.
Meditation Circles (also called Meditation Points) function as strategic hubs scattered across planetary landscapes. These locations enable health restoration, Lightsaber stance switching, skill point allocation, perk equipment, combat training simulations, and critically—fast travel capabilities. Maintaining mental maps of their locations ensures efficient backtracking when necessary. Once you gain access to the Mantis spacecraft, interstellar travel becomes available through the Holotable/Galactic Map interface. Notably, you can return to Coruscant, the initial campaign zone, during later story progression for completionist activities.
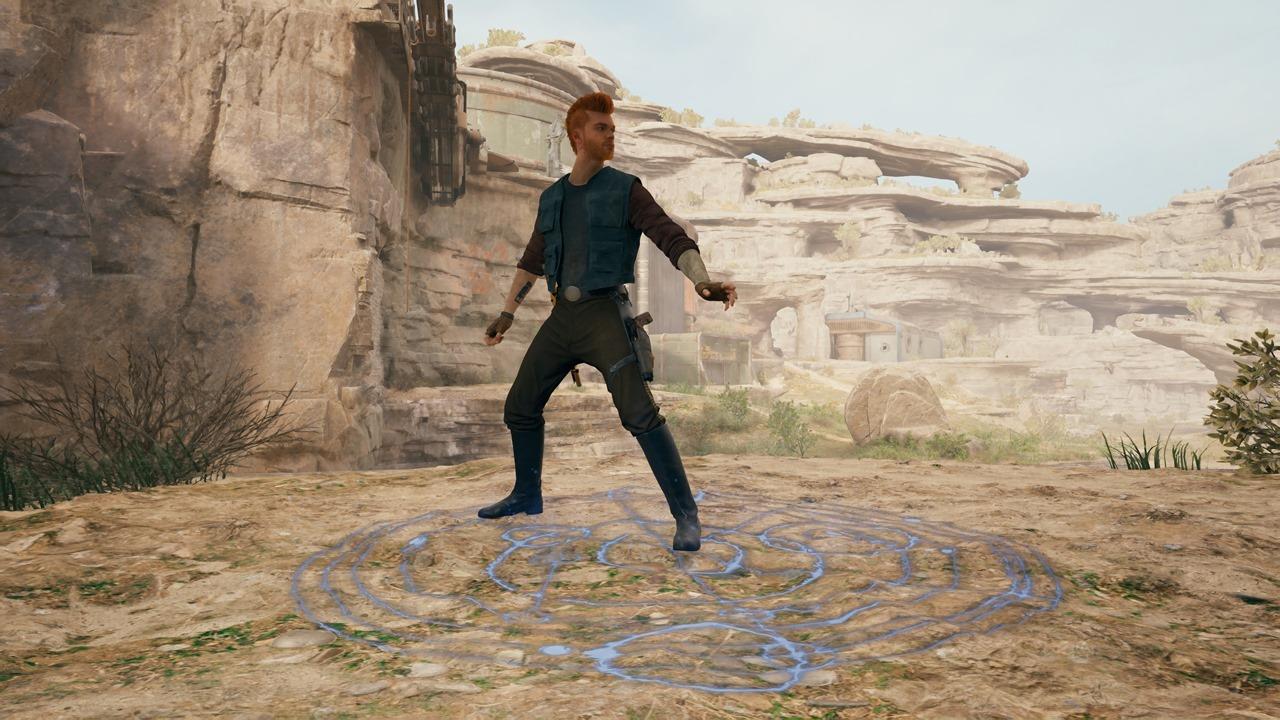
These are the bonfires in a galaxy far, far away.
Mastering movement and environmental navigation separates proficient players from struggling newcomers. Implementing these exploration strategies will dramatically reduce unnecessary deaths and resource loss.
Regarding recovery mechanics, Meditation Circles provide the “rest” function that replenishes health, Force energy, and Stimpack charges. However, this action triggers enemy respawning across the map. During active exploration or combat situations, emergency healing depends on your available Stimpack reserves. Initial capacity stands at two charges, though exploration reveals upgrade opportunities. Detailed locations appear in our dedicated Stim upgrade locations guide.
The game’s emphasis on acrobatic traversal—including sprinting, leaping, and grappling—creates frequent falling hazards. Plunging from significant heights (approximately 20+ meters) triggers screen fade-to-black followed by respawn at the ledge preceding your fall, accompanied by health depletion. A crucial accessibility option exists: disabling fall damage via Options → Gameplay → Exploration menu. While fatal drops still cause respawns, this setting prevents associated HP reduction.
Look for air vents when you’re gliding on the Relter, the game’s flying mount.
Take out the Rancor to obtain a reward from its cavern.
Advanced navigation involves recognizing environmental patterns and utilizing mount mechanics effectively. When piloting the Relter flying creature, seek upward air currents that provide lift and extended glide duration. Similarly, identifying subtle visual cues like distinctive rock formations or architectural patterns helps maintain orientation in sprawling environments. Many players waste considerable time retracing steps due to poor landmark recognition.
Understanding death consequences and experience management proves vital for efficient character development. These systems directly impact your progression pace and combat effectiveness throughout the campaign.
Upon Cal’s complete health depletion and subsequent death, respawn occurs at the most recently activated Meditation Circle, functioning as primary checkpoints. Mirroring Souls-like progression systems, death causes loss of all accumulated experience points earned since your last skill point acquisition. Reclaiming lost XP requires returning to your death location and either interacting with a luminous marker or defeating enemies emitting distinctive glow effects.

Eliminate the glowing enemies, the ones that got the final blow on Cal, to retrieve your lost XP.
Slow down time to lay waste to hapless foes.
Combat proficiency requires mastering Force ability integration with Lightsaber techniques. The slow-time mechanic proves particularly effective against groups of standard enemies, allowing precise strikes and strategic positioning. Against formidable bosses like the Rancor, studying attack patterns and identifying safe engagement windows becomes essential for survival.
Common beginner mistakes include overly aggressive playstyles and inadequate resource conservation. Successful players maintain defensive awareness, utilize environmental advantages, and manage Stimpack usage strategically rather than reactively. Planning your approach before engaging enemy clusters prevents being overwhelmed and preserves valuable healing resources for critical encounters.
For players seeking to optimize their combat approach further, our Complete Guide provides advanced techniques for mastering each Lightsaber stance and optimizing perk combinations. Understanding how different stances complement various enemy types will dramatically improve your combat efficiency. The Class Guide offers additional insights into ability synergies that enhance both offensive and defensive capabilities.
Action Checklist
- Disable fall damage in Gameplay Options to prevent unnecessary health loss
- Map Meditation Circle locations mentally for efficient fast travel and resource management
- Practice Stimpack conservation by using environmental cover for natural health regeneration
- Master XP recovery by immediately returning to death locations to reclaim lost experience
- Experiment with difficulty settings outside combat to find your optimal challenge level
No reproduction without permission:SeeYouSoon Game Club » Star Wars Jedi: Survivor Beginner’s Guide: Stances, Combat Tips, And More Master exploration, combat, and survival mechanics in Star Wars Jedi: Survivor with expert guidance