TL;DR
- Locate three Lithographic Stones (B, C, D) in the Castle room after meeting Ada
- Stone B is puzzle-adjacent, Stone C rests on bookshelves, Stone D requires breaking glass
- Match symbols to four fixed slots using rotation mechanics for proper alignment
- Complete puzzle progression to unlock the next Castle section and continue your mission
- Avoid common mistakes by carefully observing symbol orientation and placement order
Successfully navigate the intricate Lithograph Puzzle challenge within Resident Evil 4’s Castle section by mastering symbol matching mechanics. This cerebral test emerges as a mandatory progression barrier following Leon’s encounter with Ada Wong, requiring strategic thinking to advance through the medieval fortress.
The Lithograph Puzzle represents one of Resident Evil 4’s more sophisticated environmental challenges, positioned strategically within the Castle’s main hall to impede your forward momentum until properly deciphered. The puzzle’s placement ensures players must engage with its mechanics rather than bypassing this cerebral obstacle.
You’ll discover this elaborate puzzle mechanism shortly after the dramatic narrative sequence featuring Leon and Ada’s reunion, where solving it becomes essential for accessing subsequent Castle areas and continuing your primary mission objectives.
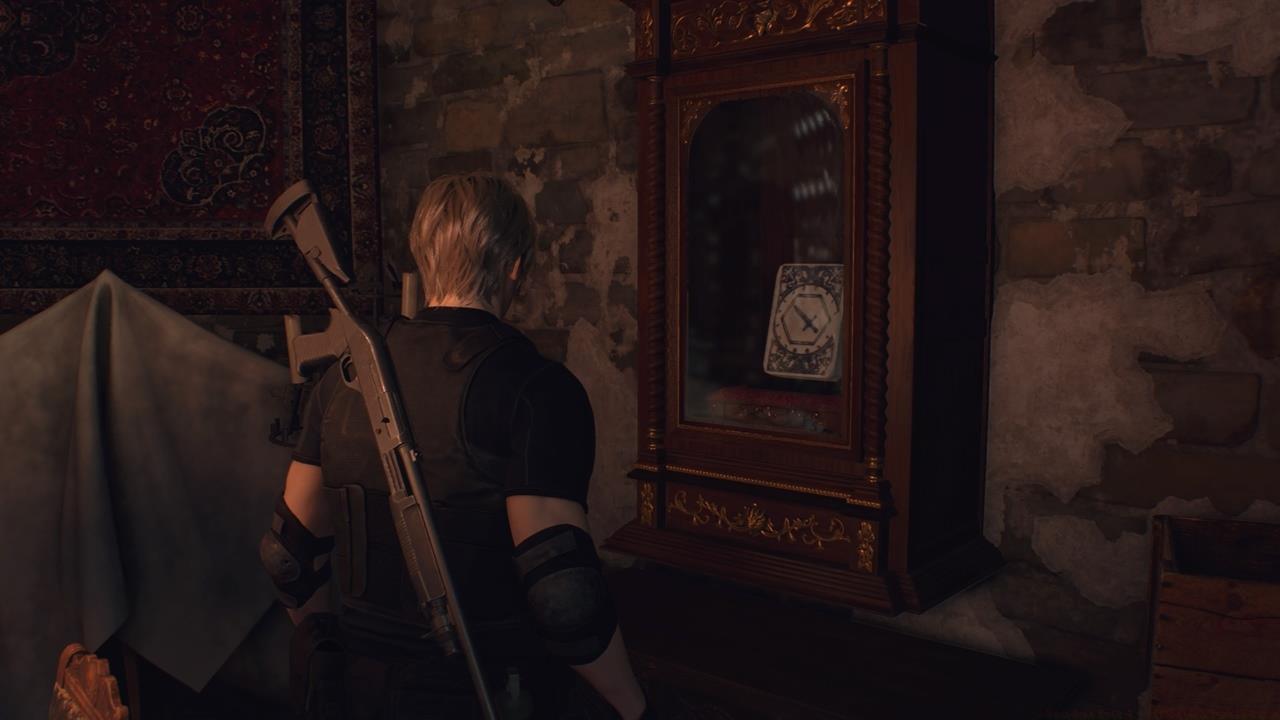
The complete Lithograph solution demands acquisition of three distinct Lithographic Stone fragments, all strategically positioned within the same chamber for systematic collection. Understanding each stone’s precise location streamlines the puzzle preparation phase significantly.
Methodically secure all three Lithographic Stone plates before attempting to engage with the puzzle’s core matching mechanics. The fourth stone remains permanently affixed to the puzzle mechanism, eliminating the need for additional searching.
Strategic scanning reveals all three movable stone locations within the puzzle chamber.
With all three movable stones acquired, carefully examine the four designated placement slots on the puzzle interface, each featuring distinct symbolic combinations that must be matched with corresponding stone faces.
The puzzle solution hinges on manipulating each stone’s rotational position until their engraved symbols perfectly correspond with the fixed slot designs. This process involves trial and error combined with systematic pattern recognition.
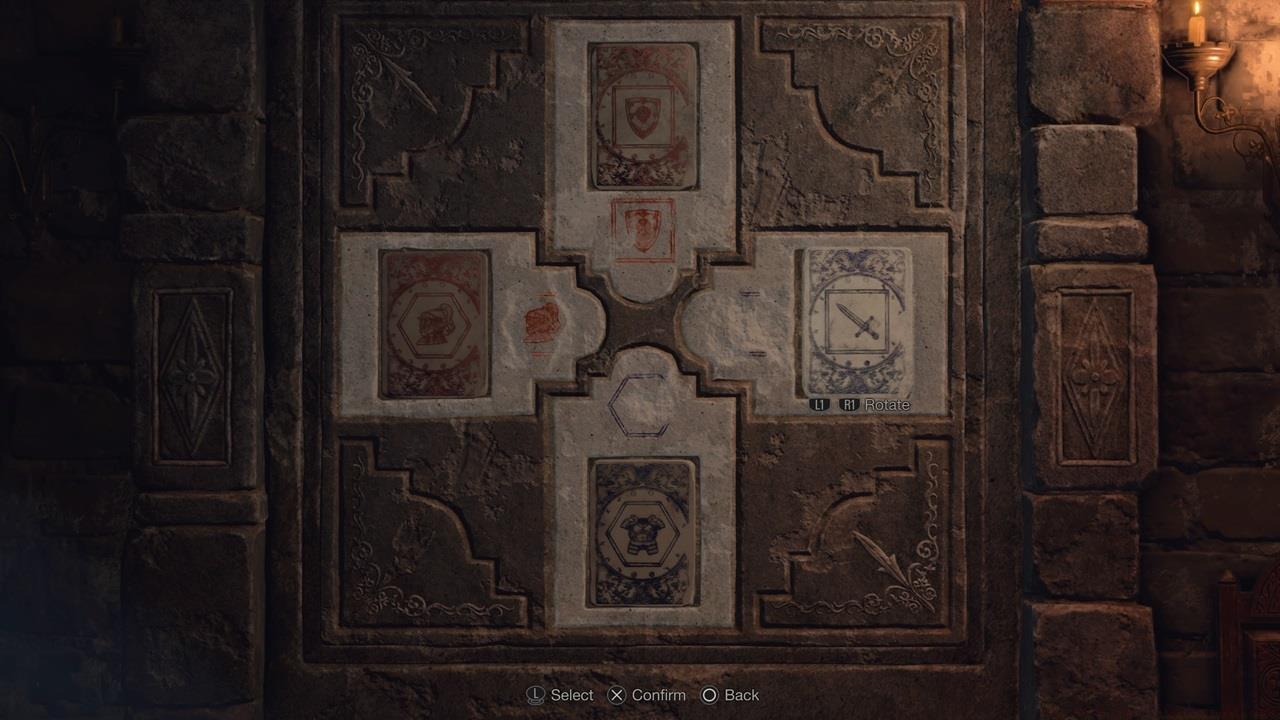
Rotational adjustment ensures each stone’s symbols align precisely with their corresponding slot patterns.
Successfully completing the symbol alignment triggers the puzzle mechanism, granting access to previously blocked areas while potentially revealing additional resources or narrative elements essential for progression.
Seasoned players can optimize their Lithograph Puzzle completion time through strategic approaches that minimize backtracking and reduce error frequency. Begin by surveying all stone locations before collecting any components to establish mental mapping.
Avoid these common mistakes: Attempting the puzzle with incomplete stone collections, neglecting to thoroughly rotate each stone to examine all symbol faces, or misidentifying similar symbols that appear nearly identical but feature subtle distinguishing characteristics.
Expert players typically complete the entire puzzle sequence within 3-5 minutes when employing systematic collection and matching protocols. Newcomers should allocate 7-10 minutes for initial attempts while learning the mechanics.
For those struggling with symbol recognition, prioritize stones with more distinctive patterns first, as these provide clearer visual confirmation of correct placement. The puzzle’s design intentionally includes both obvious and subtle pattern variations to test observational skills.
Successfully navigating this challenge not only progresses the narrative but also develops essential problem-solving approaches applicable to subsequent Resident Evil 4 puzzles, establishing foundational skills for more complex challenges ahead in your survival horror journey.
Action Checklist
- Thoroughly scan the puzzle room to mentally map all three stone locations before collection
- Systematically retrieve Lithographic Stones B, C, and D using environmental interaction
- Examine each stone’s multiple symbol faces through rotation before placement
- Match stone symbols to corresponding slot patterns using systematic trial and error
- Verify all placements trigger the mechanism before proceeding to newly unlocked areas
No reproduction without permission:SeeYouSoon Game Club » Resident Evil 4 – Lithograph Puzzle Guide Master the Castle's Lithograph Puzzle with expert strategies and time-saving solutions