TL;DR
- Focus on breaking the boss’s mallet early for Wrathbringer or keeping it intact for Monarch
- Prioritize eliminating all Dran summons during healing phase to prevent HP recovery
- Use Engineer or Medic archetypes with Enigma weapon for optimal performance
- Master dodge timing for Shatterstorm and Flame Breath attacks
- Coordinate weapon choice with your chosen kill method for maximum efficiency
Conquering the One True King in Remnant 2’s The Awakened King DLC demands strategic precision against his devastating melee combos, tracking flame attacks, and critical self-healing mechanics. This formidable encounter represents one of the most challenging tests in the expansion, requiring players to adapt their approach based on desired rewards.
Before engaging this mad monarch, strategic preparation is essential. Your decisions regarding Nimue’s fate significantly impact available rewards and encounter conditions. We strongly recommend consulting our comprehensive Nimue decisions guide to understand how your choices affect the battle’s outcome.
The encounter offers two distinct reward paths: the standard approach yields the Monarch long gun, while the alternate method requires precise execution to earn the Wrathbringer melee weapon. Each path requires distinct combat approaches and timing considerations.
The Remnant 2 One True King immediately transports combatants to an isolated throne arena upon engagement. This spatial separation creates an intense one-on-one confrontation with several high-threat abilities that demand mastery:
- Teleportation Assault – The monarch unpredictably blinks across the battlefield, requiring constant target acquisition adjustments and environmental awareness.
- Crushing Melee Combos – Executes one to two powerful club swings with deliberate animation timing; perfect dodge-roll execution provides safe evasion windows.
- Seismic Ground Impact – Slams his massive mallet earthward, generating expanding shockwaves that inflict stagger. Below 50% health, this ability chains with additional strikes causing volcanic eruptions.
- Sustained Flame Projection – Channels a continuous fire stream that actively tracks your position for multiple seconds, demanding sustained mobility.
- Implosion Field – Generates a golden gravitational vortex that pulls players inward before detonating; successive backward rolls provide safe escape.
- Dran Conjuration and Vitality Siphon – Levitates while becoming damage-immune, summoning numerous Dran villagers. Failure to eliminate these adds promptly results in significant health restoration based on surviving mobs’ remaining HP.
Advanced combat insight: The monarch’s attack patterns feature clear telegraphing, allowing experienced players to anticipate and counter effectively. Strategic use of throne room pillars provides cover against certain attacks, though evasion typically offers superior safety. Weapon destruction creates valuable stun opportunities, while efficient add clearance during healing phases prevents catastrophic health recovery. The facial void weak spot presents high-difficulty targeting opportunities for precision-focused builds.


The One True King gets temporarily stunned if you deal enough damage (left). However, you need to stay on the move, especially once his Shatterstorm pulls you in (right).
Through extensive testing across multiple encounter iterations, we’ve identified several optimal loadout configurations for the One True King confrontation. The Engineer archetype proves exceptionally effective due to autonomous turret targeting that simultaneously pressures the boss and clears summoned Dran efficiently.
For solo practitioners, the Medic and Handler starting classes provide outstanding survivability. The Medic’s unparalleled healing capabilities sustain prolonged engagements, while the Handler’s canine companion offers both health regeneration and crucial revival capabilities when downed.
Weapon selection critically influences encounter success probability. The Enigma emerged as our premier choice, primarily due to its Chaos Driver mod functionality. Deploying multiple conductive rods creates persistent damage sources while maintaining mobility to evade the monarch’s assault patterns. The weapon’s inherent chain lightning propagation efficiently damages both the primary target and his weapon durability, while simultaneously clearing grouped additional enemies effectively.
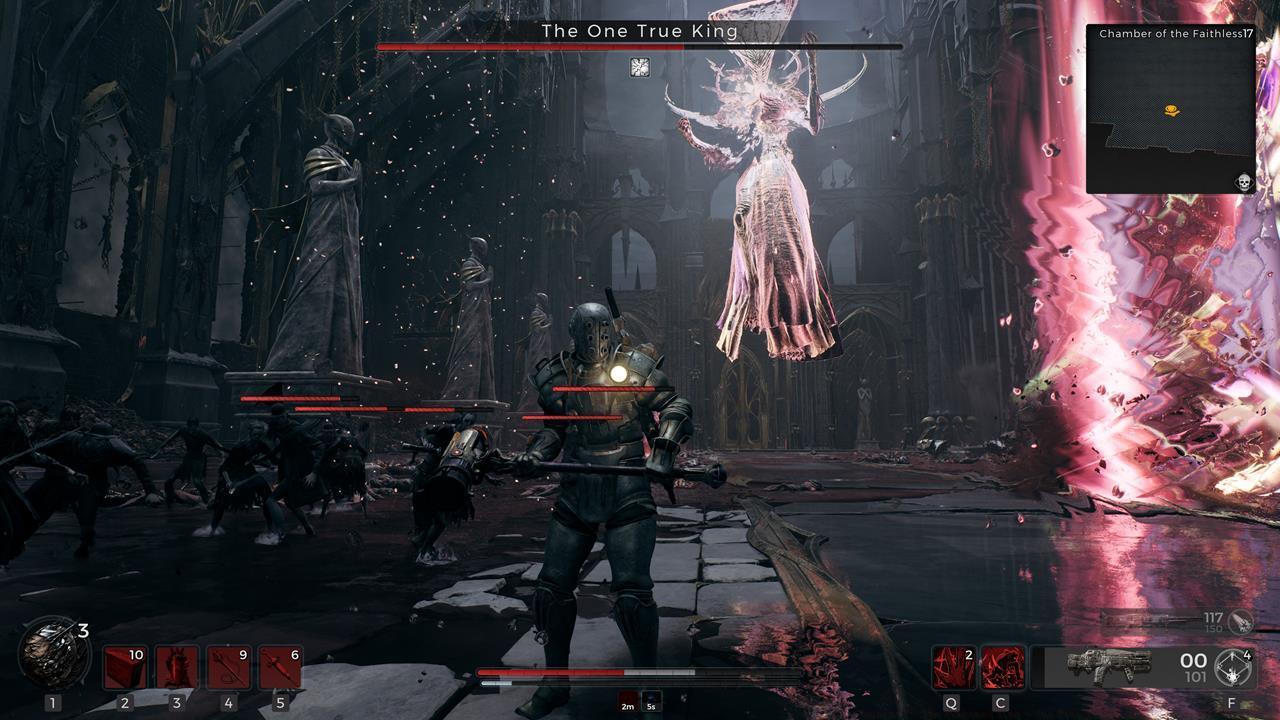
You need to take out all or most of the Dran mobs. Otherwise, the boss will replenish a portion of his health.
Advanced loadout strategy: Consider pairing the Engineer with Medic secondary archetype for combined firepower and sustainability. For weapon mods, prioritize those with area denial or persistent damage effects to maintain pressure during mobility phases. Defensive accessories that improve dodge efficiency or reduce stamina consumption significantly enhance survival probability during extended engagements.
Acquiring the Agony Spike material demands defeating the One True King while his colossal mallet remains fully intact. While weapon destruction remains possible throughout the encounter’s early phases, the critical requirement involves ensuring the mallet survives through the final blow execution. This material then converts into the Monarch long gun through Ward 13’s crafting systems.
The Monarch exhibits these combat characteristics:
- Exclusive modification: Chain of Command – Activates Harpoon Mode to designate targets, transforming primary fire into tracking projectiles dealing 15% reduced damage; impacted enemies accumulate Influence. At maximum Influence, Monarch automatically reloads while generating a shockwave. The wielder receives 20% damage amplification and unlimited ammunition reserves persisting for 20 seconds.
- Base damage: 12
- Rate per second: 10.5
- Ammunition capacity: 60/240
- Critical probability: 10%
- Weak point damage multiplier: 105%
Strategic analysis: The Monarch operates as a sustained automatic weapon platform. While individual projectile damage appears modest, strategic Harpoon Mode activation accelerates Influence generation dramatically. Triggering the enhanced damage and infinite ammunition state creates exceptional crowd clearing potential, particularly against grouped enemy formations.


The Monarch (left) can easily shred enemy hordes (right).
The alternate execution method for the Remnant 2 One True King requires destroying his mallet weapon before securing the kill, yielding the Tormentor’s Pommel material. Optimal performance involves timing the weapon break precisely while capitalizing on the subsequent ground stun window for maximum damage output. The stun state indicates successful mallet destruction, creating a limited timeframe for elimination before weapon regeneration occurs.
Important clarification: Previous theories suggested equipping specific story-related items influenced outcomes, but thorough testing confirmed this as coincidental rather than causal.
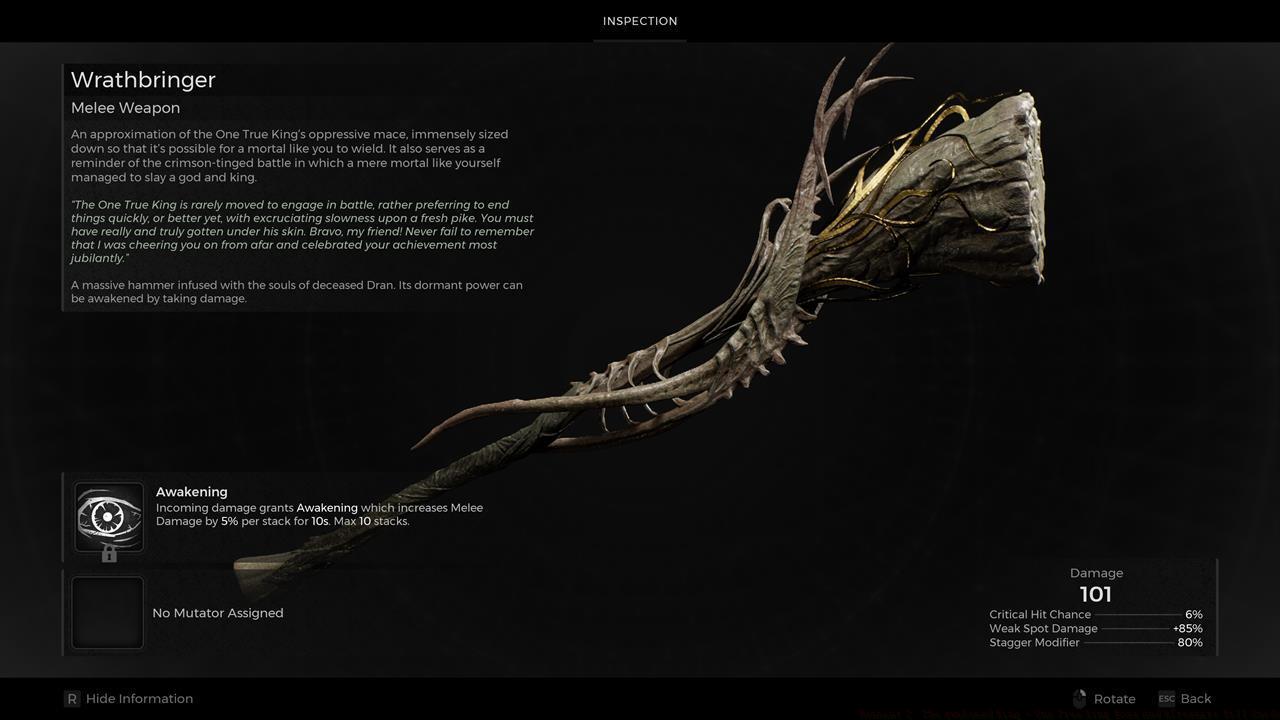
The Wrathbringer’s hits become stronger the more you take damage.
The alternate method rewards players with the Wrathbringer melee instrument, featuring these combat properties:
- Unique modification: Awakening – Received damage grants Awakening enhancement, boosting melee damage by 5% per stack for 10 seconds; maximum 10 cumulative stacks.
- Base damage: 101
- Critical probability: 6%
- Weak point modifier: 85%
- Stagger modifier: 80%
Advanced combat synergy: The Wrathbringer’s damage amplification interacts with self-inflicted damage sources, including the bleeding effect from the Atonement Fold ring available through Leywise the Scribe. This interaction enables near-permanent buff uptime, though maintaining character vitality remains critically important.
This comprehensive guide provides everything required to conquer the One True King encounter in Remnant 2’s The Awakened King expansion. Remember that additional narrative outcomes and rewards exist based on your Nimue interaction decisions throughout the DLC content.
Remnant 2: The Awakened King introduces expansive new exploration zones within Losomn’s realm. The expansion contains numerous hidden secrets, including the powerful Ritualist archetype. For additional strategic guidance and gameplay techniques, explore our comprehensive Remnant 2 guides collection for additional combat mastery resources.
Action Checklist
- Choose your reward path: Monarch (mallet intact) or Wrathbringer (mallet broken)
- Optimize loadout with Engineer/Medic archetypes and Enigma weapon
- Master dodge timing for Shatterstorm and Flame Breath attacks
- Prioritize Dran elimination during healing phase
- Execute chosen kill method with precise timing requirements
No reproduction without permission:SeeYouSoon Game Club » Remnant 2: The Awakened King – One True King Boss And Alternate Kill Guide Master the One True King boss fight with advanced strategies, weapon rewards, and expert combat tactics