Master tactical SWAT operations in Ready or Not with proven strategies for achieving perfect S-rank mission scores
Understanding S-Rank Fundamentals
Achieving S rank excellence in Ready or Not demands more than mission completion—it requires executing operations with professional precision that mirrors real-world SWAT team protocols. The scoring algorithm specifically rewards tactical discipline, non-lethal resolution, and systematic threat neutralization while penalizing collateral damage and reckless engagement.
Aggressive playstyles typically yield lower scores regardless of mission success. The game’s evaluation system heavily favors calculated, methodical approaches where every action demonstrates controlled professionalism. Understanding this scoring philosophy is fundamental to consistent S-rank performance.
Non-Lethal Engagement Tactics
Transitioning from lethal to non-lethal operations dramatically improves your scoring potential. Equip specialized tactical equipment designed for incapacitation rather than elimination:
- Flashbang grenades for disorientation and room control
- CS gas canisters for area denial and suspect suppression
- Stinger grenades that disperse rubber pellets for crowd control
- Pepper spray for close-quarters suspect management
- Tactical mirror tools for safe room assessment
When suspects display disorientation from your non-lethal tools, immediately issue verbal commands using the shout function. Wait for the distinct compliance animation where they drop to their knees before approaching. Apply restraints swiftly—every successful arrest contributes significantly to your final score, while each unnecessary elimination creates substantial point deductions.
Advanced Technique: Use flashbangs in tandem with gas grenades to create layered disorientation effects, allowing safer approaches to heavily armed suspects.
Civilian Protection Protocols
Civilian casualties represent one of the most severe scoring penalties in Ready or Not’s evaluation system. Before deploying any tactical equipment or initiating room entry, conduct thorough visual assessment to identify non-combatants. Civilians may exhibit panic behaviors including screaming, fleeing, or crouching in fear—none of these actions justify lethal response.
When civilians comply with your commands, immediate restraint application is mandatory. Unrestrained compliant civilians still generate point deductions even when they pose no immediate threat. Use quick-restraint keybinds to minimize time between compliance and securing.
Common Mistake: Many players forget that civilians discovered later in the mission still require restraint. Maintain zip-tie inventory throughout operations and systematically secure every non-combatant encountered.
Evidence Collection & Weapon Security
Following suspect neutralization, immediate evidence collection becomes critical for maximum scoring. Suspects typically drop their weapons upon arrest or incapacitation—these must be secured promptly. Additionally, mission-specific evidence items including drug packages, documents, and electronic devices contribute to your completion percentage.
Glowing items on the ground indicate essential collectibles. Develop systematic room clearing procedures where one team member provides security while another collects evidence. This division of labor improves efficiency while maintaining operational safety.
Counter-Surrender Protocol: When suspects fake surrender and subsequently require elimination, their dropped weapons still demand securement. Failure to collect weapons from neutralized hostile suspects still incurs scoring penalties despite the justified use of force.
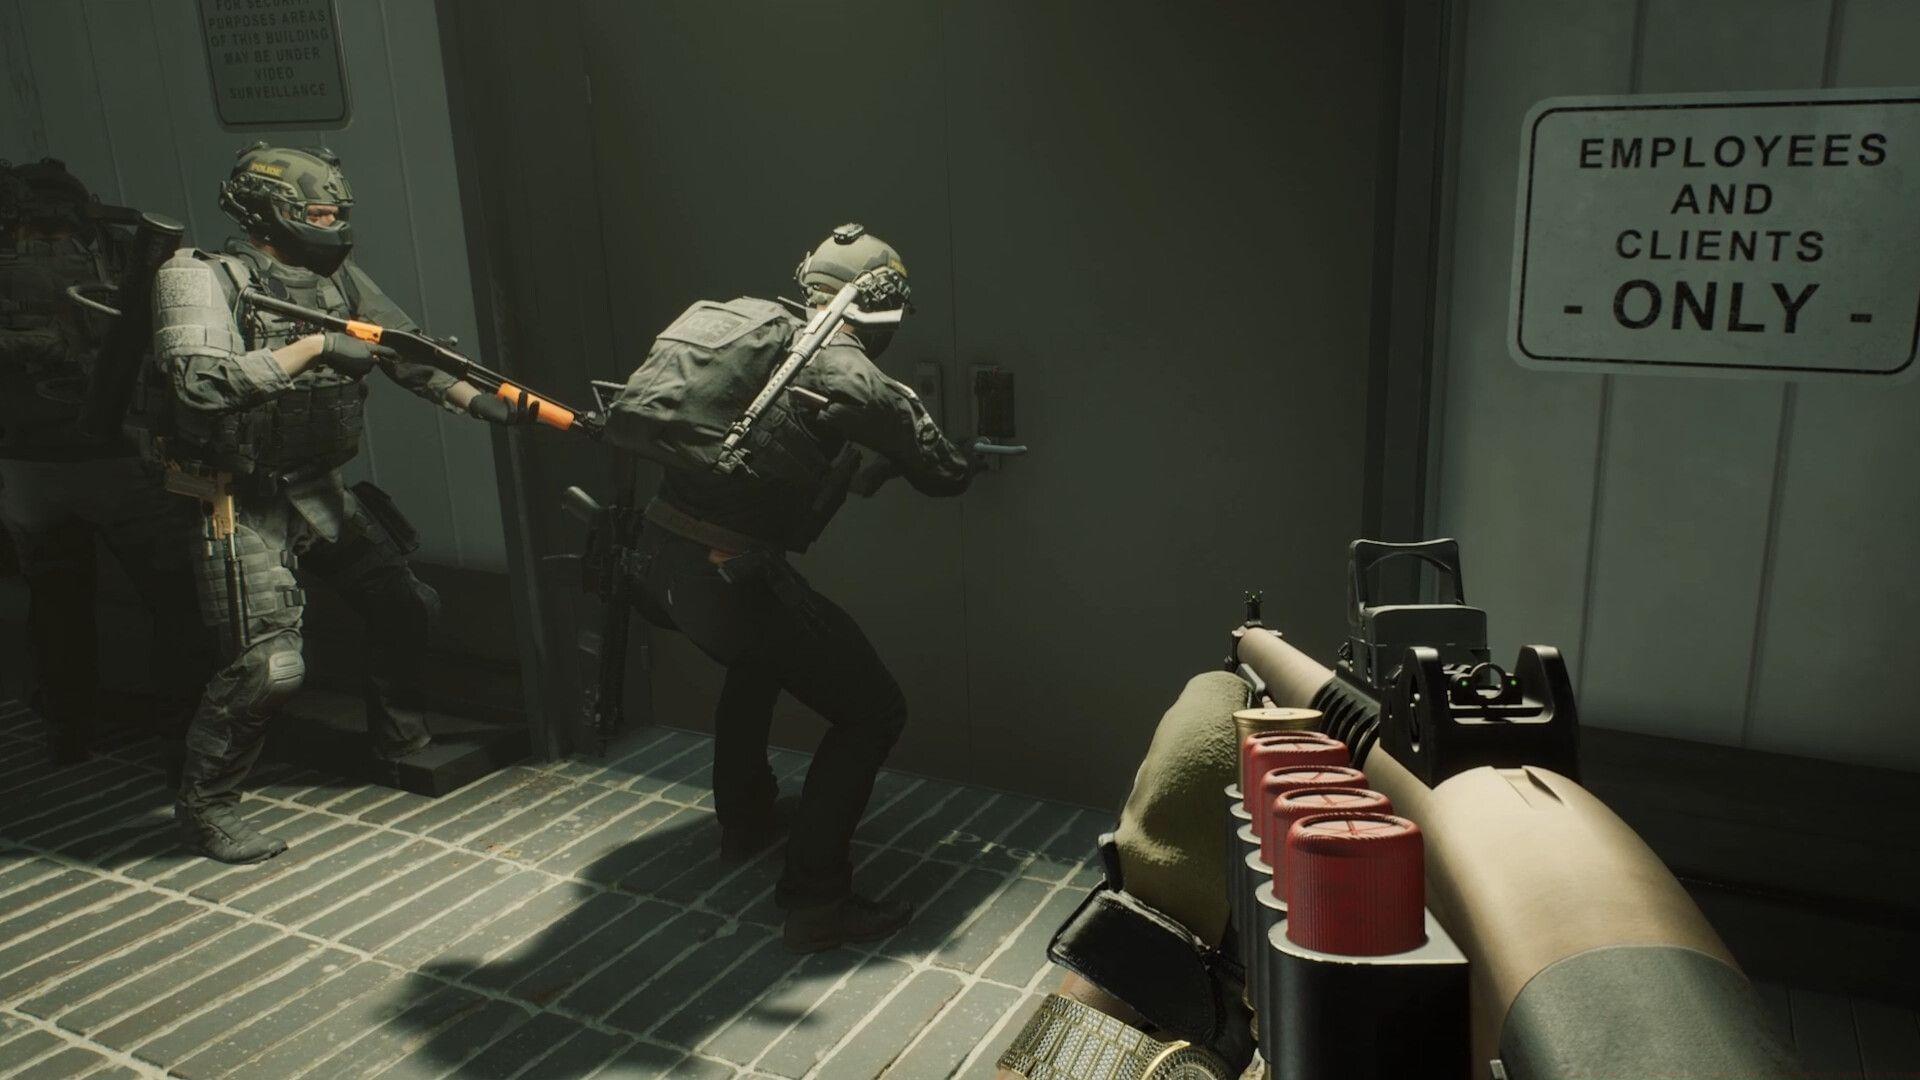
Team Management & Survival
Officer casualties—including AI teammates—create substantial scoring deductions that often eliminate S-rank potential. Treat AI squad members as valuable assets rather than expendable resources. Utilize tactical equipment to enhance team survival:
- Door wedge blocks to control engagement points and prevent flanking
- Under-door cameras for room assessment before entry
- Peek-and-scan techniques to identify threats without full exposure
- Staggered entry formations to maintain covering fire angles
When situations deteriorate, don’t hesitate to regroup and reassess rather than pushing aggressively. The scoring system rewards methodical progression over speed. Monitor team health status continuously and utilize tactical pauses to reposition vulnerable units.
Objective Completion Mastery
Ready or Not missions contain two objective categories that both require completion for S-rank achievement:
- Hard objectives (Primary mission goals displayed on your tactical tablet)
- Soft objectives (Secondary tasks including evidence collection, suspect arrests, and intelligence reporting)
Rushing to extraction after primary objective completion forfeits substantial scoring opportunities. Conduct thorough post-objective sweeps of the operational area, checking corners, containers, and hidden areas for remaining evidence or suspects. Report all findings through the communication system to ensure proper logging.
Pro Strategy: Designate one team member as ‘evidence specialist’ during planning phase to ensure comprehensive collection while others maintain security posture.
No reproduction without permission:SeeYouSoon Game Club » Ready or Not S rank guide: How to get the highest mission rating Master tactical SWAT operations in Ready or Not with proven strategies for achieving perfect S-rank mission scores