TL;DR
- The Mid-Zone requires completing the ‘Mid-Zone Crossing’ mission after several hours of gameplay
- You’ll need multiple runs through junctions G1 and G3 with proper lighting equipment
- G2 contains the storm drain entry point marked by three map pips
- Mid-Zone introduces deadly Birds and toxic marshes requiring careful planning
- Activating the Stabilizer Tower triggers zone collapse – plan your escape route first
Venturing into Pacific Drive’s Mid-Zone represents a significant escalation in difficulty and danger. This hazardous region becomes accessible through the critical path mission ‘Mid-Zone Crossing,’ which unlocks approximately 3-4 hours into your campaign after completing initial objectives from Oppy and other characters. The mission serves as your gateway to more challenging territories filled with unprecedented threats.
While the Route Planner displays the Mid-Zone location, reaching it involves complex navigation challenges. The journey demands substantial preparation, including mastering how to repair your car and ensuring you maintain a lot of gas in the tank. Many players underestimate the resource requirements and find themselves stranded in dangerous areas.
Navigating the junction network requires patience and multiple attempts to establish a reliable route.
From the Auto Shop Hub to the Mid-Zone Barrier
The journey to the Mid-Zone wall involves traversing a highway system with multiple junctions that don’t initially connect. The path requires sequential unlocking through specific actions rather than direct navigation. Here’s the progression strategy we developed:
- The initial route from your hub to junction G1 consists of a relatively straightforward highway segment.
- During your first G1 visit, no direct path to G3 will be available. You must collect sufficient Anchors and escape via Gateway to reset the area.
- Returning to G1 reveals the connection to G3, but this junction presents extreme darkness conditions. Crafting headlights, flashlights, and flares becomes essential for navigation – without these tools, progression becomes nearly impossible.
- The process demands multiple Gateway escapes and returns before finally accessing G2, which contains the actual Mid-Zone wall entrance.
Common Mistake: Many players attempt to push through G3 without proper lighting, resulting in vehicle damage and wasted resources. Always prioritize illumination tools before attempting this section.
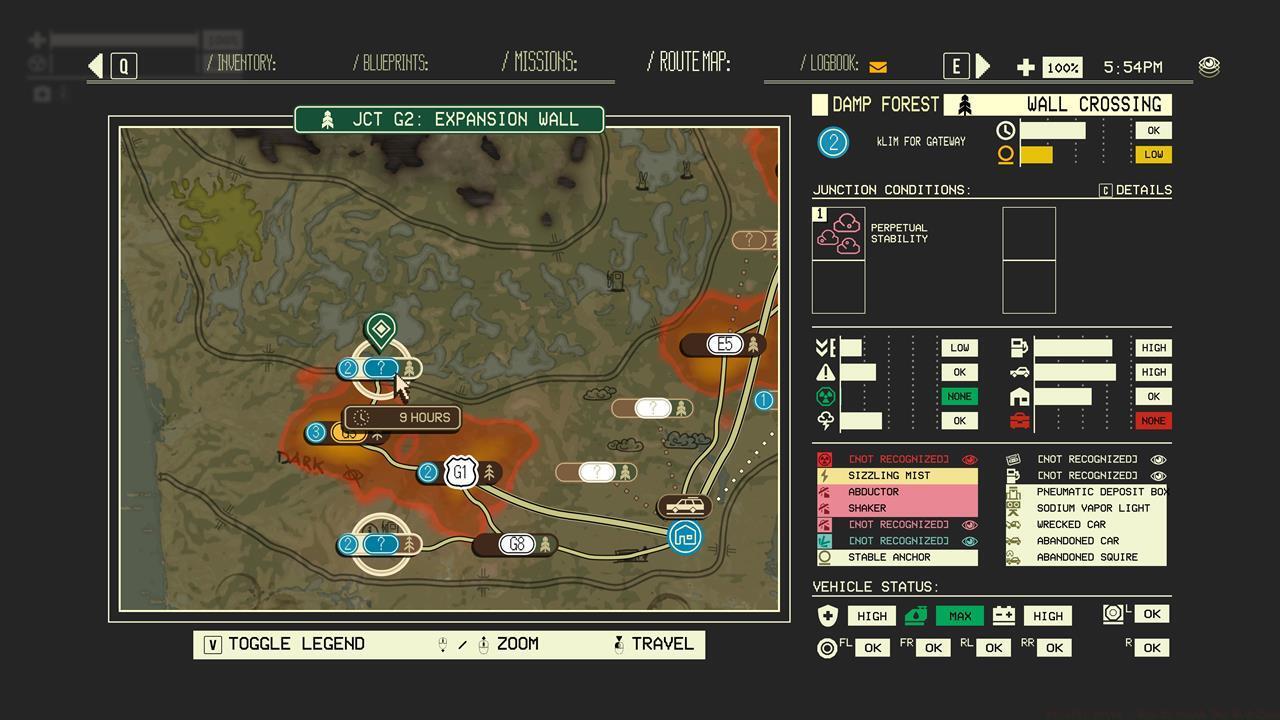
G2: Mid-Zone Wall Navigation
G2 presents the final challenge before Mid-Zone entry. While procedural generation affects vehicle placements and anomaly distributions, the core road layout remains consistent across playthroughs. Your objective focuses on southern progression toward three distinctive map markers.
The three pips serve as your visual guide to the storm drain entrance point.
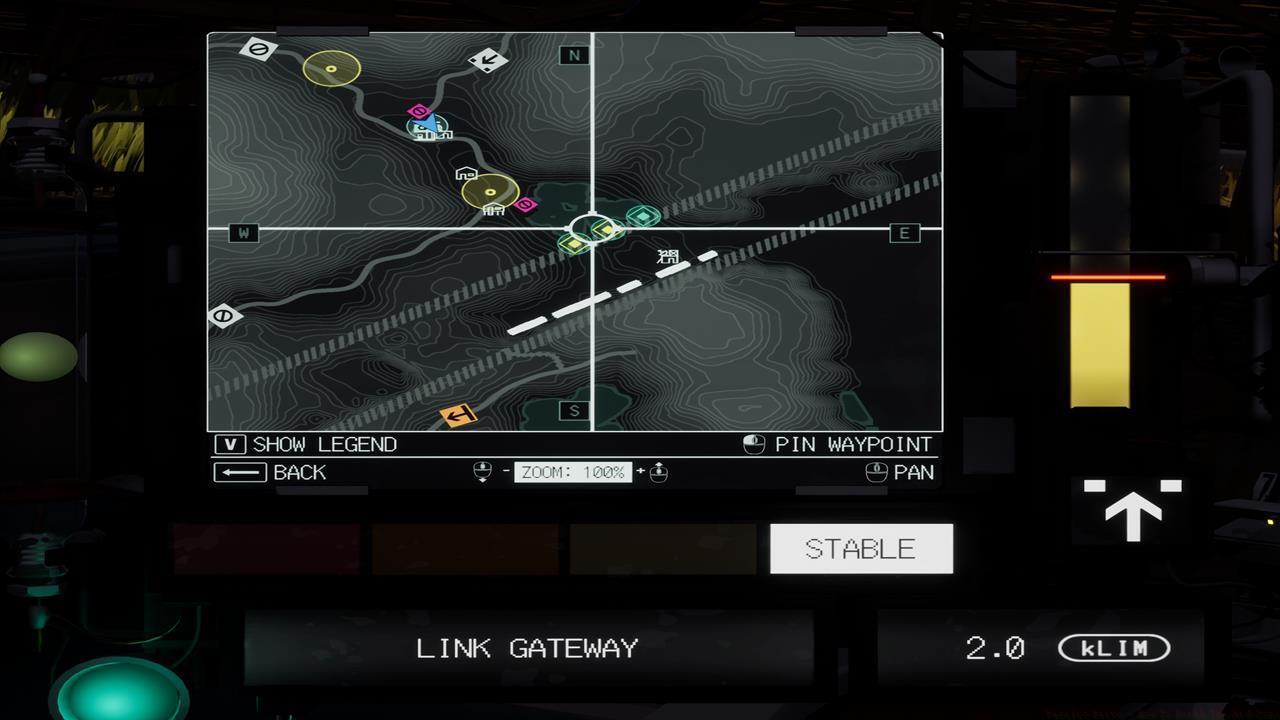
Storm Drain and Tunnel Navigation
To breach the Mid-Zone barrier, you must navigate through a storm drain system represented by the three map indicators. Drive directly into the tunnel opening and maintain forward momentum through the darkness. The tunnel system eventually transitions into an industrial area resembling a railway station or dockyard with numerous cargo containers.
Continue following the winding path as it circles through the complex. Eventually, an exit emerges that connects to the proper Mid-Zone roadway. Pro Tip: Maintain moderate speed through tunnels – too fast risks collision with unseen obstacles, too slow increases exposure to potential anomalies.


Enter the storm drain (left), and follow the path through the darkened tunnels (right).
Mid-Zone Survival and Escape Strategy
The Mid-Zone introduces significantly more dangerous environmental hazards and anomalies. You’ll encounter floating tri-tentacle creatures called ‘Birds’ that pose greater threats than Abductors, along with toxic marshlands that can immobilize your vehicle. Your primary objective involves activating a control panel within the Stabilizer Tower positioned on a hilltop.

The Stabilizer Tower activation triggers immediate zone instability requiring rapid escape planning.
While the activation task appears simple, it initiates immediate zone collapse similar to battle royale mechanics. Strategic preparation becomes critical for survival:
- Gather multiple Anchors within the Mid-Zone before approaching the Stabilizer Tower.
- Identify and pre-select the optimal Gateway for your escape route, considering terrain challenges from your hilltop position.
- Account for marshland areas that dramatically reduce vehicle mobility – getting stuck during collapse proves fatal.
- Advanced Technique: Experienced players recommend scouting the entire Mid-Zone to identify the fastest escape route before activation.
Successfully escaping the Mid-Zone completes this challenging mission and unlocks additional objectives. Many players then focus on unlock the keypad door in the Auto Shop to access additional upgrades and resources. For comprehensive vehicle management strategies, consult our Class Guide to optimize your loadout for future expeditions.
Action Checklist
- Craft headlights, flashlights, and flares before attempting G3 junction
- Complete initial Outer Zone objectives to unlock Mid-Zone Crossing mission
- Navigate G1-G3 junction sequence with multiple Gateway escapes
- Study G2 map and identify three pip markers for storm drain location
- Scout Mid-Zone escape routes before activating Stabilizer Tower
No reproduction without permission:SeeYouSoon Game Club » Pacific Drive – How To Reach The Mid-Zone Master the treacherous journey to Pacific Drive's Mid-Zone with essential survival strategies and navigation tips