TL;DR
- Essential brewing requires Nether access and specific mob drops like Blaze Rods
- Create brewing stands using cobbled blocks and Blaze Rods for potion production
- Master awkward potions as the foundation for all advanced brewing recipes
- Strategic potion selection can dramatically improve survival and combat effectiveness
- Advanced techniques include farming automation and effect duration optimization
Carrying a Potion of Fire Resistance transforms dangerous lava encounters from certain death to manageable situations, providing crucial protection during Nether exploration and mining operations.
Much like strategic power-ups in other gaming realms—whether restoring mana in RPGs or consuming energy boosters in real life—Minecraft potions deliver game-changing advantages when deployed correctly. The alchemy system offers numerous beneficial concoctions that can turn the tide in combat, enhance exploration capabilities, and provide critical survival buffs. This comprehensive tutorial covers establishing your brewing infrastructure, fundamental potion crafting mechanics, modification techniques, and strategic recommendations for prioritizing which potions to brew first.
This guide focuses on Minecraft Bedrock Edition 1.18, compatible with Windows 10, Xbox, PlayStation, Switch, and mobile platforms. Java Edition mechanics may vary significantly in specific implementation details.
Initiating your potion-making journey requires accessing the Nether dimension, which necessitates crafting a Diamond Pickaxe to harvest Obsidian for portal construction, plus Flint and Steel for ignition.
Several Nether-exclusive components are fundamental to potion creation, particularly Blaze Rods and Nether Wart. Additional mobs including Magma Cubes and Ghasts yield materials essential for specialized potion recipes.
To acquire Blaze Rods efficiently, locate a Nether Fortress where Blaze enemies spawn. These floating, torch-like hostile mobs projectile fire attacks that can be particularly frustrating. Defeating them yields Blaze Rods, indispensable for brewing operations. For dedicated potion enthusiasts, establishing an automated Blaze Farm like the design from content creator JC Playz significantly streamlines resource gathering:
Nether Wart also appears within Fortress structures, though with initial specimens and Soul Sand blocks, you can cultivate your own Nether Wart farm to minimize return trips to the dangerous Nether dimension.
Before commencing brewing operations, construct a dedicated brewing station. These apparatuses sometimes appear in village cleric dwellings, or you can craft one independently using straightforward recipes.
The crafting formula requires three cobbled block variants—standard cobblestone, cobbled deepslate, or cobbled blackstone—combined with one Blaze Rod.
This combination yields the essential brewing equipment:
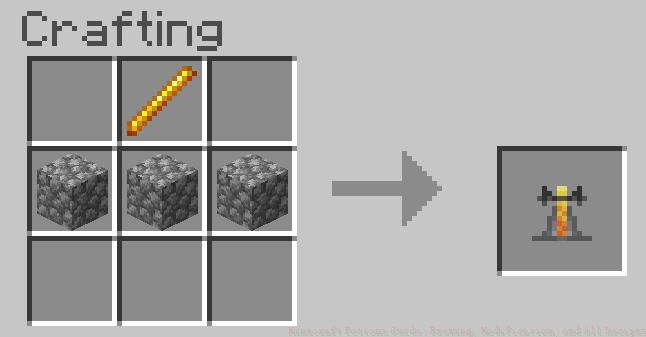
Brewing Stand recipe
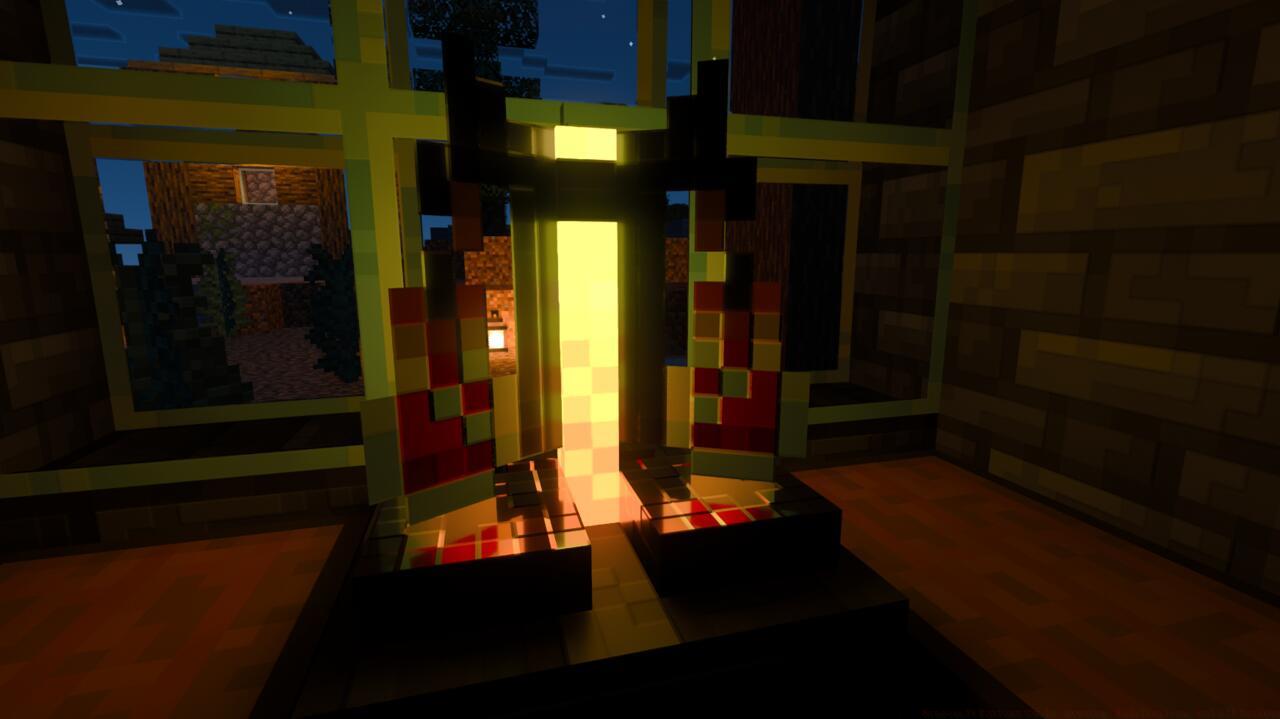
A Minecraft Brewing Stand
Pro Tip: Position your brewing station near a reliable water source and storage system. This strategic placement minimizes movement during multi-stage brewing processes and significantly improves efficiency. Many experienced players incorporate chests for ingredient organization and water cauldrons for easy access.
Common Mistake: Beginners often attempt brewing without establishing proper Blaze Rod supply chains first. Without consistent Blaze Powder production (created from Blaze Rods), you cannot fuel the brewing stand for extended operations.
The foundation of all advanced potions begins with creating Awkward Potions, which serve as blank canvases for effect application. Combine Nether Wart with Water Bottles in your brewing stand to produce these essential base potions.
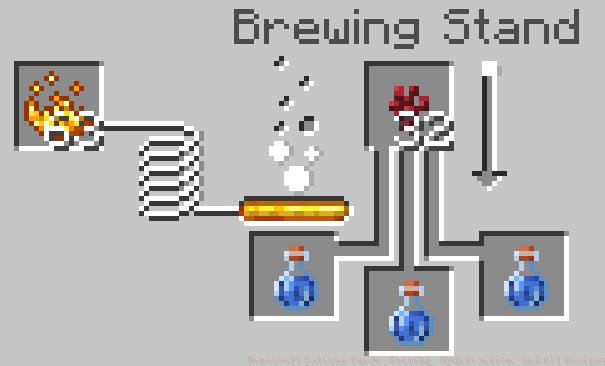
Awkward Potion recipe
Once you’ve established your Awkward Potion supply, introduce secondary ingredients to impart specific effects. For instance, adding Magma Cream creates Fire Resistance potions, while Sugar develops Swiftness effects.

Fermented Spider Eye recipe
Advanced Technique: Master modifier ingredients like Glowstone Dust to amplify potion potency (increasing effect strength but reducing duration) or Redstone to extend effect duration (without enhancing strength). Fermented Spider Eye inverses potion effects, transforming healing into harming or regeneration into decay.
Strategic Priority: Focus initially on brewing Healing, Fire Resistance, and Strength potions. These provide the most immediate survival and combat advantages, especially when preparing for challenging encounters like exploring the Nether or battling the Ender Dragon.
Optimization Tip: Experienced brewers create automated ingredient farms for materials like Spider Eyes (via spider spawners) and Sugar Cane (for paper to craft Gunpowder for splash potions). This sustainable approach ensures consistent potion supply without repetitive resource gathering.
Action Checklist
- Gather Diamond Pickaxe materials and create Nether Portal
- Locate Nether Fortress and collect initial Blaze Rods and Nether Wart
- Craft Brewing Stand using cobbled blocks and Blaze Rod
- Establish Nether Wart farm on Soul Sand for sustainable ingredient supply
- Brew initial batch of Awkward Potions as foundation for advanced recipes
- Create essential survival potions: Healing, Fire Resistance, and Strength
No reproduction without permission:SeeYouSoon Game Club » Minecraft Potions Guide: Brewing, Modification, And All Recipes Master Minecraft potion brewing with essential recipes, advanced techniques, and strategic tips for survival success