TL;DR
- Three primary methods: physical training, Chiral Crystal collection, and Antigravity Devices
- Carry 80-120kg over 2+ km distances to trigger strength progression
- Every 1,000 Chiral Crystals reduces carried weight by 1kg through chiral density
- Each Antigravity Device adds 10kg capacity but requires strategic backpack space management
- Combine methods for exponential benefits and master terrain-specific load distribution
Effective weight management stands as one of the most crucial gameplay mechanics in Death Stranding 2: On the Beach. As Sam Porter Bridges, your ability to transport essential supplies across treacherous terrain directly impacts mission success rates and overall progression efficiency.
Why does carry capacity matter so profoundly? The game’s core loop revolves around connecting isolated settlements through delivery missions. Each successful transport strengthens the fragile network rebuilding human civilization. However, being overencumbered severely limits mobility, increases fall risk, and makes navigating hostile environments exponentially more dangerous.
Mastering weight optimization transforms challenging expeditions into manageable journeys. Proper load management enables you to carry more critical resources, complete multiple objectives in single trips, and maintain the agility needed to evade threats.
Death Stranding 2 provides three distinct yet complementary approaches to enhancing Sam’s carrying capabilities. Understanding when and how to employ each method creates a powerful foundation for advanced logistics planning.
The methods progress from early-game accessibility to late-game specialization:
- Physical Training: Natural progression through gameplay – requires carrying heavy loads over distances
- Chiral Crystal Collection: Resource-based passive enhancement – scales with exploration efficiency
- Chiral Antigravity Devices: Crafted equipment providing immediate capacity boosts – demands strategic resource investment
Seasoned players typically combine all three approaches, using physical training as the foundation while supplementing with crystal benefits and device enhancements.
The most organic method for increasing carry weight involves systematically challenging Sam’s physical limits through sustained heavy load transportation. This approach mirrors real-world strength training principles applied to the game’s mechanics.
Optimal Training Parameters: Research indicates carrying between 80-120kg for distances exceeding 2 kilometers consistently triggers strength progression. The game’s hidden stamina system tracks both weight duration and distance traveled, with longer expeditions providing greater progression rewards.
Advanced Technique: Instead of simply overloading your backpack, utilize the strand mechanics to create secured cargo bundles. This approach allows you to carry additional weight while maintaining better balance control. Critical mistake avoidance: many players overload immediately rather than gradually increasing weight, resulting in frequent falls and damaged cargo.
Balance Management: When carrying extreme loads, frequently shift Sam’s weight distribution by adjusting movement speed and direction. Uphill segments demand slower, deliberate pacing while downhill sections require careful braking to prevent momentum-based stumbles.
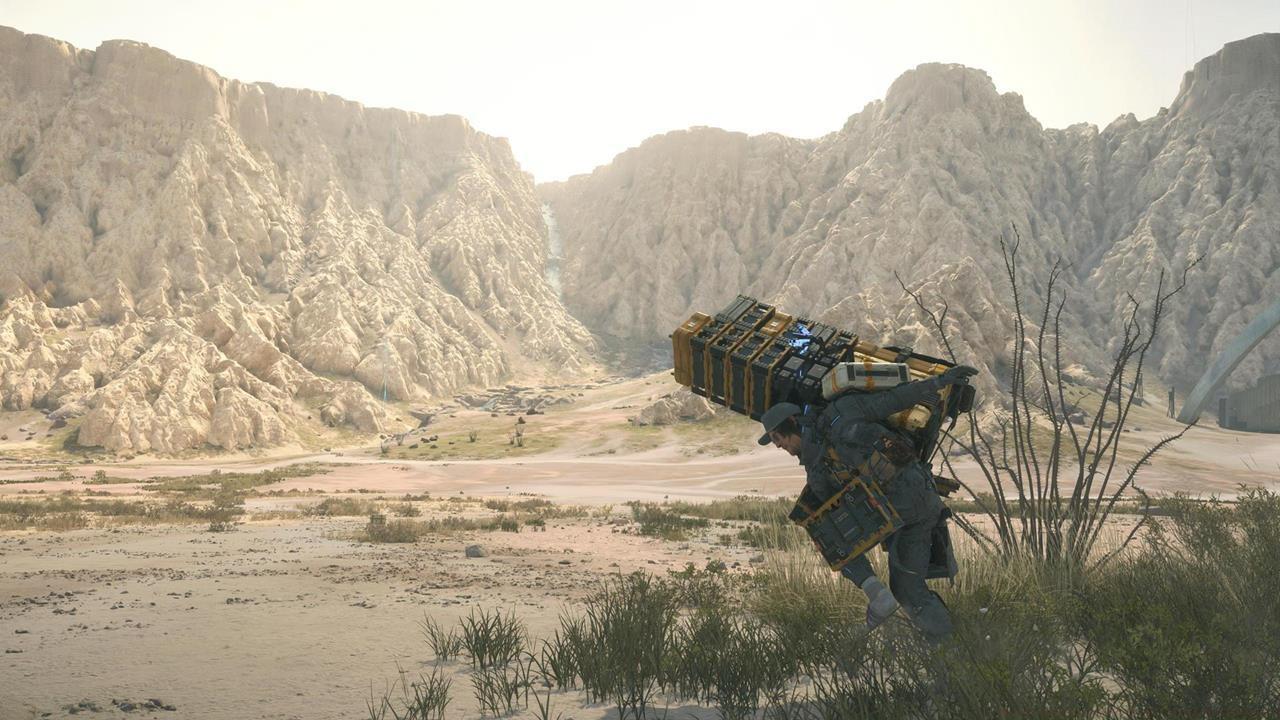
Strategic load distribution prevents falls while maximizing training efficiency.
Chiral Crystals represent the game’s multipurpose premium resource, with weight reduction being one of their most valuable functions. These glowing crystalline formations exist throughout the game world, with higher concentrations appearing in areas of chiral activity.
Collection Optimization: Deploy your Odradek scanner continuously while moving through new territories. Priority collection zones include tar pit peripheries, BT engagement sites, and mountainous regions with frequent timefall.
Mathematical Benefits: The weight reduction mechanic operates on a precise formula: every 1,000 Chiral Crystals in your inventory reduces your effective carried weight by exactly 1kg. This passive benefit applies regardless of your current load, making crystal collection valuable throughout your entire playthrough.
Advanced Collection Strategies: Beyond field collection, utilize private room showers to recover additional crystals – this mechanic yields 5-15 crystals per shower based on your recent distance traveled. Additionally, construct chiral collectors at strategic locations to automate crystal gathering while you focus on deliveries.
Resource Allocation: Balance crystal usage between weight reduction and other critical functions like road construction and equipment repair. For players focusing on our Weapons Unlock strategies, remember that some advanced weapons require significant chiral investments.
Systematic crystal collection creates compounding benefits throughout your gameplay experience.
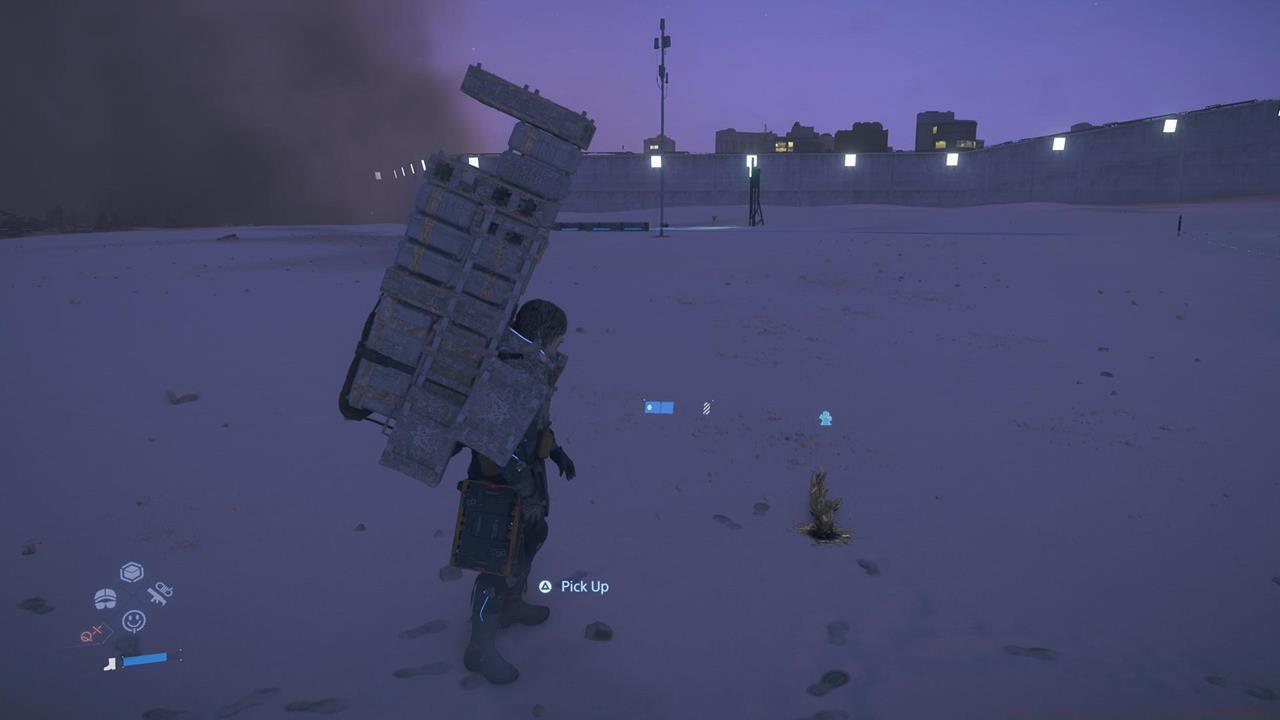
Chiral Antigravity Devices represent the most direct method for expanding Sam’s carrying potential. These technologically advanced attachments manipulate chiral fields to effectively lighten your load.
Unlocking Requirements: Gain access to these devices by achieving Connection Level 2 with The Government faction. This typically occurs after completing 8-12 delivery missions for them during the Australia story arc.
Crafting Specifications: Each device requires precise resource investment:
- 100x Chiral Crystals – the chiral field manipulation component
- 60x Chemicals – stabilizer and containment elements
- 80x Special Alloys – structural framework and attachment mechanisms
Strategic Deployment: Each mounted device increases your load limit by 10kg, but backpack real estate becomes a precious commodity. Plan your attachment layout considering both current needs and future expansion.
Backpack Optimization: The maximum number of devices you can equip depends on your backpack customization. Early-game backpacks typically accommodate 2-3 devices, while upgraded models can support 5-6 attachments. This progression system connects well with our Class Guide principles about equipment specialization.
Common Pitfall: Many players craft devices prematurely before securing adequate backpack space, wasting valuable resources. Always verify available attachment points before investing in crafting.

Proper device placement maximizes capacity gains while maintaining backpack functionality.
Master-level weight optimization involves sophisticated combinations of all three methods alongside intelligent route planning and inventory management.
Multi-Method Synergy: Combine physical training during early deliveries with systematic crystal collection, then transition to device-based enhancements for end-game content. This phased approach ensures consistent capacity growth throughout your entire playthrough.
Route Optimization: Plan delivery routes that pass through high-density chiral crystal areas while avoiding the most treacherous terrain when heavily loaded.
Terrain-Specific Strategies:
- Mountainous Regions: Prioritize antigravity devices and reduce base load to maintain climbing efficiency.
- BT Territories: Balance capacity with mobility – sometimes carrying less enables faster evasion.
- Long-Distance Highways: Maximize load capacity when utilizing constructed roads where balance concerns diminish.
Inventory Prioritization: Apply weight management principles to our Complete Guide principles about resource allocation across different gameplay scenarios.
Pro-Tip: Maintain a “training load” of 20-30kg above your comfort zone during routine deliveries to continuously build strength while maintaining operational effectiveness.
Action Checklist
- Carry 80-120kg loads for 2+ km distances to trigger strength progression
- Systematically collect Chiral Crystals using Odradek scans in high-yield zones
- Reach Connection Level 2 with The Government faction to unlock device crafting
- Craft first Chiral Antigravity Device using 100 crystals, 60 chemicals, 80 alloys
- Optimize backpack layout to maximize device attachments while maintaining essential gear
- Combine all three methods for exponential capacity growth throughout campaign
No reproduction without permission:SeeYouSoon Game Club » How To Increase Carry Weight In Death Stranding 2 Master Death Stranding 2's weight management with three proven methods and advanced optimization strategies