TL;DR
- Locate 10 hidden scanners across the Zone to unlock the secret Scanning Complete achievement
- Each scanner activation rewards artifacts and triggers unique mutant encounters
- Several locations require specific timing or story progression to access
- Use environmental clues and PDA entries to pinpoint exact scanner positions
- Prepare for anomalies and hostile creatures at each activation site
Games and Esports Articles
During your journey through the treacherous S.T.A.L.K.E.R. 2 wasteland, you’ll discover specialized scanning devices similar to the equipment used in the introductory mission. These scattered instruments are integral to obtaining the covert Scanning Complete accomplishment. Successfully gathering all ten units will trigger this hidden achievement while providing valuable artifact discoveries. This comprehensive walkthrough details optimal acquisition methods and addresses frequent complications players encounter.
Many online resources display incomplete mapping data, often omitting essential scanner positions necessary for completion. Our verified guide includes the previously missing tenth location while correcting erroneous marker placements that previously misdirected completion efforts.
Before embarking on your scanner collection journey, strategic preparation significantly enhances success rates. Equip anomaly-resistant gear and carry ample medical supplies, as each activation typically triggers environmental hazards or hostile encounters. Understanding regional mutant behaviors and optimal approach timing can mean the difference between successful activation and untimely demise.
Many players underestimate the importance of timing constraints, particularly with the Chemical Plant scanner that only functions post-midnight. Additionally, certain zones remain inaccessible until reaching specific story milestones, requiring careful progression planning.
Navigation efficiency proves crucial for minimizing radiation exposure and resource depletion. Study environmental landmarks carefully and utilize the detailed imagery provided to avoid common navigation errors that waste valuable supplies.
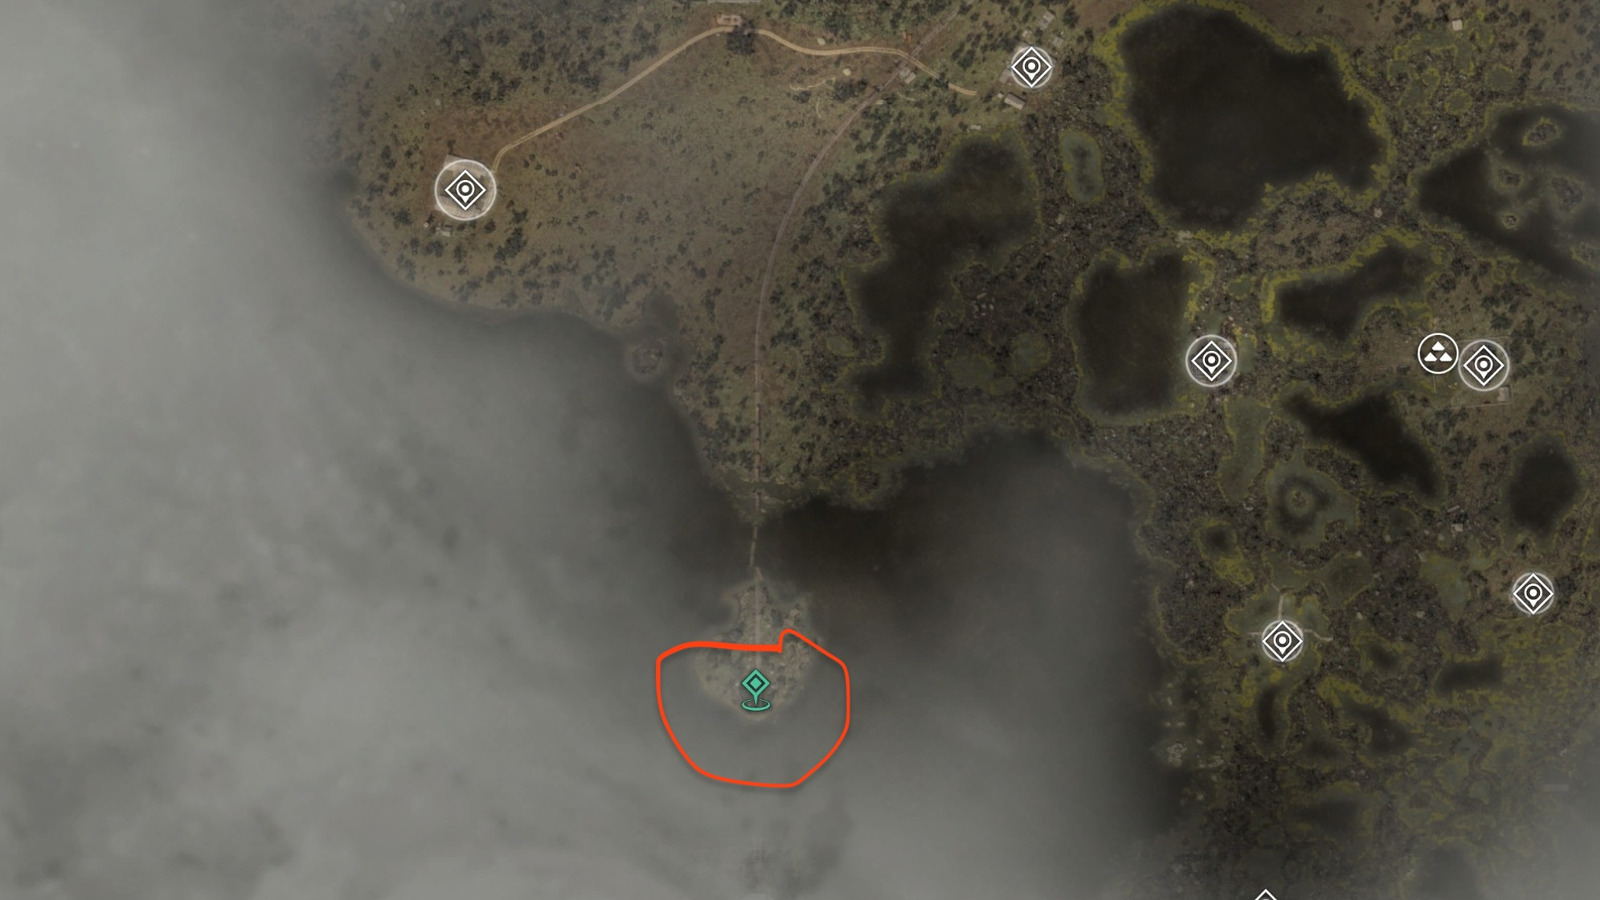
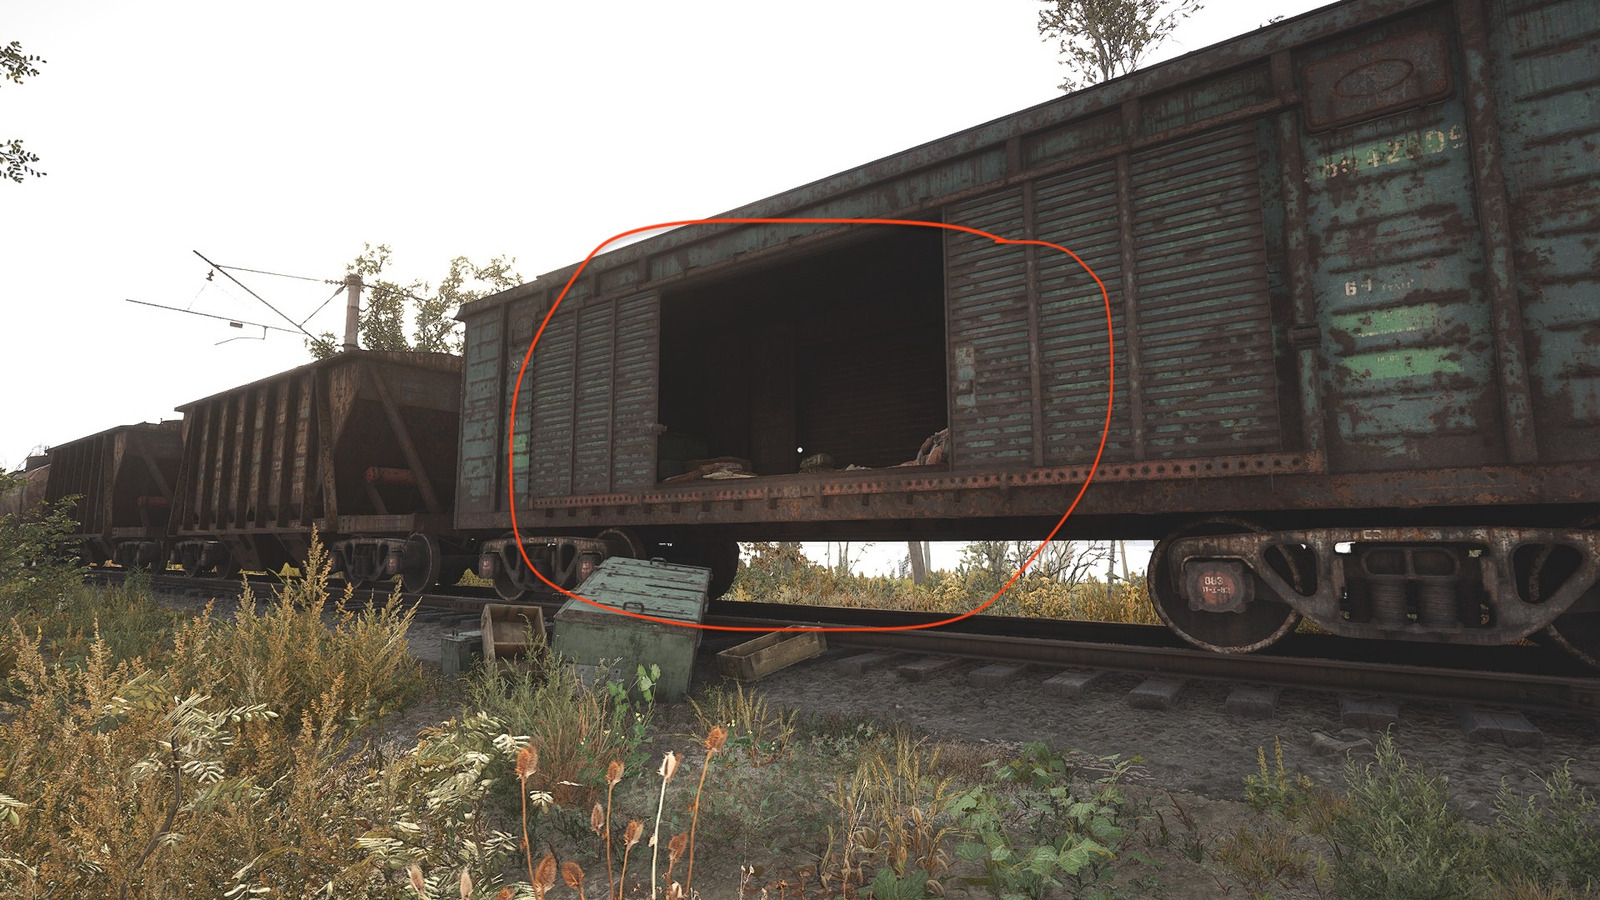
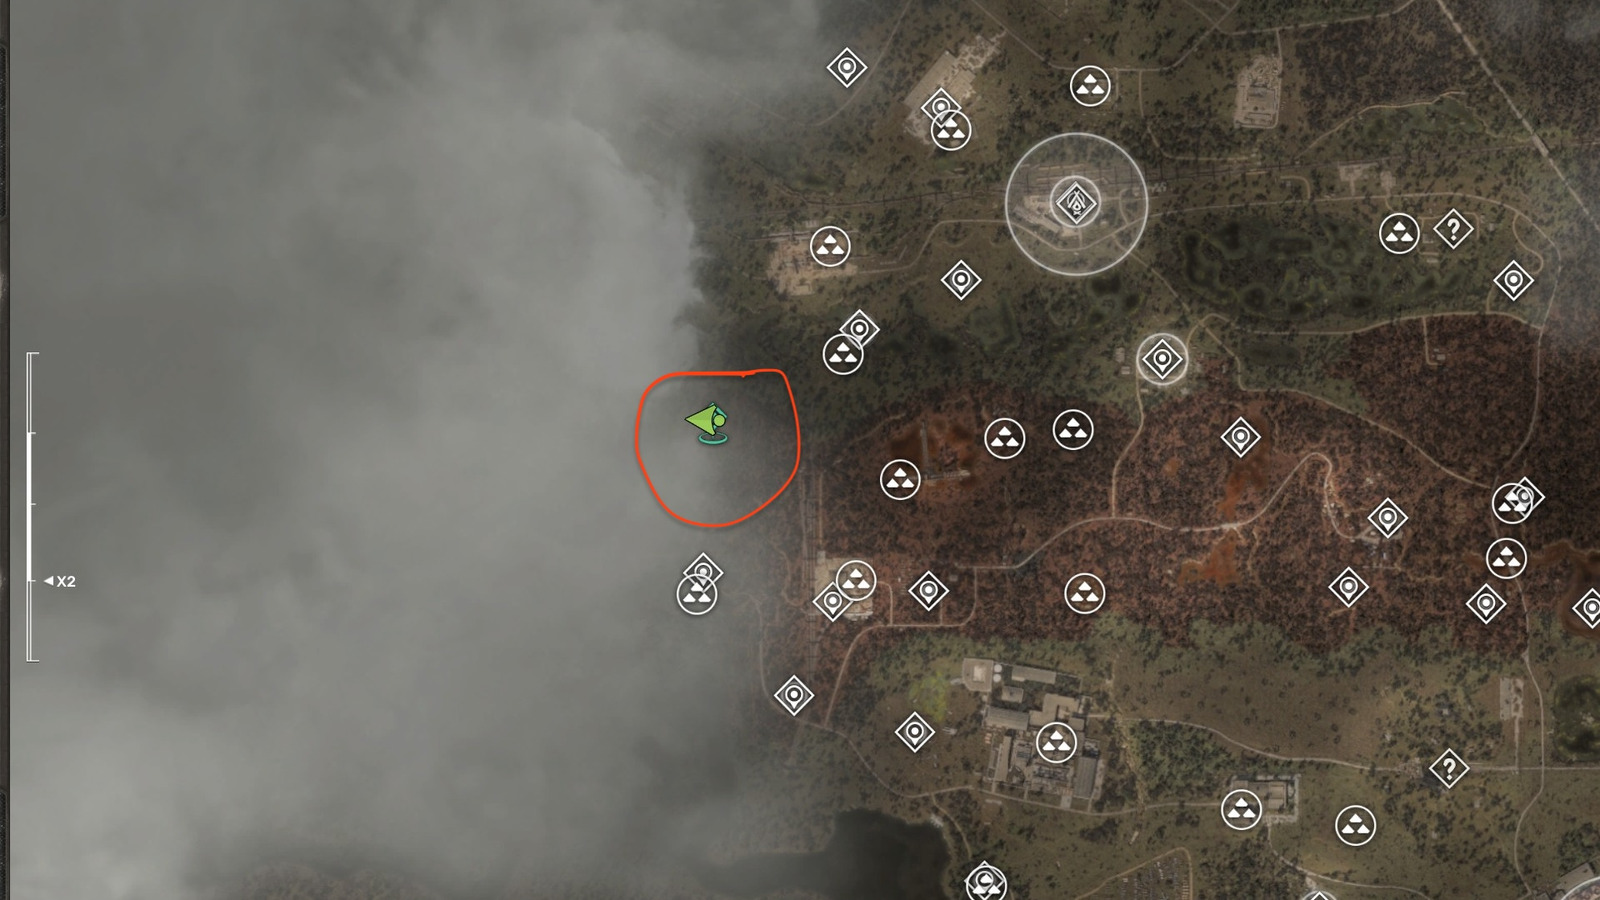
Navigate to the designated island area marked on your map interface. As you approach this location, observe the derelict train composition. One carriage contains three deceased researchers alongside a fallen stalker operative, with the latter possessing the essential PDA device containing activation protocols.
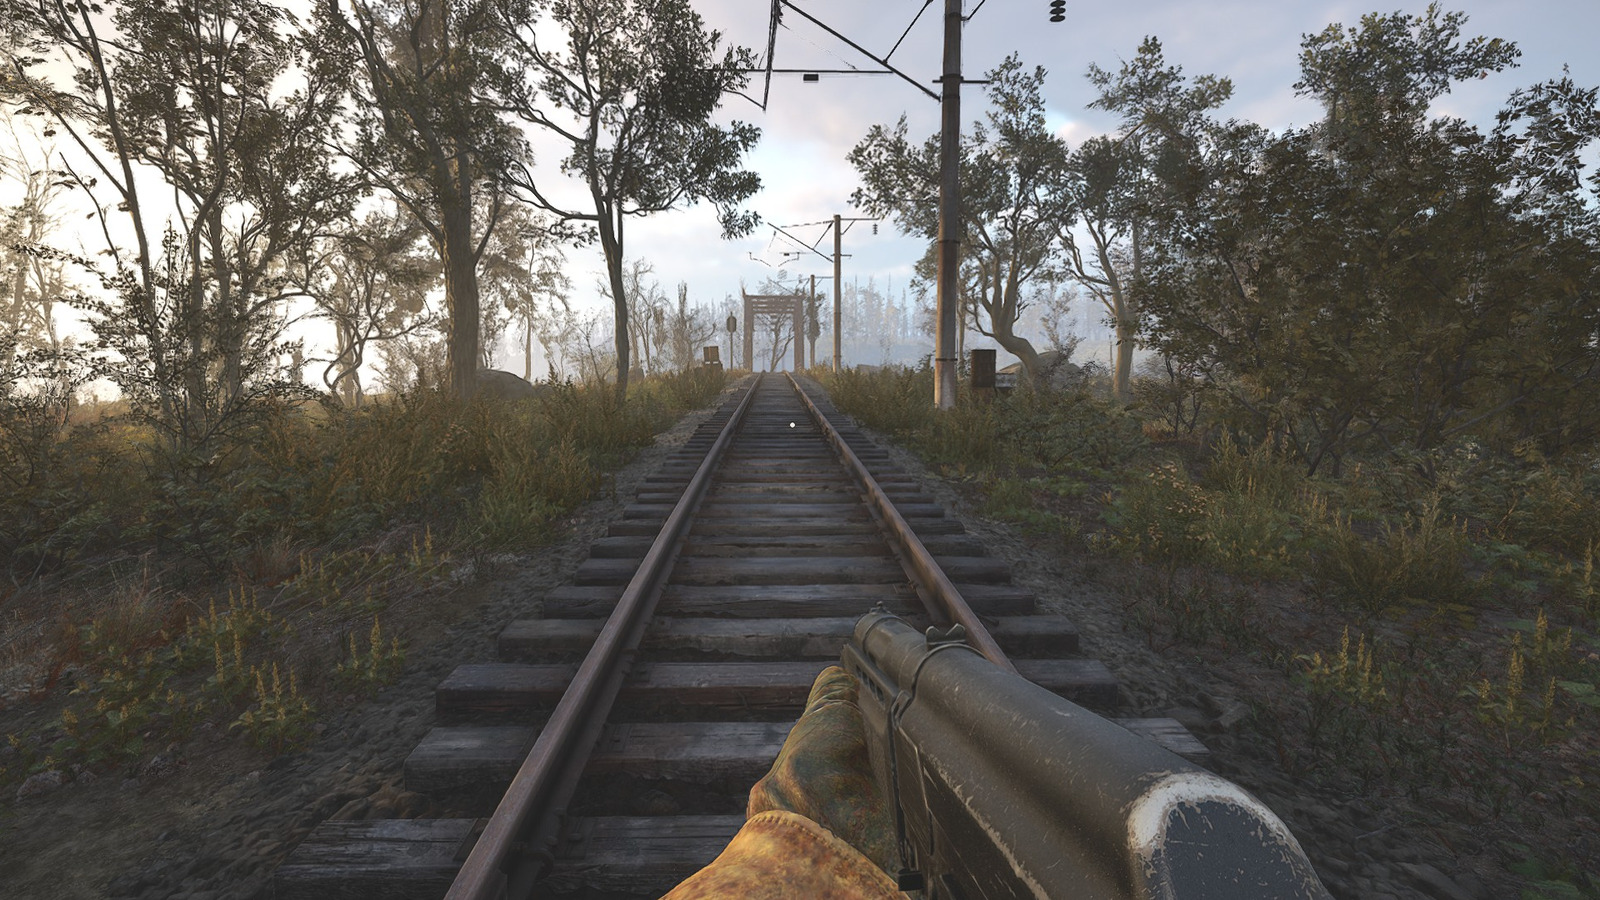
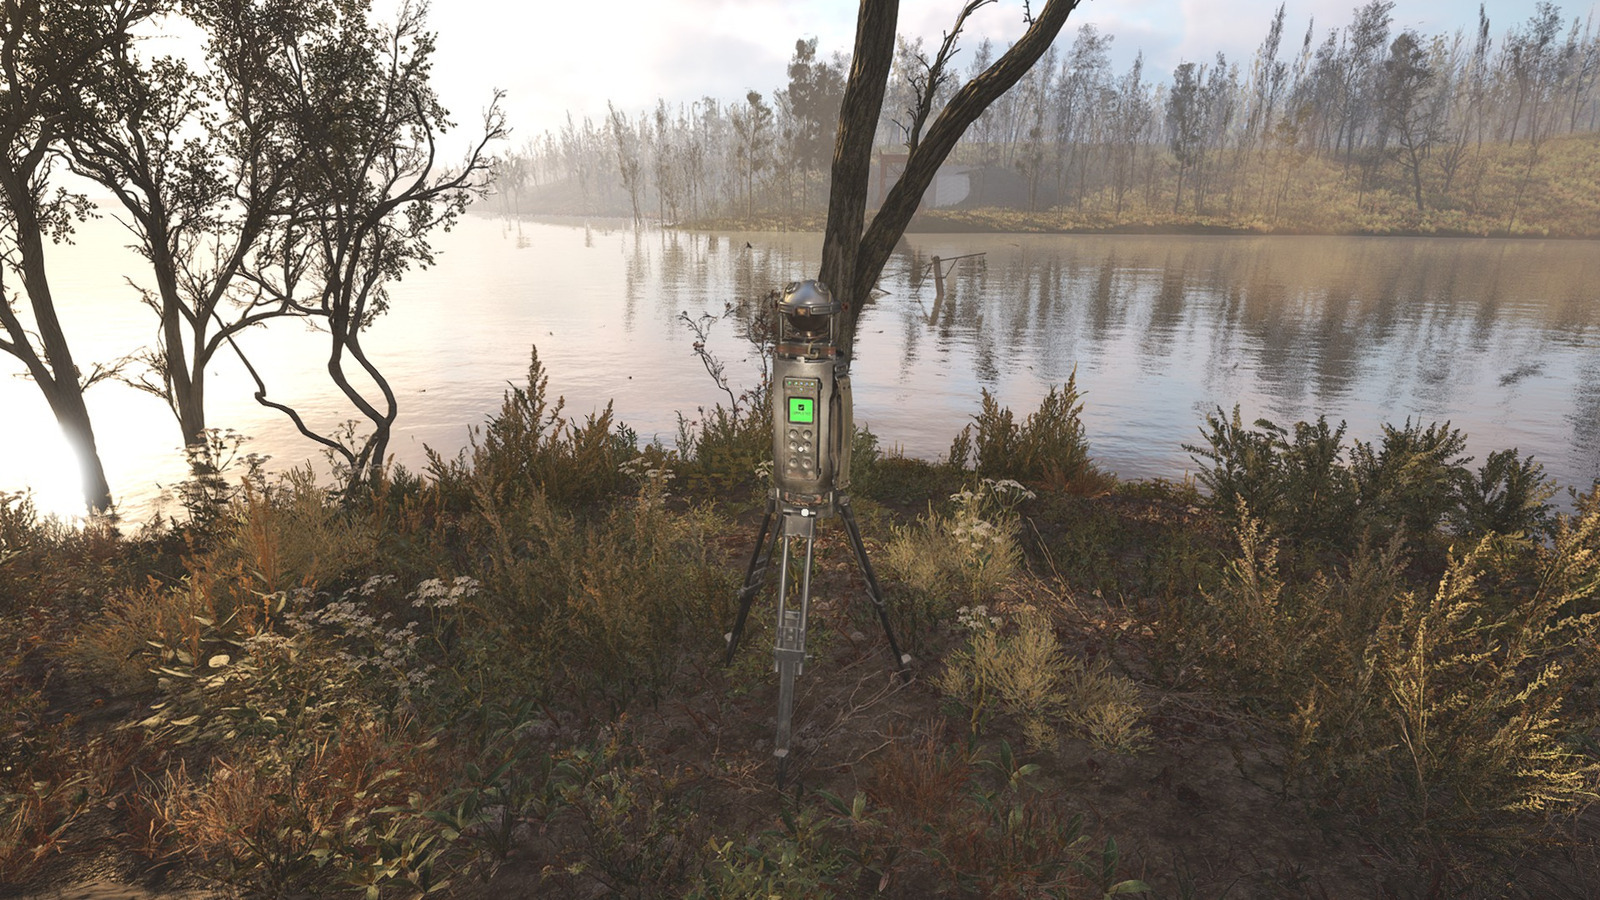
Proceed from the train carriage toward the island following the railway alignment. Eliminate zombified stalkers positioned along both rail sides before initiating the scanning mechanism.
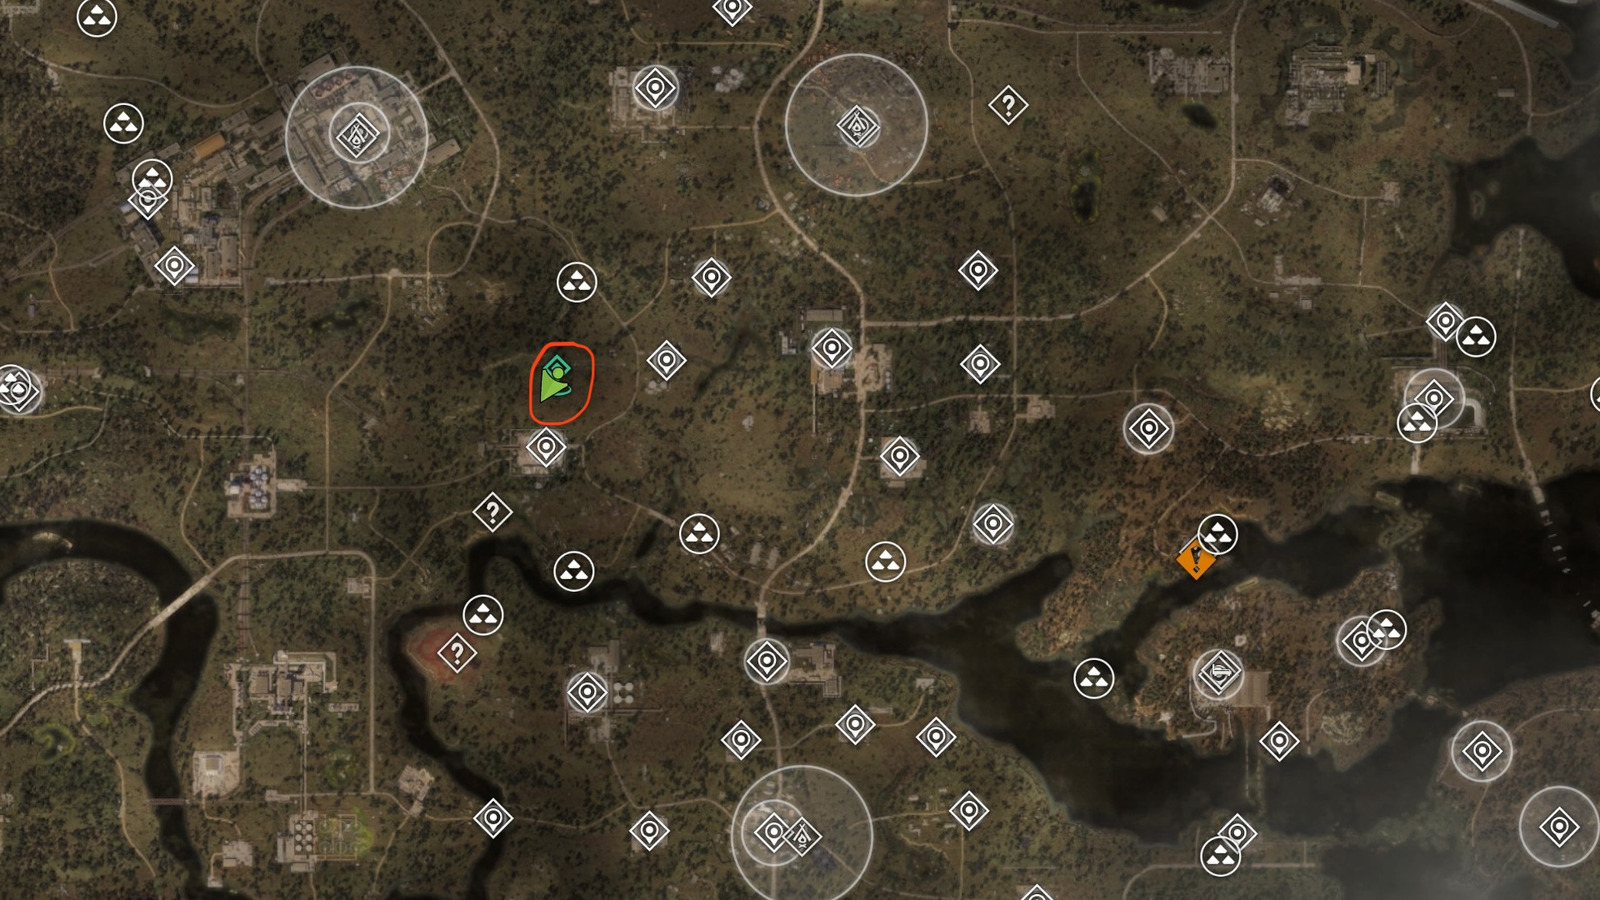
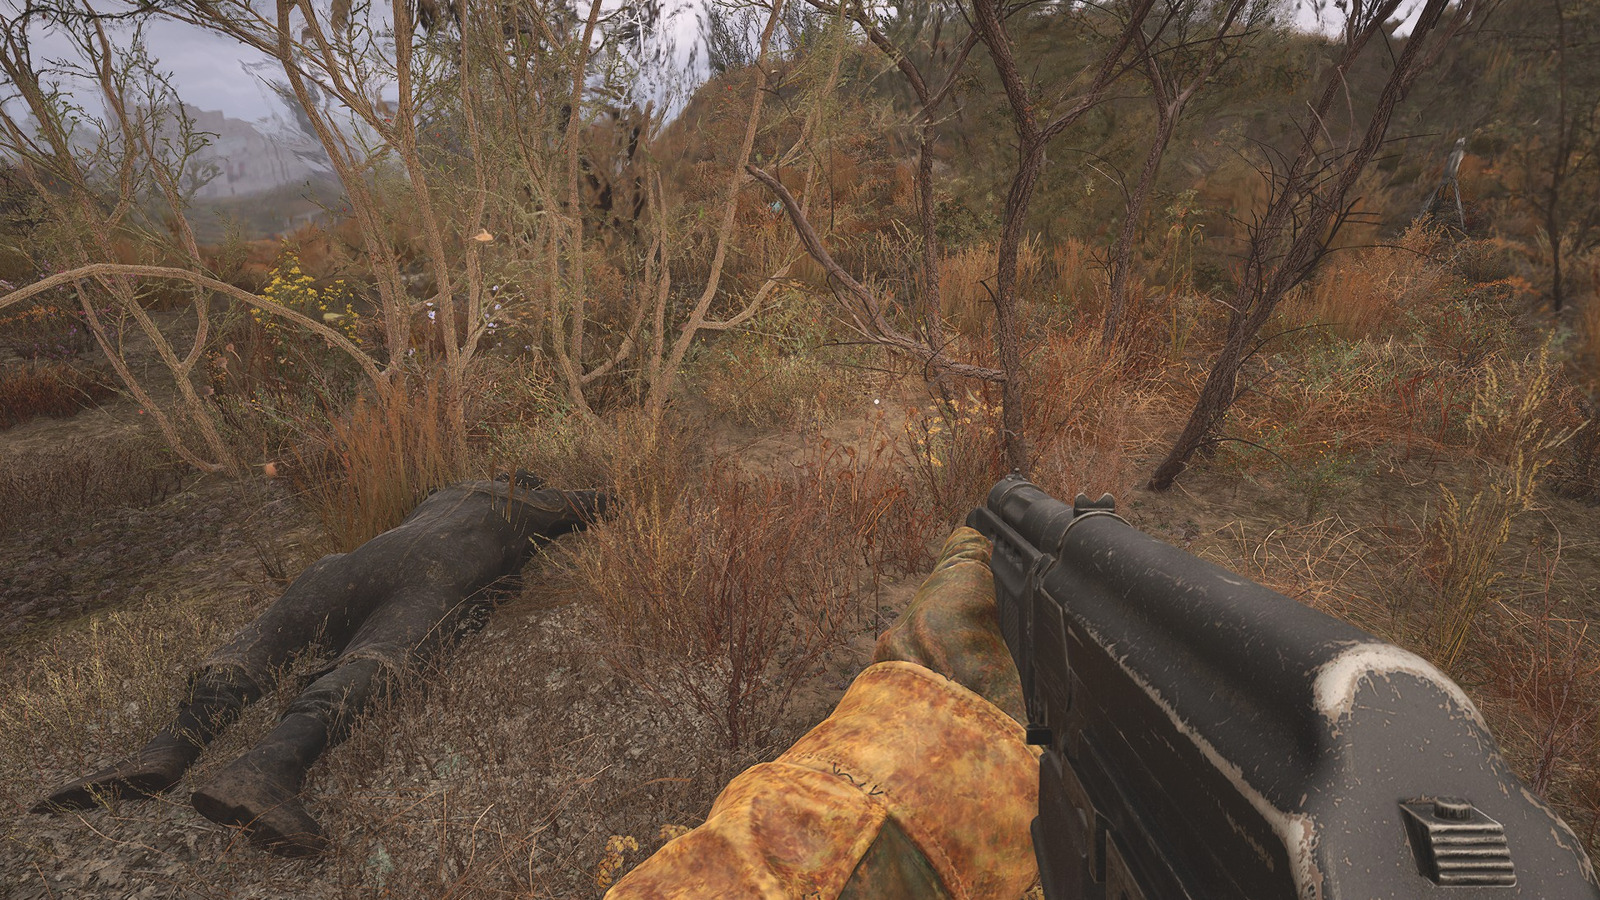
Identify the precise location indicated on your navigation display. Upon arrival, locate the deceased bandit operative and retrieve his personal data assistant, which documents the circumstances surrounding his demise. Subsequently activate the scanning apparatus while remaining vigilant for emergent anomalous phenomena in the immediate vicinity.
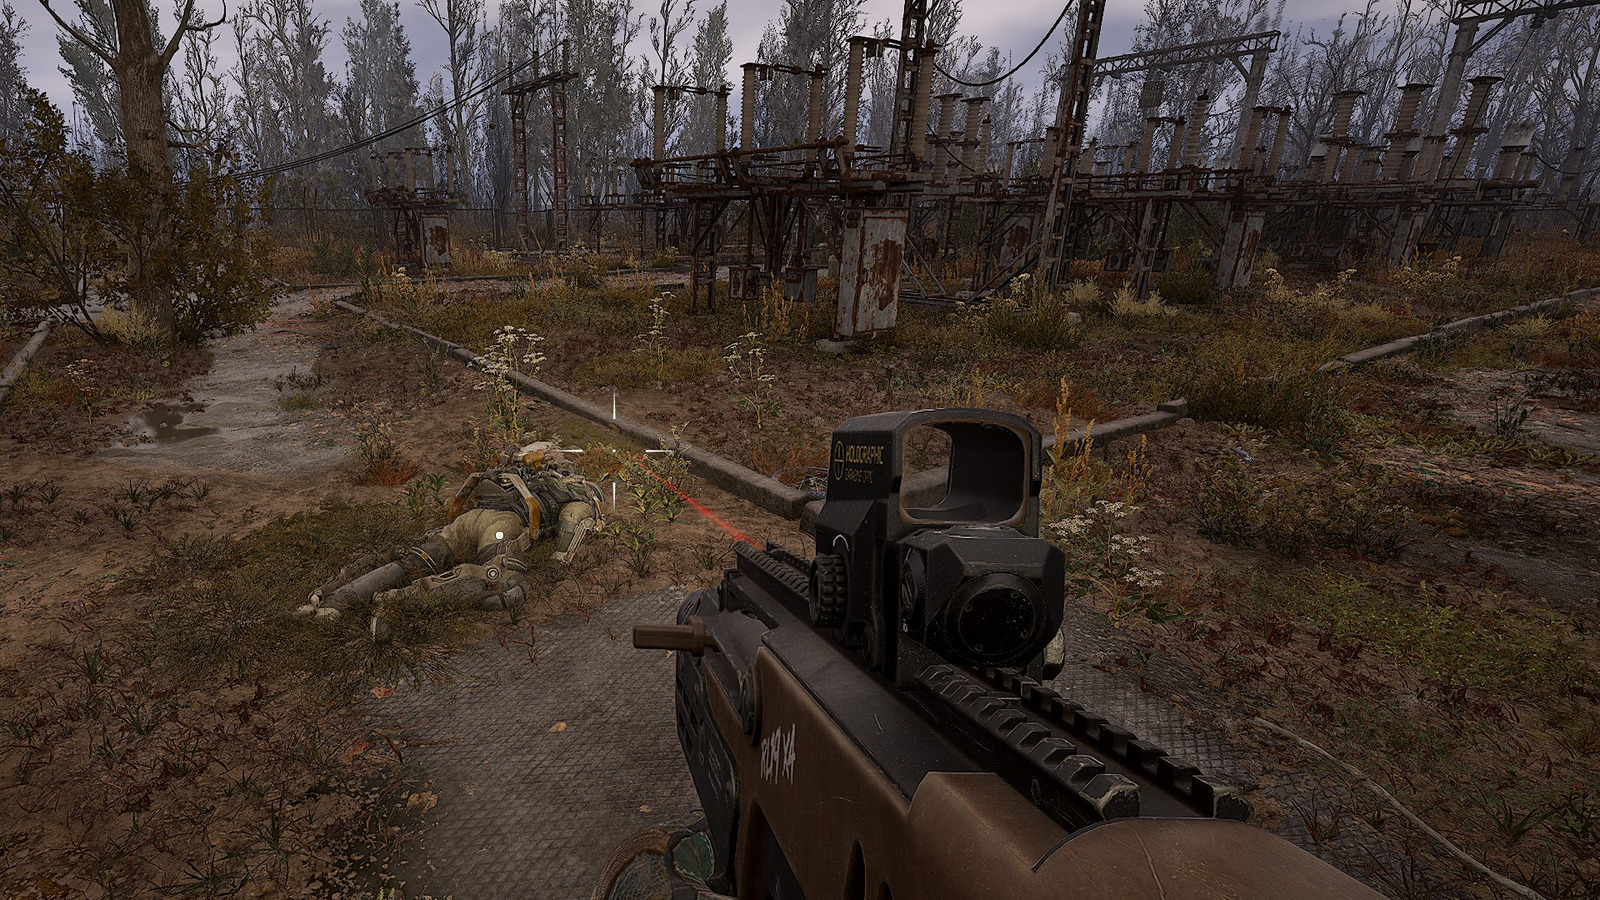
This particular scanning unit resides westward of the Rostok operational base within an expansive industrial structure depicted below. You’ll encounter another stalker attempting device activation moments before a bloodsucker assault. Intervention to preserve the operative remains optional before accessing the mechanism post-encounter resolution.
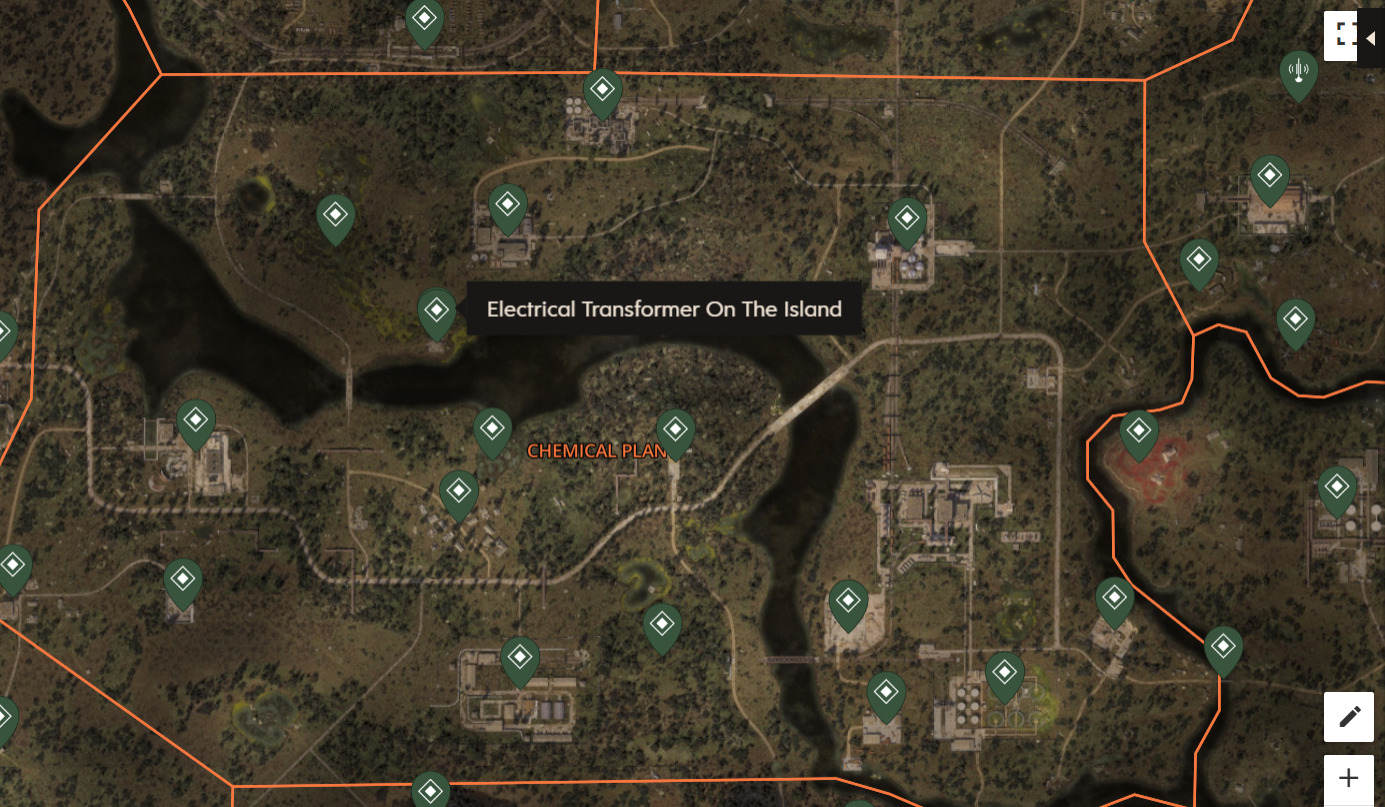
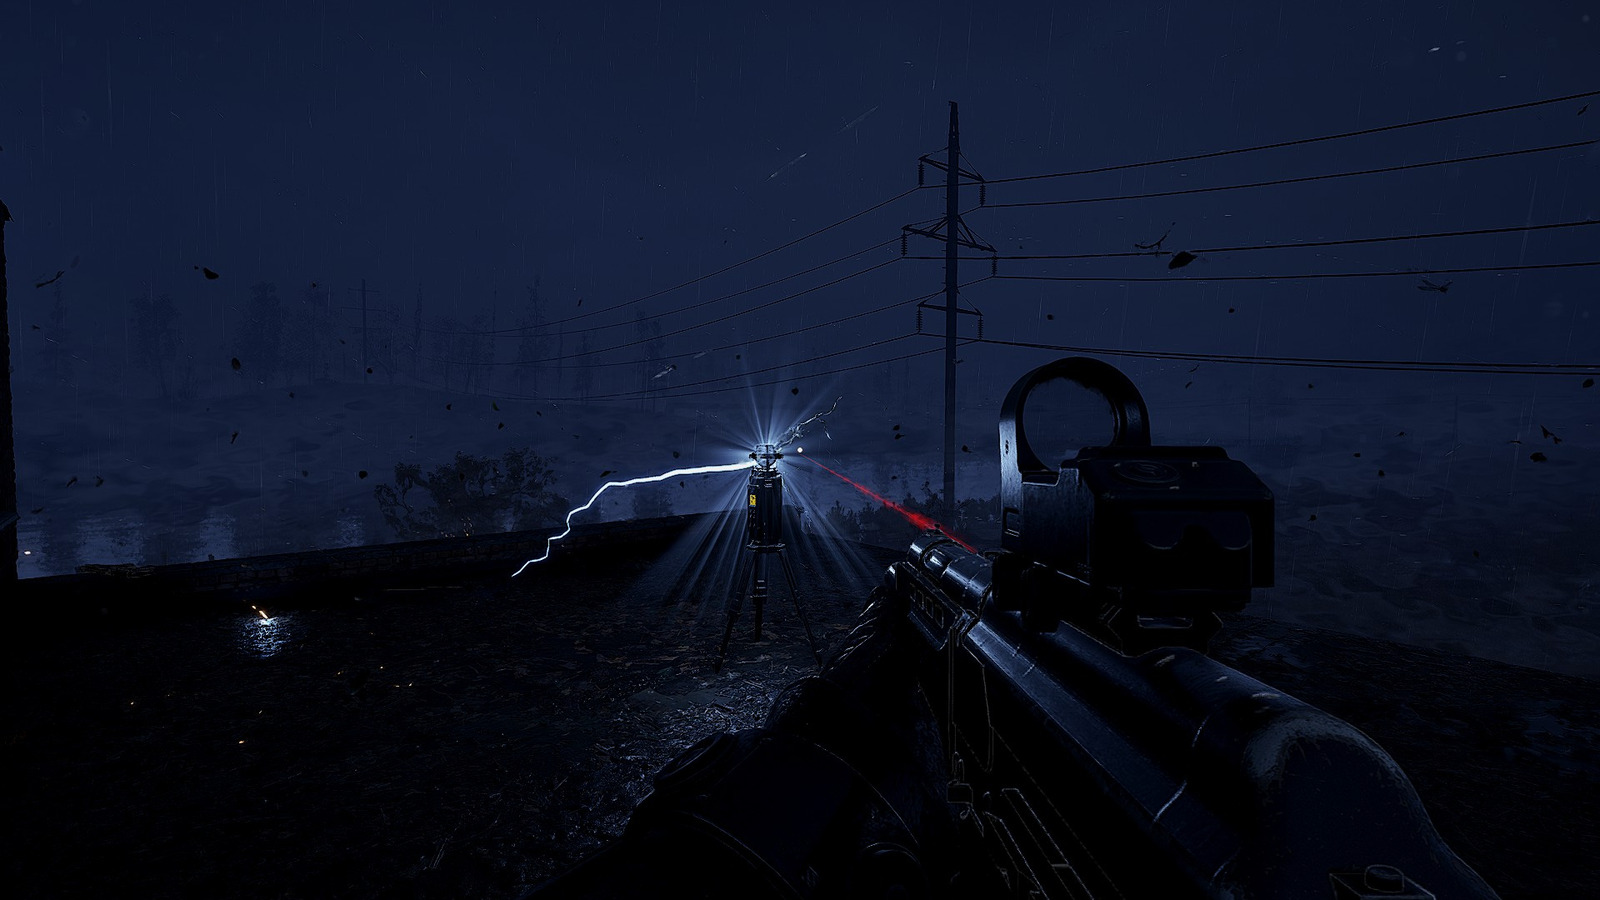
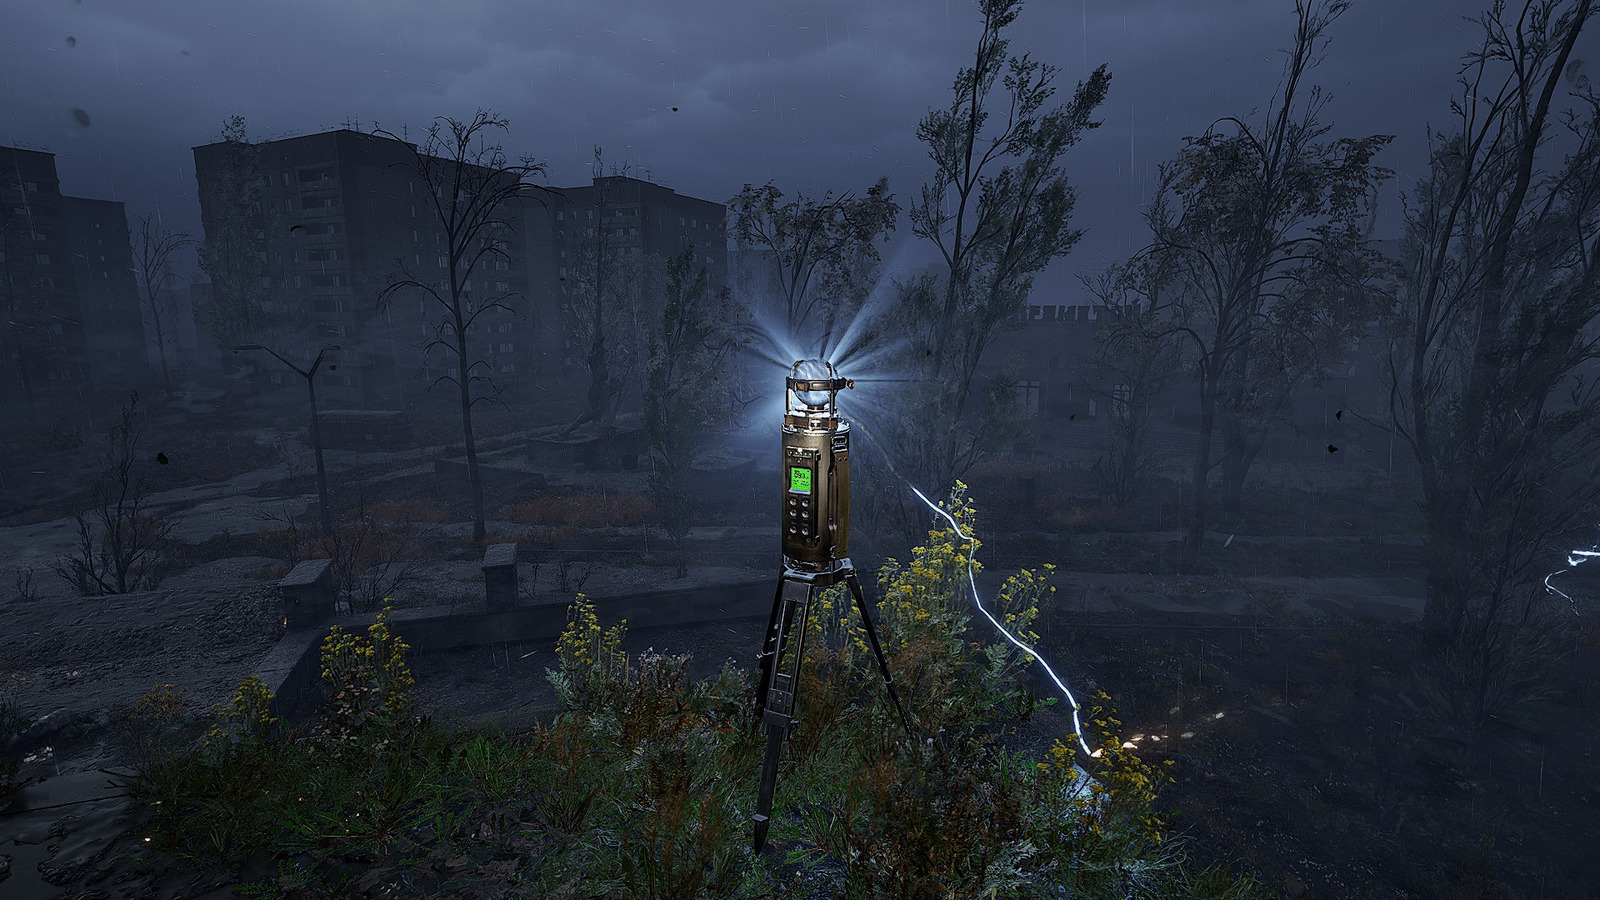
Positioned atop a structural rooftop within the Electrical Transformer complex on the Island territory. Crucially, device activation only succeeds after midnight conditions. Post-activation engagement with a Burer mutant entity becomes necessary.

The Zaton scanning apparatus situates adjacent to the Hydrodynamics Laboratory facility in the northeastern sector of this region.
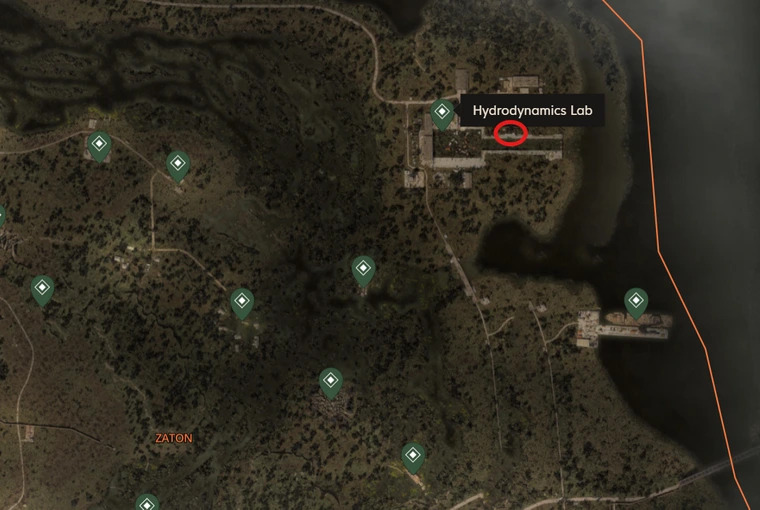
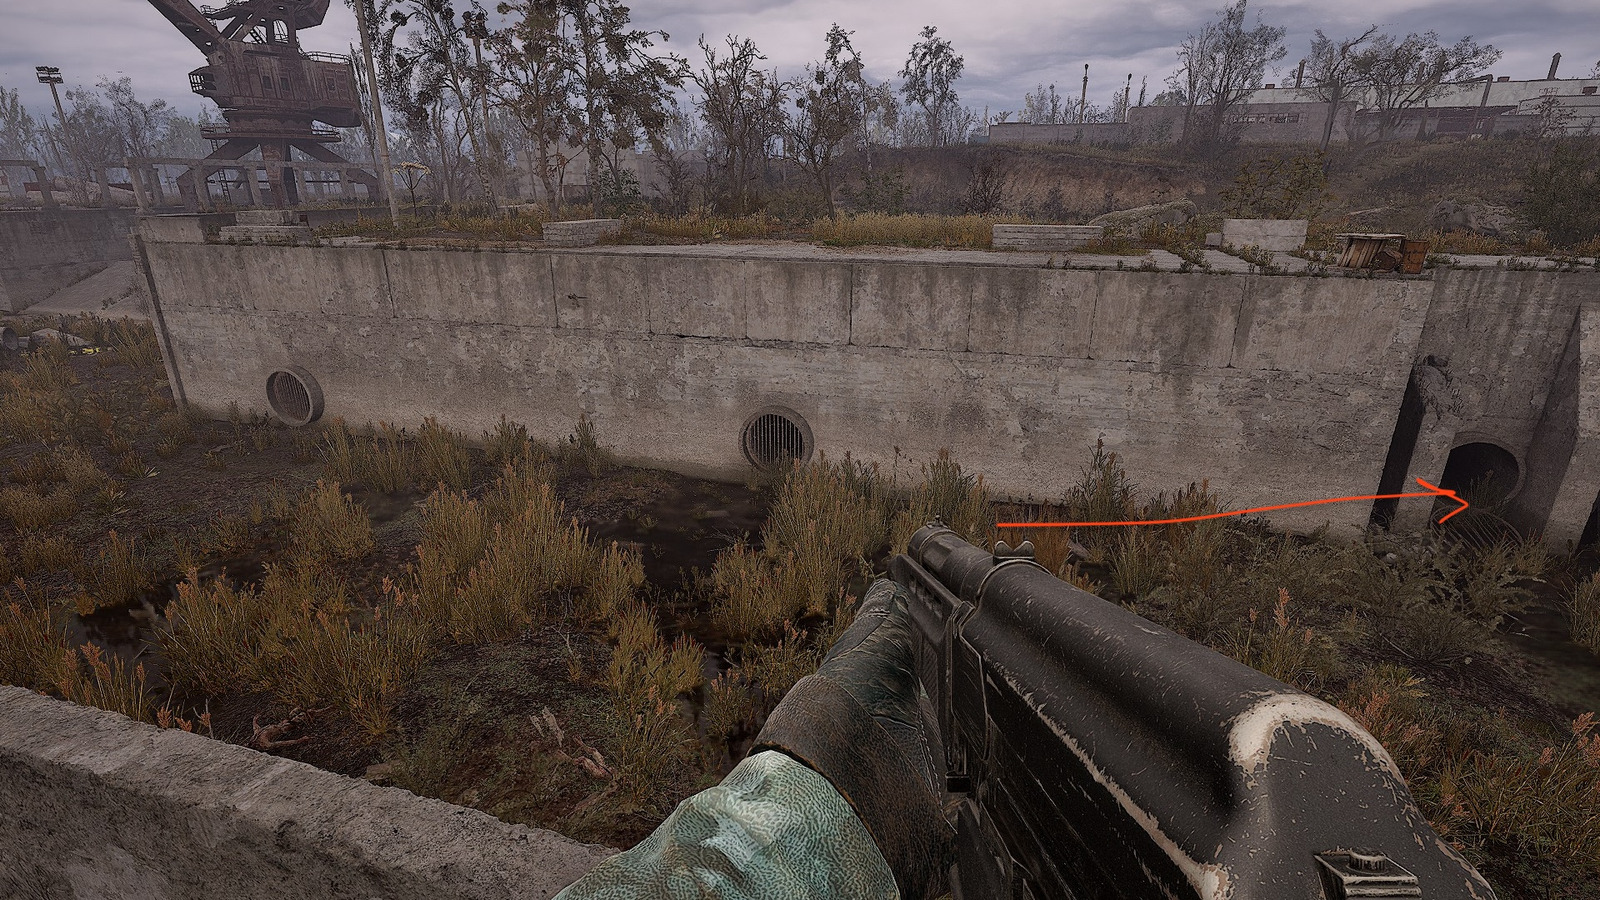
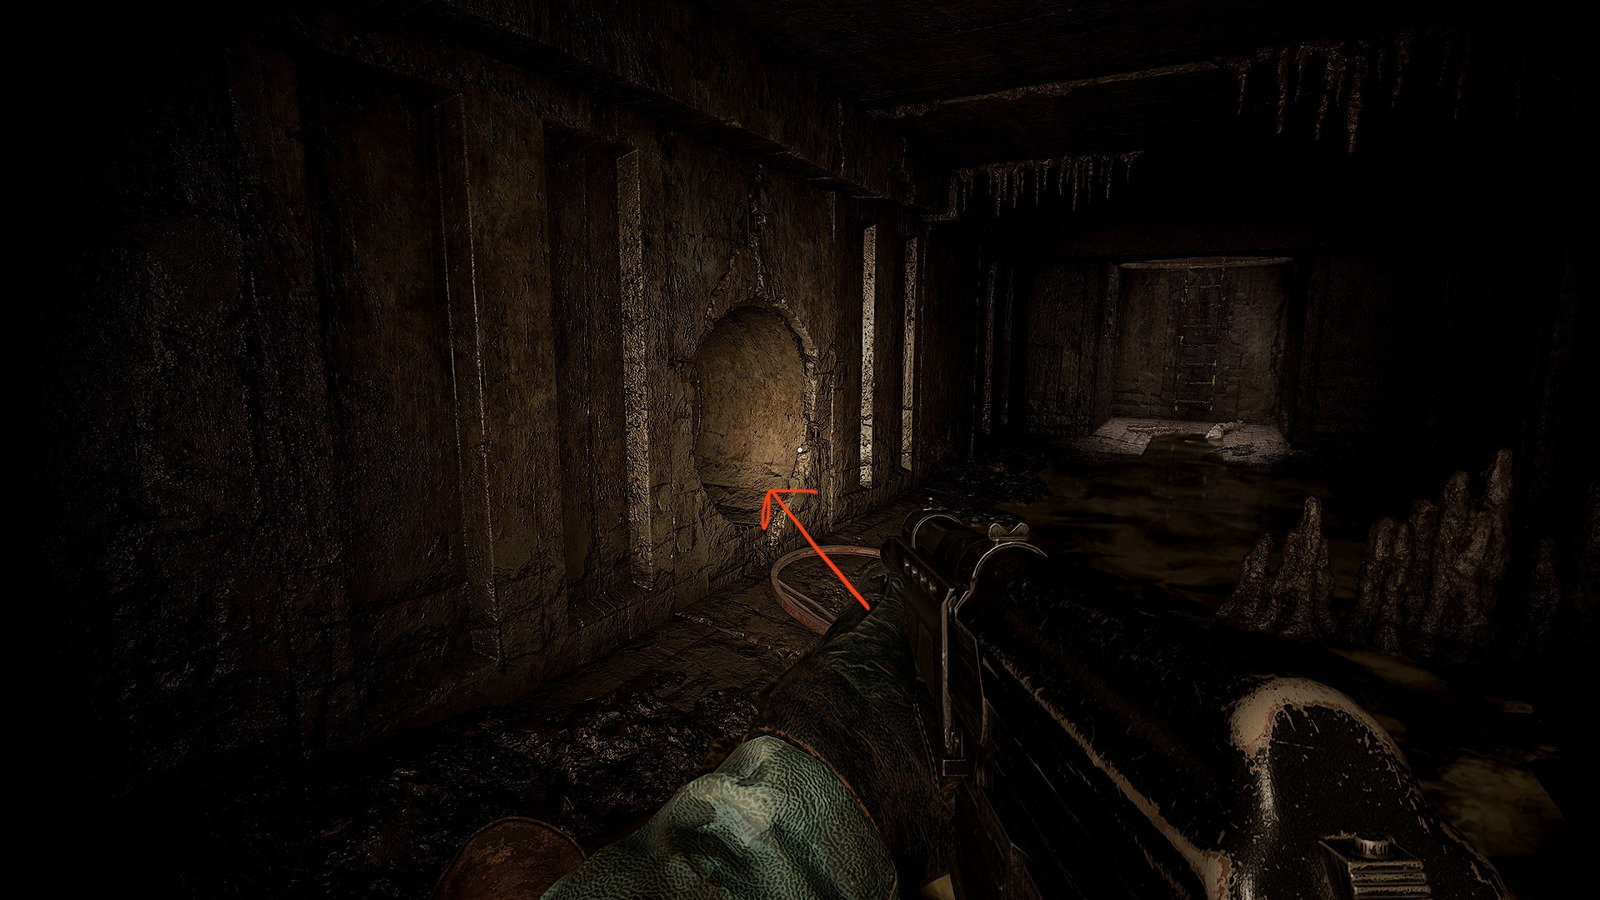
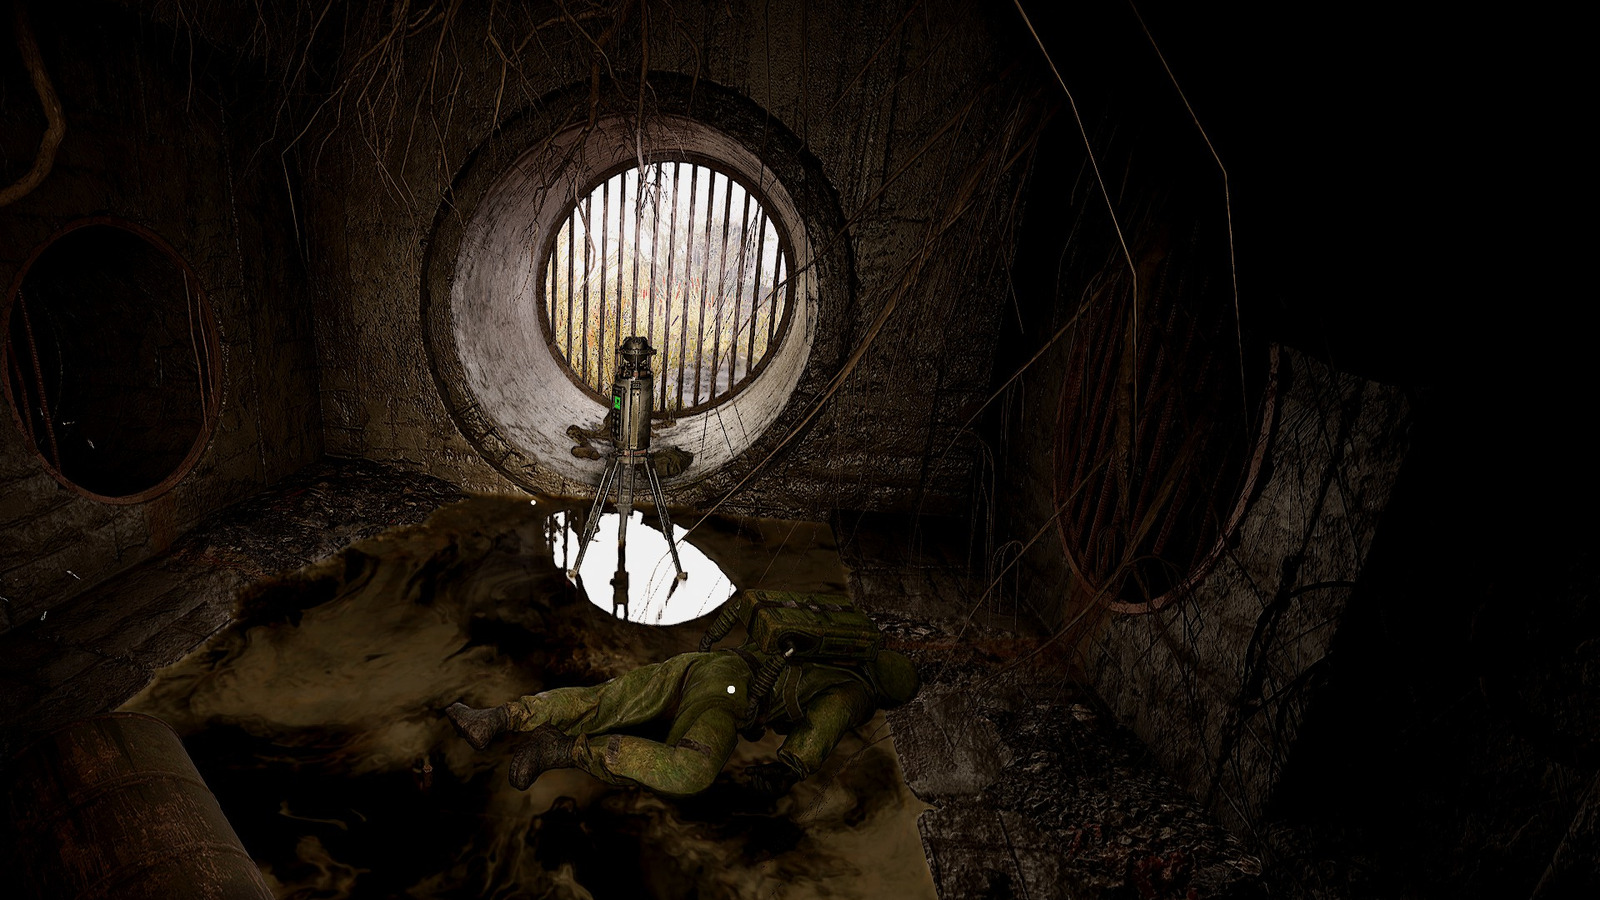
Identify the sewer egress point featuring compromised barrier fencing. Upon entry, proceed along the left-side conduit where you’ll discover both the scanning mechanism and a deceased researcher with accompanying equipment.
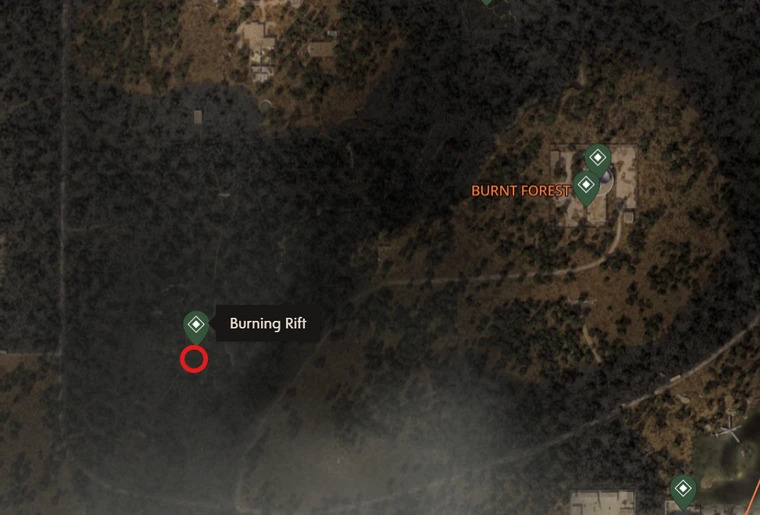
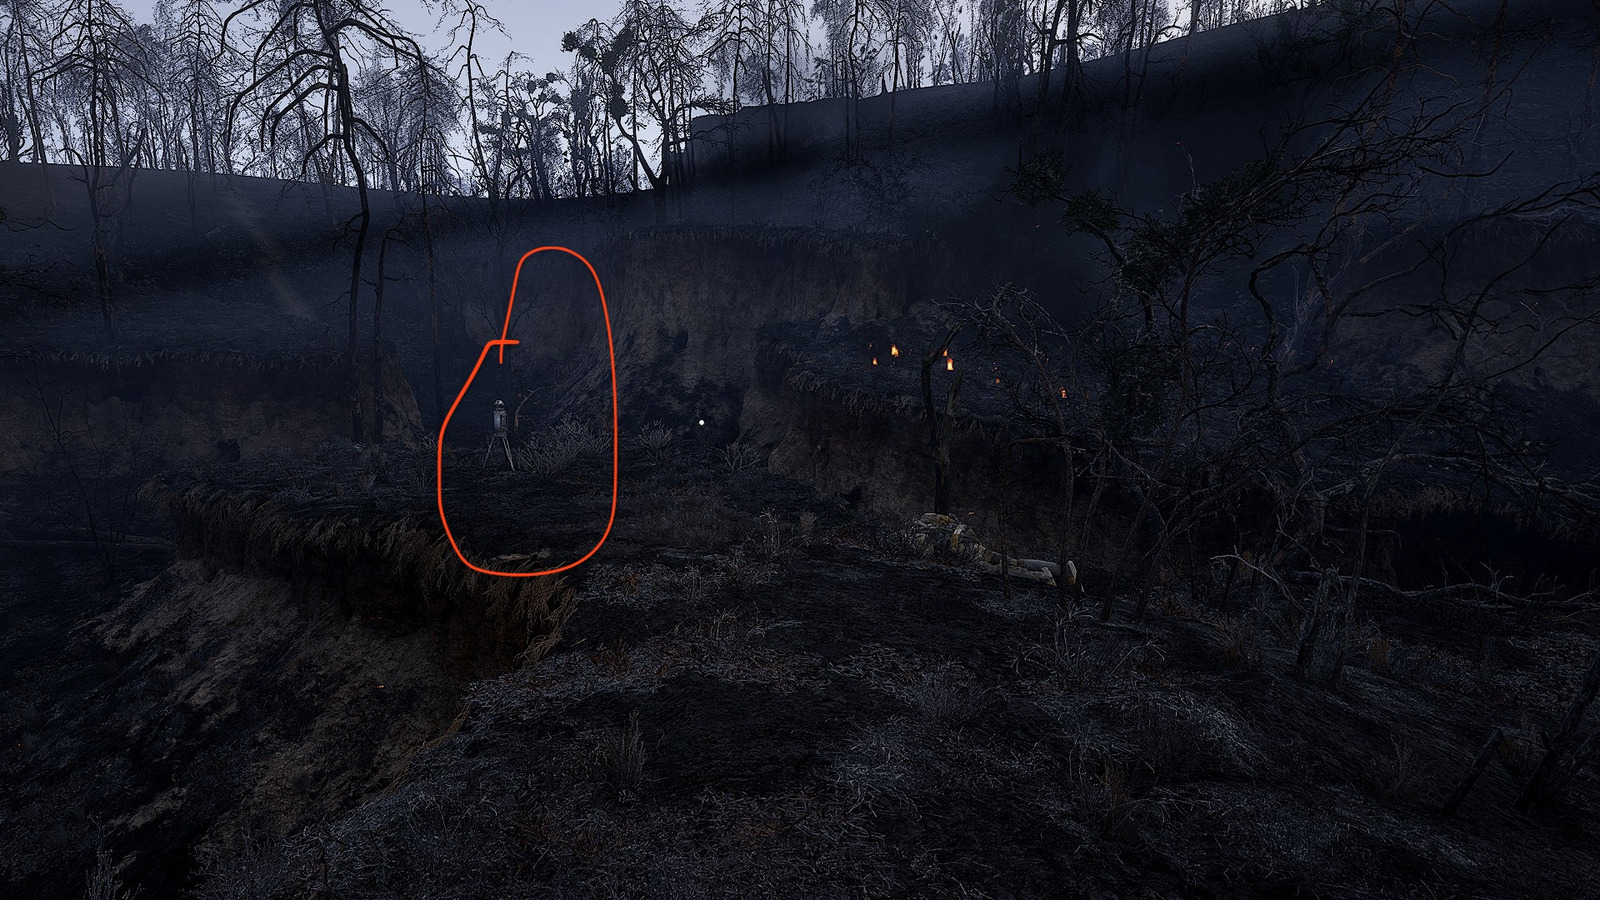
Locate the Burning Rift geographical feature. The scanning device positions within the depression area, atop a minor elevation formation. Following activation, prepare for engagement with two substantial Poltergeist entities.
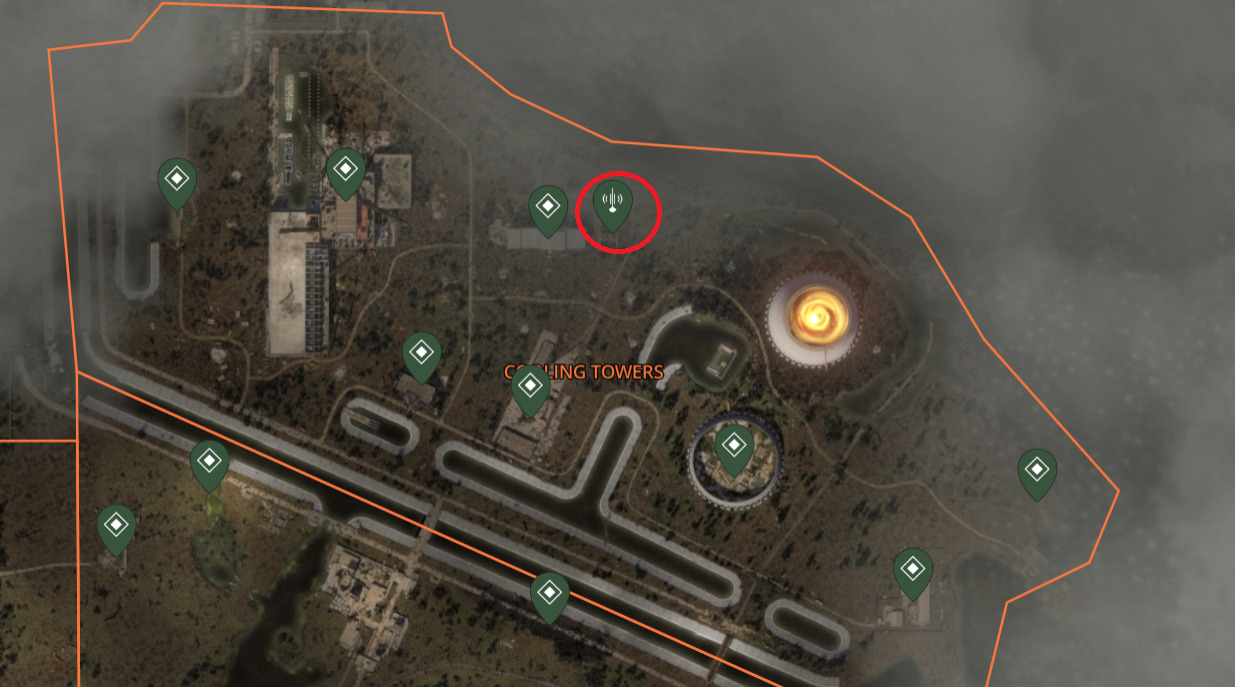
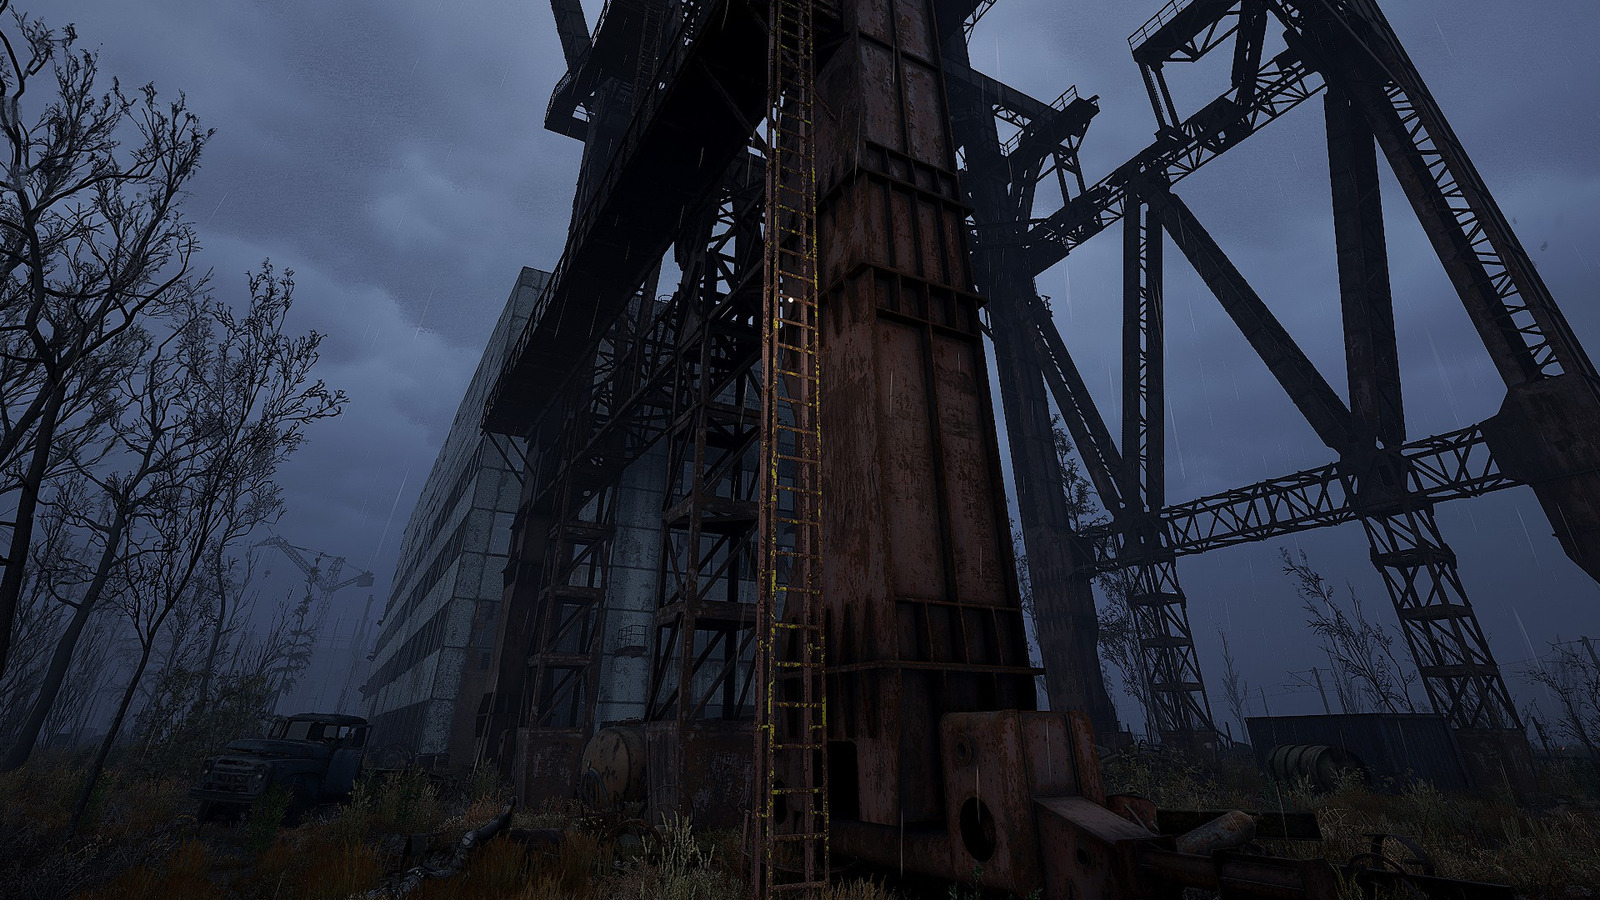
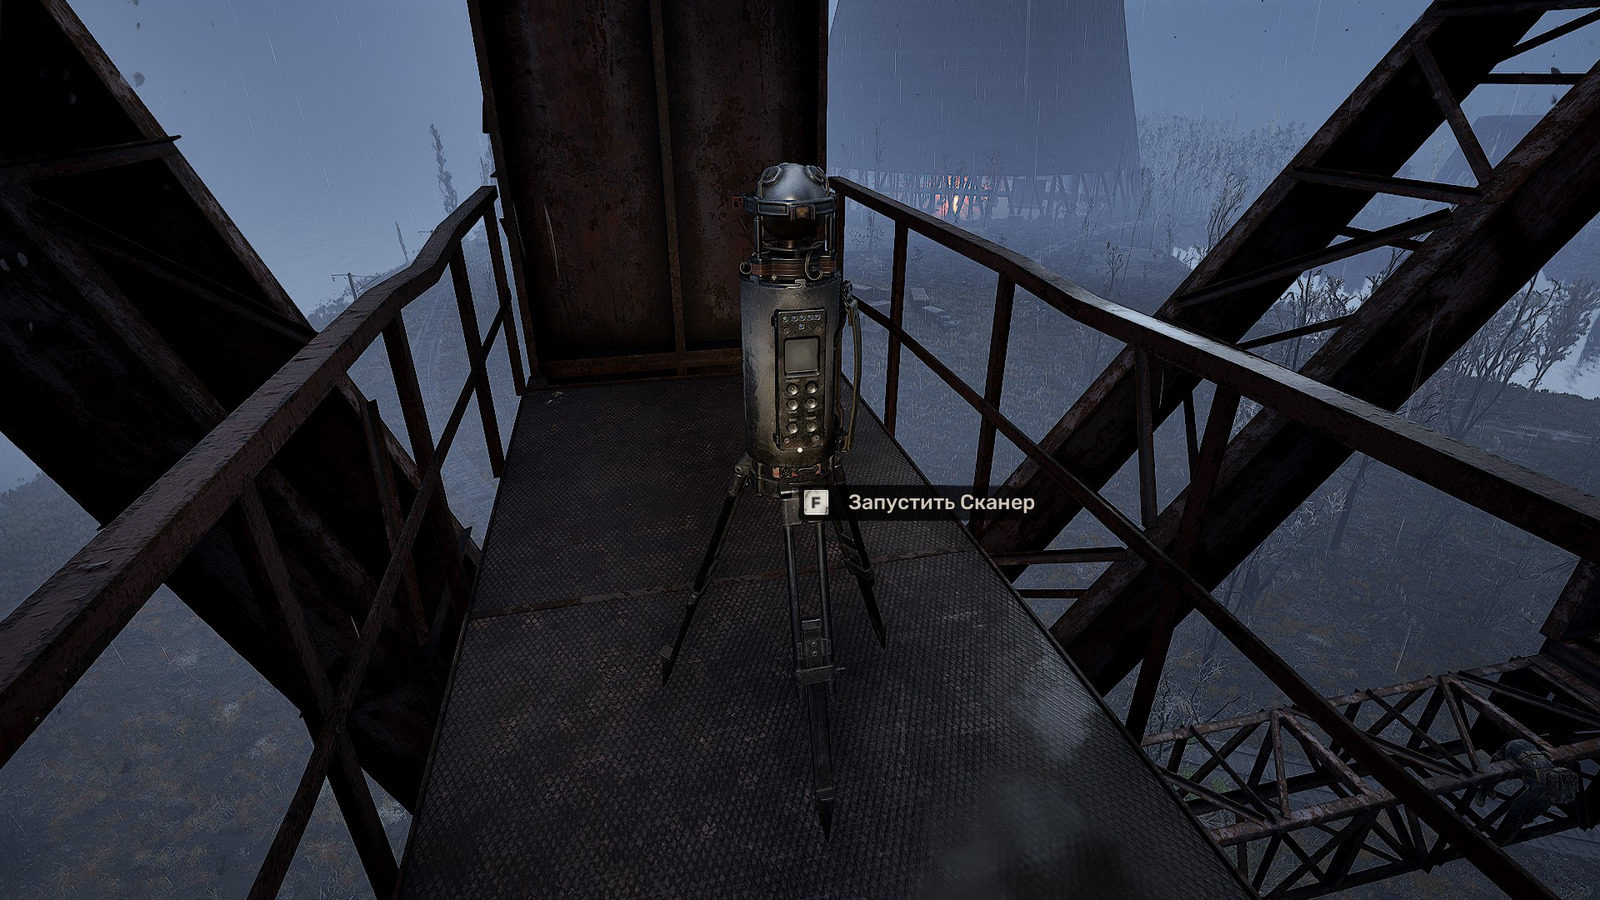
Identify the crane apparatus eastward of the SKD Assembly Unit complex. Locate the vertical access ladder facilitating rooftop ascent. Post-scanner discovery, confrontation with an electrically-charged Poltergeist variant becomes inevitable.
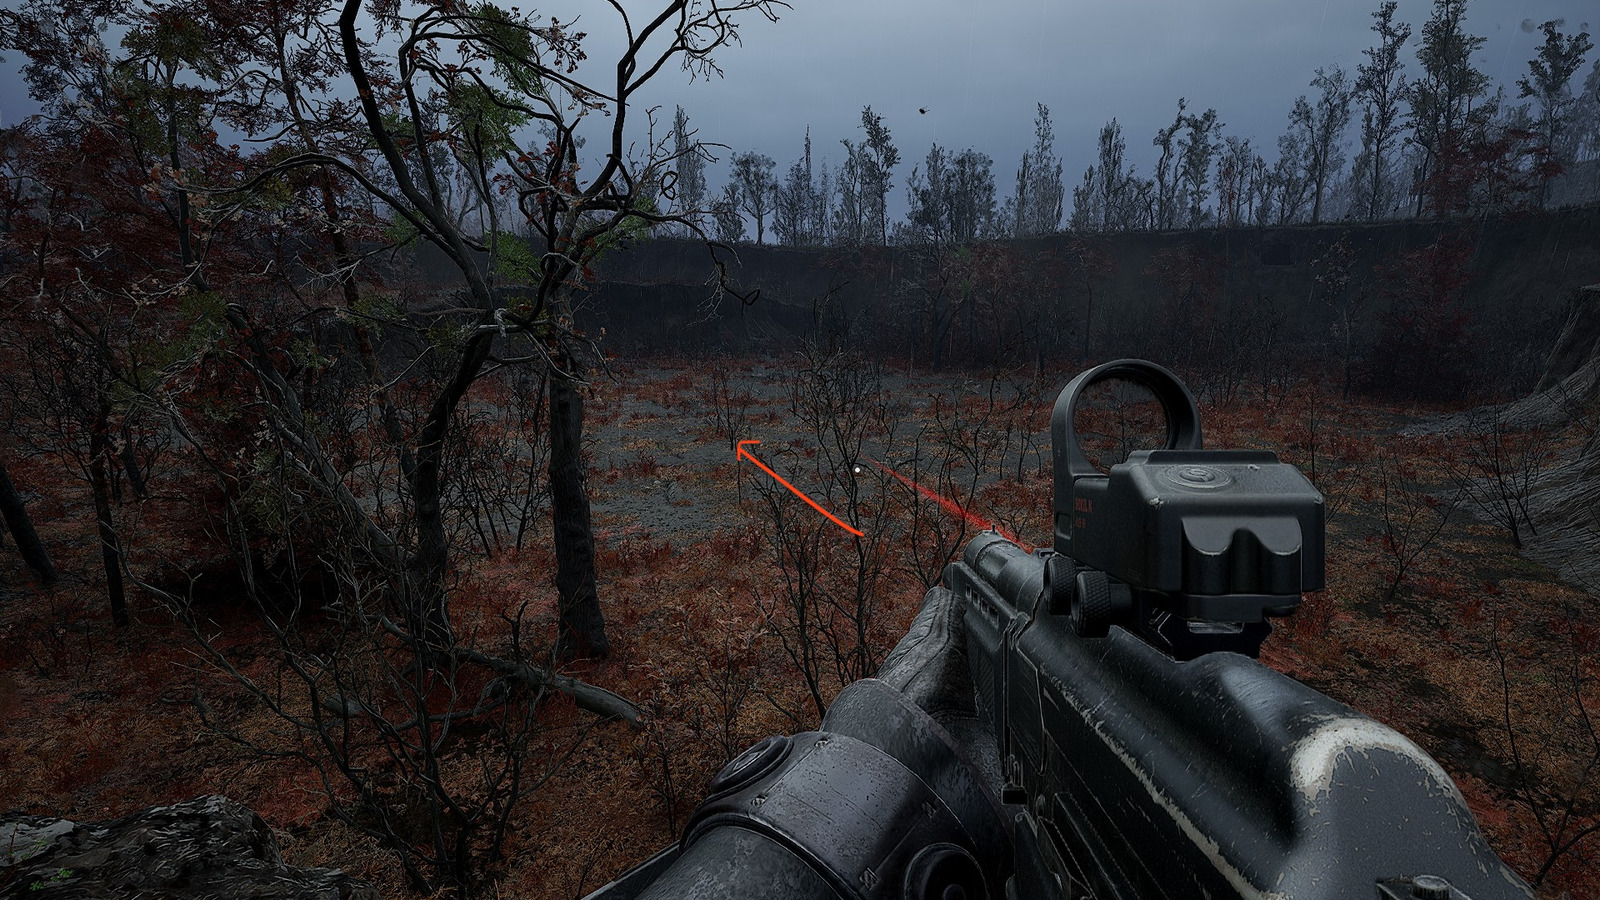
The scanning mechanism locates along the extreme perimeter boundary between Yaniv and Red Forest territories. Identify the clearing area containing animal remains and skeletal structures.
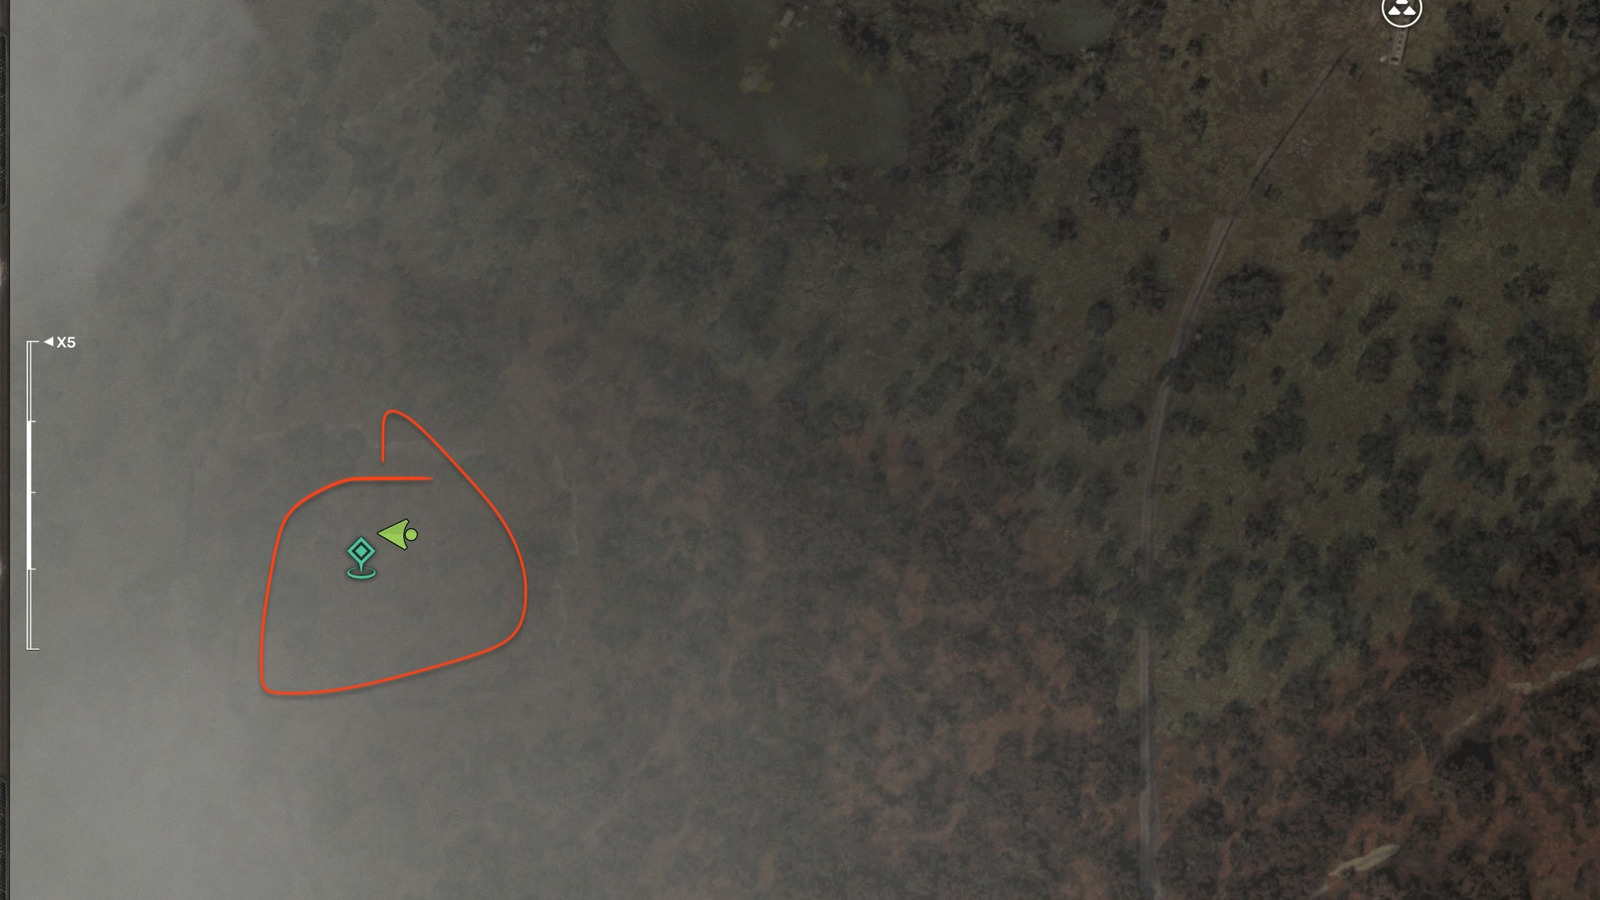
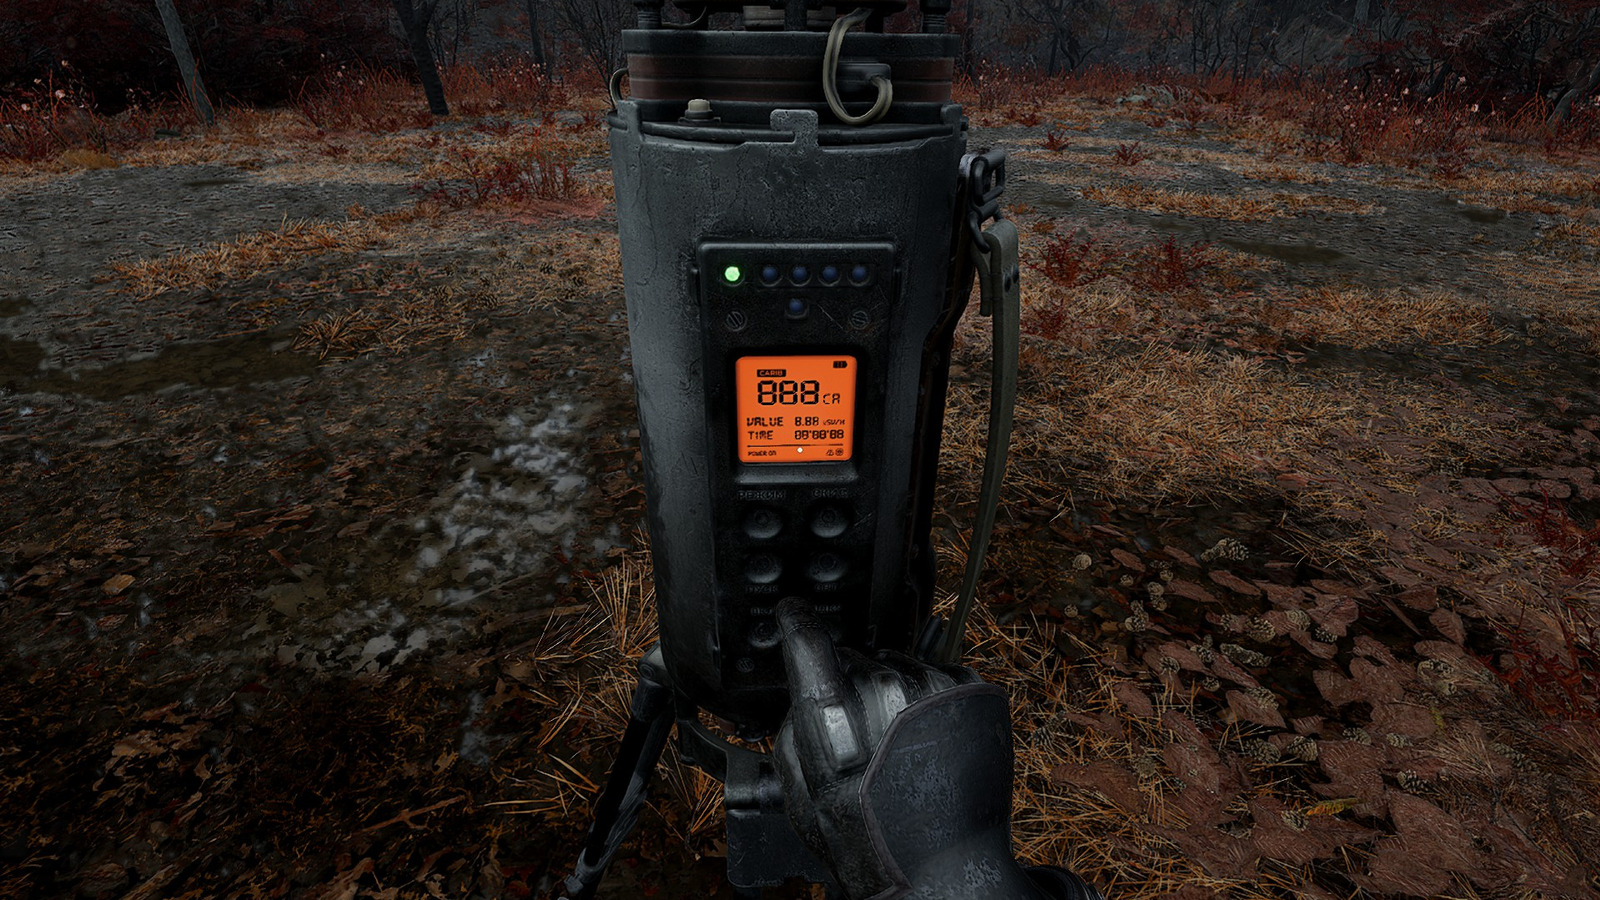
After locating the designated area, advance toward the clearing center until visual confirmation of the scanning apparatus. Activation initiates toxic anomalous manifestations, necessitating protective equipment utilization.
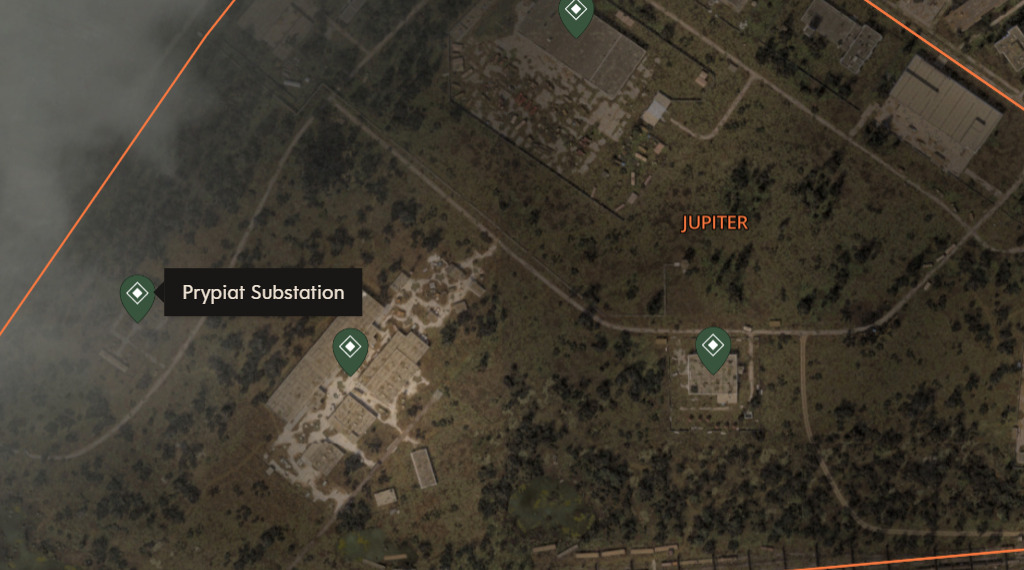
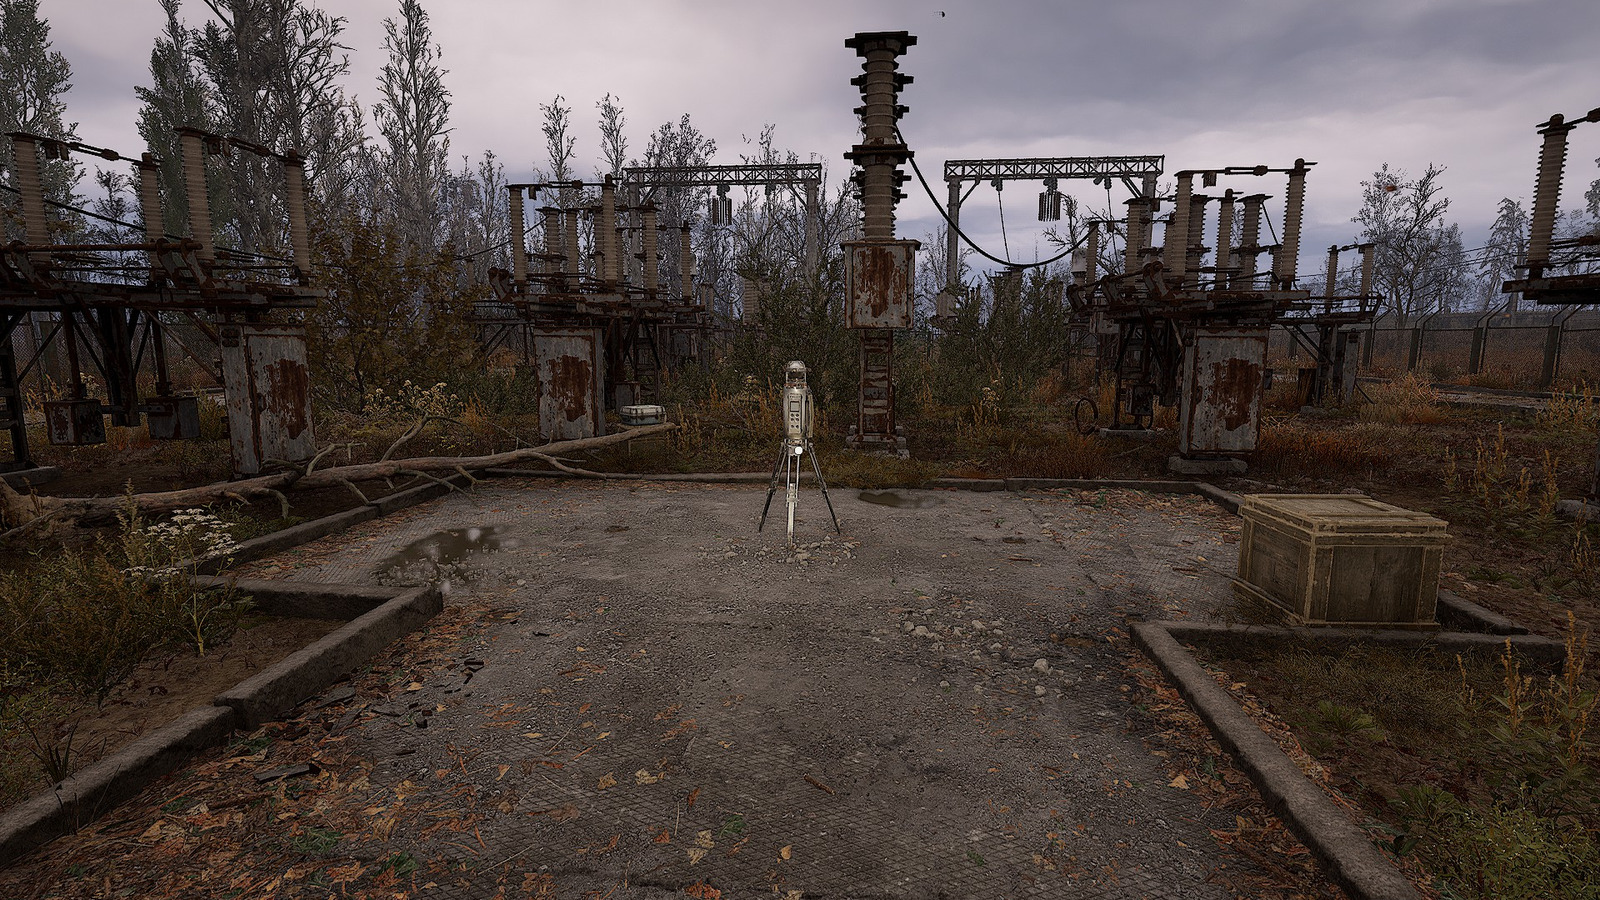
Navigate to the Prypiat Substation installation. Retrieve equipment from another deceased stalker operative positioned nearby. The scanning device situates centrally within the area for straightforward identification.
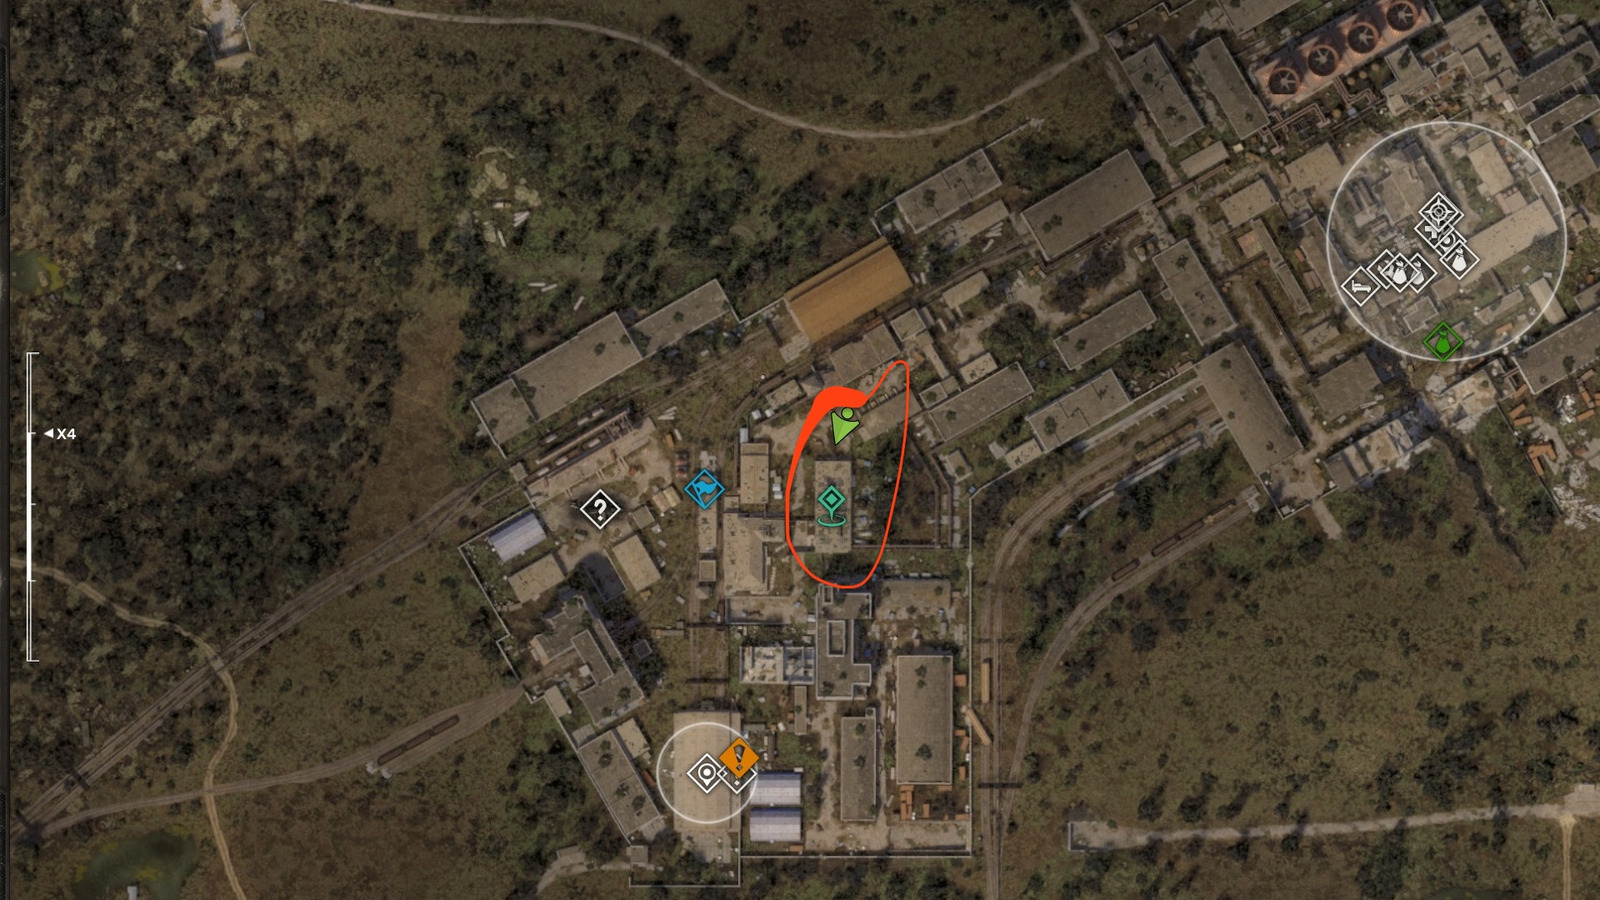
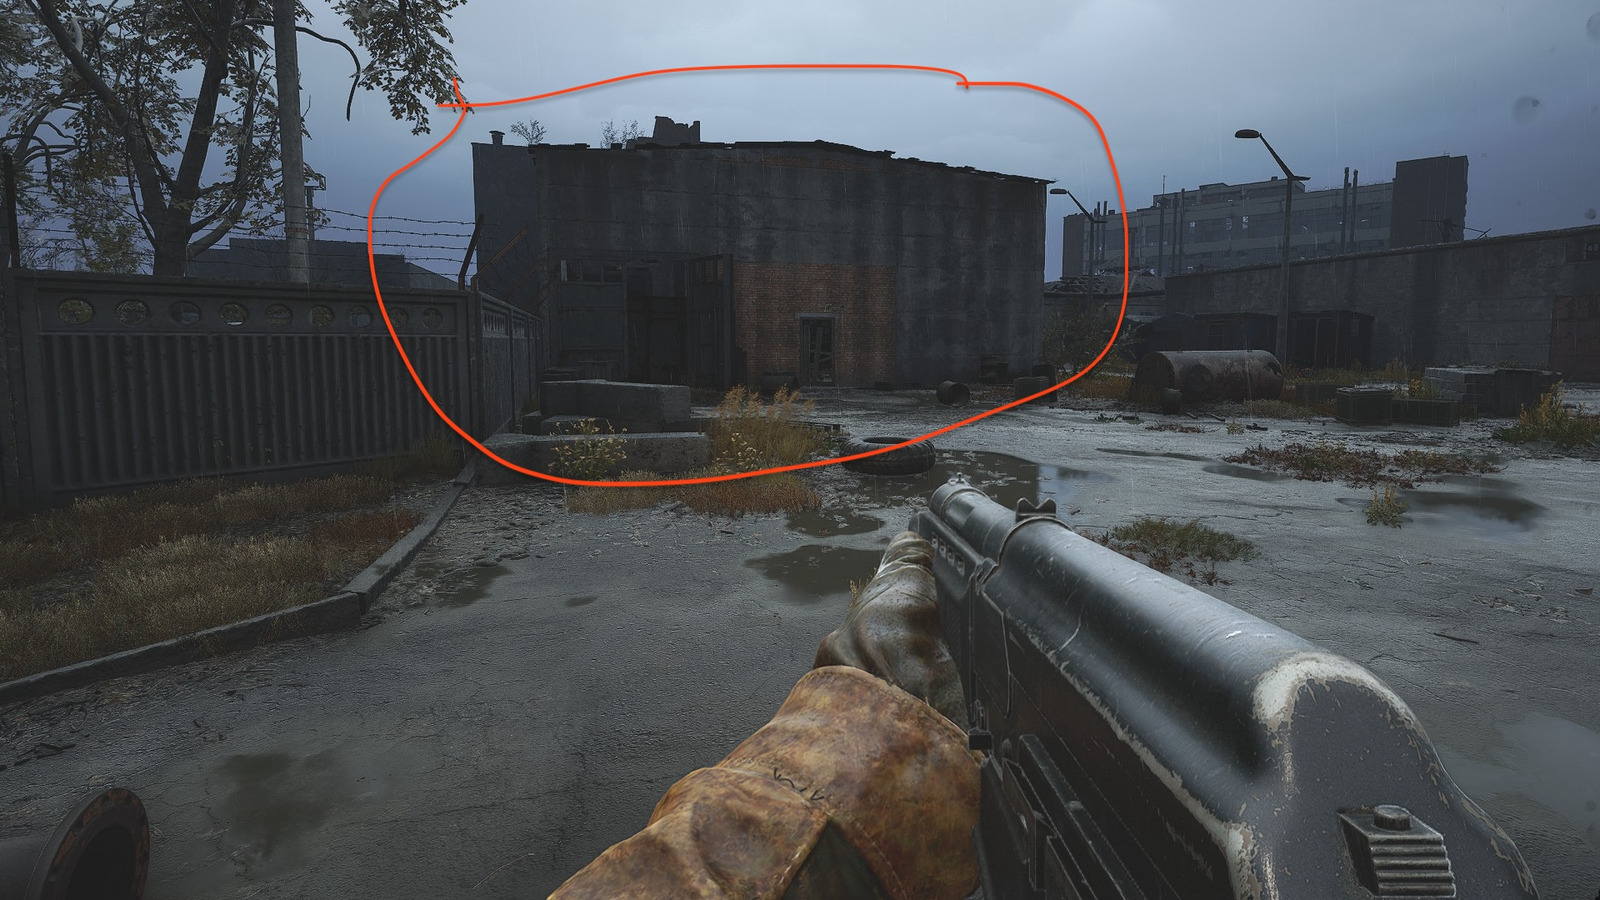
Identify the River Port district location. The scanning apparatus positions atop a structural rooftop illustrated in the accompanying visual reference.

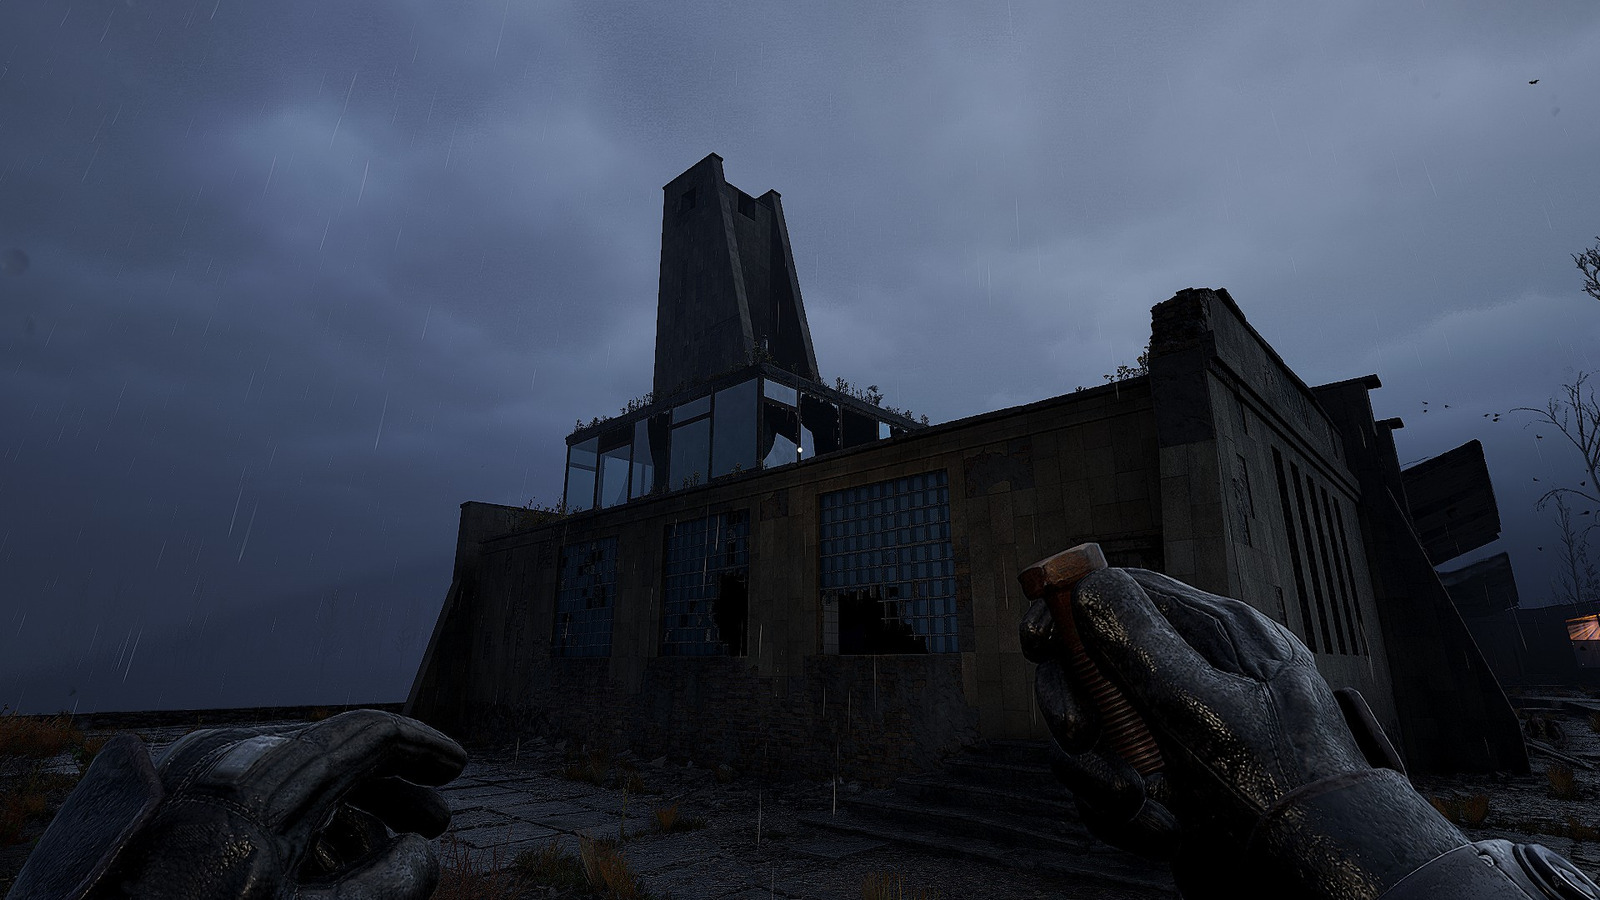
Locate the structural entrance point. Within the interior space, identify the vertical ladder facilitating rooftop access. Additional equipment from another deceased operative alongside the proximate scanning mechanism completes your achievement acquisition.

Optimize your scanner collection route by grouping locations geographically rather than following numerical order. Begin with accessible early-game scanners before progressing to story-locked territories. The Complete Guide provides additional context for efficient Zone navigation.
When engaging mutants during scanner activations, prioritize disabling special abilities first. Burer mutants require close-quarters engagement while Poltergeists demand ranged combat approaches.
Artifact collection represents a significant secondary benefit. Each scanner activation typically yields 1-2 artifacts, making this achievement particularly valuable for equipment enhancement. Consult our Weapons Unlock resource for optimal artifact utilization.
Note: Several territories remain inaccessible before reaching specific narrative milestones. Utilize our early access guide for Prypiat territory if pursuing achievement completion before endgame progression.
Action Checklist
- Acquire anomaly protection gear and ample medical supplies
- Collect Swamps, Garbage, and Rostok scanners (early game)
- Navigate to Chemical Plant scanner after midnight
- Secure Zaton and Burnt Forest scanners
- Progress through Cooling Towers and Red Forest scanners
- Access late-game Jupiter and Prypiat scanners
No reproduction without permission:SeeYouSoon Game Club » How to find 10 scanners in Stalker 2, all locations. How to get Scanning Complete achievement in S.T.A.L.K.E.R. 2 Complete guide to locating all 10 scanners and unlocking the secret Scanning Complete achievement in S.T.A.L.K.E.R. 2